Showing posts with label art blog. Show all posts

Sunday, June 15, 2014

What I Wore #102 on a Charleston Vacay

 Day One of our Charleston Adventure: Knowing that Charleston this time of year is like a fiery inferno, I decided to wear my lightest vintage dresses and my comfiest of walking shoes. Thankfully, being right on the water, there is always a fantastic breeze that keeps you from overheating and sweating. Cuz when that happens to me, I'm usually done for the day. dress: vintage, found on etsy; belt: made by me; sandals: Chacos

Well, hello, long lost friends! I do believe I've said those very same words or similar at the start of each blog post of late. It seems that since summer began a coupla weeks ago, things have sped up around here instead of slowing down. Between a trip home to Indiana, a vacation to Los Angeles with the hubs and this voyage to Charleston with my muthahs, I need a break from this break! I'm ready to start plotting next school year, stitch up some dresses and, well, do nothing. Which is really what I do best.

That all bein' said, I just had to share with you my vacay to Charleston, South Carolina. I'd never been before and I found it to be absolutely amazing. Have you been? We stayed three whole days and managed to cram in so much goodness. I know I searched the interwebs far and wide for what to do...so I thought I'd share what we did so you don't have to do the same when planning your trip to Charleston! Oh and you'll have to lemme know what I missed out on as I'm sure we'll be making a return trip. Which is your fave restaurant (ah, so many choices!), fave beach or fave thing to do? I'd love to hear from ya! Until then, here's our Adventures in Charleston in Three Days!
 Day One: Staying in Charleston is mucho money during the peak season (and it's pretty much always peak season cept for Jan and Feb!). I'm talkin' like $200 a night. We weren't about to do that, we had souvenirs to buy! So we stayed just a couple exits outside of town and rented a car. The traffic was never an issue and there was always plenty of parking...even if you did have to pay for it.
 This photo cracks me up as it sums up Charleston in one shot: palm trees, beautiful homes and America. Our first order of business was a carriage ride. Now, ya'll, I'm not much of a carriage ride kinda gal, but this one was great. We took a 60 minute tour of the city that included Rainbow Row and Battery Park as well as quaint little side streets. We used Palmetto Carriage rides and I'd have to recommend them. They treat their mules so well and our guide was a history major so dude knew his stuff. 
 You can't go to Charleston without getting a big fat hairy history lesson. Much of America's history is not pretty. This town does an excellent job of not sweeping any ugly parts of American history under a rug. Time has stood still in this town and it's like revisiting another era. These colorfully painted houses are on Rainbow Row. These houses were in a pretty sad state until they were purchased by a group of ladies in the 1940s who painted them bright colors and essentially "flipped" them. They've kept their bright colors since.
 After our carriage ride, we hit the City Market which has been going strong since 1804. It's a covered open air market with vendors selling anything from flea market fair (we all picked up a hat quickly realizing that the sun was going to be relentless) to handmade goods. Of course, the market is best known for the artists creating sweetgrass baskets which you can see behind the painted portrait of the woman above. I loved those murals above each entrance to the market's buildings.
 After an incredible lunch at Brasserie Gigi (seriously, the food in Charleston was always amazing!), we decided to walk back to some of the sights we saw on our tour.
 Like St. Philips Church which can be seen from just about anywhere in Charleston and made for a good landmark for us...especially since I have no sense of direction.
 There are seriously churches everywhere in Charleston which is how it got the nickname The Holy City. There wasn't too much of a draw to come to the New World for the Europeans back in the day as getting here meant spending months on a boat with a high chance of death. And even when ya got here, you still had to battle the elements and those other folks that where already calling this place home (another ugly side of American history). However, one big draw was religious freedom. With that promise, many folks did take the leap to come to American with many of them calling Charleston home. This here super sweet pink church is the French Huguenot Church.
We also went through the Old Slave Mart Museum which was incredible. Slave auctions where held inside this museum because the auctioning off of slaves was outlawed in public view. Formerly, people were bought and sold all along this street. Inside this museum, you can hear the actual recordings of former slaves that were recorded by the WPA in the late 1930s. I found this museum so heartbreaking. I don't think you can take a trip to Charleston without going through it.
 After the museum, we strolled down to Waterfront Park and watched the kids playing in the fountains. One of my favorite things about this city are the large beautiful trees. Imagine how much history those trees have lived through!
 My mom and mother in law looking very Laverne and Shirley, my fave rerun as a kid.
We ended our day with a big ole mean at Hominy Grill. Kids, you go there, you order you some okra and shrimp beignets. And fried green tomatoes. Oh! AND shrimp and grits. And don't forget to have desert(s). Amazingly good.
 Day Two: We hit Folly Beach bright and early. It was such a beautiful beach in a fun little beach town. I would go back there and stay longer if I could. dress: vintage, gift from a friend (thanks, Cynthia!) and redone here; belt: made by me, details here
 Folly Beach was a 20 minute drive from Charleston. The pier was a lovely sight.
 Mom and I chatting about who-knows-what.
 A view from the pier.
I somehow convinced my mom to carry all of my stuff. She's got a sweet sherpa thing happening here. This photo cracks me up.
We strolled the beach for a coupla hours before heading in to the town for lunch. We ate at Folly Beach Crab Shack and I swear, the hush puppies were the most amazing thing ever. My moms-in-law spotted this fun place and I had to snap a picture.
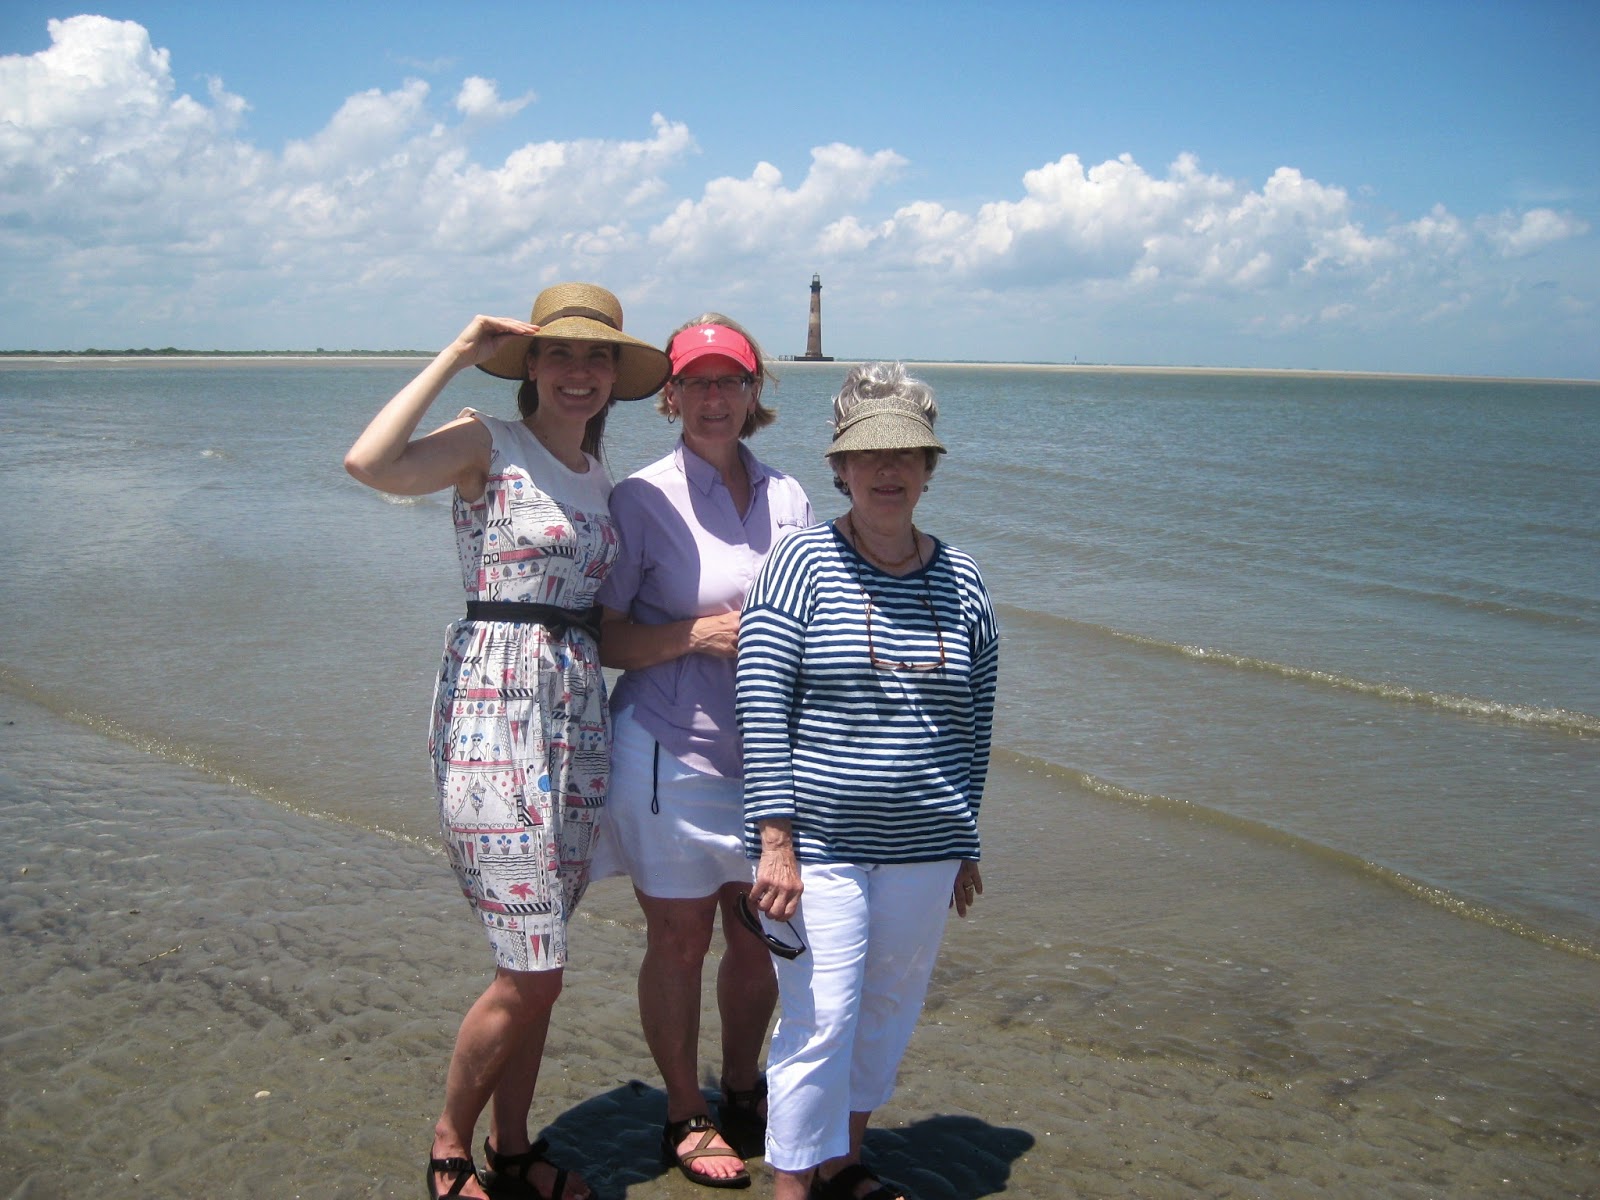
 A short drive down the road brought us to Morris Island lighthouse. This nonfunctioning lighthouse is now submerged and the community is attempting to bring it back to it's full glory. Personally, I totally dig it's shabby chic appeal.
 While lighthouse gazing, we spotted a family of dolphins not far from the shore having a big time. This was the highlight of my trip to Folly Beach, it was so sweet.
 See ya, Folly! We spent our afternoon shopping on King Street popping in and out of shops. We also took in the Gibbes Museum of Art which had a fabulous collection of paintings and sculptures that captured the history of Charleston. Then we promptly pigged out at our fave restaurant of the trip Fleet Landing
Day Three: So mom and I got this crazy notion that we should walk the 5 mile Cooper River Bridge (aka the Arthur Ravenel Junior Bridge). In the middle of the morning. On the hottest day of our trip. My moms-in-law, being much smarter than us, opted to go on another carriage ride. Smart woman. The walk was beautiful and hot. 
 No, this isn't the view from the bottom after my mom tossed me over it. I snapped this on our boat tour later in the day. It's this the coolest bridge ever? Sorry Golden Gate. You're cool too.
 That's a lotta walkin'.
 A mom and me selfie attempt.
Once our walk was over and we picked up my not-nearly-as-sweaty-and-exhausted mother-in-law, we hit Dixie Supply Bakery Cafe for a Diners, Drive-Ins and Dives experience. This place is definitely a dive (I got the side-eye from my mom when we entered the place) but the food was delish. After that, we headed over to the pier for a boat tour. This here is Fort Sumter as seen from our boat.
Having eaten so much shrimp on this trip, I thought it only right to snap a pic of a shrimp boat being followed closely by a buncha hungry birds. After our boat tour, we dined at Blossom and had the best crab cakes ever. Holy cow, I'm getting hungry just thinking about it! That evening we did a ghost tour which was really more like a history tour. It was so fun to hear the spooky side of Charleston.


Our flight outta Charleston wasn't until noon, so we popped back into town and enjoyed their Saturday Farmers Market and one last stroll through the historical streets. It was such a fun place with so much to do! I don't think we could have crammed in any more but that's okay. Gives us a reason to go back!
Read more »

Monday, June 9, 2014

In the Art Room: A Pinch Pot Mascot

Well, kids, as you read this, I'm heading out the door and takin' a vacay to charming Charleston with a coupla muthahs. That'd be my dear, albeit totally crazy, mother and my mother-in-law (who will be in need of your prayers as she contends with a double dose of deranged). If one of us doesn't make it back, it'll be my mom who I'll prolly leave tied to a chair in the hotel room with tape over her mouth (true story: in elementary school, my mom talked so much the teacher resorted to taping her mouth closed. She promptly chewed through the tape and commenced chatting. This is what I'll be dealing with). Wish me luck, kids!

In the meantime, I thought I'd share with you these here 2nd grade Pinch Pot Tigers! At my school, the tiger is our mascot so the kids were totally excited to bring the Johnson Tiger to life. Some kids went the traditional Bengal orange and black tiger route...
While others created a white tiger. Did you know that the white of the tiger's fur is a recessive gene? Some mistake them for being albino but that's not so. Many white tigers are bred but, because there are so few of them, there is usually inbreeding. This results in all sorts of birth defects and also has scientists considering renaming the White Tiger the Kentucky Tiger (so sorry, Kentucky friends. That was a low [although hilarious, right?!] blow).
The kids loved creating these tigers. I was so thrilled to see them painstakingly paint those wee tiger faces. That's when you know they are in love with their project, when they put forth so much effort. 
So just how'd they do it? Well, we started out with these supplies:

* Low-fire clay (I'm a Cone 06 gal, myself)

* Toothbrush (preferably your mom's or mother-in-laws, depending on who you're ticked at)

* A skewer

* Aqua

* A clay mat. Canvas works great.

To create these bad boys, we used 2-3 thirty minute classes. On the first day, we made a pinch pot and tiger legs. For the pot, I tell the kids to begin by rolling a sphere and placing it in the palm of your hand. Notice that the sphere isn't perfect. I try to discourage the kids from rolling a perfect sphere because they will do it FOREVER thus drying out their clay and using up precious art time.
Next up: stick your thumb in that sphere of clay until it looks as though your thumb has an afro. Do not puncture your thumb all the way through your clay as that would result in a clay donut. And don't nobody like clay donuts. They's nasty.
Pop that thumb out and use your pinching fingers to evenly pinch the sides of your pot. It should be of cookie-thickness. Once completed, the kids are given another piece of clay. For this, they'll divide the clay in half and roll two coils that are about 4" in length. I have rulers out on the tables for this reason. Once complete, the kids stack their pot onto their coils, wrap it in a damp paper towel and put it in a labeled zip lock bag until next class.
The following class, we chat about making tiger faces. I don't like to tell the kids an exact way of creating a face so we go through many options. When working with clay, I like to stress that you can make anything outta clay with a sphere, a slab or a coil. We chat about the different features a tiger might have and what, out of those three things, we might use to create them.

When demoing, I always stress that you gotta slip and score. I have the kids use the toothbrush and that cup of water for this purpose. After this chat, the kids work on creating the heads. Because of the detail they like to create, most take the entire time making that clay head. Once finished, it gets placed in the zip lock bag along with the pinch pot and coils.
This young artist didn't like my cartoon-y version of a tiger. I had a buncha tiger photos on display as well as one pulled up on my brand new big screen T.V. (ya'll, this thing makes me feel like I'm in a sports bar, it's that huge). I love how she created a three-dimensional muzzle for her tiger and that painting job, gah! I love my 2nd graders. 
On the final day, we toothbrushed and added the heads and legs. Now, I'm not gonna lie, those legs had been in that zip lock bag for days. So they were a little dried out and noncooperative. To solve that, some kids opted to have their tigers laying down (as the clay was too weak to support the pinch pot) while others crumpled up newspaper and used that to prop up the tiger's legs. 
After the legs and head were attached, some kids created a tail. I had to really encourage them to make strong thick tails that did not protrude. So most rolled a coil for the tail and then turned that into a spiral before attaching to the pot. If the kids happened to have extra time when finished, I told 'em that they could create something to go along with their tiger. However, I reminded them that I'd only fire it if they made sure to slip and score. 

This young artist created a baby tiger to accompany the mama. 
And this one decided to have a mouse riding on the back of the tiger.
Another Kentucky Tiger.
Once the tigers were complete, the kids glazed then with Mayco's Stroke and Coat. It's my fave as the colors are just perfect. The kids spent an art class with the World's Smallest Paint Brushes to create these lovelies. When it comes to glazing, I only have two rules: Don't Glaze the Bottom (because the glaze, when melted, will adhere to the kiln shelf) and Don't Layer Three Zillion Different Colors of Glaze as this will result in an unappealing mix of muddy colors once fired. 

And there you have it, friends! A Pinch Pot Mascot that's both functional ("oh, my tiger can hold my earrings!") and adorbs. Until next time, wish me luck with those mothers and have yourself a great week, ya'll!
Read more »

Wednesday, June 4, 2014

In the Art Room: The Art Show, Part 2

 It's kinda funny to think that just a couple weeks ago, my school's hallways looked like this. Of course, now that school's out, the halls resemble some sort of institution (which, let's be honest, those last couple of weeks, we coulda all be institutionalized. The kids, the teachers, shoot even the class pets, were all a wee bit bonkers.) As I mentioned in my last art show post, all artwork that all students have created all year is hung for this show which is like hundreds of masterpieces. The World's Most Amazing Parental Volunteers hang everie-thang, can you believe that? I'm a lucky girl, this I know.

In my last art show post, I shared with ya'll the work of the wee ones in kindergarten through 2nd grade. I've yet to share with you the clay projects that were also displayed at the art show because I'm slowly putting together the how-to posts on those babies. When that's done, I'll wrap up this art show series. Oh! And if you wanna see some art shows of the past, you can see last year's show here and here.

And now, without further jibber-jabber, I present to you the masterpieces of 3rd and 4th grade with loads of linky-loos to lessons...
 For the art show, the parent volunteers hang the work outside the classroom. I don't give any directions on how to hang...just cross your fingers and use enough sticky tack to make it stay. I love how each volunteer hangs the work differently.
 In third grade, we started out the year learning about Norway and Vikings. My amazing student teacher Rebecca had just returned from a trip to Norway and this was a lesson created by her (and influenced by Painted Paper!). I wrote up a blog post all about Rebecca's adventures and this lesson here.
 My goal for this past school year was to create a mural with each grade level. I only partially achieved that goal (my younger kiddos did a collaborative mural to be shared in an upcoming post). My 3rd grade created a Magritte-inspired mural that proved to be the art project that just kept on giving. You can see examples of that in the work at the bottom of this photo.
 Here's one part of the Magritte project with tissue paper collaged landscape backgrounds.

This enormous beast of a mural hangs right outside of my art room. I think it's there to stay a while, I love seeing it when I walk out of my art room. The details of creating this mural are here.
 The paper we used to create the birds for the mural and our collage landscapes were so cool we decided to use them in yet another Magritte-y project. Final installment of Magritte series here.

 After all that Viking and Magritte-ness, I introduced the kids to the world of Asian art with a heavy dose of Ming vases and cherry blossom trees.
 This was a super fun lesson that incorporated so many thing. A review of watercolor techniques, symmetrical vase design, drawing a narrative, shading/shadow making and new ink painting methods. Full lesson here.

 
Both 3rd and 4th grade were introduced to Chinese calligraphy. We learned to grind out own ink and paint with sumi-e bamboo brushes. This was a big hit and we seriously painted tons of these characters. After a couple of classes doing that, the kids picked their fave to mount, label and frame.
 My 4th grade this year was like a dream group. We had such a good thing going, as they loved being in art as much as I did having them. Which was a bit of a problem as I was therefore always late sending them back to class. Seeing them go at the end of this school year was very hard for me, sniff. I'll miss them so much!
They kicked off the start of this school year creating this huge mural for a canned food drive. Full details here.
 I think this Viking project was one of my favorite lessons this year. I simply love all the watercolor techniques that the kids incorporated into their work. I will definitely be doing a redo of this here lesson in the future (I have a bad habit of doing a lesson only once as I get a little bored with repeats).
 Again, another lesson with many layers of stuff taught. It's like an onion, this project. Without the onion breath.
 These guys also did some Chinese calligraphy. However, theirs included a hanger with Sculptey beads on the end of a wooden dowel and a red stamp.
 Like with the wee ones, I also have these kids write an artist biography. These are slightly different though in that they are to also have friends add comments about them. I'll share more details about those bios in an upcoming post (I keep saying that, I hope I can keep up with all this "up-coming" posting!).
 When learning about Asia, we did some Suminigashi which is Japanese paper marbling. Details here.
 When I ran outta paper marbling supplies mid-way through the lesson (don't you hate that?! Argh!) I did a quick switch to chalk marbling...which I kinda liked even better!
 With those stars we used in the chalk stenciling, we created some fun narrative collages.
 Near the end of the school year, we put our sumi-e painting techniques to good use with these paintings. Students could create either bamboo, cherry blossom or pine trees after practicing on newsprint.
 I've not written up a lesson on this project yet...it's on my summertime to-do.
 A favorite was adding the tissue paper leaves or flowers. They just couldn't stop adding these, loved 'em so!
 Of course, in my absence at NAEA, the kids drew these adorable Chinese pandas. When I returned, they put their watercolor painting skills to work on the background. Lesson here.
 The day before the art show, in 30 minutes, the kids created these sweet things. On the night of the art show, we also host an ice cream social. The kids painted these for the occasion and I managed to get them up the day of the show! This was seriously the easiest 30 minute lesson ever. I'll be sharing the details in an upcoming post,

And there you have it, ya'll! The 2014 Art Show! Stay tuned for the final installment of the show which will include kid clay projects. Until then!


Read more »