Showing posts with label art day. Show all posts

Tuesday, February 21, 2017

In the Art Room: Introducing the Principles of Art

My first grade students are currently learning about the folk artist Kerri Ambrosino. Here's a sneak peak at their works in progress. As they moved on to the next phase of this project today, I thought it would be a great time to introduce the Principles of Art. We already know the Elements. Here's a video of the simple hand jive I taught the students as well as a sneak peak inside this first grade lesson:
As I've mentioned, I do a lot of call and response, almost too much. But it really helps my ELL students, reinforces vocabulary and, frankly, it's just plain fun. I love hearing my students voices in that video, you can hear each of their fun little personalities. 
Here's a little more on the Elements of Art hand jive. 
My first graders used a similar method to painting and preparing their papers for this collage. You can see more of that process here
Love to hear what fun songs and dances y'all use to reinforce vocabulary in your art room! 
 photo signature_zpsd10b3273.png
Read more »

Monday, February 20, 2017

DIY: Patterned Planters

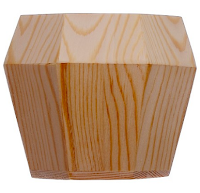
So my new project of late has been painting what I've dubbed my Patterned Planters. I found these three wooden planters up at Target recently in their arts and crafts isle. YES, they now have an arts and crafts isle...and YES you will buy silly little somethings that you don't need but must have. Please tell me I'm not alone in my thinking that Target pumps some sort of magical air into their stores that acts as a shopping aphrodisiac. I see you Target! I know what you are up to and yet I just can't quit you! 

Refocus. Planters. 
I mean, look at them. How could I turn away from their mid-century mod adorableness? It would be like leaving behind a platter of puppies at a buffet (I have no idea...I saw a Golden Corral commercial today at the dentist and now I'm obsessed with the idea of unlimited proportions). When I saw these, it was like a knee-jerk reaction, immediately grabbing them and tossing them into my cart (fun Southern fact: shopping carts are often referred to as buggies. As in, "Ima fixin to go on down to The Pig {that would be the Piggly Wiggly} and fill my buggie up with Pabst. Ya need anythang?")
I had no idea what I was going to do with these planters and so they sat for a good month doing a bang up job collecting dust and taking up space. After painting this wooden jewelry and really enjoying it, I decided to attack one of the planters one evening.  
I dunno if you are like me, but sometimes I will talk myself out of creating because of the following excuses:

* I don't have time. Which is usually true...but c'mon, those dirty dishes, lesson plans (hahahahaha, what lesson plans?!) and laundry can wait!

* I don't have the right supplies. Then use what you got!

* I don't have an idea. Which, I have found, can often lead to THE BEST ideas. It's having an idea that can be crippling. Letting go is the best way to open your mind.

...and, this one's THE WORST...

* I might mess up. Ugh! Who cares?! I remember one time I had this unpleasant teacher who produced the plays at my high school. When she was trying to decide who to give the lead role in the play to, me or my friend, she wrote us each a "heartfelt" letter. In it she told us both, "it really doesn't matter who I pick. It's not like either of you are going to end up doing anything with your talent." Side note: my friend is an EXTREMELY talented artist, art teacher and public speaker. Thank you very much. I don't know what that has to do with "messing up" but it just came to me and I felt like sharing. You're welcome!
To start each planter, I kinda grabbed a handful of paints from my stash and established that as the planter's color palette. I then painted each flat surface a color, allowed to dry and then attacked each with a variety of pattern. 
 I love to create "after hours"... I usually start around 8pm while watching some mindless something on Netflix that I only half need to pay attention to (I kinda love The Unbreakable Kimmy Schmitt right now) and work until, well, way past my bad time. This creative outlet is a great way for me to unwind unlike something like sewing...where I have to focus or my relaxing time becomes a marathon of seam ripping and creative cussing. It's an Olympic sport.
Because I happen to be a serial plant killer, I decided to opt out of the real deal and use these fun beaded flowers I recently scored at an estate sale. They are handmade. The woman had a beautiful window sill full of them and how-to books in her basement. Y'all better believe I scooped up both.
I went with a more retro colored palette for this planter. Of course, I am always heavily influenced by Mary Blair. I have a couple books of her work and I was constantly flipping through them for ideas. 
Nothing says 1970's Tupperware like this color scheme. Hello, avocado green!
This isn't my first time down pattern planter road. 'Member these cat liter container planters? (okay...trust me, follow the link. They are much cuter than they sound, y'all).

So now I kinda wanna attack everything with patterns. I mean, I even wanna glue these three together, run some wires through them and make it into the stand for a lamp. I know, right?!
 Then again, I also wanna frame my palette. So there's that. 
Awright. Thanks for letting me share. Now if you'll excuse me, that buggie of Pabst ain't gonna drink itself. 
 photo signature_zpsd10b3273.png
Read more »

Sunday, February 19, 2017

In the Art Room: Art Buddies

Once a month, we have half days in my school district. You'd think a half day would be an easy day but it's actually more like a normal day condensed into half the amount of time. Read: it's crazy. On these days, I have four classes, four different grade levels for 30 minutes each back to back before we dismiss. Our half days are almost always on Fridays and the kindergarten classes I would normally see on that day miss art. If you do the math (which, gross, why would you) that means I end up missing my kindergarten classes seven times over the course of a school year. Yikes!

This time around, I decided to do something about it: invite my kindergarten classes in during the time scheduled for my third and fourth grade classes. See if you can follow me on this journey: when I see my third and fourth graders on their normal art day, the classes are doubled up (meaning I see two third/fourth grade classes at a time. This was the only way I was able to get an hour with these students). However, on half days, I only see one of those third/fourth grade classes. Which means that if we did our normal art lesson, when I saw the kids next, half of them would be ahead. So usually on those days, we do something completely different. That means more work and planning for me.

When I got the schedule for our half day, I approached the kindergarten teachers and asked if they'd be willing to give up some of their time to allow their students to have art. I let them know that they'd have Big Buddies to help them in art today. I let the third and fourth grade teachers know that their students would be giving up their art time to act as role models to the kindergarten kiddos. Here's a glimpse of how our very busy 30 minutes went!
I have to say, the Big Buddies ROCKED it and the Little Buddies were THRILLED to have them. I saw my older students step up, speak kindly, be gentle and guide their new friends. I saw my younger students tell them what they knew, sit up tall and follow directions to make their new friends proud. It was a big ego boost for both sides and a lot of fun to watch. 
How did this go down? I met both grade levels at the entrance of my room. I told the younger students to go in and take a seat on the floor in the first and second row. We were seated under the large television screen you can see in the video. I asked the older students to sit behind so that the younger kids could see. I explained to both parties that they'd have to play close attention to be a good student and a good teacher. I explained that were were creating paintings that would later act as a sky in a collage landscape. We learned about TEXTURE and TINTS with texture being our Word of the Day (whenever I say the WotD, the kids know to give me a WHOOP-WHOOP!). I let the younger friends know that TEXTURE is one of the elements of art. At that point, I had all of the kindergarten kids turn around and face the big kids as they did this little hand-jive to explain what the Elements of Art are...
I told the kids that they were to use white paint first and put big blobs of white onto their paper. I said to "scoop, plop, flip the brush over" at which point the kids repeated with me "scoop, plop, flip". I didn't want cups of water on the tables with this many kids and because it would put holes in the construction paper. So the kids were instructed to clean their brush either on their paper or on their messy mats. From there, they were to add "baby blobs of blue". Once complete, they were to use the texture tool of their choice to blend the colors together creating a TEXTURE TINTS of blue.
As a reminder of the directions for EVERYONE, we did a call and response...my favorite thing in the world. 
We got through all the directions, painted and even did a bit of book reading all in 30 minutes flat. With the help of the older students, I was able to have a much more relaxing teaching experience...and drink my coffee! 
I will admit, we were loud and proud! But with 35-ish big and littles in the room, I was willing to go with the flow. All kids were on task, all kids were having fun and all kids completed their painting. We did neglect to wash hands as I just couldn't see having that many friends at the sinks. Thankfully, I work with classroom teachers that totally understand and were fine with taking care of hand washing. 

I really cannot wait for another half day to do this again. I think this will be a fun new routine for my students. My favorite part was when a third grader, who was the last to walk out of my art room stop, lean against the wall and let out a big WHEW! When asked if she was alright, she said, "teaching kindergarteners is TOUGH! I'm exhausted!" Ha! 
 photo signature_zpsd10b3273.png
Read more »

Thursday, February 16, 2017

In the Art Room: I WROTE A BOOK!


I know I've mentioned this before...but now I can finally make it official because IT'S FINISHED! Guyz, I WROTE A BOOK! 
I still cannot believe it. In fact, I don't think I'll actually believe it until I have a hard copy in my hands. The book is not due to come out until mid-May but it is available for preorder on Amazon, Barnes & Noble, IndieBound, and Indigo. It is so surreal to see my name pop up on these sites!

What will you find in this book? 52 CLAY PROJECTS, Y'ALL. Clay that does not require kiln fire. The purpose of this book is to give kids the opportunity to explore creating homemade clays, store-bought air dry clay, paper clay, oven baked clays...you name it, I tried it out in this book. Writing this book, I approached it from an art teacher standpoint: would my students enjoy these clay projects? If you recall my 1950's diner-themed art show last year, then you actually got a glimpse of several projects in the book. For our art show, we used kiln-fired clay which means that the projects in the book are versatile enough to be used with just about any kind of clay you have available. It's a book for those who wish to explore clay with children regardless as to whether or not one has a kiln!

So, how did writing this book come to be? It all started last November. A lovely editor at Quarry books reached out to me and simply asked me if I'd be interested in writing a book. She had seen this Sculpey creation and this paper clay pumpkin and was curious to know if I had more up my sleeve. I'm not even gonna lie: I was so flattered to be asked to write a book that I immediately agreed before discovering that I'd be dreaming up, writing about and taking step-by-step photos of 52 clay projects. 


It wasn't until last February that the paperwork was signed and I was on the hook to write a book. And that's when reality set in. True Confession: I'm a BIG TIME procrastinator. And there ain't no procrastinating when it comes to book writing. There were several deadlines throughout that I had to meet which was a good thing as it kept me working...but it was tough because I had to give up precious time to do so. I spent weekends and nearly the entire month of June in my pj's from morning til night sculpting in clay, snapping a picture, sculpting a little more and snapping another picture. That part was fun. It was the writing the steps out that was more tedious. I mean, I write all the time on this here blog but I write in a very casual tone. I had to sound all legit and professional and yet kid-friendly and such for the book. Thankfully, I was working with wonderful editors who helped tremendously.

June 30th was my final deadline. I made it...and might I add on June 29th. Whew! Snapping hundreds of photos and editing them, writing endless pages of copy and doing rewrites...it all made me seriously consider my life's choices. My husband's favorite question was, "Well, do you regret saying yes?" that answer varied from day to day during the course of the creating. But now I can say Nope! I don't regret it a bit! His next question is usually, "Would you write another book?" Well, I've not been asked...so I don't know my answer. 

Thank you so much for letting me share my exciting news with you. It's so nice to see all that hard work, long hours and pj'ed weekends become something tangible. You'll have to let me know if you get a copy and what you think! 

 photo signature_zpsd10b3273.png
Read more »

Monday, February 13, 2017

In the Art Room: Chalk Prints and Shaving Cream Marbling

In second grade we are working like crazy with our short 30 minute art classes to try our hands at two different paper treatments: floating chalk prints and shaving cream marbling. My goal has been for all of my students to attempt both processes twice before the end of class. It's a go-go-go kind of class but it's a lot of fun. When I shared a couple short videos of my students working on these papers, I got a lot of questions about the process. So I created a video that will walk you through each. I'll also go through the supplies needed in this here post. Here's the how-to video:
Supplies for floating chalk prints:

* Paper. I used 6" X 9" papers. These will be used for the covers of their Rainbow Book. I only order between 80- 90 lbs paper for the art room. 
* Chalk. We used Freart Chalk by Prang. I like this chalk because it's high in pigment and thick like sidewalk chalk.
* Tongue depressors. We used the big ones which you can get cheap at the Dollar Tree.
* Tub of water. I made it so each my students had their own tub to save on time. I see my second graders at the end of the day so this meant I didn't have to hustle to move the tubs for my next class. 
If you watch the video, you'll see just how easy this process is...and how beautiful the results are. 
I have a feeling the kids are going to have a hard time deciding which beautiful papers to use for the covers of their Rainbow Book!
When doing these chalk prints, you can even use stencils to create a really cool look. Check out this blog post where we used star stencils
The best part is, you don't have to "set" these creations as you would normal chalk pieces!
 For shaving cream marbling, you'll need the following:

* Shaving cream. We used cheap dollar store stuff.
* Liquid watercolor.
* Paint brushes.
* Tongue depressors.
* Paper. 
This process required more steps so some of my students would get excited and forget those steps. I made sure to appoint my Art Teachers in Training who did a wonderful job reminding kids of the steps. Yay! 
I did not change out the bins of shaving cream or water. For the floating chalk prints, it was not necessary. For the shaving cream, it just meant that the following prints had more color. 
 Again, so pretty! I can't wait to see these on the covers of their books. Here are the books they are creating:
I have done shaving cream prints before...but never in a closed container. I am never going back, y'all! The mess is contained...like, literally.
Have y'all done these kind of prints before? I'd love to hear about it! I'm also curious to know what you did with your beautiful papers. 
I'll be sure and update you with our completed Rainbow Books!
 photo signature_zpsd10b3273.png
Read more »

Sunday, February 12, 2017

Field Trip! Sawtooth Print Shop

I'm excited to share with my students and y'all another installment in that series of videos that I'm calling Field Trip!  I got the idea to visit contemporary artists and film them in action to share with my students. The goal is for them to see living artists creating and know that creating art takes many forms from mural painting to folk art to...printmaking. Which brings me to these two good lookin' folks, Chris Cheney and Nieves Uhl of Sawtooth Print Shop.
They are seriously so much fun!
I met Chris and Nieves at a workshop hosted by The Frist Center for Visual Arts. We had so much fun that when I was dreaming up artists to visit, their studio immediately came to mind. Not surprisingly, they were totally open to the idea and were gracious enough to carve time (see what I did there? "Carve"...get it?!) out of their busy schedule to show me just how they create their prints. They were so thorough in their explanations that I believe kids will understand their process. 
Personally, I just loved exploring their space and snapping photos for their vintage typeface. I was told most are purchased from former printmakers who no longer have a means to print or a desire to do so. 

 I loved how clearly they explained the reasoning behind carving backwards. I know I would mess that up ALL.THE.TIME. I don't know how they do it.
Both artists did their internship at Hatch Show Print which must-see if you are ever visiting beautiful downtown Nashville. 
I felt like I learned so much from this field trip as well! Seeing the process of how their posters are creating was like taking a step back in time. I think that showing this Field Trip! video will be a great introduction to any printmaking unit. 
Since we're talking about printmaking, I thought I'd add some of my favorite printmaking projects and videos to this post. 
You don't need fancy printmaking supplies to create great prints with your students. In a pinch, you can use styrofoam sheets, markers, paper and a damp sponge. If you've never tried marker prints, they are a game changer! First grade created these lovely prints with that method. More details here

Last year, third grade tried their hand at printmaking with these beautiful cityscape prints

For that, we did use ink but markers could have been used as well. 
Gelli Plates make a great printmaking surface as well, which is what we used for this Andy Warhol-inspired lesson. I've created my own gelatin plates and had the kids use those as well. 
Earlier this year, my third graders created these marker prints and used them in a fall collage
Fourth grade created these radial prints for Dot Day and had a ton of fun. 
Seriously, y'all. This poster created by Sawtooth is a kid-fave in my room.  

Special thanks to Chris and Nieves for the fun visit. Y'all are the best! 
 photo signature_zpsd10b3273.png

Read more »