Showing posts with label art lesson. Show all posts

Friday, September 19, 2025

(EASY!) Abstract Shape Painting!

Hi, y'all! I know, I can hardly believe it either: two blog posts with two lessons in one week?! What can I say, when the ideas start rollin', it's hard to stop 'em!
So, truth be told, every since I started adding slightly diluted tempera paint to my bingo daubers, I've been coming up with all sorts of fun art lessons! I have several 'in the can' and I'm working to bring them to you and your artists as fast as I can. To always stay up-to-date on my free video lessons, you may want to join my email list! You can do that here. 
Like my most recent videos, I'll start this one with a bit of a Teacher Talk to walk you through the prep for this lesson. I would say this project is appropriate for kindergarten through 3rd grade, depending on what it is you hope to cover with your students. Meaning, if you find that you have older students who need a simple project to remind them of your painting procedures, this may be it! And if you have younger students who are ready to dive into the land of shapes, this one's for you.
OF COURSE, the best book for the job is Alfred the Ape Knows his Shapes! This book covers EVERYTHING...I really wanted to create a book that wasn't your basic baby shape book like so many out there. I wanted to dive in to organic, geometric, the difference between a form and a shape and so much more! 

And now, for the lesson video:

I found that for this lesson, the prep was pretty easy. I mean, filling those empty bingo daubers was not fun BUT...once they are done, they do last. You can find the empty bingo daubers here
I also found that tempera paint works well with this project althought, tempera cakes would work too. For my favorite painting supplies including the paint trays and more, visit here. 
I created this lesson because I thought many of you may be moving on from LINE themed lessons to now...shapes! If you'd like to see my Top Ten Line Themed lessons, visit here! 

And in case you missed my other super fun and colorful painting lesson, see it here

Oh! AND my cardboard line sculpture lesson! It's here
I just love how colorful these are. I think what really does it is that different colors used for the outline. 
For my personal art, I kinda want to paint some funky still life paintings using this method. Kind of a pop art meets cubism. What do you think?!
I hope you have a chance to try this lesson out! If you do, please lemme know, I would love to see. 

Happy Friday!
photo signature_zpsd10b3273.png
Read more »

Wednesday, August 27, 2025

Let's Draw School Supplies!

Hey, y'all! If you are looking for a fun back-to-school lesson that also introduces your artists to their art supplies then look no further! I've got it covered with this super fun school supply art lesson!

To jump directly to the lesson with process photos, visit my friends at Prang right here!
Full disclosure: I never used Prang's markers until working with them. They truly are the best markers! I used to use another popular brand (ahem) but always found them to be runnin' outta juice almost straight out of the box. Not only are the Prang markers much juicer and full of color but they are SO GOOD at this marker plus water hack! AND...all the marker tops are the same so that means no searching for that one missing marker top. If you know...you know.

Okay, now on to the lesson! 
In this video, I'll walk your artists thru the steps to draw each and every one of these cute little art supplies. I would recommend having students practice drawing on a dry erase board first or in their sketchbooks. Then they can dive in on their artwork. I would have students draw with pencil first...then trace with permanent marker. 
Now, I couldn't decide which was cuter: the supplies with the faces or the supplies without! So I created both versions in the video so you and your artists can decide. 
I also created free downloads! This way if your students need inspiration or even a coloring sheet, they are all set! 
This is also a great lesson to keep on hand for a sub! I know the start of the school year can be...a lot so I hope this lesson helps!
Here's a version without the silly faces! And, of course, a download:

Here's that download!

Of course, if you are looking for books to read to your students, I got ya covered! Visit here to check out my books and my digital downloads.

Have a great week, friends!


photo signature_zpsd10b3273.png
Read more »

Wednesday, July 30, 2025

Let's Create a Patterned Self-Portrait with Color Pencils!

Hello, friends!

If you are looking for the perfect Back-to-School art lesson; one that's low-mess and low-stress (because those first days of school are stressful enough!) then have I got the lesson for you! 
Kid-friendly video here! But if you'd like visuals to go along with this or a lesson plan, my friends at Prang have you covered! Check it out here. 

This is a lesson I did many moons ago with my fourth graders as a part of a Romero Britto unit. I decided to redo the video and give it a bit of an update. But if you'd like to view the original as it does introduce Britto, you can find that lesson here. 

On that first day with my fourth graders, we got this far...which is pretty dang good! In that lesson, we were using a variety of color pencils but...what I really wish we would have had were THESE:
Now...I used to be a big fan of the Prisma Color Art Sticks...don't get me wrong, they are so stinkin' good but they are very pricey. These color pencils have that same rich color and buttery feel when you are coloring. They are larger so easier for students to hold and the triangular shape means they aren't constantly rolling off tables. They are larger than the average color pencil so I can't fit 'em in my pencil sharpener. BUT you should never put color pencils in electric sharpeners anyway as they have a fragile core and tend to break easily, regardless of the brand. So...get some of those metal hand-held pencil sharpeners and your students will be good to go!
I will say this: working on a size 9" X 12" sheet of drawing paper does make the drawing time-consuming. And it's exhausting for the hand with all the coloring...I say that from creating the video. My hand was tired! You could make the paper a smaller format for students to work on. This would speed up the lesson and make it so you don't have to hear "my hand is tired" all the time. 
You could try cutting that 9" X 12" in half or just trimming it down a little. These drawings were created on that full sheet of paper...so it's doable! You can check out more details on these finished pieces here. 
For the patterned background, it always helps to have idea sheets. So I created a FREE download just for you and your artists! Here it is:
If you decide to use this sheet in your classroom, I hope you and your students find it helpful. You do not have my permission to copy this sheet to sell it on Teacher Pay Teacher (yes, I have to say that because yes, people do it). Find this free download for you and your artists here!


If you want for your students to create patterns that perhaps symbolize something about them, you might want to share this sheet! Then, when you display their artwork, you can hang this next to their piece. It would be a great conversation starter for parents and family during Open House! Find this sheet here. 
One of my favorite things to do when we return to school is have EVERYONE do the same lesson...it saves my sanity and it makes for an EPIC collaborative display. So put your own spin on this lesson and maybe deck the halls with colorful patterned selfies! You can check out this lesson (with video!) here.

Have fun, friends!
photo signature_zpsd10b3273.png
Read more »

Saturday, December 7, 2024

Floating Chalk Print Snow Globe!

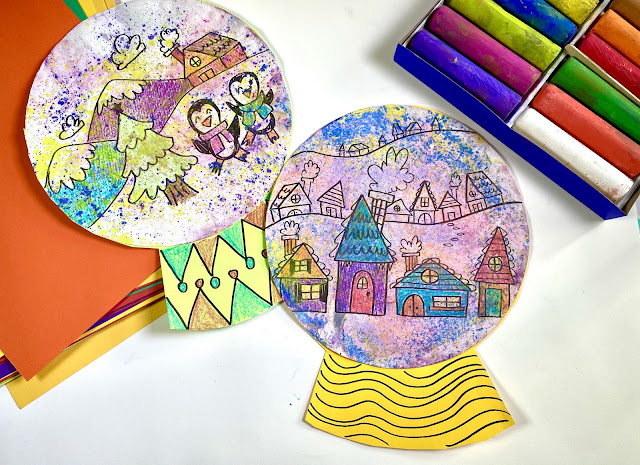
YOU GUYS. I can't tell you how excited I am about this one! After I created my first Snow Globe lesson , I started getting all sorts of ideas on how to add color to the background. I thought...what about chalk prints?! 

I first shared the process of Floating Chalk Prints back in 2014 (that's wild!) and you can check out that post here. But really...not much has changed! You'll need:

* A basin of water. And, seriously, nothing but water.

* Freart chalk, found here. Sidewalk chalk won't work...and artist chalk is so expensive and little...this stuff is seriously the best.

* If you are looking for round paper, Prang just created some!

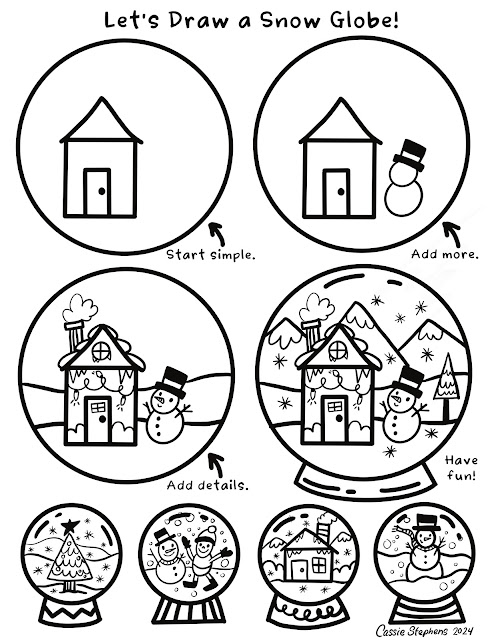
And that's it! Of course, you might want these free downloads from yours truly...

Okay, now...let's get started. I promise...you and your students are gonna love this!
RIGHT?! Out of all the methods I tried for adding color to the background (and I have another fun one that I'll be sharing here and on YouTube soon...I always post to YouTube first so, please be sure and subscribe to be alerted!) 

Whenever I share the process of floating chalk prints, I always get the question "do you have to spray or set the chalk once dry?" NOPE! Which is what makes it even more amazing!

I hope y'all have fun! I can't open my comment section here on my blog, unfortunately, because I get spammed for days BUT...I am active on Instagram and Facebook! BTW...I recently had a fake Facbeook account created in my name and likeness. It's not me! The one I have linked here is my account. So...if you do this lesson in any way, I'd love to see! Please be sure and tag me. 
And...friendly reminder...that if you are interested in receiving any of my books for the holidays, you may want to order super soon! I sign all of my books before packing them up and sending them your way. You can find them here!

photo signature_zpsd10b3273.png
Read more »

Monday, November 25, 2024

Let's Draw (and Paint) a Wreath!

Hey, friends! I shared on social media last week that I had some exciting news...with my friends at Prang, you can now purchase ROUND paper!

Here's a little more about how that idea came to be:
If interested in seeing those round Dot Day activities my students did, visit here.

But...I know that there are TONS of art lessons out there that could be based on a round piece of paper! In fact, I would have loved it for my Snow Globe lesson

Here's a little peek at the paper Prang has for you:


I was concerned that the paper wouldn't be their good quality stuff but it is! In fact, I was able to paint on it to create this wreath project! I created a video for you to use in your art room or at home. Of course, if you don't have round paper, that's no problem! I walk you through an alternative at the start of the video. Here you go:
So, honestly...while creating this video, I wasn't sure if the markers were going to bleed enough to provide color. At first...it seemed nothing was happening. I thought the lesson was just going to be a flop! BUT then I came back an hour later after the paper had dried and it looked AMAZING! So be sure and tell your artists to be patient and let it dry.
Creating a wreath puts me in mind of Christmas! If you have children who are readers...might I recommend my art-themed choose your own direction book Find Your Way. I've had so much positive feedback from parents, homeschool families and teachers alike! You can find it here. 


Read more »

Tuesday, October 3, 2023

Easy Pumpkin Sculptures!

Hey, y'all! 

I'm all about the Halloween projects lately and I came up with one that I know your students will love! I mean...I loved making it so even if you just need a fun little weekend craft to unwind, you may want to try this one on for size. 

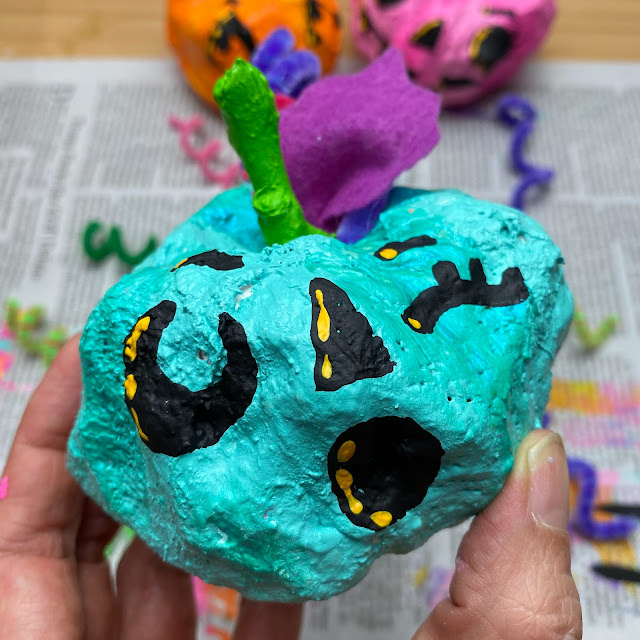
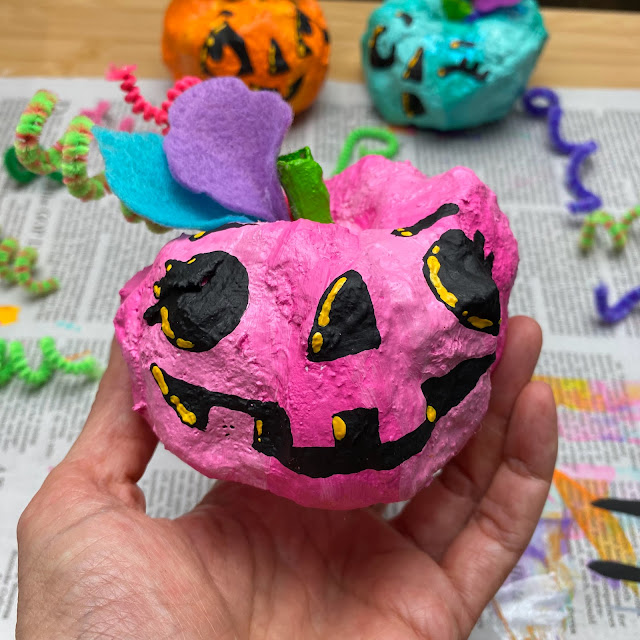
You can find the supplies for this right here. But really...it's just foil sheets, plaster wrap and acrylic paint. Sticks, felt and pipe cleaners are things the average art teacher has in surplus so...you can add that to your shopping list if necessary. But if you are anything like me, those types of supplies seem to multiply in your supply closet!

I created a kid-friendly video for you to share with your students if you'd like. You can find it here:


Personally, I know my students would struggle with the face. So! I talk about embracing your mistakes a lot in the video. I also chat about practicing first. I would recommend doing the faces with a paint pen if you have younger students. I know paint pens like Posca markers are expensive...so maybe it's a station students can rotate to when finished.
But who's to say they have to add a face? They could designs like dots with a sponge brush. Or they could collage a face onto the pumpkin. That might be easier for them. OR you could bust out those googly eyes that also multiply in your closet. I mean, really, the possibilites are endless. Just start with a cute pumpkin base!
If you need a little time between pumpkins drying, you might want to check out this post. Students could work on this pumpkin drawing activity in addition!
Full video right here!
Most of all, have fun! And if you create these cuties, please be sure and tag me on social media. I love to see what you and your students create!


photo signature_zpsd10b3273.png
Read more »