This past Monday was our school's field day. There was a 90% chance of rain and thunderstorms for the occasion (of course!). I was in charge of the Art Station which was a new thing last year. In the past, I'd always been in charge of the Face Painting Station with parent and student volunteers. Last year, some changes were made and I was given a box of sidewalk chalk and told that was my station. Y'all...I don't know if you've ever sat outside all day in the blazing sun while kids rotate every 15 minutes only to write words like "fart" on the sidewalk and then ask when they can go to the next station but I can easily testify that it is NO BUENO. I decided to do something different this year...
And this was NOT it. My grand idea would have involved being outside (I'm keeping it a secret in hopes that I can make it happen next year!) and Mutha Nature was given me a big fat "no" with those impending storms. So I arrived at school at 6:30 am to start plotting what my Art Station might look like. I created a video to kinda walk you through what we did:
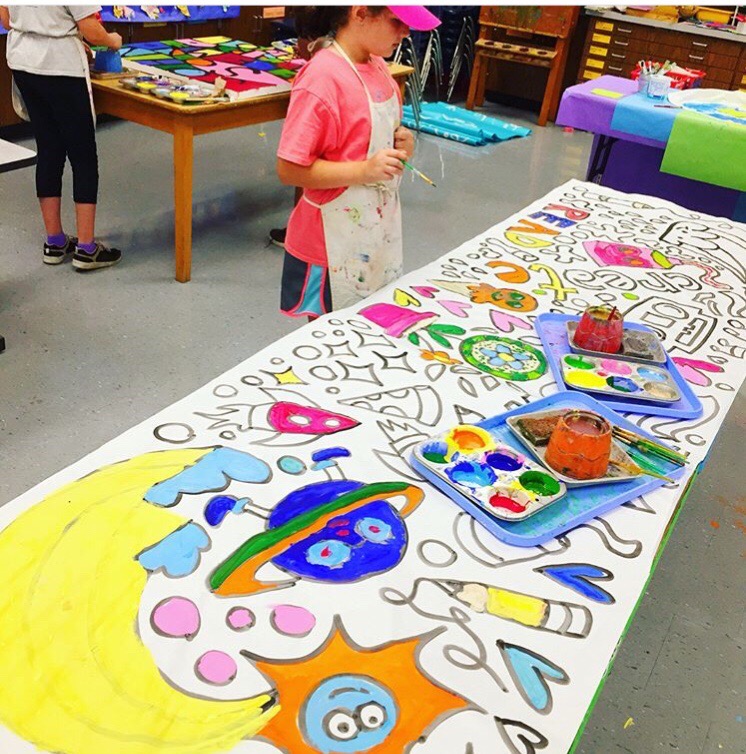
I already have several "stations" or centers in my art room that the kids are familiar with as they are my Early Finisher Centers. In addition to those centers, I also created two painting stations for the kids to explore. This HUGE banner was one of them and what we created on canvas I will share in an upcoming blog post.
These banners are about 18' long. I simply rolled out huge pieces of bulletin board paper, laid it across three tables and went to town with my good ole bingo dauber. I'm about read to retire this set as we've used them a lot this year and the tops have lost their fuzzy marker-ish-ness. But they work so well for big posters!
As soon as the kids walked in my room from their outside activities (I have an exterior door making it easy for them to come in), I invited them to take a seat on the floor. I was concerned the kids would be bummed that they were inside (cuz, y'all, IT NEVER DID RAIN!) but they actually loved it. 15 minutes in air conditioning with a chance to go to the restroom if needed ended up being a good thing. I told their teachers, who were rotating with them, to take a little break and come back in 15. It was a good moment to relax for everyone.
Once everyone was seated, I reminded them of their centers choices and talked to them briefly about the banner. Then I released them.
I told the kids that they could rotate to a new center if they wanted but first had to leave the old one as they found it...or even better.
Painting friends were reminded to slap on an apron as leaning over the giant banner could get paint on clothes.
I gave no instructions when it came to painting other than be sure and clean your brush between colors. To clean it up a bit, I painted over the whole thing with my black outline and added pops of white once it was dry.
And now we have two huge banners to decorate the halls when we come back to school in August! I'm so excited as our hallways are usually so sad when we return.
Have you ever done anything like this? Love to know what you did in your art teacherin' world!
Here is the final installment of the 3D tour of our art show. Our school-wide art show features every work of art created by every student. The halls are filled with your 2D pieces (future blog posts on those displays!) while the art room showcases our 3D creations. You can see Part 1 and Part 2 of our art show tour of 3D works. Our art show was Superhero themed (tho you'd never know it by this display) and the kiddos were asked to dress the part. You can read more about that here.
While they look cool, they only are impactful if you are standing right over them. So I got this idea to create a Pie in the Sky display!
I started by painting and hanging one paper panel and pizzas in front of it, just to see how it looked. I immediately loved it and decided to make the whole display this way.
If you are interested in more details about this project, here's the video I created last summer. In this video, I am creating a variety of pizza plushies. However, for my kiddos, we went bigger. That's really the only difference.
Here's a terrible picture of how I hung the paper. I put a strip of masking tape across the back. Then I created a tab of masking tape by folding a piece of tape in half. From there I used two paperclips linked together. One went thru the tape tab and the other was stabbed into the ceiling tile.
To hang the pizzas, I simply used fishing line. I fed the line thru the pizza and hung it also with linked paperclips. To prevent the pizzas from twirling in the wind, I made sure they butted up against the paper so they would not rotate.
This was definitely a show stopper...and the younger kids were all asking "when are we making THOSE?!" That's when you you know you got a winner!
While I was attending NAEA, I created a sub plan for my kiddos introducing the artist James Rizzi. When it came time to create a backdrop for our superhero city, I reminded my students of this artist. Using bingo daubers filled with diluted India ink and construction paper, they created these fun cities. They made the most epic backdrop for all of our superhero projects.
Here's a time lapse of our big night!
I feel like I've been in go-mode every since returning from the art teacherin' conference in March. We hit the ground running with clay projects right after spring break. Normally, I create instructional videos for my clay lessons but this time around, I just didn't have the time. So...I'll be sharing the projects with you but just know that more details are to come.
To kick off our superhero theme, my second graders created onomatopoeia plaques. We have 30 minute art classes so on the first day, we created the background piece and painted it with glaze.
The following day, we added the middle piece and the lettering. Once out of the kiln, we glazed the lettering and fired again. While waiting for the firing, we created Model Magic beads for the hanger of our plaques. More details on this project to come!
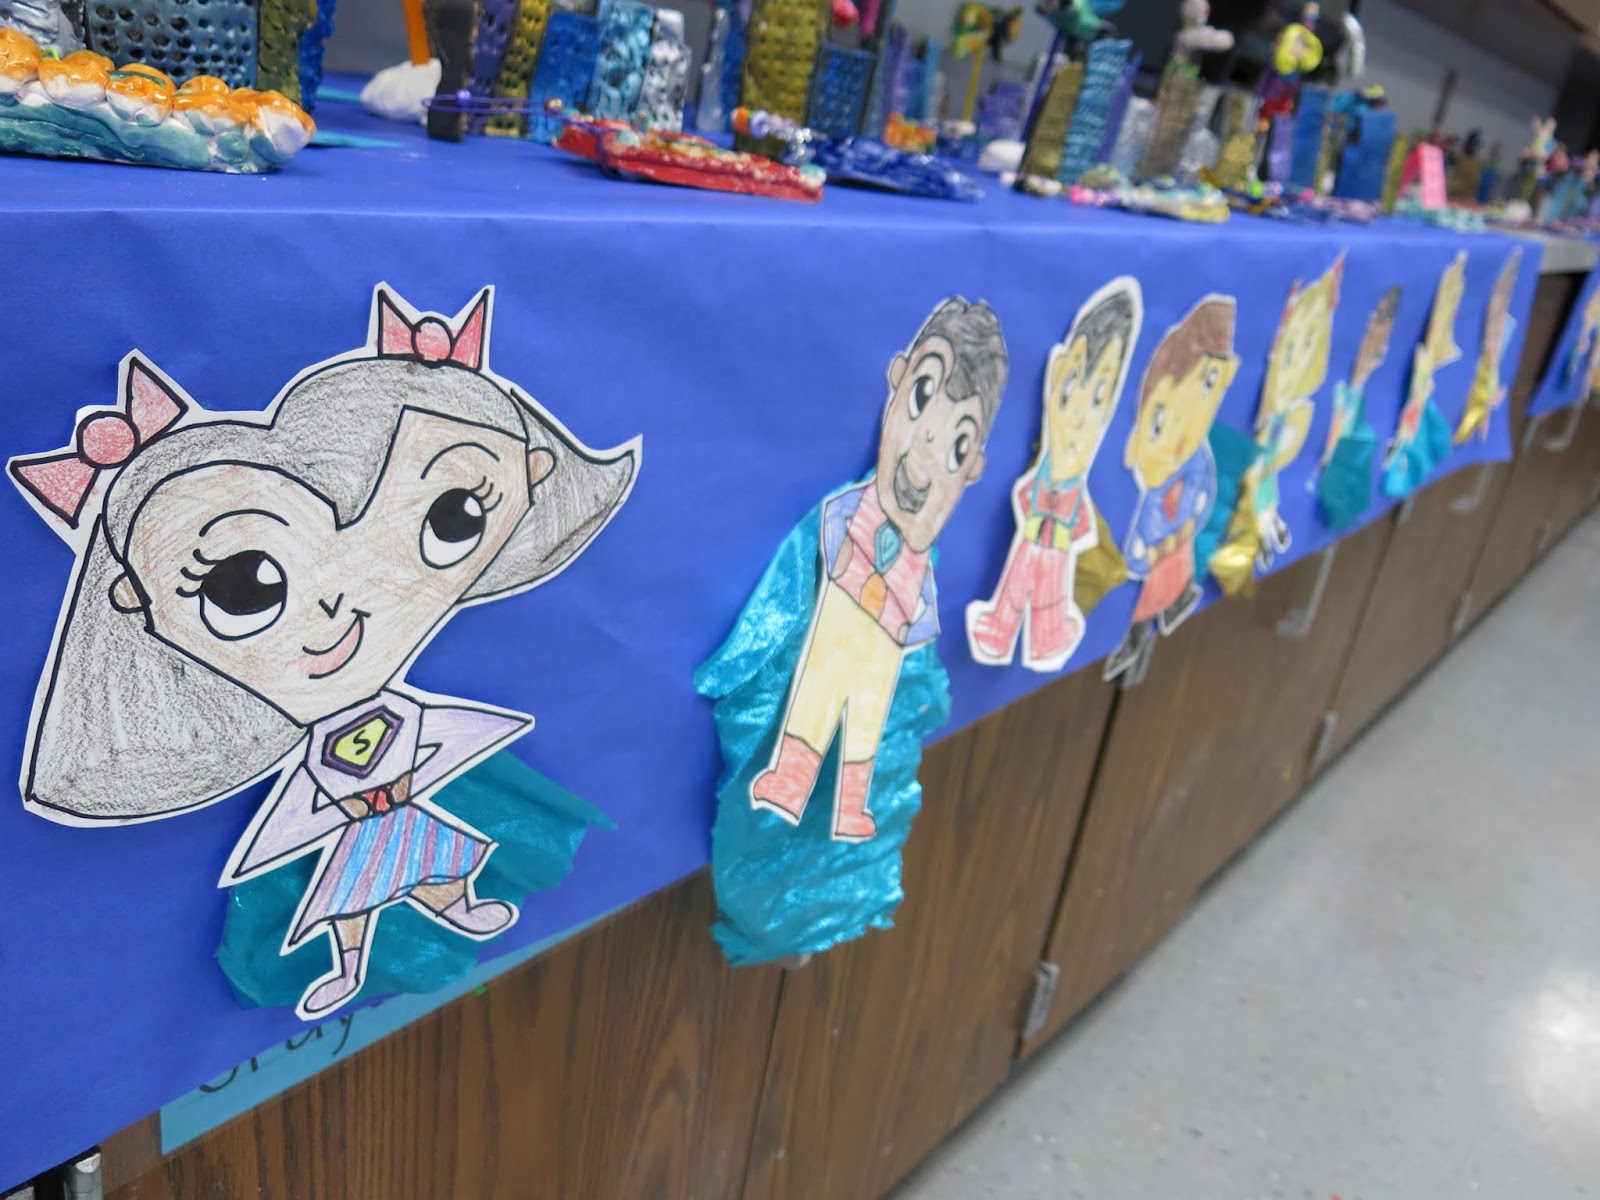
My second graders also created these sweet superhero selfie statues!
I had two classes come at once so that I could have an hour of art with my second graders. We created these in that amount of time.
Complete details (hopefully with video!) to come, promise! We used cone 06 Amaco clay to create these. Once out of the kiln, we glazed with Amaco's Teacher's Palette glaze.
I only have three rules when glazing: do not glaze the bottom, NO WHITE SPOTS and be sure and glaze everything a minimum of three times. I love that this superhero has a sidekick!
Third graders created superhero CARS! This was easily my favor project to teach and see come together...each one is so different and so fun. I cannot wait to share with you just how easy this project is. Every kiddo was completely excited and engaged!
From drag race cars to sports cars, jeeps, limos and more, they came up with everything. I had originally planned for them to also create a 3D pop up city to display their cars in...but we simply ran out of time.
One fun thing we did was add alphabet noodles to the license plates of the cars (or anywhere else the kids wanted). This was a fun way for the kids to personalize their cars. The noodles burn out in the kiln, leaving behind their impression.
Don't tell...but this AMAZING drag race car is my absolute favorite thing of all time! The imagination and invention on this kid...such a show stopper!
Some of us created self-portrait style bobble heads...
And some of did not. And I love both!
Every year, I love these bobble head projects more and more.
Now don't you go telling anyone, but the first grader's projects just might be my favorite.
And they were easily the most excited bunch. We started by creating super cities in our 30 minute classes. After they were fired, I dunked them in diluted black tempera paint and the kids added metallic paint on top. We also used clay to create a flying super selfie!
These were painted with tempera cakes and sealed with sparkle Mod Podge.
Super shields were also created...I cannot wait to share with y'all the details of those projects. But that will have to wait. Thank you so much for letting me share our Superhero portion of the art show!
In case you haven't noticed, things have been a lil quiet around this here blog. It's not because I've not been busy...in fact, it's quite the opposite. I've been so busy with art show prepping (and other life stuff) that I found myself unable to keep up with my usual three posts a week. This has NEVER happened before...and I think that's because this was our biggest and most time-consuming art show yet!
For our school-wide art show, we showcase EVERY piece of art that EVERY student has created all year. What that means is that the halls are filled from floor to ceiling with two-dimensional pieces. I'll be sharing that portion of the art show (complete with video tour!) in an upcoming blog post. Today, I thought I'd take you on a tour of the three-dimensional displays of the art show that I showcase in the art room. Here's a tour:
Yes, I know, my art room is very large! It used to be the school library before a remodel that happened well before my time. Why do you think I wanted to be at this school so badly?! I'm fortunate that my administration gives me the day of the art show "off" to set up my art room like this. My specials team also helped me out by taking some of my classes to allow extra set up time. You never realize just how long all of this takes until you start pouring weeks, days and hours in to it!
I thought I'd give you a closer look at all of the projects and share links to videos and/or blog posts in case you'd like more details. We'll start with this fun and easy kindergarten project!
All of our clay projects were created with Amaco's low fire cone 06 clay. We also used Amaco's Teacher's Palette Glaze, which we loved. The colors are so vibrant and shiny. The art class following our clay project, we worked with the three primary colors of Crayola's Model Magic Clay. The kids had to create the secondary colors and make them into a bead of rainbows by adding them to skewer sticks.
From there, we used pipe cleaners to add them to our plaques with a little pony bead in between!
The art show 3D displays were set up in four parts: kindergarten plaques, the superhero displays, the pizza pillows and, my favorite, the Art Supply Store!
After learning about the artist Lucy Sparrow, I had each of my first through 4th grade classes create an art supply. My third graders and some of my second graders created these crayons. Complete lesson and video here!
One fourth grade class created these glue bottles and also made little pencils. This project was so easy, it was kinda crazy! Here's the lesson with video.
Not only did we create these glue bottle sculptures but we also had to come up with a name for them! These were a hit at the show.
A couple of my other fourth grade classes created these tubes of paint! I'm telling you, creating these art supplies was not only fun but a great lesson on recycling as most of them were made with a toilet or paper towel tube base. You can find out more about this project here.
One project I never got around to blogging about were the making of these second grade scissors and glue sticks. These were super fun and easy to make...my favorite part was reading what the kids decided to call their "product" and price it.
And that wraps up our art supply store! Join me tomorrow and I'll take you on tour of the rest of the 3D displays of our art show...or watch the video for the complete tour.