This is my second year to do this lesson with my third grade students and, even still, I'm amazed by the stunning results. And the kids are so super proud!
I created this lesson last year inspired by the artist Sandra Silberzweig. I LOVE her work and I know you will too. Here's the lesson video I created and used once again this year.
I'm not gonna lie: the devil is in the chalk brand details. The reason these colors are so vibrant is because I SWEAR by Faber-Castell's chalk. I stayed far away from chalk for many years because the colors were so stinkin' dull. But not these, they go on vibrant and stay that way. I cannot recommend them enough!
Also having that color wheel on hand helps tremendously. I found mine online after a quick google of "color wheels" and laminated one for each two kiddos. Our key word is analogous. They can't pronounce it but, by golly, they know what it means!
To seal, I'll hit these with a mist of hair spray. I like the dollar store variety...but do be careful. Sometimes it comes out in speckles and can leave that look on the kids' work. Nothing another thin layer of chalk wouldn't hide.
We created these on 9" X 12" sheets of paper as that's the size of the frame for the Artome art show. I don't think I'd do this project much bigger...making black glue is not my favorite thing in the world. By the way, this year, I made mine with India ink instead of tempera paint. It seemed to work just as well and came out of the nozzle a lot easier.
I will say, I do believe my Rainbow Tree is starting to influence my artists!
We most def won't be forgetting rainbow order any time soon!
And now for a ridiculous amount of colorful portraits! Sorry, I love each and every one, they are so stunning.
One thing I liked about this project is that even if the kids "mess up" during the black glue stage, it doesn't matter. I told them to keep going. If they finished one and were still unhappy with the glue, I allowed to do another. Then, on chalk days, they just picked their favorite and used the extra one as their back up paper.
We all have those perfectionists...I get it. But I'm not a fan of starting over 23 times...so I always require them to finish it out before starting again.
So looking forward to our art show! I'll keep you posted!
So, I totally thought I shared this video lesson with y'all in a previous post but after some digging, I couldn't find it on my blog! So sorry! I oftentimes post a video to my YouTube channel without adding it here simply because I'm crazy and forgetful. However, if you subscribe, you can stay up to date on my instructional videos (along with some other stuff) that you are more than welcome to use in your art teacherin' world.
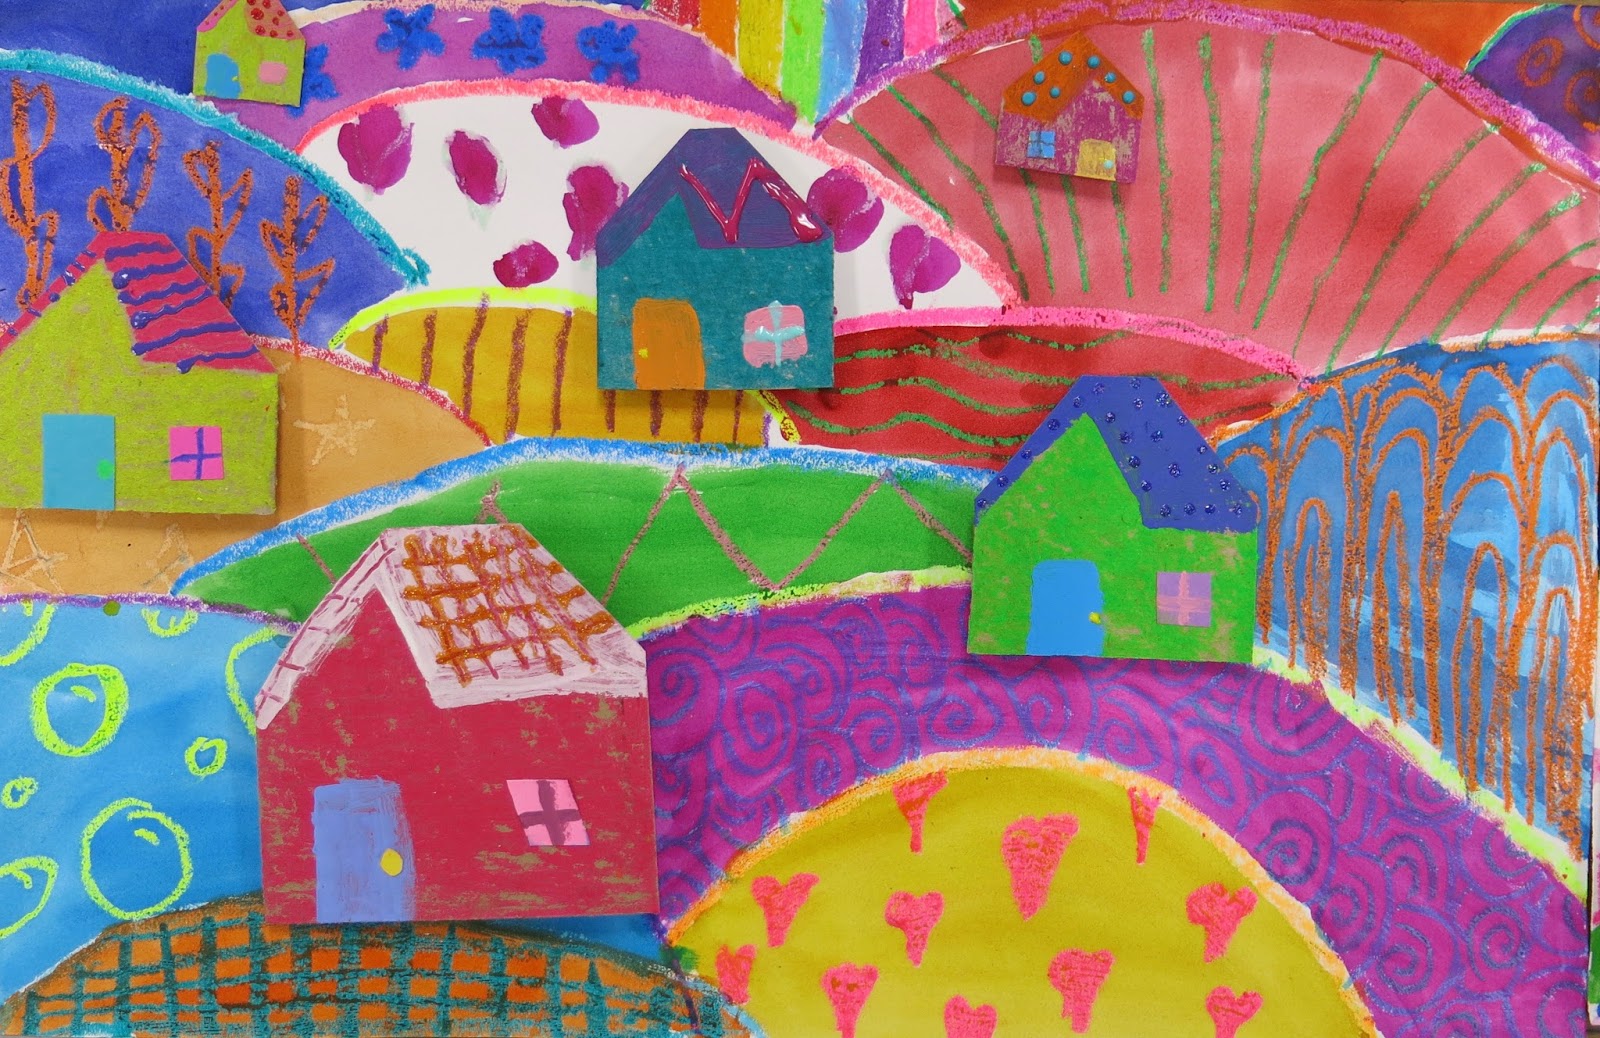
But first, let's talk about these amazing third grade patterned landscapes!
Forgive me but this blog post is gonna be photo heavy...I'm just in love with this project! Every single one turned out so happy, colorful and bright. Here's the video used to teach this lesson:
This did take us about three and a half art classes. While working on this project, my early finishers worked on this lesson which was a great tie-in what with the pattern review:
My students are now obsessed with drawing three dimensional houses!
I'm going to tell you exactly what art supplies we used for this project because, let's be honest, one of the reasons these look so good is because they are so bright and colorful. Kid artists deserve to use quality art supplies just like grown folk. That's easy to say...but not always easy to afford. The supplies I'm about to share are not bananas expensive...but they aren't your bargain basements fare either.
To start, my students used fluorescent oil pastels by Sargent. These are my favorite to use when we are creating a watercolor resist because of how bold and bright they shine through the paint.
They run about $7 a pop...and I purchase enough for two kids to share. You can find them in just about any art supply catalog. We don't use these all the time...like I said, we love them for resist. I've shared these many times before on my blog, I just love them!
I love both liquid and watercolor paint. However, I wanted the kids to use pan watercolor paint for this project because I'm still learning the liquid watercolor paint ropes. How much water do I add to dilute? It looks black in the cup and that confuses the kids...you get the idea. I'm working on my issues with liquid. When it comes to pan watercolor tho, not all are created equal. I LOVE Crayola's Mixing Colors:
Okay...here's the deal. I didn't always love Crayola's watercolor paint until I discovered theses guys. Here's the deal: DO NOT BUY THIS SET unless you don't have any watercolor trays. Instead, by the refill colors in the set. Here's what I have: I got rid of the black, white and brown from my watercolor trays. Now I have refill pans that I simply pop out and replace of the following Crayola watercolors: red, red-orange, orange, yellow, green, turquoise, blue, blue violet, purple and magenta. I place them in the paint pan in that order.
These photos have not been altered...that's truly how bright the watercolor and oil pastels are! Now you see why I love 'em so!
For our houses, we used cereal boxes. I sent out an email at the start of the year asking for cereal boxes simply because we need that cardboard for projects like this!
The kids used "naked" oil pastels to do a rubbing on the house before either collaging the doors and windows on or painting them. That was a hot mess of a day, not gonna lie. We had paint, cardboard, paper, glue and puffy paint all on the tables.
As far as puffy paint goes, I like Tulip brand that can be purchased in most craft stores. It's expensive at about $3 a bottle...but I LIVE for puffy paint and so do my kids!
Once the houses were dry and the background was complete, the assembly was ready to happen.
I am the proud owner of a TON of foam core from matting and framing artwork. I simply chopped that into bits for our pop out foam.
To really get those houses in the foreground to stand out, the kids made sure to double up the foam core. One piece was used for those in the middle ground and either one or none for the background.
With these complete, my students are moving on...we are now onto creating self portraits for our winter art show!
I decided to give myself a wee break and use a lesson from last year for our selfies...it was a huge hit so I'm excited to give it another go:
We'll be using my favorite chalk brand for this project: Faber-Castell!
Alright, I did say this post was going to be photo-heavy, right?
But, can you blame me?! Each one is just so happy!
I definitely will be doing this project again. I can't think of anything I'd change about it.
Even when some friends went wild with the puffy paint, it worked!
You'll have to keep me posted if you give this project a try in your art room. Please be sure and tag me. Not only would I love to see but it also helps others find the details on the lesson.
Just a peak at the foam core. I stressed that none should be visible from the front of the house.
A little over a month ago, I got an email from Trixi Symonds over at Coloured Buttons. She asked me if I'd like to join her super fun #sewasoftie project for the month of July. Her concept was simple: introduce kiddos to stitching with a month long sharing of sewing projects via her Facebook page (which, by the way, is LOADED with fabulous sewing inspiration for kids of all ages). I happily agreed and used my recent trip to Italy (and love for all things pizza) as my inspiration.
Another reason I chose pizza is because my kiddos always find inspiration in food. Are your students/kids like that? It's so funny to me: give a kid a piece of clay and it's guaranteed that they will come back with a clay cookie, pizza or a taco. I know when I share this project with my third and fourth graders in the spring, they'll be all in.
Let's talk supplies:
* Craft Felt in bunches of colors. I find that I have a TON of craft felt. Does it multiply? Are teachers secretly dumping the stuff in my storage closet? The latter is more than likely the case. It would also explain the ziplock baggies of broken crayons I always receive (y'all, I don't even use crayons!).
* Chenille Needles are my jam. They have a big eye that is great for threading and a nice sharp point which is perfect for puncturing that felt.
* Thread can be tricky. Get the cheap stuff and it can break with a slight tug. We use embroidery floss with the single thread...not the one with 6 threads. Cuz we ain't got time to be splittin' hairs.
* Paper for creating a pattern and for making a needle threader.
* Scissors are great...and if you have one for fabric and another for paper then you are just the bee's knees.
* Pins and a Magnet to park those pins. They make these great pin wands that my students love. You just wave them and the pins snap right to the wand.
When I first got the idea to create this lesson, I kept getting more ideas. First it was allowing the kids to create toppings that can be changed at any time. Kind of like the felt boards I played with as a kid. That's why I created the segment in the video where the toppings are changed. Then I thought it would be great to introduce button sewing...for that the toppings would have to be tacked down. And, of course, I had to throw on some puffy paint because PUFFY PAINT MAKES MY WORLD GO ROUND. Thank you, Puff Daddy for the Puffy Paint. He's the one who invented it, right?
Then I got the idea for a silly-faced pizza. I spotted these giant googly eyes at the craft store and thought it would be fun. Because I wanted to add arms like we did with the Stitched Monster project, I knew I'd have to go about sewing a little differently. Originally I was going to make one video...but I decided that two was best: one for the Stuffed Pizza and Button Sewing and another for the Funny Faced Pizza.
So, just some thoughts on sewing with kids: I usually do a fibers unit in the spring, after clay. Kids love sewing, weaving, felting, you name it...and it's a great follow-up to clay as they pink-puffy-heart-with-sparkles LOVE clay. However, sewing is a challenge that you and your students need to be prepared for. Whenever we tackle something new, I remind the kids that we are learning and that takes practice and patience. I tell them that some of them will get it right away...and others will take a little longer...but we will ALL get there. With practice and patience. It's important to emphasis this so that frustration does not lead to a defeatist mentality.
Now, I'll have my students glue their items down with tacky glue. But, for those kids creating at home who wish to change the toppings of their pizza frequently, they could simply keep their cut pieces in a sealed bag.
This pizza was created the same way as the first but I really wanted to introduce button sewing. What better way to do that than with pepperoni buttons?! And, of course, puffy paint.
No doubting that I grew up in the 80's...I got puffy paint in my veins.
Shortly after posting my Stuffed Pizza video on my YouTube channel, Jeanne Kemp, an art teacher out of Baltimore shared this with me. She'd done the project with her students! How fun and they did a fabulous job. I had pizza for dinner in their honor.
This project is a little more involved simply because of the addition of sewing the arms and sewing three sides verses two. For that reason, I'll reserve this project for my older students.
I def don't plan on purchasing them all googly eyes as I don't have that kind of budget. So, more than likely, if my students decide to make a face, they'll have to create the eyes from felt. No biggie.
I really had fun creating these pizzas. They got me excited about hand sewing again...and the upcoming class I'm taking at Alabama Chanin. More on that to come. LOVE to know if any of you all have taken a class there before!
Until then, have a super fun time stitching your pizza!