Showing posts with label valentines day. Show all posts

Monday, September 24, 2018

In the Art Room: Chris Uphues!

Well...something super duper and magical happened to me this weekend while I was taking a little trip to Orlando...I got to met Chris Uphues and Jennifer!

You.Guys. I have been WILD AND CRAZY for these two for a while now. They are simply the best. SERIOUSLY. I mean, look at this amazingness first of all...
And having met them, I can tell you, they are just as bright, happy and loving as each and every heart you see right here. Seriously, y'all. My mom and I sat down with them, totally interrupting Chris' mural painting time, and they made us feel so welcome, happy and warm just to be around them. I've never met two people who were as cute and kind as these two. I could literally hang with 'em all day!
When I discovered through some excited messaging with Jen that we'd be in Orlando at the same time, I knew I wanted to make a meet up work. I mean, I've been creating lessons and sharing my love of Chris' work for a while now! 

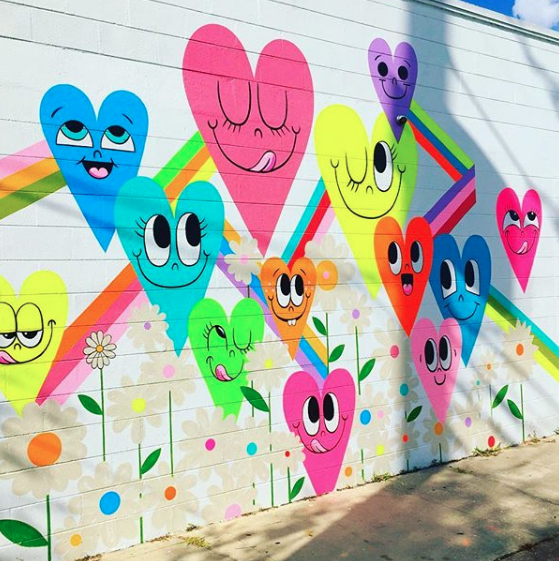
Since I'd be meeting them...I decided to have my students learn about Chris while I was away. So...Chris taught art for a pinch while I was gone, even if he didn't know it. 
Sweet baby Jesus in the manger, there is nothing, NOT A THING, I hate more than prepping for a sub. Can I get an amen up in here?!

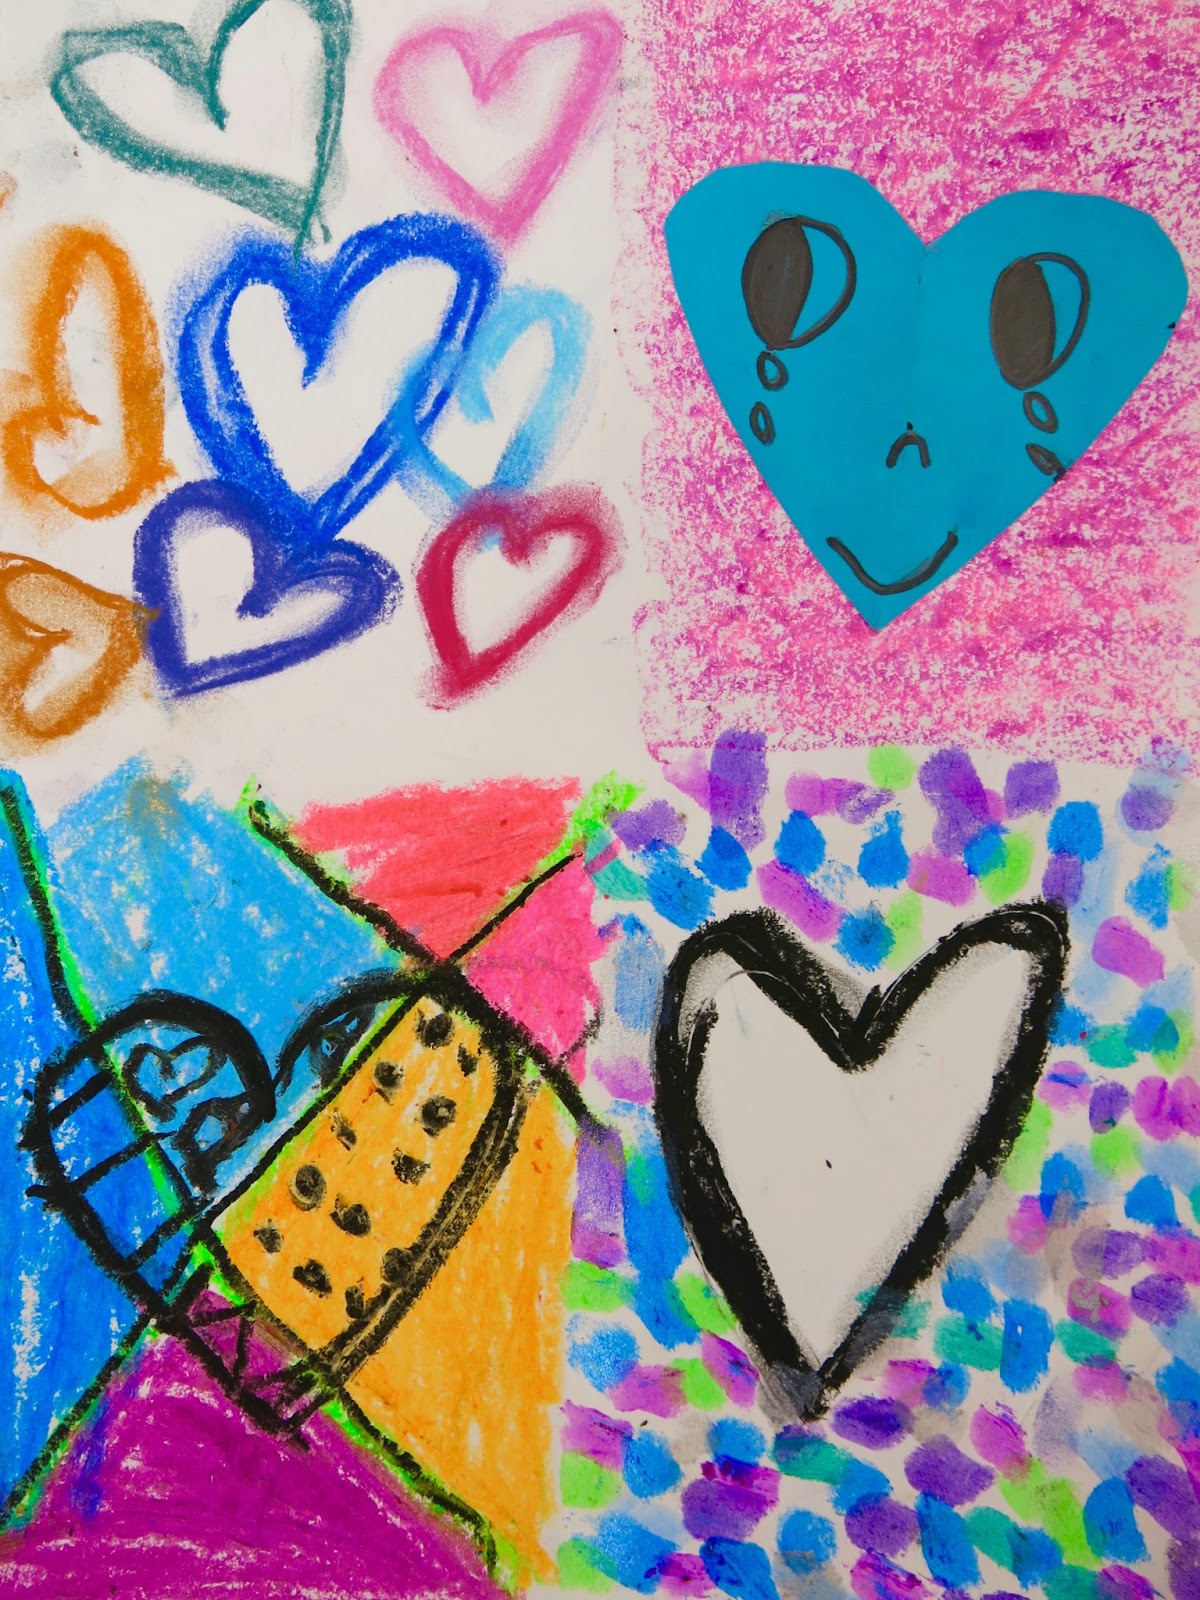
THAT being said, I did create some drawing sub plans for my kids and I thought I'd share 'em with you. My students and I LOVE Chris Uphues and I am so excited to share this drawing lesson with them. When I'm out, I like to keep my sub life easy: so a lesson for ALL GRADE LEVELS with LIMITED SUPPLIES AND PREP it is! Yippie! Happy sub means happy classroom to return to.
I told my sub that the classes that only have 30 minutes will probably only get to the dry erase board sketching. They're also reading the book The Shape of my Heart at the start of art class. 

For my hour long classes, they will also sketch and then, after a short time, meet again on the floor to view the rest of the video. 

What's up next for these drawings? Just you wait and see (which is code for I HAVE NO IDEA BUT I'M UP FOR SUGGESTIONS!). 
Also...stay tuned. I'll create a post in the next day or so with free downloadables of the handouts I created. Until then!
 photo signature_zpsd10b3273.png
Read more »

Thursday, February 22, 2018

How to Make a Paper Heart with Kindergarten!

Teaching kids how to make a paper heart can sometimes make you question your life's choices. And that is ESPECIALLY true if you teach kindergarten. The week of Valentine's Day, I wanted to take a break from our usual projects and teach this skill. Knowing that it might be a bumpy ride, I wrote this poem. It helped me so much, I wanted to share. Feel free to use in your art room with any age group of kids!
So, how does this poem work? I recited it during my demo with the kids and had them repeat after me. I do call and response ALL DAY LONG in my art room so they are used to this routine. Here's a glimpse into my art room with kindergarten:
By the end of our 40 minute art class, each student had successfully cut out many hearts. We also chatted about the artist Chris Uphues and added fun faces to these. The kids were beyond excited to create and take these home with them. Just had to share!
 photo signature_zpsd10b3273.png
Read more »

Saturday, February 3, 2018

In the Art Room: Romero Britto-Inspired Hearts in First grade!

Hey, y'all! This blog post is brought to you by my (and my students!) newfavorite things:

* Bingo Dotters (Daubers?) filled with India ink

We had a blast with this lesson. So much so that when I shared on my Instagram, I got lots of questions. I thought I'd create a short video tutorial for your and your kiddos! Here you go:

Please pardon my nasally voice as I'm currently losing a fight with a head cold. I blame the children.
 I have 30 minute art classes with my wee-ones. We managed to crank these out even after watching a video about Britto and reviewing lines, shapes and patterns. I was so loving the direction they were going so far.
 The following art class, we learned all about bleeding tissue paper magic. This had the kids very excited. I encouraged them to use either warm or cold colors in each section. Some did and some didn't. It's first grade, y'all. They do what they want. 

 These hearts are HUGE. We created them on 18" squares. So, by the third art class, some had a little bit more tissue-papering to do and some did not. So I introduced the idea of the paint sticks. I really let the kids do what they wanted in the background...it was a new medium for them and I really wanted to see what they would come up with.
 By our fourth and final 30 minute art class, I still had some kids wrapping up their masterpieces. My early finishers set to work with their paint makers. They added pattern to GIANT hearts that I drew on multi colored bulletin board paper.
 I hot glued their giant hearts together and added them to our heart display!
 Ugh, still need to get some signage up there!
Such a fun lesson, I had to share! Have fun!
 photo signature_zpsd10b3273.png
Read more »

Monday, January 22, 2018

In the Art Room: Artists with Heart!

Last week, we were out of school for seven consecutive days in a row with snow. It was heaven, lemme tell you. We finally ended up going back to school on a Friday after a 2 hour delay. If your school is like mine, when we have a delay, we specials folks get an alternative schedule...which basically means that whatever you'd planned on doing, just go right ahead, open that window and throw it right out. Knowing that, and knowing that I didn't wanna spend my shortened Friday running around like a mad woman trying to locate projects, sort supplies and remember where we'd left off, I decided to do a fun one-day project with all of my classes. That's when I got the idea for a crash course on four artists who use hearts in their art!
I did this lesson in about 30-40 minutes. My classes are 30 minutes in length...but this did run a pinch long. The classroom teachers don't usually mind if I keep their kids a little longer...which only works for me if I don't have another class standing outside my door. Thankfully on this day, it worked out. 
And we cranked out these beauties in that short amount of time! I created a keynote of each artist. I did a quickie intro, shortie demo and then set my timer and said, "okay, you have five minutes!" We NEVER do art class like this...but the kids really seemed to love the challenge. They took to calling it "speed art" or an "art game". I need to come up with a name for it. I really love this idea of a crash course in learning about artists! 
For a wrap up, we've been doing this standing-on-our-chairs thing (hey, if Ron Clark can do it...). At the end of art class, the kids stood on their chairs, looked around the room, admired each other's artwork, got super loud and then I rang my chime and we cleaned up. 
In the video, you'll see what supplies we use and how I have them organized. I love chalk pastels, oil pastels and a new kid-fave: paint sticks!
The kids had not used paint sticks yet and they were huge fans. Several companies now make these. Mine are from Sargent. They go on slick and wet like paint but dry instantly. So fun!
Now we have some fast, fun and colorful art for the halls!
I stayed after school on Friday and started to matte an frame the work. I'm trying to get a little ahead for our big art show that we do in May. I'm always in a mad dash to frame in the spring...so I thought that I'd take one class a week to sort, prep and frame. We'll see if I can keep that routine up. I know I'll be happy that I did come springtime!
I have a TON of love-y dove-y lessons on this blog, you can find them put all together in one blog post here
 photo signature_zpsd10b3273.png
Read more »

Monday, January 8, 2018

In the Art Room: Top 15 Fave Valentine's Day Lessons!

After winter break, I always find myself in the mood to start Valentines-y/Warm-Fuzzy/Lovey-Dovey projects with the kids. When doing a little searching on my blog last night, I discovered that I've done 15 Valentine's-themed lessons over the years. I had no idea I'd done so many! I thought I'd share them with you today. May of the links back to the original post will include an instructional video. Please let me know if you do any of these lessons, I'd love to see what you and your kiddos create!

Robert Indiana Love Prints! Believe it or not, my sweet FIRST GRADERS created these a couple years ago! It was a great lesson for printmaking and definitely one I will be doing again. If you don't have printing ink, you might want to check out this blog post where I'll show you how to print with paper and markers!
James Rizzi Love Birds!  Who doesn't love James Rizzi?! These birds are based on some of his work and is a great tie-in if you've already taught Rizzi and his fun cityscape works.
 Recycled Hearts!  Last year, I had a stock pile of messy-mats from our months of painting. We used them to make these two fun works of art (see below also) and they were such a hit! What a great way to review the warm colors, pattern and line.
So much sweetness!
Chris Uphues Hearts! If y'all don't know who Chris Uphues is, then you need to! He's one of my fave dudes to follow on Instagram. His artwork is so fun, so happy and so kid-friendly. They had a blast creating these happy hearts inspired by him.
J Goldcrown Hearts! If you need a quick one day project, I would recommend this one for sure! You can introduce your students to another street artist, J Goldcrown, and have them work in chalk! This is a great project for just about all levels. 
Sculpture Hearts! Last year, I introduced my second graders to Celluclay with this project. I have 30 minute art classes with these kiddos so we had to hustle! We spent one day covering our foil hear in clay, two days painting and the last day stringing beads. These were one of my favorite projects for Valentine's day!
 My Heart Has Wings! If you want to do a feel-good project with your faculty and staff, might I recommend this one? We did it on a PD day and it was so much fun. Of course, this would be a great project for kids as well.
Candy Heart Sculptures! My fourth graders created these candy hearts last year and they had a blast. We used plaster strips which created a super hard surface for the candy. We even made giant candy boxes to display them in!
 Woven Hearts! Every year, first grade does a paper weaving and every year we do something a little new. Last year, they nailed the weaving part so well, I thought I'd introduce them to simple sewing. They did great and I loved hanging them up like a quilt.
Candy Heart Drawings! When my fourth grade early finishers were done with their candy heart sculptures, I had them move on to a drawing of their candy hearts with oil pastel.
Britto Mural! A few years ago, I had to be out for a couple of weeks for jury duty. While I was gone, I had my students work on the parts of this Britto-inspired mural. It was great because then there was a fun masterpiece to hang in the hall when I returned. You can check out the instructional videos in the link.
Valentine Animals! My kindergarten kiddos created these fun animals last year. I created an instructional video for each one which you can find by clicking on the link. 
Collaborative Heart Mural! Collaborative pieces are a lot of fun this time of year. If you follow the link, you'll see which grades created what for this huge collaborative pieces that still hangs in our front office.
Peter Anton Box of Chocolates! This might have been a kid-favorite as it involved using EVERYONE'S favorite art supply: puffy paint! Check out how we made the faux candies and boxes by following the link.

What are your favorite projects this time of year? Love to hear! 
 photo signature_zpsd10b3273.png
Read more »

Saturday, January 6, 2018

In the Art Room: Gallery of Gratitude Portraits!


After the holidays, with Valentine's Day on our minds, I like to have the kids spread a little love and cheer. I've got lots of lovey-dovey based projects in the works which I'll be sure to share. One project that really spread a whole lotta warm fuzzies was one we did a couple years ago called the Gallery of Gratitude. 
You can read all about it here. This project meant so much to the folks I work with. They were stopping in their tracks, reading the words the kids wrote about them, taking pictures, crying...it was AMAZING. We did it right before Thanksgiving to give thanks. I knew I wanted to do the project again this year...but missed the Thanksgiving deadline. So I thought it would be perfect for the winter...when we could all use some warm fuzziness. However, instead of drawing the portraits like we did previously, I decided we'd change it up a bit.
A while back, an art teacher (whose name I don't recall so I cannot give credit to -- so sorry!!) did modeling clay portraits with her kids and they were SO FUN. She shared the the kids looked at the author/illustrator Barbara Reid. Y'all have to check out Barbara's books and videos, so amazing. After watching her videos, I realized just how easy this would be for my fourth grade students. Here are the supplies we are using:

* Modeling Clay. The brand does not matter! And the stuff is CHEAP! So much cheaper than Sculpey and full of color. I bought some inexpensive variety packs from the craft store.

* Matte board. I used matte board because of the weight of the clay and I wasn't sure if it would warp cardboard. I happen to have a TON of matte board so it came in handy. I cut ours to 4" squares as I wasn't sure if the kids could do large pieces. They could have totally done it!

* Model Magic Clear Glaze. The thing is, modeling clay NEVER EVER dries as it's a combo of wax and oil. However, with a thickish layer of the clear glaze on top, it becomes pretty hard.

* HOBBY LOBBY METALLIC PLATES! Y'all! I saw these at the Hob Lobs a couple months ago and just about fainted. The perfect fancy frame, right?!

*Old school yearbooks. So we could look up the person whose portrait we are making.

* Names. These are the names of folks whose portraits we are making. We'll be doing a portrait of every person who works in our school building. 

Video demo I created for the kiddos: 
We started the project yesterday. We spoke a lot about gratitude, what it means, how to show it. Then I had the kids draw a name of a person who works at our school. I told them that if they were happy with the name they got, they could go to their seats and get started. If they didn't know the person and were interested in trading, they could remain on the floor. The kids remaining on the floor shared who they had and traded. A few kids were allowed to redraw a name if they had no clue who the person was...and I knew kids in my other classes would be happy to create that person's portrait. I did have a couple teacher's kids in the class who we all agreed should have first dibs on their parental units. Everyone was happy with who they were creating.
When I share my videos with my kids, I do not show them the entire video. Instead, I break it up into bits. For example, before we drew names, I had the kids watch the first part of the video about covering the background. Then we drew names and set to work. Thankfully, my heat was working and my art room was SUPER warm. This really helped with the manipulation of the clay. In the video, you'll notices I struggle a little because my heat was not working on the clay was super cold and hard. So crank up that heat for this lesson!
After completing the background, the kids came to the floor and we each announced which person we were creating a portrait of. That was fun and the kids were so excited. This is their last year at my school so many of them shared memories of the person whose portrait they are creating. We then watched the second phase of the video about creating a skin tone and creating the basic shape of the head, neck, ears and nose.
I will say this, a couple of kids made their head shapes super small. So I had those who "got it" go around and help make the heads a little bigger. For my next class, I'm going to have a head shape created out of paper and request that the kids place their clay on top and stretch it to that size...I think this will help make the heads bigger and more consistent in size.
I made sure to write down whose portrait was spoken for so that I could keep track of who we were creating and who still needed a portrait made. We might end up having a handful of extra teachers and staff...and I'll put my early finishers on those.
Here is my teacher example! I'll be certain to share our progress with y'all!
 photo signature_zpsd10b3273.png
Read more »