Showing posts sorted by relevance for query 1st Grade. Sort by date Show all posts

Monday, May 26, 2014

In the Art Room: The Art Show, Part 1

 It's official, ya'll: School's Out for the Summer! And it really truly couldn't have come at a better time. Our school wide art show was a week before the last days of school which was a good thing since I was basically a useless puddle of exhaustion after the fact. I'm just glad that my Stress-Related Art-Show Eyebrow-Twitch finally stopped as I was tired of the dude at Starbucks thinking I was hitting on him.

Before I share with ya'll the amazing artwork of my kindergarten through 2nd grade students (3rd and 4th grade kiddos and clay projects to be shared in another photo-laden post), I have just gotta give a great big 
Thank You! 
to the dozens of parent volunteers that popped in everyday for two weeks leading up to the art show to hang the artwork. That's right, they hung everything that the kids created all year (my rough estimate was about 2300 masterpieces). I'm super lucky to have such amazing support from the parents of my young artists. Ya'll are the bestest!

Okay, without further ado, I present to you the masterpieces outta Kindergartenland!
 In kindergarten, I like to start the school year with a great big fat unit on line. We sculpt with lines, paint a pattern of lines and create an abstraction of lines. These bright and happy paintings are always a favorite of mine.
Another fave this year was clay butterfly sculptures. I really love that crayon/watercolor technique for the little ones. It seemed to add more depth to their texture than glaze would. That painting on the right is another project from our line unit.
For Read Across America week, I wore my Don't Let the Pigeon Drive the Bus dress and we created these cuties. This was a big hit with the kids and parents alike. We had a lot of fun trying out our wet-on-wet watercolor skills with this project. Look below and you'll see how they did that in the background of their work.

 One thing I love about having the parents hang the artwork is that each hangs the pieces a little differently. I find that this makes for more dynamic displays from class to class. Foxy lesson here and Starry Night Collages here.

 This year, I made signs for the art show that were inspired by that AMAZING art teacher over at Painted Paper. When I saw her post on art show signs, I knew I had to use our stash of leftover painted papers to make my own.

 Onto the 1st grade artwork. The little ones were so busy this year! One of our most recent masterpieces were these koinobori that we were able to hang in a large bank of windows. Details on that fun and quick lesson here.
 My 1st grade started the year creating those hilarious Viking Self Portrait collages with Rebecca, my former student teacher (who is RIGHT NOW interviewing for her own art teacher gig, wish her lucky, ya'll!). Details on those Starry Night Collages here and Party Pandas here
 Our second round of self-portraits were of a Japanese theme with ourselves dolled up in kimonos. Details on that lesson here
 When I was absent for a couple of days attending the NAEA conference in San Diego, I left my "But I'm Not an Artist!" sub directions on teaching the kids to draw these pandas. And, much to her surprise, her drawings, as well as the kids, turned out great! This also meant that I could come back to work with a lesson already started and simply bust out the watercolor paints for the kids to finish them. Details on those ceramic stars to come.
One final look at 1st grade before we move onto the...
 Again, the idea for these signs came from Painted Paper. Each set of signs was hung right above the hallways leading to that grade level. 
I really loved the work that my 2nd graders created this year. Some of my favorites were their circle loom weavings and their cherry blossom paintings. 

 Every year, I have my 1st through 4th grade students right an autobiography to hang with their artwork. This also proved to be a great sub lesson when I was out for a different occasion. Can't remember what. Booze Cruise, maybe? Wishful thinking. My 2nd grade also took part in the Viking and Kimono fun. 
 We hang ALL the artwork that the kids have created ALL year. Which means that one class can take up a whole lotta wall space. I have yet to find what sticks the best to cinderblocks in the muggy pre-summer heat of our halls. We've tried every kind of tape, that blue sticky stuff by Dapp, double-sided tape by 3M and hot glue. While hot glue works great, it's a headache trying to get it off the walls. Next school year, I'm begging and pleading for more cork strips.
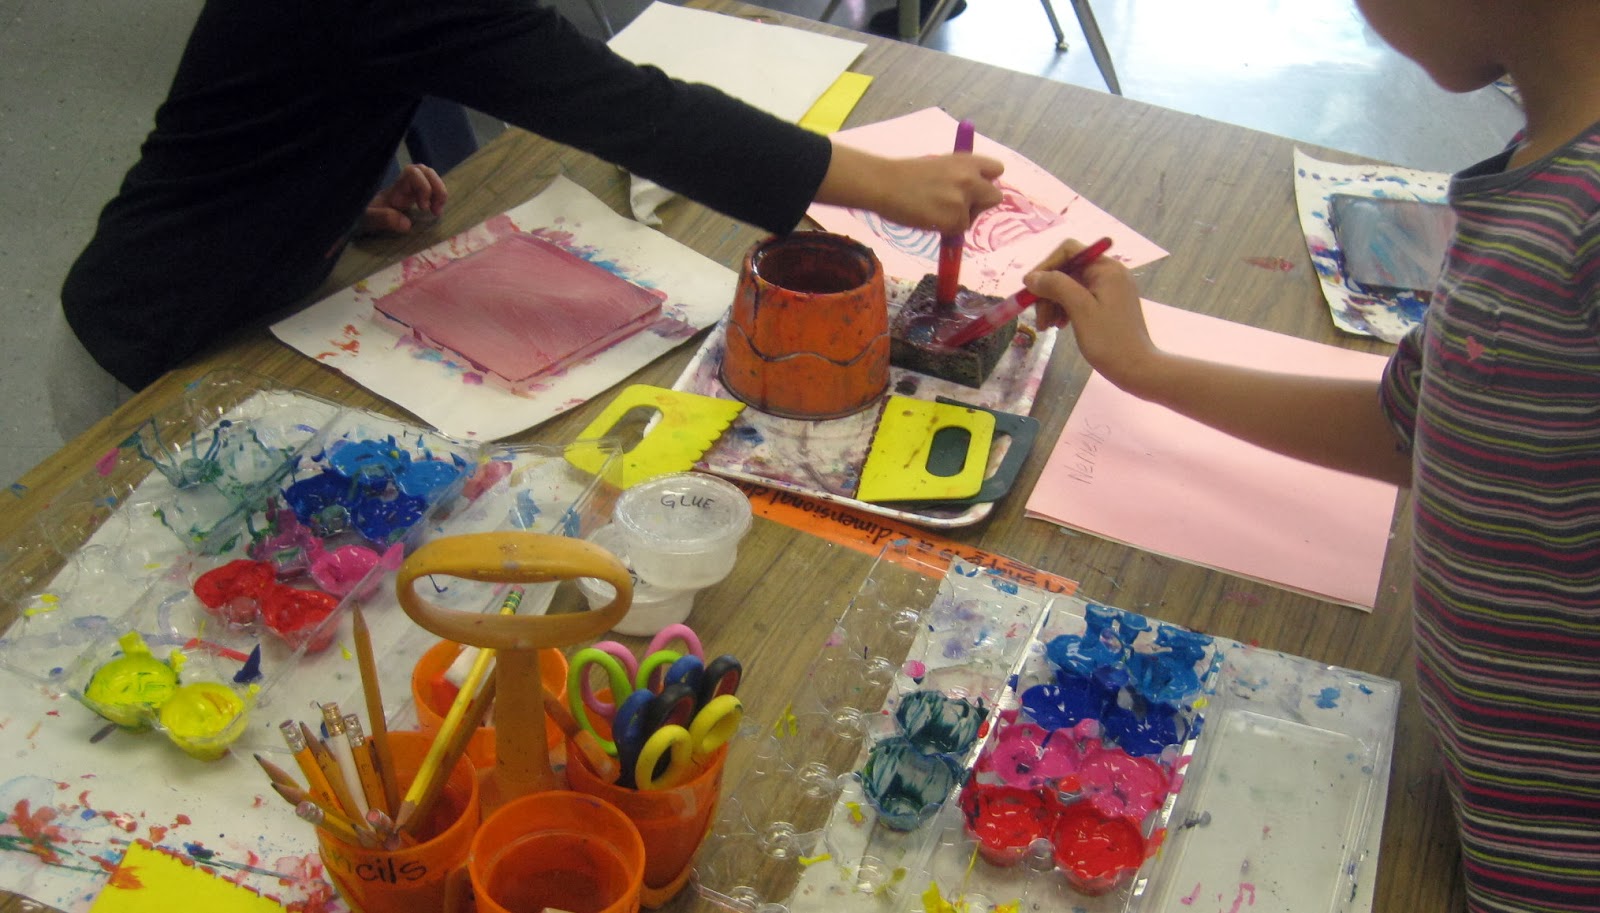
 Paper marbling was a fast and fun project to teach about the Japanese art of Suminagashi
 I liked this lesson so much, I blogged about it twice. 
 I've always struggled with a circle loom weaving lesson where I loved the results as much as the kids did the process. In the past, we wove on CD's and unpainted white plates. The results were fine...but when we painted the plates this year, it seemed to take the weaving to a whole new level. 
And there you have it, ya'll! The 2-dimentional masterpieces by kindergarten through 2nd grade. Stay tuned in the next coupla weeks as I share the rest of the art show as well as lessons with ya. 

Until then, how do you know it's officially summer? Well, it's 1pm and I'm still in my pajamas! May your days be filled with pjs and craft projects, teachery folk! For the rest of ya, take a day or three off, you've earned it. Tell your boss a crazy art teacher said so!

Wednesday, March 26, 2014

In the Art Room: Teaching Vocabulary, Part 2

Way back in freezing cold January, I wrote a blog post called Teaching Vocabulary. In it, I shared with you some new approaches I've been taking to introducing words in the art room. I also asked for your advice and, holy moly, did ya'll deliver! Thanks, kids!

Since that post, I've tweaked (not twerked. See how important learning vocabulary is?!) my aforeblogged methods and added some new ones. So in this three-part post (because the Vocab Party never ends!), I thought I'd let you in on some of my new tricks (complete with video clips, ya'll! See what your encouraging words did? YOU'VE CREATED A VIDEO-CLIP-MAKING MONSTER!) as well as the words of wisdom shared. I do hope we can continue this vocabulary convo so leave your pearls of vocab-teaching wisdom in the comments below, pretty please!

Without further ado, I present to amazing reader comments, updates on my vocabulary teaching routines and some short clips...
But now a word from the Super Fab Teacher Gillian: "I often have my grade 1's answer a question, spell a word, or read something before leaving the room at the end of the day... I try to switch up the question or the words so that there's something appropriate for everyone! For example, sometimes with my lower level readers, I'll show them two words and ask "which one says _____?" whereas for a higher reader I might ask them to read the word or tell me the meaning. I try to keep it random enough that they don't really catch on to the fact that I'm consistently making it easier for some than others. Might work for you too!"

Um, Gillian, this totally worked for me, thank you so much! If you glance at my first vocabulary post, you might notice that I just had 2 sets of art words, one for my 1st - 2nd grade students and another for the older kids. The words were chosen randomly pulled from a list found on the interwebs. However, these words didn't seem to stick because we weren't making connections to them in art class (duh, art teacher!). Now I have the students read words as they enter that directly pertain to the lesson being taught. This means I have a different set of words for each grade level. For kindergartentown, I show them a shape and ask for the name and the color. My favorite part is when the word is introduced, so-n-so will say, "that was my word at the door!" 

Art Project Girl blogger Erica says:  "Oh my gosh. I totally get it. Some teachers debate with me that just teaching the word without the meaning is not an okay practice. . . but I really feel that it is the only real way that kids will learn vocabulary that I am teaching, repetition, repetition, demonstrate, practice . . . So I always just throw the vocabulary out their have them sing it, repeat me, repeat me in different voices (they love saying vocabulary while holding their nose and making nasally teacher sound) then as the year goes on we learn what the vocabulary means, how to use it."

I love Erica, don't you? Her blog is super fab and she's always coming up with fun ways to teach her students. If you attended the AOE online conference, then you know how Erica brings all sorts of games and fun into her art room. This got me thinking about how I could introduce something new in my room called "Word of the Week" (even though in the clip I refer to it as "Word of the Day".  Sorry, my bad) in a fun way. Here, lemme 'splain it to you...

After all that "whoop-whoop" craziness, I drop directly into a moments chat about our Artist Inspiration which I attempt to explain here...
(gah, that face. only a mother could love, right mom? Um, MOM?! Oh, never mind.)
A message from one of my favorite teachers, my Aunt Kimmy: "always labeled everything --and I mean everything in the kindergarten/1st grade classrooms. And in my home too, because I've done a lot of tutoring at home. There's a sentence strip still on the ceiling in my kitchen...everyone that comes to my house is just used to seeing the word "ceiling" on my ceiling. Now I leave it there for Rayleigh..:) When Kirby was two months old, I had everything labeled in his bedroom. "bed", "dresser","chair"...."wall"... You get the picture. That's how I do it. Our language is too crazy to try to teach reading by sounding out words. That's my opinion and I know a great debate can be started by saying something like that because there is something to be said for phonics...sometimes."

I love this idea of labeling everything and I'm working on it. Those words that the kids learn at the door? They go on our word cabinets (yes, I just about have enough cabinets to cover the alphabet. Don't hate.) Do ya'll label everything in your classroom? I think this is simply genius. But she is my Super Amazing Aunt Kimmy so I might be a pinch bias. 

Mrs. C of Rainbow Skies and Dragonflies blog: "I have the kids repeat vocab words also... they learn the meaning as we go along. And yes, you think they will remember the kooky way you introduced something and it would be burned into their brains forever, right? No, not so much... We have spent mucho time on color theory this fall and even though I know in my heart of hearts they know what the Primary colors are ( 1st/2nd grade) when I asked before vacation they all looked at me like I had three heads! Seriously guys???"

I love Mrs. C. Always telling it exactly how it is. And isn't that the truth, ya'll?! No matter how hard we try or what hoops we set on fire to jump through, sometimes the kids just don't get it. Maybe they're having an off day, maybe they've gotten too used to us jumping through flaming hoops, I dunno. I can only think that the connection we made with the word wasn't a powerful enough one to get it to stick. But when it does, it's so exciting it's magical. Like this "invention" by one of my third grade students. 
I mentioned that our word of the week was "invention" and that our artist Leonardo da Vinci often drew his inventions...but many times they were so far ahead of their time that they were impossible to create.

3rd Grade Girl: But can we make an invention if we wanna? I mean, instead of just drawing one?

Me: Sure! Make it and bring it in!

And this is what my friend brought me the very next day. An Art Robot. So amazingly awesome.
She even created an "advertisement" which was the previous week's Word of the Week. I was so excited that I dragged this sweet child and her robot onto our school's televised Morning Announcements. I really wanted to encourage this sweet artist. She was thrilled (despite being camera shy) and the kids loved seeing her creation when they walked into the room. Pretty sure the word "invention" will stick with her. Although we have been out of school for a week...so we'll see.

Please stay tuned for Part 3 of this Teaching Vocab series as I have more insight from you super smart readers and (joy!) more obnoxiously goofy clips! In the meantime, I'd love to hear more of your vocabulary-teaching wisdom, friends, so lay it on me! 


Sunday, March 16, 2014

In the Art Room: Let's Make Sushi!

Konichiwa, ya'll! As you might recall, my wee artists are learning about Asia this year with a current focus on Japan (Asia's a big ol' place, not sure we'll be able to focus on much beyond Japan, India and China, sadly. I'd say I need a longer school year but that'd be crazy talk). Last year, when we were travelling Europe in art class, we had tea and biscuits when learning about the United Kingdom. The kids pretty much thought that was the best thing ever. For that reason, I got the notion that we outta learn about the Japanese art of crafting sushi by making some of our own -- both collage...and edible!
 I began this lesson with my 1st grade students by doing our usual: looking at the map, finding Asia, finding Japan, chatting about what makes it an island, counting the four main islands in Japanese (ichi! ni! sahn! shi!), you get the idea. We then chatted about how rice is a staple in many Asian countries. And, with Japan being an island and all, their main source of protein is fish. This go a lotta "eeew!"s from the 1st grade set who declared: I hate fish! Unless it's buttered, battered and fried, a la Chef de Capt. D's, that is. We are in the South, after all. We eat our Moonpies the same way.

But, kids! Many times, their fish isn't cooked. It's raw!

 This got a lotta wide-eyed stares from the peanut gallery. At this point, I busted out the super sweet book Yoko by Rosemary Wells. If you've not read it, it's all about a little Japanese-American cat who takes her sushi to school only to be made fun of by her classmates. In the end, her teacher saves the day, as usual (it's what we do). After reading, the kids and I decided that food that is unusual to us isn't weird, it's just different. And, possibly, delicious.
My inspiration for the collage portion of this project came from the book First Book of Sushi by Amy Wilson Sanger. The images in the book are these amazing collages that look rad and were surprisingly easy for the kids to create.


Another source of inspiration for the kids was my set of sampuru (which means sample in Japanese. Note, this is not my set but an example pulled from the interwebs). I told them about how when I was in Japan, the restaurant windows were filled with sampuru to give potential diners an idea of what to expect inside. Creating sampuru is a fine art in Japan as it's meant to look realistic and enticing. So our collage sampuru had to do the same.

If you wanna make a totes delish sushi collage as well, here's what ya gotta do (in 30 minute art classes):

Day #1: Printmaking! We did some monoprinting on a new class favorite the Gelli-Art plates. They print just like gelatin (go here for my most popular blog post to date [which isn't saying much, ahem]) but without the prep and the bad feeling you get when you find out where gelatin comes from (animal bones, people). The draw back? They are pricey -- these were $10 a pop. I had one for each two kids and they seemed content, albeit chatty, to take turns. These printed papers later became their plate for sushi.

Day #2: Making sushi! After reading our talk and reading about Yoko, we started by making two sushi rolls. In the story, we saw how Yoko's mom made the sushi by laying out the seaweed, pressing the sticky rice on top, adding a surprise and cutting the sushi. We wouldn't be able to experience those steps until later...so for now, we simply traced circle templates and added our surprises inside the circles. Most of us stuck to green for avocado or cucumber, orange for carrots and pink for fish.

Day #3: With our plate and sushi created, we learned about common Japanese condiments while eating sushi. We chatted about how we use ketchup, mustard, salt, pepper here...but in Japan, they use wasabi (some kids had tales of this super hot green stuff), ginger and soy sauce. We created that, the green grassy garnish, some sashimi and chopsticks.

This hat was a pretty big hit with the kids...although they kept looking at my head and saying things like, "ohh, you are making me hungry!" which I thought was odd until I remembered just what was on my head! DIY directions here.
Day #4: On our last day, we put the finishing touches on our sushi collage and added a black border as well as a paper frame. Because we've gotten so much use out of our random painted scrap papers (thanks for the idea, Painted Paper!) I don't throw anything away. It's kinda a problem. But it makes for such fun collage material!
Ohhhh, looks delish!

Day #5: Candy Sushi party! As a wrap up for this lesson, I thought it'd be super fun for the kids to make candy sushi. Of course they were all over that idea! In fact, I mentioned it a little too early in the lesson which lead to the question "when is candy sushi day?!" like, every 5 minutes. I finally set a date and the anticipation was through-the-roof high.

To make it a wee bit more authentic, I greeted the kids at the door in my kimono and asked them to remove their shoes and place them up against the wall. Thankfully my room smelled like a candy factory which cancelled out the stinky feet smell.

When we entered, I doused the kids in hand sanitizer and had them go shopping for a paper plate, a set of chopsticks, a packaged Rice Krispie Treat and a Fruit Roll Up. Once they dropped that off at their seat, we met at a demo table for some quick directions. I reminded them of the tale of Yoko and how her mom prepared the sushi. I had found some packaged seaweed at the grocery and showed that to the kids. I wanted to emphasize that we were only making candy  sushi...that the process would be kinda similar but, well, not. And the taste would be completely different. I didn't want some kid begging to go out for sushi only to be disappointed it didn't taste like a fist full of sugar.
So the process goes a little like this: lay our your "seaweed" (aka Fruit Roll Up). Squish your "sticky rice" (that'd be your sticky Rice Krispie Treat) to make it about the same size as your seaweed. Place it on the seaweed and put some surprises inside. We opted for gummi worms and bears.
Roll it up and slice with your plastic knife.
Now, for my pre-K friends, I didn't have chopsticks so we used the Japanese snack Pocky. These didn't prove to work so well as they broke easily and melted in our hands. Not that the kids minded!

For those wee ones, they used their hands.
For my 1st graders, we had chopsticks and they loved them. However, they had no clue how to use them, even after a demo. Watching them attempt to operate them was kinda like watching a baby giraffe trying to walk on their new found legs -- hilariously awkward. They dropped more sushi than they put in their mouth. Which made me think: maybe I'll invest in some class chopsticks so the kids can practice some fine motor skills with them. They enjoyed using them (so much so that one boy picked up all the food wrappers with them) but definitely needed some practice. Have you all ever done fine motor activities like that in your art room?
By the way, I tried a bite of candy sushi...and all I can say is, I'll eat the real thing any day. SoOoo much sugar! Those kids were seriously vibrating when they left my art room!
But it was super fun and I'd totally do it again. In fact, I've got several 1st grade classes that have yet to have their party so I'm looking forward to more sushi-making-madness soon!

Have ya'll ever done an artsy food activity in your art room? I'm hoping to continue this tradition so I'd love to hear your ideas...icing cookie color wheel, anyone?

Off to get some sushi! Chat soon.

Sunday, March 2, 2014

What the Art Teacher Wore #91 and Works in Progress

Wacky Tacky Day (in celebration of Read-Across-America Week) which, in my world, is simply known as Monday: I actually had several parent volunteers in and outta my room on Monday...and not one of them commented on my outfit. Which can only lead to one conclusion: THEY THINK I DRESS LIKE THIS EVERYDAY! When I complained about this to a fellow teacher, they said, "Stephens, for you Wacky would be jeans and t-shirt. Maybe you need to step it up a notch." Hmm, point taken. sweater: Target; stripey shirt: Forever 21; skirt: thrifted, originally from Target; tights: dunno; shoes: thrifted, Crocs; necklace: The Paper Source; headband: gift from a friend

Like, wow, ya'll. That last blog post was a doozy, no? It was kinda like I drizzled gas all over the post, flicked a match and BOOM! So many passionate responses from all walks of art teacher, classroom teacher, home school educator life. I appreciate all of you that commented and sent me emails. I loved reading each and every perspective. I'm still sorting through my thoughts...but I'm so glad that we were able to have a thought-provoking and open-minded discussion. I think that just shows that as creatives, we are always open to ideas. I have plans for a follow-up post in the future. In the meantime, feel free to continue the conversation via comments or email. Muchas gracias.

Moving right along, did ya'll celebrate Read-Across-'Merica Week (a link to what I wore last year for the occasion)? It's my fave week as I have outfit-inspiration all week long! I thought I'd share that with you along with some of our latest works-in-progress. Enjoy and I'll be back with a DIY on my Don't Let the Pigeon Drive the Bus dress soon!
My second grade create a circle loom weavings every year. Last year we made them on a CD which, if you are an art teacher on pinterest for, like, 30 seconds, you've seen. I loved doing it, but wanted to move back to weaving on a plate this year. After a brief chat about Kandinsky and his concentric circles, we painted our own on Chinet plates. You gotta use Chinet when doing circle weaving as they are super sturdy and make for a great canvas.
On the following art class, pattern was discussed and the kids were given the World's Smallest Paint Brushes to decorate their plates. They are so super bright and happy, I actually thought of leaving them as-is! But I know the how much the children love weaving. It's like this magical thing that reaches those kids who are more tactile learners. Like the boys. I hope to have them warping their looms by next week. I'll keep you posted.
Crazy Hat Day: Man, did I need a sushi fix by the day's end! I made the hat and matching sushi shoes...but failed to have my dress completed in time. Thankfully, a sweet friend of mine had scooped this lovely dress up at the thrift store for me (thanks, Ann!) and it fit the bill perfectly. dress: thrifted; belt: Pin Up Girl Clothing; shoes: thrifted, altered by me; hat: made by me
Once my dress is complete, I'll be sure to tell you all about my sushi hat and shoes!
When I glanced at the drying rack at the day's end, it looked like this. Painted plate looms by 2nd grade, sushi collage by 1st grade, cherry blossom paintings by 2nd grade, warm/cool watercolor paintings by 3rd grade, wet-on-wet and sumi-e paintings by 4th. It's bright cheeriness made me so stinkin' happy.
Words on a Shirt, er, Skirt Day: Pretty sure this was my get-up last year for R-A-A Week. It was so fun telling the kids all about how the skirt portion of my dress used to be my bedsheets as a kid. dotted tights and shirt: Old Navy; dotted boots: DIY, go here; Star Wars Dress: DIY, go here and see me chillin with Boba Fett. Seriously.
Wednesdays have become my new fave day of the week. Me and two absolutely lovely teachers work with a group of about 17 girls and boy (yes, singular. He JUST NOTICED last week that he was the only dude in the class as he's been so involved in his cross-stitch) teaching a hand and machine sewing class. The kids have been creating a sampler of stitches that ended with them cross-stitching their name. And adding buttons or a satin stitched shape of their choosing.
When they come in, they drop everything and want to start immediately. They are supposed to have snack first but most are like, "can we just skip snack and get started?!" I love their enthusiasm!
Most finished up their embroidery this week. These will be the front of pillows so they chose fabric for the back and were introduced to machine stitching this week as well. I can't wait to see how they turn out!
Whoops, sorry. Totes forgot to take an outfit photo on Thursday. My bad.
My school purchased some Gelli-Plates for me this year. They aren't cheap, about $10 each. I managed to get 10 and my first grade students played around with 'em this week. They thought monoprinting was just about the best thing ever.


These prints will be used for our sushi platter collage which I'll share with you soon.
Dress Like A Book Character Day!: Aw, yeah, Don't Let the Pigeon Drive the Bus, ya'll! I do love this book (although, Pigeon Finds a Hotdog is my personal Mo Willems' fave). I had so much fun creating this dress. And, even though the zipper is an absolute nightmare (note-to-self: wine and zipper-sewing don't mix) AND I managed to back into a tray of red paint thus staining the hem (I'm determined to get that paint out: OUT, DAMNED SPOT!), I still love this crazy dress. DIY blog post to come, ya'll!
After reading the book to kindergartenland, they created and painted their own pigeons. I got the idea for this lesson from the always awesome blog, Mrs. Knight's Smartest Artists (thank you, Hope! I think you're rad!). Go there and be inspired!

And that's all, ya'll! I hope your week is a fantastical amazing one!