Showing posts sorted by date for query Field day. Sort by relevance Show all posts

Sunday, November 7, 2021

Centers in the Art Room

I'm not sure if you've been experiencing it in your art teacherin' world but of late I've noticed that my students are on the squirrely side of life. It's hard for them to sit still, focus and contain their level of excitement. I can usually manage to ride that wave in 30 minute art classes as we get up and move round, do a little dance, do a whole lot of call and response and stay very busy. However, recently I decided to try something new (for me) and that was create some art-makin' centers for my students on the Friday before Halloween. 

It's hard to do new things, especially if you've been at this art teacherin' thing for closing in on 25 years. However, pushing yourself out of your comfort zone is what keeps us fresh and keeps our students excited and intrigued. That's what I noticed when I created this center-formated art day. 

Here's a little of what that looked like:

If you cannot view the above video, than try viewing this blog post from a laptop. Or just tap this link. 
I've done open centers in my room before, most notably on our Field Day. You can read all about that here. I will say, it's a lot of work on the front end when I set up for Field Day. What I found in this most recent experience is that it doesn't have to be. Kids make the most of each center regardless of what is offered. In fact, limiting the supplies seemed to force them to really stretch their imagination. 
Some of my take-aways:

* Limit the centers. Too many seem to overwhelm the kids. Instead, start with just 3-4. 

* Introduce "greatest hits" as well as 1-2 new centers. At the start of art class, you will need to run through the centers to let the kids know what's in store. Too many new centers means too much time spent explaining and confusion. So maybe share ones you know the kids are familiar with (for me that was the large pumpkin coloring sheets and blocks) and introduce the new ones. 

* Limit the amount of kids per center. I limited mine to 2-4 kids per center, depending on the center. I had a sign on each that let the kids know how many kids could create in one space. 

* Dismiss kids to center one at a time. After explaining, I asked each student individually where they wanted to start and dismissed from there. Allowing each student to hop up at once and make a mad dash is not how you want to start your class! 

* Allow students to switch centers at a designated time. With 30 minute art class, I set my alarm each 7 minutes. This allowed kids to hear my alarm and know that if they wanted to switch, they could. My rule was they had to tidy their space before leaving it. This prevented kids from center-hopping from one place to the next without digging in. 

* Hold kids to your rules and routines. Sometimes when we do something different, the kids think that rules and routines go out the window. Let them know that the routines you've established for clean up, working together and noise levels still apply. 

* Pay attention to what they respond to. It might surprise you! And it might give you ideas for future centers. 

Have fun, friends! 


photo signature_zpsd10b3273.png

Sunday, October 17, 2021

How to Create a Paint-by-Number of Your School, an Update!

Hi, my name is Cassie Stephens and I like to start projects and then wait months, sometimes even years, before I finish them. 

Please tell me I'm not alone. 

Case in point: this project that my students began on field day last spring. You can read all about it here. You can also check out this video unless you are reading my blog from your phone...in which case you'll need to view this post from your laptop in order to check out the vid. Technology is super cool. 

We go all out on field day with collaborative projects. ANYTHING to keep me from sitting outside all day and doing sidewalk chalk or melty face painting. You can see our field day set up for the art room here. 
After the kids painted it in the spring, it looked a little rough (sorry, I don't have any photos). I was a little disappointed by the look of it until I realized that all it needed was to be outlined again. That REALLY made the colors pop and cleaned it up nicely. 

I went in over my fall break and really enjoyed listening to a podcast and outlining this beast. It took no time at all. And I used my fave new hack of drawing with a Q-tip dipped in ink. It works so well, provides a consistent line and holds quite a bit of ink! 
I did use a Sharpie to write the name of our school. I also would STRONGLY recommend using bottles of craft store acrylic for this painting. We initially painted it with tempra and it looked so faded, translucent and chalky. 
Like many schools, the front of ours is a little boring in that it has a huge parking lot out front. So I took some liberties by adding our country and state flag, our state flower and a banner with our school district logo.
And now I'm totally hooked on the idea of creating more paint by numbers with the kids for our school!
It was really easy by just snapping a photo of the school and tracing in Procreate. I am thinking that we need a giant canvas of our school mascot next!
Pretty sure this beauty will end up in the front lobby of our school. I cannot wait to see it up! Here's what it looked like the day we started painting it. I'll keep you posted on how it looks once up!


photo signature_zpsd10b3273.png

Wednesday, June 2, 2021

How to Create a Collaborative Paint-by-Color Painting for Your School!

If you know me...then you know I do my field day duties a little different than the rest of the school. After years of face painting, snow cone-ing and watching kids grow bored of sidewalk chalkin' after five mintues, I decided a couple of things:

1. It's too dang hot outside on field day!

2. It's the PERFECT way to do a collaborative because you see all the kids in the whole school all in one day!

You can read all about the field day activies that I love to do in this post. My fave: BACK TO SCHOOL BANNERS! More details here including a video!


The kids REALLY enjoyed painting on this...and I've been really excited to give this a go for a while. I'll be sure to share the final result soon. Thanks, y'all! 


photo signature_zpsd10b3273.png

Sunday, March 28, 2021

20 of My Favorite School-Wide Collaborative Projects!

Collaborative projects! Collaborative projects are one of my favorite things. I love them at the start of the year and the end. I love doing them with the whole school or just a grade level. I love using songs, themes, artist-inspiration...you name it. I just love collaboratives!

We've done a TON over the years and I thought I'd put them all together in one big ole blog post. So, here you go: my 20 Favorite Collabortive Projects. Be sure and click on the links, many of these have how-to videos. 


Check out this blog post on how we created several canvases in this style for our school and the school library!


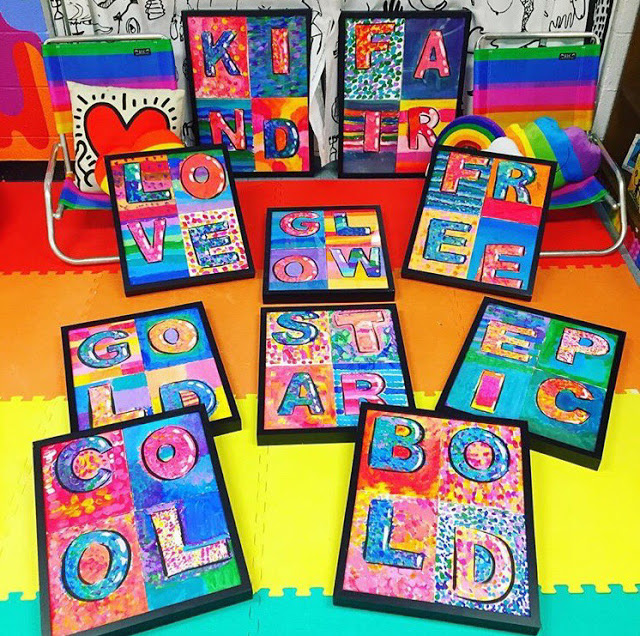
Students worked in table teams to create these positive four-letter words to describe our school

A fun mural based on the book You Be You was created by nearly all of my students. You can learn about the process of creating our fish here. Read all about the making of the mural itself here!

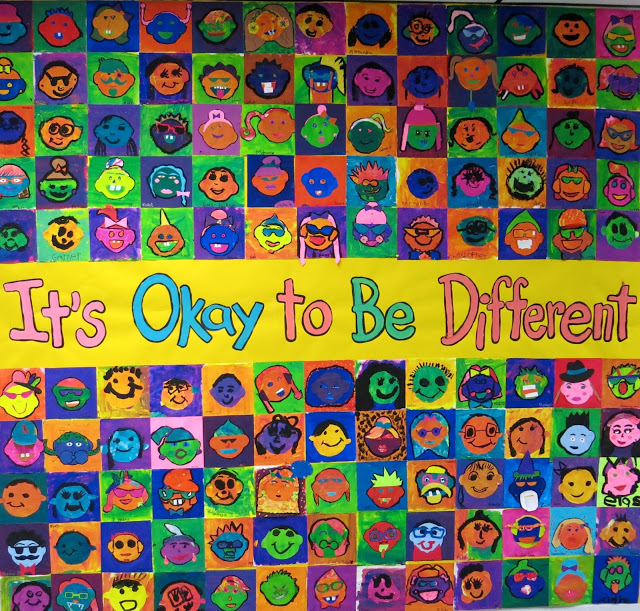
Another book we used for inspiration is the book by Todd Parr called It's Okay to be Different. You can check out how we created these collages here!

The Our School Has Heart mural was a piece with a contribution from each student in the school. You can see the breakdown of who created what in this blog post
Our clay collaborative mural is a bright and shiny beauty that hangs in a prominent place in our school. Each student contributed something to this piece...you can read more about the process here

One year, we created a Village of Kindness as apart of our art show! Each student upcycled a milk carton that our cafeteria queen cleaned in the dishwasher. The students made little doors that opened and said kind words to those who peeked inside. Students worked together to create the landscape on the bulletin board. 

I love to do collaboratives at the start of the school year. I especially like ones where students celebrate our school and that set a postive tone. That was the idea behind this collaborative!
Another fun way to start the school year is with some selfies! We've created them for a monochromatic mural. You can check out the video here. 
Inspired by the artist Romero Britto, this mural was created by my students when I was out for jury duty! My sub just played the video and when I returned, I assembled the mural!
A collaborative mural that definitely made the rounds was this one! The kids loved creating the feathers and it was a beautiful thing while in the hallway but I will say...it was a lot of work to assemble. All the details here. 
My fourth graders created this collaborative one year that lives at the front entrance of our school. We even 'wrapped' it for Christmas and brought out admin out for them to unwrap it as it was hung on the wall of our school. 
We kicked off this school year with our What a Wonderful World collaborative mural. Details and video tour here. 

Here's another look of our school mural. Above that, you'll see our Learning for All collaborative!
During our field day one year, my students rotated through many art stations. One of them was this alphabet and number series. My librarian requested them and we just love how they turned out. Click here to see them framed and hung in our school library. 

Much like our monochromatic collaborative, this map collaborative was created with a self-portrait of each of my students! 

We are the tigers at my school so we do tiger-themed artwork every so often. This mural was created by first graders of all of their tiger drawings. You can find a how-to video right here!

In table teams, my third graders created a Rizzi City inspired by the artist James Rizzi. 

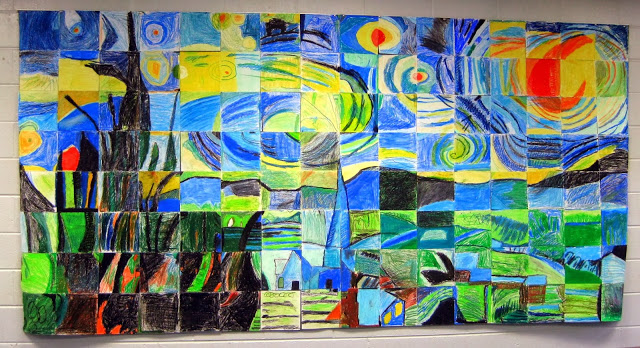
One year, we did super-sized works of art inspired by Andy Warhol and Vincent van Gogh! When these came together, they were stunning. All the details can be found here


photo signature_zpsd10b3273.png

Friday, August 14, 2020

Top Tips for Surviving Back to School!

Today I was asked if I was ready to return to school next week and I just nearly spit out my coffee. 

Like, wait. What? 

OMG. I do start back to school next week! It's not even next week, y'all. It's down to just mere days and hours. Minutes even. How in the world did I slip into such daze of delightful denial that I had forgotten? 

Okay. I'll be honest. I have not forgotten. It's been on my mind since July. 

As a teacher, I think of July as a month-long version of Sunday night. You teachers know what I'm talking about: Sunday night is the one time of the week that you dread because you literally spend the evening running through all the work that lies ahead. What's first-grade learning? Is second grade finished painting or will I need to prep paint trays in the morning? Fourth grade was on a field trip so half of them are behind while the other half is ahead...so who's doing what tomorrow? Third grade, did I plan a lesson for third grade? And, kindergarten. Lord have mercy on my soul, what will I do with kindergarten tomorrow?! 

If that's our average Sunday night then y'all know what our month of July feels like. Especially in the midst of this wild world we are living in. 

Needless to say...I have been having just a tiny bit of trouble relaxing (ahem). But I have found some ways that have been working for me and I thought I'd share them here. Let's start with something I've recently mentioned on Season 2, Episodes 1 and 2 of my podcast: BLISS.
This morning, I was going over all the things I needed to do today and I started to have trouble calming myself down. I've only had a couple of panic attacks before (once during my third year of teaching when I MELTED DOWN A KILN and immediately lost sight in my left eye and was sent home. Good times) but this morning, I noticed that the feeling over being overwhelmed was effecting my breath. Meaning...I couldn't catch it. Not a good feeling at all. Then I remembered my acronym BLISS. 

The B is for Breathe. It helps when breathing to have a gatha or a phrase that you say mentally as you inhale and exhale. What this will do is help you to focus on your breathe. Just taking a deep breathe and exhaling is great but, if you are like me, your mind will rapidly move to what it is you are currently fixated on. So if I have myself mentally say, 'Breathing in, I am calm; Breathing out, I can relax,' it really helps. Try looking up gathas or writing some for yourself. If, after a couple of breaths you aren't feeling better, keep trying. Breathe deeper. Relax your shoulders. Focus on the present. You'll get there. 

The L is for List Your Gratitudes. By that I just mean, while you are breathing, stop and take a look around the space you are in. Mentally list off what you are thankful for. Currently, I'm thankful for a comfy chair, a cup of coffee and the sewing room I am sitting in. You don't have to write it down. Just take in the present, 

The I is for Indulge in Your Feelings. Look, things are not easy right now. It's okay to have all the feelings. I've mostly felt confused (by the tons of emails) and overwhelmed (by knowing that the load on my teacherin' plate is about to get bigger) and upset (because I know I won't be able to do it all). And I think it's okay to get all up in your feelings now and then. As long as we don't live in that space, I think it's fine. 

The S is for Stop Reading Social Media. When have you EVER hopped off social media and felt like that was time well spent? I mean...I am an epic social media time waster! I spent a couple of days this summer completely off social and not only did I not miss it but I felt so much lighter. I recommend a little social media vacay if you can. 

And the last S is for Surround Yourself with Joy...whatever that may mean for you. For me...it's creating, sewing and painting. If I don't take my creative vitamins, I swear I go through a withdrawal.
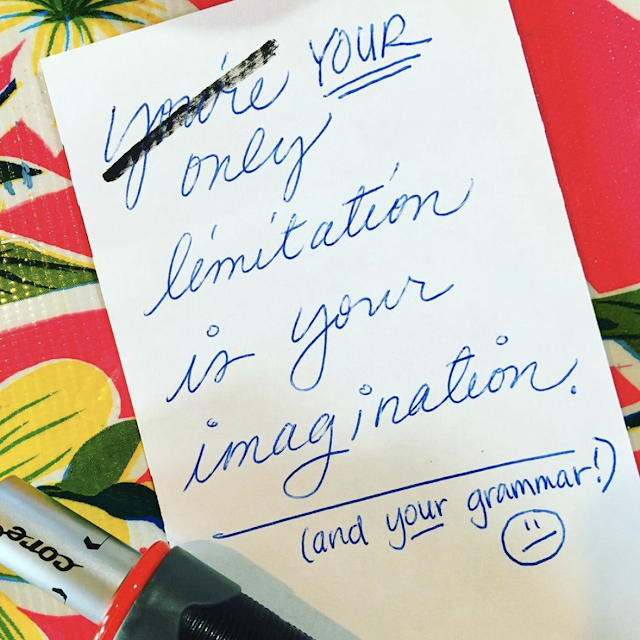
Wanna know what is keeping me up at night and my mind on a constant hamster wheel of thoughts? LESSON PLANNING. I keep thinking "how can I possibly provide my students with the best art education they deserve if I'm on a cart or on a screen or they are spaced so far apart?!" This little phrase right here has been helping me keep a positive mindset. 

Your only limitation is your imagination.. 

I was chatting with an art teacher the other day who has been teaching for 31 years. I've been at it for 22. Neither of us have EVER seen anything like this current teaching state. Which means...we are all in this together! It doesn't matter how long you've been teaching, this is a challenge for us all. Her mindset was, "a challenge can be fun." And she's right! Not the kind of 'fun' any of us signed up for...but if we think of it as a challenge and accept it as such, maybe it will push some of us out of our teaching comfort zone. This challenge has the potential of making better teachers of us all. 

All that to say...I'm still not ready! I'm still not sleeping well! I've been having my BTSN (Back to School Nightmares) like crazy and they seem to be even worse this time around. Y'all, I had a dream that there were WOLVES in the school the other night. My mind is on overdrive! I shared this with my friend Virginia who recommended I start at the beginning of the alphabet and think of all the foods I could. I got to the letter H before I had to get out of bed and hit the kitchen for a snack. All that did was make me hungry! 

A couple times this month, when sleep has completely illuded me, I've tried Melatonin by Natrol. I had no clue what Melatonin was until recently. It's a natural hormone that your body creates to let you know when to hit the hay and get outta bed. Twice this month, when my mind wouldn't allow me to rest at all, I found this to help. I even woke up without my standard morning headache (do y'all get those?!) which was a nice surprise. 
Just know...that if you are feeling a little panicky and overwhelmed, it's okay. Also, just know that yours truly will be teaching children in THIS ROOM next week and what you see right here is the clean and tidy side. 
Also know that my face has permanently frozen this way (just as mama said it would) as I've made it so many times when asked "Are you ready for school to start?!" Hahah, yep! Sure am! Doesn't it look like it?!

In all seriousness, y'all, we got this. We handled it like champs in March when it came out of nowhere and we suddenly found ourselves as YouTubers, videographers, Zoom-Call champs and more. We can do this new thing and we'll be doin' it together. Love y'all! Mean it! 
photo signature_zpsd10b3273.png

Sunday, October 27, 2019

School Wide Collaborative for our Library!


Way back in May, my students worked together during field day to create some artwork that was requested by our amazing librarian. Well, I'm excited to share that last week, their work was hung and the library looks incredibly colorful because of it! Check out this tour:
My excited face and vein popping neck say it all, folks. 
School wide collabs (a project that all of your students work on that remains in the school as a permanent display) can be a big task. Especially when you only see your students once a week. That's why I love to do my school wide collaboratives on a day when I see all of my students at once: FIELD DAY! In the past, I was supposed to do sidewalk chalk for a day as apart of field day. You all...I did that one time in the 90 degree humidity that is Tennessee spring and I decided never again. And that's how our Field Day collaboratives was born. You can read more about it in detail here. Or you can hear more about it here:
I have about 350 students in my school. I had to have a lot of options available for them on field day so they would each be able to take part. I loved how each piece ended up turning out. 
We painted on 8" X 11" canvas board for the numbers and letters. However, matteboard would have worked as well. In a pinch, cardboard might even do the trick if it were primed with gesso first. 
 If these look familiar to you, that's because we did our first large painting like this the year before. It was such a hit it inspired several more. You can read about our first attempt here. 
 The set up for the day was pretty easy. We simply used up the paint we'd had at the end of the year. My chairs were gone because we'd just had our art show . All I had to do was move some tables around, make some signs and prep. Okay. Not gonna lie...the prep did take a while...
 Like making these big banners to be used at the start of the school year...
And these giant canvases...

 But, you know what, totally worth it. 
I think the letters make me the most happy. I drew the letters in pencil on canvas board. The kids could either paint the letters in all cool or all warm colors and then use the opposite for the background. 
 I thought they looked amazing...and then we framed them. Fabulous!
We've done so many school wide collaboratives now that I think I'm long overdue for a recap post! I love doing them because it's like we are leaving behind our own little fingerprint on our school. Just thought I'd share!

 photo signature_zpsd10b3273.png