Come on in, and pull yourself up a chair (like Chairry!)
Let the fun begin, it's time to let down your hair!
Pee-Wee's so excited,
'cause all his friends have been invited (that's you!)
To go wacky, at Pee-Wee's Playhouse! *
Hey, kids! Whatcha see here is one of the most bad a## baby showers this side of puppet land: A Pee-Wee Herman Baby Shower! That's right, ya'll. When my best bud (who happens to be a super fantastical art teacher) shared that she was expecting, we -- along with another art teacher buddy -- decided that the theme should be a common bond of ours: Our Love of All-Things Pee-Wee!

Did ya'll watch
Pee-Wee's Playhouse ** as a kid? I admit, I wasn't a kid when the show was in it's prime but a teen with a penchant for all-things-kitsch. I spent my Saturday mornings watching it with my kid bro, cracking up at the cast's insane antics. That show has had a huge influence on my crazy-art-teacher style and I strive to be Pee-Wee-esque on a daily basis in my art room ('twas the reason I started the
Word of the Week!). So when we settled on a Pee-Wee Herman baby shower theme, I was beyond excited to play hostess!
Because we also have a love for the movie
Pee-Wee's Big Adventure *** (just watched it the other day, ya'll. Still as amazingly awesome as ever!) this shower was a combo Playhouse/Big Adventure. My mom, an avid bike-rider and bike-stuff collector, really came through with some bike-themed decor. That's her image hanging on my front door!
I'm pretty sure the whole shebang woulda made Pee-Wee proud. Or at least have him making this face.
Now, this party was not without some work on the part of me and my co-host and fellow art teacher Stephanie. She created these amazing signs that greeted baby-mama and guests as they entered the shower. Aren't they the best things ever?! My favorite part is Randy and his mis-matched nostrils, ha-ha (read in your best Pee-Wee laugh).
While Stephanie and I were plotting and planning, we decided to dress as characters from the show. She settled on Pee-Wee while I decided to dress as my all-time favorite femme fatale, Miss Yvonne. Now, if Ima gonna be totes honest with ya'll, I gotta admit Miss Yvonne is my fashion icon. Seriously. I mean, what's not to love? Big hair, big, um, skirt, big flirty personality, she's got it all! I've always loved her the bestest.


But I just didn't have the right dress. That is until I remembered this 1991 prom number of mine. That's right, kids, I still have my prom dress. Along with photographic evidence of a bad perm and a prom date who thought a stone-washed jeans/tux combo was the sh$$. Now before you go all, "OMG, you can still fit into your prom dress?!", let's take a look at this dress, shall we? It's only fitted through the bodice with a nice open skirt for the girth that has become my hips. I never did manage to fill out that bodice despite sleeping with my training bra under my pillow since age 13. Boobie Fairy, why hast thou forsaken me?! Lil known fact: did ya'll know I went to prom with Abe Lincoln? Just kidding, he opted to go to the theatre that night.

Now a pure white dress just wouldn't do for Miss Yvonne. I mean, did you see that cleavage -- she's no angel, ya'll. So I gave that dress a make-over with a bath of Procion's robin's egg blue dye. And I'm so excited about the results, I might have to find me another prom date! Anyone know here Lincoln went after that theater production? He's not returning my calls.
Stephanie (aka Pee-Wee) and I came up with a magnificent munchie menu that went a lil something like this: mac -n- cheez, basil-moz-tomato sammies, crackers made to resemble Pee-Wee's iconic suit -n- tie and Playhouse-themed cuppie-cakes!
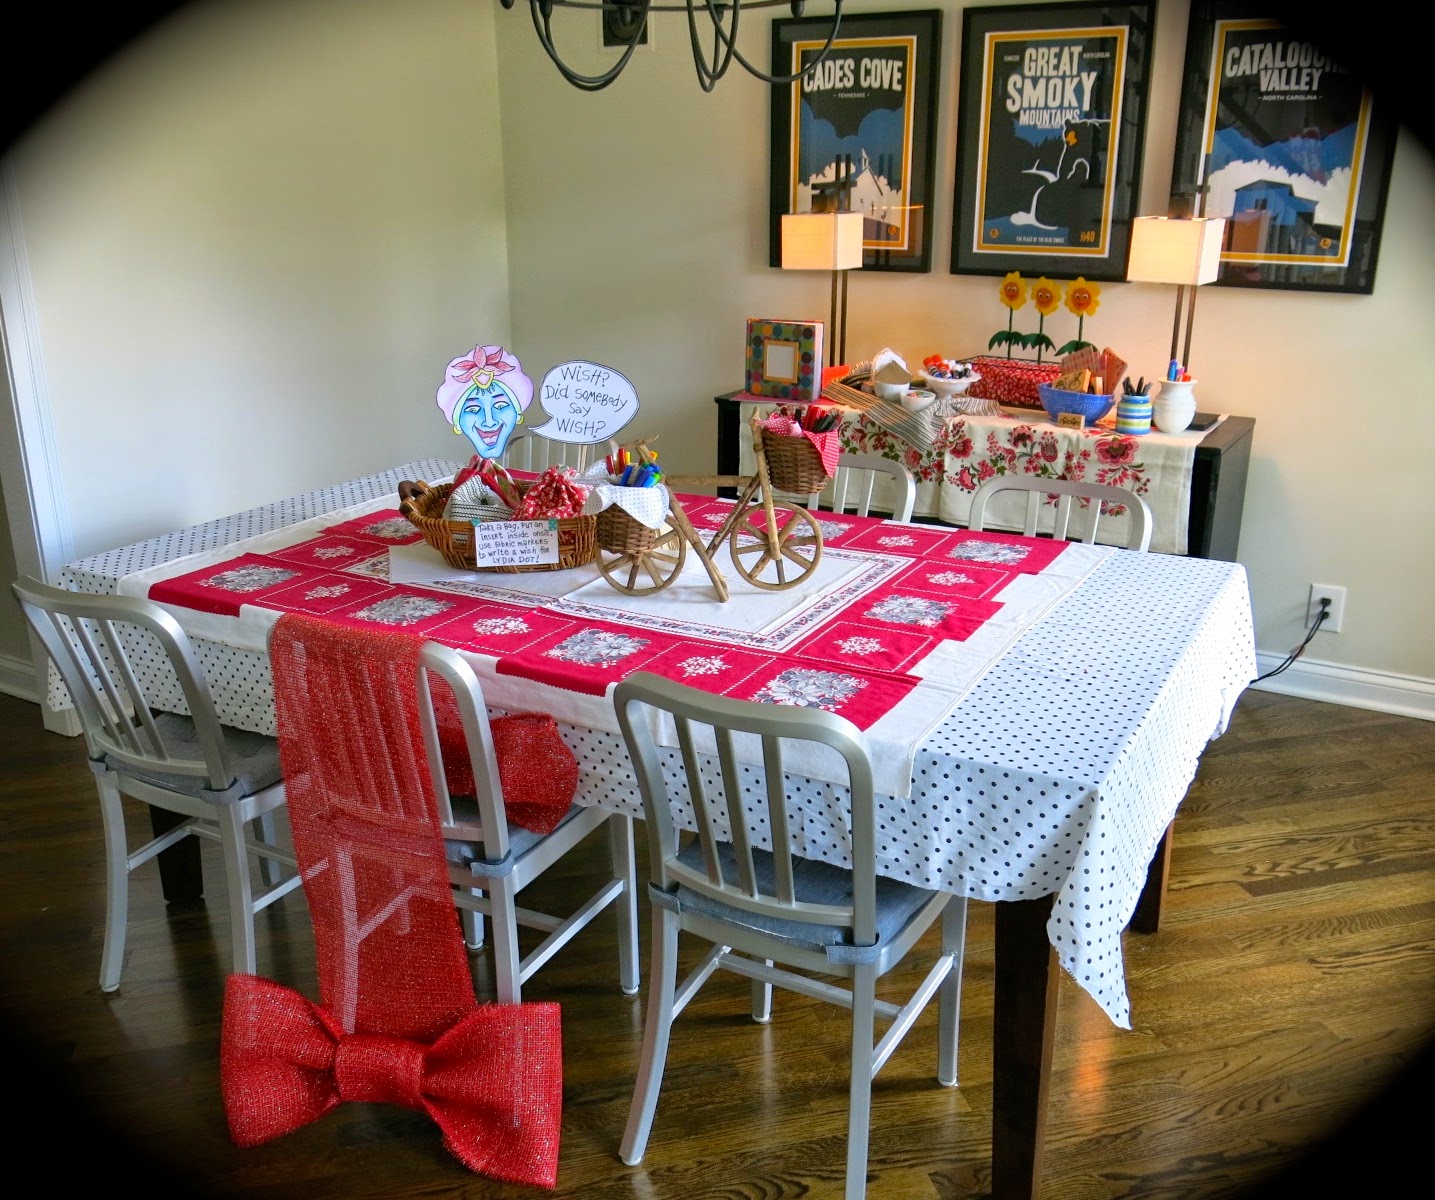
This wee arrangement greeted guests when they entered the kitchen. My mom gave me the go-ahead to spray paint her mini-bike red (looks way better, ya'll). I sketched up the cupcake decor, made a buncha copies, colored 'em in and glued a flat wooden stick to the back. I had fun looking up lines from Pee-Wee's Big Adventure...although I can't believe I forgot, "I love that story!". Oh well, next Pee-Wee Party!
Now I've never thrown a baby shower before and I've only attended one (I just don't get asked to these sorts of things. Never been in a wedding either...and for that I count my lucky stars!) so I was kinda just making it up as I went a long. I knew that we should have some sort of craft as most of the guests were art teachers. So in the dining room, I set up a coupla stations (the fact that I just used the word "station" gives away that I'm a teacher, doesn't it?!): a onesie decorating area and a scrapbook decorating activity.

I always loved Jambi and secretly make wishes to him on a daily basis. Why "I wish to live in an ice cream truck" hasn't happened yet, I've no idea. In the basket, I stitched up a buncha little draw string bags (have ya'll ever made those before? I snapped a how-to picks for a future DIY post if ya'll are interested) and placed a wee onesie inside. Stephanie came through with an assortment of fabric markers that were great. So that the drawn image wouldn't go through to the back of the onesie, I cut thick paper to be placed inside the onesie while working. These turned out so amazingly cute, ya'll, but you'll have to take my word for it. We were all so busy crafting, I forgot to snap photos!

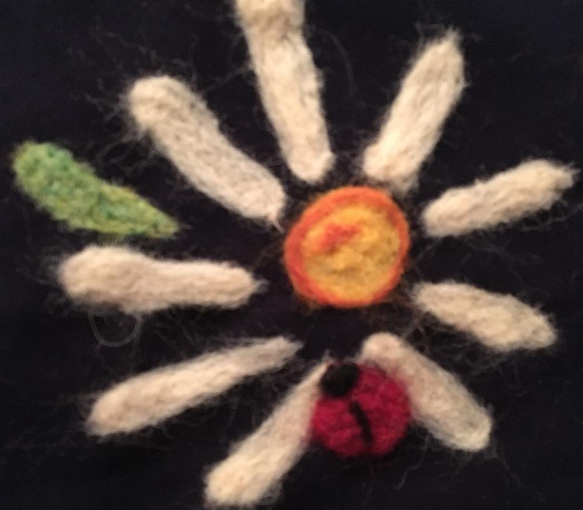
Don't you love those sweet flowers from the Playhouse? Stephanie created 'em outta felt and I totally want to make some for my art room. While I was working on this party, I watched an amazing documentary on
Wayne White called
Beauty is Embarrassing. If you've not seen it, you really should check it out. Wayne was one of the puppeteers from Playhouse and did voices for several characters including one of the flowers.
For the party, Stephanie had the great idea of a photo booth. We decided to have the photos in an album to give to Mallory (aka Baby Mama) along with some sweet scrapbook'ed notes from us. So after onesie making, we stamped, glued and drew ourselves silly. Speaking of silly...
 |
| Holy cow, was that photo booth a ball! I had a buncha props like hats, glasses and scarves while Stephanie had some cute handmade ones. Hubs got me a remote control camera clicker (I'm sure there's a better name but I'm sticking with that one) for Christmas and it was perfect! I just set the thing on "continuous" and snapped over 100 photo booth pics. |
My fave photos are the outtakes. This one of my sweet former student teacher (
'member her?!) and Mallory is one of my faves. By the way, wish Rebecca luck, she just landed her first art teaching gig in Salt Lake City! She's gonna be fantastical!
For present-opening time, I just knew we'd have to have a Chairry! He came together super fast: just covered an armchair in blue fabric, added the felt mouth and attach the goggly eyes. The funny thing is, Malloy had given me those goggly eyes for my birthday!
Stephanie did an awesome job creating the wallhangings in the background. I spy Mr. Kite, Clocky, Mr. Window and Terry! AND, I dunno if you noticed, but Mallory's shirt is the door to Pee-Wee's Playhouse! She felted it just for the occasion. WHO MAKES A SHIRT FOR THEIR BABY SHOWER?! This awesome lady. That bunting was stitched up by me and was the simplest thing ever: get yerself some quilt binding, cut some triangles, pin 'em inside the binding and stitch. Cake.
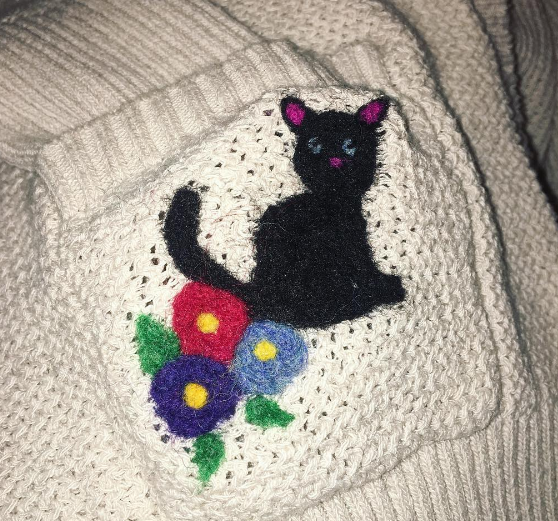
Here's
one of the prezzies I made for Lil Miss Lydia Dot. Stay tuned for the Pee-Wee bibs I created too! I'll share that with ya'll later this week.
I'm thinkin' Chairry had a good time...although, he looks like he's had a few too many, dontcha think?
It was such a super fun shower for one super awesome friend that I'd do it again tomorrow. And everyday after that. Although I don't know if hubs would agree.
But I bet I know one guy that would!
Thanks for dropping buy this photo-heavy post, ya'll! I hope you enjoyed hearing about it as much as we did putting it together! Stay tuned for one more Pee-Wee post soon!
Until then, I KNOW YOU ARE BUT WHAT AM I!?
* Pee-Wee's Playhouse Fun Fact: The theme song for Pee-Wee's Playhouse was both written and sung by the one and only Cyndi Lauper! Take a listen here.
** Many a folk got their start on Pee-Wee's Playhouse. Probably the most famous one was Laurence Fishburne who starred as the always-county-always-polite Cowboy Curtis. But did you know that Rob Zombie served as a production assistant? Or that Jimmy Smits played a mechanic (for a hot minute)? Of course, Phil Hartman was Captain Carl and a writer for the show. The list goes on...
*** Pee-Wee's Big Adventure was directed by non-other than Tim Burton! He'd just been fired from Disney (what?! silly mouse!) after creating a lil film known as Frankenweenie. Paul Reubens (aka Pee-Wee) saw the film and asked Burton to direct his movie...which lead to Beetlejuice that lead to Batman and Tim Burton Fame -n- Fortune. Thanks, Pee-Wee!