Showing posts sorted by relevance for query plate weaving. Sort by date Show all posts

Wednesday, April 16, 2014

In the Art Room: Circle Loom Weaving with Second Grade

When it comes to art lessons, I'm not much of a repeat offender. Since I like to change up the cultural theme of my art room every year, my lessons usually follow suit. However, I always have my 2nd grade create a circle loom weaving for a coupla reasons:

* It's excellent for building fine motor skillz and pumpin' up those wee hand muscles. And what kid doesn't want super strong man-hands?

* It's chock full o math connections: measuring, pattern making, long division (okay, maybe not that last one but you get the idea.)

* It reaches those kids that might otherwise slip through the art cracks (dude! what if there were such a thing as "art crack"?! Would that be like the equivalent of huffing a sharpie and drinking the paint water?!) Particularly my boy students. They absolutely thrive on weaving, being the tactile learners that they are. In fact, I overheard one little guy tell a buddy whilst weaving, "this is the best day of my life, I love this!" Daawwww.
All that being said, I've not been in love with how I've taught circle loom weaving in the past. Usually when we wove on a plate, we simply started with a blank Chinet plate, created our weaving and used markers to color the rim of the plate (go here and scroll down to 2nd grade art to see). Last year, in an effort to change things up a bit, we did the whole weaving on a CD thang which was cool and all but I still wasn't in love with the end result.
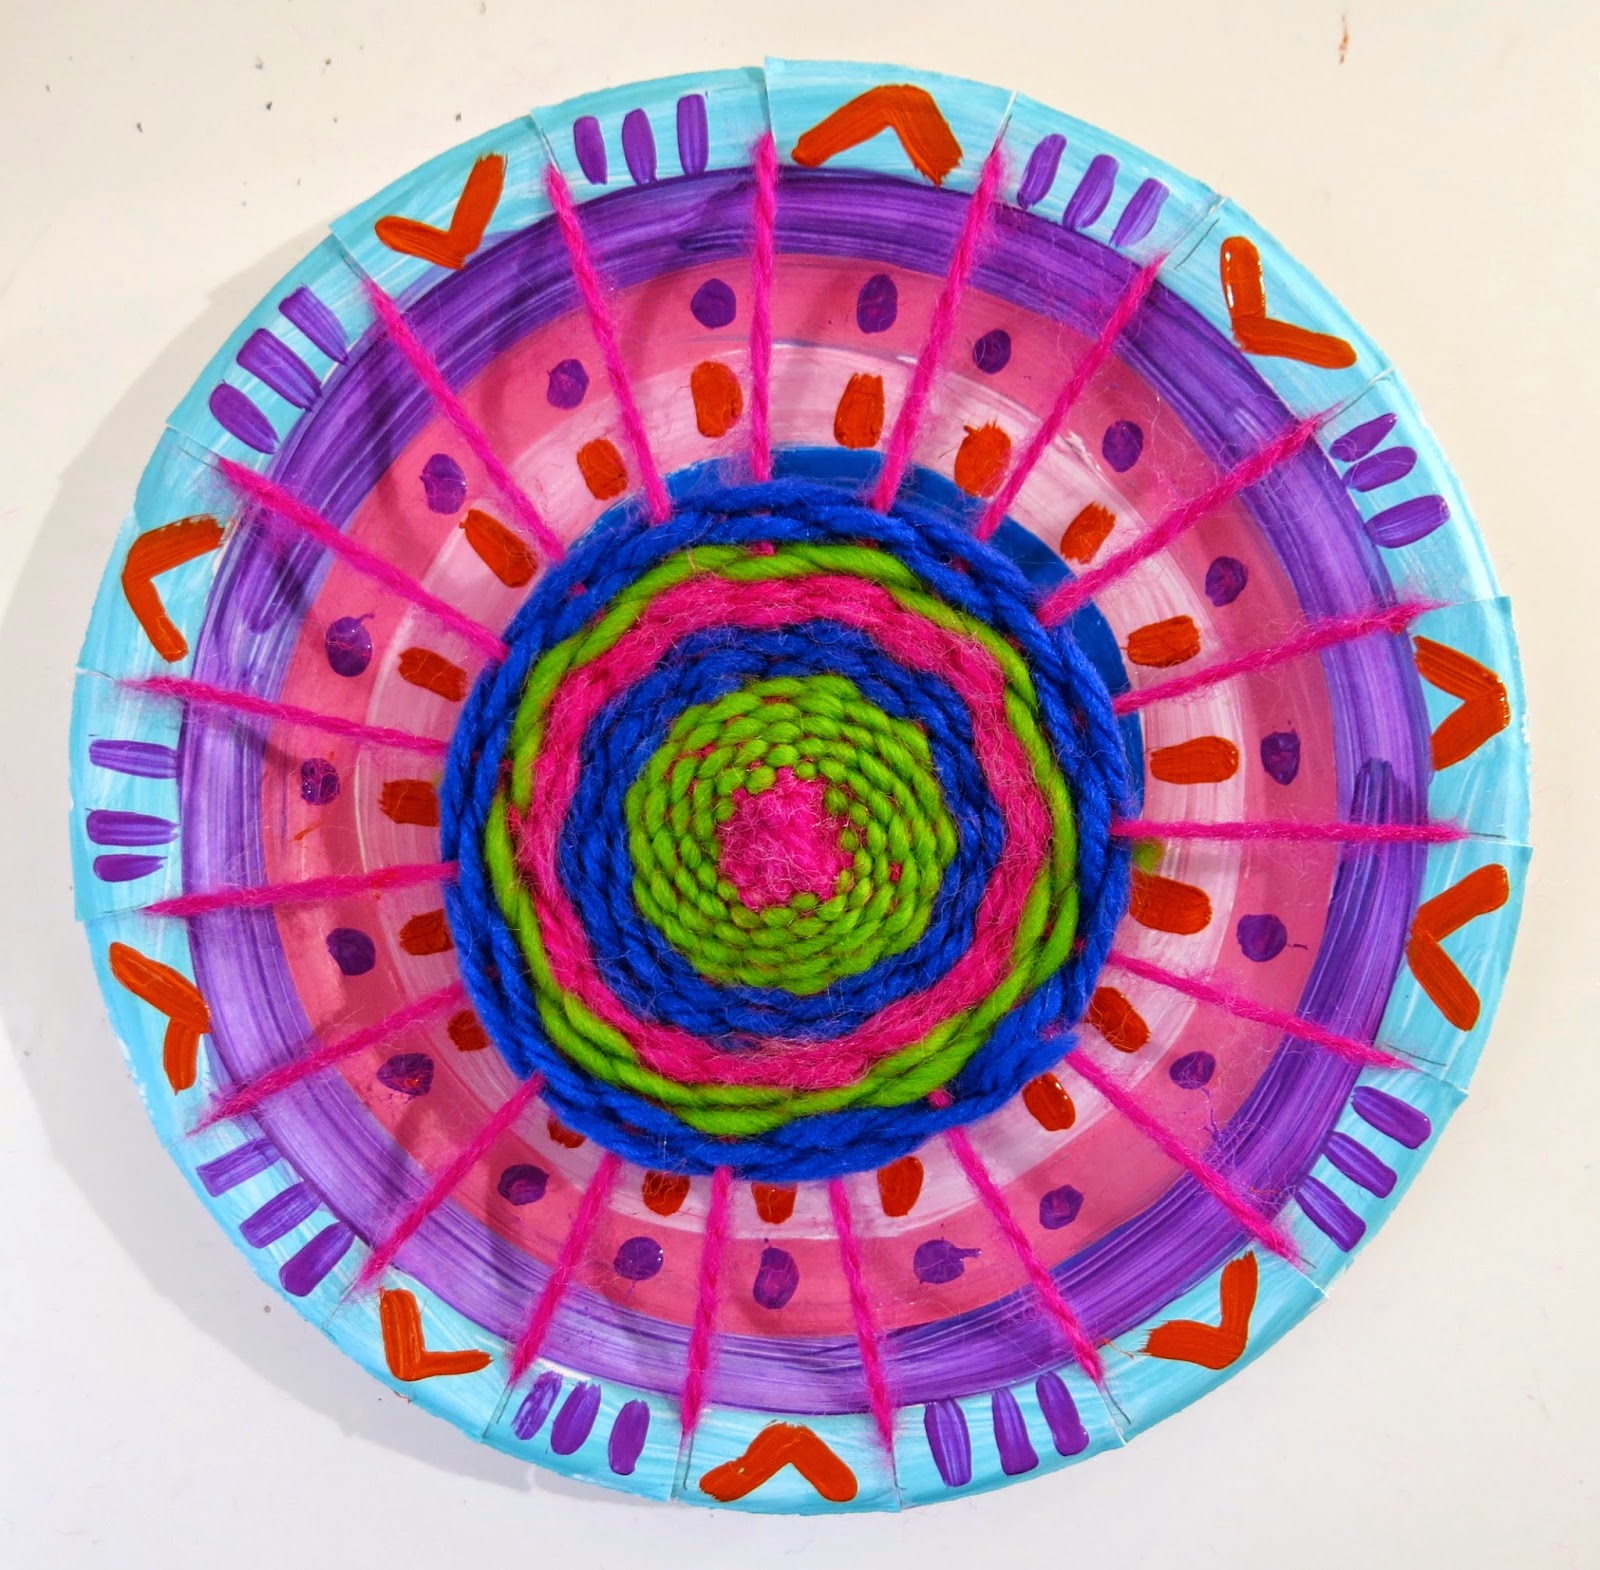
This year, in an effort to try something totes different but still make sure the kids got in their much needed weaving time, I opted to have them paint their plates before attaching them with woven greatness.
 Wait, you wanna make a Painted Plate Circle Loom Weaving too?! Okay, kids, russell up the following: 

Chinet Plates. Ya'll don't use anything less. These bad boys are as good as a canvas as far as plate-painting-surfaces go.

Tempra Paint. I only use Crayola's Washable Paint. The colors are about as good as it's gonna get in an elementary classroom.

A Loom Template. You'll thank me later, ya'll.

Yarn and Beads.
 Over the course of 2-ish art classes, we painted these plates. On our first day, we chatted about Kandinsky's concentric circle paintings and created our own. The following art class was spent using the World's Smallest Paint Brushes to craft those patterns that you see. By the way, if these look a pinch familiar to you, I shared these plates in a recent post about (attempting) to teach good craftsmanship. 
 Once the plates are painted and patterned, I give the kids a loom template with exactly 19 notches (not nachos) cut into it. The kids are to trace these notches onto the rim of their plate, count to check that they only have 19 lines to cut (because there will be the rando kid that has 55 lines drawn everywheres) and then cut the lines on the rim of the plate. I encourage them not to cut beyond the rim as this will make for a saggy weaving. Which sounds about as ugly as it is.
 Once the kids have their plates (which we now call our looms) cut, they are to grab a small skein of warping string and meet me on the floor. For the correct amount of warping string, I wrap the yarn from my hand to my elbow five times. These small bundles are available in a variety of colors for the kids to choose from. 

Now. Let's talk about teaching the kids to warp their looms. Which can either be like watching a train wreck happen in slow motion or a piece of cake. Lemme show you the cake route cuz, well, everybody loves cake.

First of all, when we are all seated on the floor, with our looms and warp string in front of us, ain't nobody allowed to touch nuthin until I say "go". You even think about touching that loom and yarn and Ima gonna snatch it up. Because, you know wuz about to happen. They'll think they've got it, fiddle around and not catch a bit of direction and the next thing you know, you've got a class of 20 all train-wreckin-it-up. So. Watch me and wait for the "go". 

First step: Put the tail end of the yarn in any notch. There should be a short tail about the length of your finger in the back while the rest of the yarn hangs loose and free in the front. Go. (I tell the kids that their "go" signal to me for the next step is to put their weavings on the floor in front of them. When I see that, I can proceed.)

Next: Bring the length of yarn down dividing the plate in half (see above photo). But, there's a catch. Be sure that there are 8 empty notches on the left side and 9 on the right. That's muy importante, ya'll. Go.

Now: (see left photo) Take the long length of string and have it "go to the right neighbor's house" meaning have your string go in the next notch on the right hand side. Now, this neighbor is super rude and it shouts, "get outta my house!" so the string runs all the way across the plate (see right photo) and makes the World's Smallest X. 


 Next: Rotate the plate so that the length of string is at the bottom (left picture). That story I just told about the string getting kicked out of the neighbor's house? It's a pattern. Which means it's gonna repeat. So, let's do it again! Go to the right neighbors house. Get kicked out. Go across the street and make the World's Smallest X. Rotate the plate.

After watching this routine, the kids walk me through completing my plate warping by repeating this as I go:

Go the neighbor. Get kicked out. Make World's Smallest X. Rotate the Plate.

Which gets shortened to:

Neighbor. Out. X. Rotate.
 You'll know you're finished when your little string has no home to go to. And that will be your weft or weaving string!

The following art class, we start to weave with that wee string.
 The first day of actual weaving is usually the toughest. I tell 'em over and under until I'm blue in the face...and they get it. That is until they pull the string tightly to the middle and it looks like this:
And then they're all "whuh, huh? whuh just happened to my string?" 

At this point, I tell them that they might have to loosen their weaving a bit to see just what they did previously. This will put them back on over-and-under track. When their weft is as long as their hand, they are to double knot tie a new string to the end. It can be a tough first day...but I repeat over and again: Your first day of weaving is the hardest. But you'll get this. And you'll love it. 
And when they do, without sounding like some sappy art teacher, it's pure magic.

During our weaving sessions, some kids sit on the floor with me and we chat and get to know each other. We've taken weavings outside on sunny days and sat under trees. We lay on the floor or relocate to tables where our buddies sit. It makes for such a fun and relaxing environment. 
Since the kids really caught on fast to weaving this year, I thought I'd throw out the option of adding pony beads. Some kids took to it right away, complimenting their designs with a beaded pattern. 

 And others opted out, content to just weave until they reached their limit of a 4" diameter. Once weavings were complete, the last of the weft strings was double knot tied to a warp spoke.

The weaving portion of this project only took us 2-ish 30 minute art classes. Since I limited the diameter to 4" (because I hated the thought of their beautiful paintings being hidden AND because the kids will seriously weave For.Eve.Rrr. if not limited), the project ended up being rather quick. By my weeks-long-art-project standards.
I think I can happily say, I'm thrilled with these circle loom weavings. I will definitely be sticking with this painted plate loom lesson. It's become a new weaving fave. To finish these guys off, the kids will tie a "hanger" of yarn at the top so these can be displayed for our upcoming art show!

By the way, I've shared a couple of weaving posts on this here blog. Some of my faves are the following:


What are your fave weaving projects? I'd love to hear!


Tuesday, January 6, 2015

In the Art Room: Circle Loom Weaving

Wuz happening, my wild and wacky weavers?! I hope the return to art teacherin' (if that's your bag) has been a smooth one. Personally, I find it a cruel joke to return to school the week of a full moon but, once again, the powers that be neglected to ask my opinion. When will they ever learn?

So, show of hands, how many of y'all decided to go down Weaving Street this month? If you need a refresher, you can start with this paper weaving lesson then transition to this super fun straw weaving project. I just had my fourth graders start their pouch weaving and they were beside themselves with excitement. Like, they were all, "enough with the History of Weaving prezi, lady, let's weeaaavvveee." I'll be sharing that prezi with y'all later this week (still tweaking it) but you can find the complete steps for pouch weaving starting here
But let's talk Circle Loom Weaving, shall we? This lesson I do with my second grade kids but if you've never taught weaving to your students before, I recommend teaching this to third grade. Again, always start with that basic paper loom weaving as it teaches all the vocabulary and techniques making all weaving projects that follow much easier. 
Supplies:

Chinet Plates: When plate weaving, I always use these. They are the thickest and most durable plates. I like to use the smaller size.

Yarn: Any kind will do. Funky yarn is fun but only use that for the actual weaving portion. For warping, use regular yarn.

A Loom Template: I have two for each of my five tables so the kids can share. Each template has 19 notches on it.

Masking Tape: You'll need this to tape down the initial warp strand. And for closing the mouths of those "I Can't Do It" kids. Oh, I kid! Kinda.
Last year I typed out all the steps which you can find here. I'm hoping that you'll find the video even more helpful. If you still have any questions, please ask in the comments and I'll get back to you.
For those of you that don't like video, here's some pitchers and werds. Place the loom template on the painted plate. Trace and cut the 19 notches. I always encourage the kids to count and be certain they have 19 lines drawn before cutting (as some will end up with 190 which is not what you're going for).
NOT GONNA LIE: Warping is the least fun part. Especially when some of the kids stop listening and get stuck on repeat: I Don't Get It. When that happens, I have everyone put everything down, we stand up, we stretch, we shake it off. Then, I tell 'em that they are going to sit back down, not touch a thing, and listen to me. Again. 

I have also found that peer tutoring is priceless. These kids speak the same language. Have them help each other, they communicate much better with each other I have found!
Once you are beyond the warping hump (um, the whuh?), the weaving portion is much easier. That is WHEN you get beyond that initial confusion I mention in the second clip. However, if you do that little trick that I share with you, I think you'll find that the kids get it and will really take off with weaving. They love to sit on the floor and weave and chat. I let them sit with buddies, sometimes we go outside if the weather permits. It's just such a fun, relaxing project...once you are beyond the warping and initial day of learning to weave. Stick with it, you'll find that you and the kids will love the process! 
Granted, this weaving project does take time. However on Thursday I'm going to share with you a similar weaving project that takes have the amount of time for those of you that are limited. 

Until then, I do hope you found this helpful and will consider giving weaving a go! And I'd love to know, what weaving projects do you just love to do? 

 photo signature_zpsd10b3273.png

Sunday, March 3, 2019

In the Art Room: My Favorite Fiber Arts Lessons!

Hey, friends! I'm coming to you today with my very favorite fiber arts projects! Teaching fiber arts is one of my very favorite things to teach, along with clay. This summer and fall, I put in HOURS creating THIS BOOK which will be due out this coming summer:
You can preorder yourself a copy here if you are interested! But if you just can't wait, I thought I'd share some of my very favorite fibers projects right here today. Be sure and follow the links to the lessons as nearly all of them have how-to videos that are perfect for you and your students. Let's start with sewing!
1. These GIANT pizza pillows were such a hit last year with my students that I knew I had to do it again. Because I was wrapping my fibers book this past fall, I decided to kick off the school year with fibers. Usually, I'm all about fiber projects in the spring. This is how we displayed the pillows at last year's art show!  This year, we also made both emoji and donut pillows (size: HUGE) but for details on those, you'll have to scoop up my book.
2. If you are looking for a beginner sewing project on a smaller scale, you might wanna try these stitched monsters on for size. My kids used Smart Fab fabric for the bodies but felt would work just fine. If you are curious what types of needles and thread I recommend, be sure and check out this blog post as well as the others where I break it down for you. 
3. I learned embroidery from my grandma when I was in elementary school and I LOVED it. It felt so good to learn something so "adult" in my mind: creating a picture with needle and thread. I love sharing this experience with my students now too. You can read all about this Our School Has Heart fiber art's experience right here. 
This year, I decided to live dangerously and introduce embroidery to my second graders at the start of the school year...when they are still first graders, really. It was a bumpy start but they got it and loved it. This lesson can be found in my book but I did create this video a while back to help you troubleshoot stitching with kids:
Actually, the above video was created for AOE during one of their online conferences! This is a couple years old but does walk you thru a lot of important details of all things fiber arts and kids. 
And here is my troubleshooting embroidery with kiddos video. I hope you find them helpful!
4. For even MORE details on sewing and embroidery, along with a book I strongly recommend, visit here!
5. Needle felting with kiddos is not something I do very often...but I do enjoy doing it! If you attempt needle felting with children, I'd make certain it's with a group of kids that understand the dangers of the needle felting tool and are responsible enough to handle it. As y'all know, I LOVE needle felting and have put in countless hours stabbing stuff. If you are interested in learning more about needle felting, start here.
6. One of the most popular lessons on this blog has been my string art lesson. This is based on a project I did in 5th grade and LOVED. My students have loved it just as much. I've created videos to walk you and your kids through this lesson so be sure and check out this blog post AND this blog post
7. Paper weaving is a must when you introduce weaving to your students. But what to do with the paper weaving when finished? Last year, we made these woven owls and the kids loved them! 
Both this blog post and the one mentioned above have A TON of videos on teaching first graders (and up!) how to make a paper loom and weave. 
8. Circle Loom Weaving has always been a huge hit! I normally do with my second graders in the spring but this year, I did it with third grade in the fall. I can't tell you how many videos I have on this! Be sure and check this blog post out if you have any questions about getting started. 
9. Have you ever tried CD or Embroidery Hoop weaving? So fun and easy! Last year, my second graders tackled CD weaving instead of plate weaving. It was a great way to upcycle those stacks of CD's I'd been accumulating. This type of weaving takes less time than plate weaving as you don't have to spend two art classes painting the plates. They also look super pretty in the window when light hits the CD. Video and lesson details here!
10. Whenever I get stumped for a lesson, I just think back to the things I enjoyed creating as a kid. I remember the summer I spent at a vacation bible school learning straw weaving. So fun! My kids love this one too. Details and video here!
11. Want a lesson that packs a huge punch? Tree weaving teaches landscape painting, weaving and so much more! This lesson of mine has been another huge hit on my blog. I have many videos to walk you and your kids through this fun technique. You can find it here. 
12. I have yet to meet a kid who didn't love making Ojos de Dios. Why not try expanding on that love by making BIG God's eyes?! We did that here!
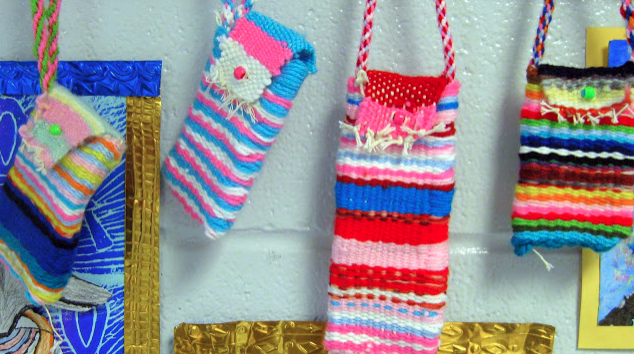
13. Pouch Weaving used to be one of my all time favorite things to teach. Because it is complex, I created an entire series of weaving videos for you and your students, including how to create that cool cord. You can find the beginning of the series here.
 14. Got yarn? Then you and your kiddos can yarn bomb! What a great activity for your early finishers too. 
15. Shibori! I love shibori dying and so do my students. I created a video that explains EVERY one of these folding techniques and you can see it here
So, truth be told: I've been blogging for seven years and teaching for twenty. I KNOW I've left some great lesson links and videos off this list accidentally. So, you are wanting more, give my name and whatever type of fiber project you are interested in a google search...or search in the bar on the side of this blog. Because there are just so many fun fibers lessons out there. AND stay tuned for my book where there are even more!
 photo signature_zpsd10b3273.png

Monday, January 19, 2015

In the Art Room: Tree Weaving

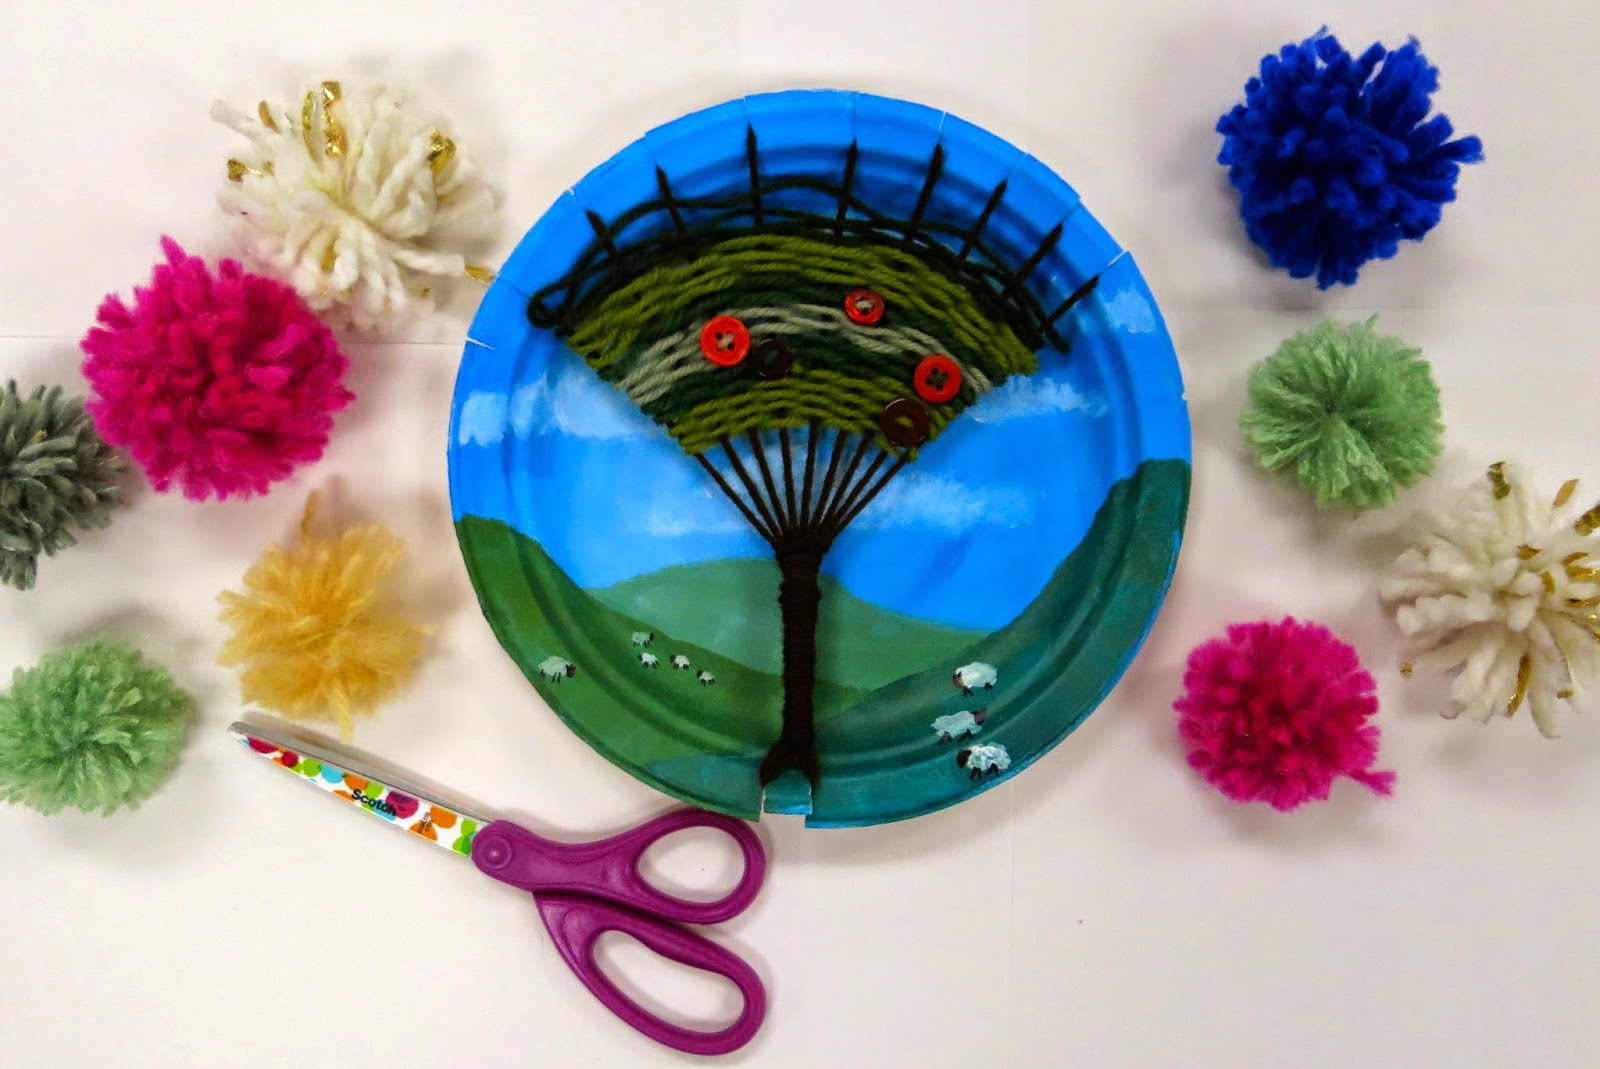
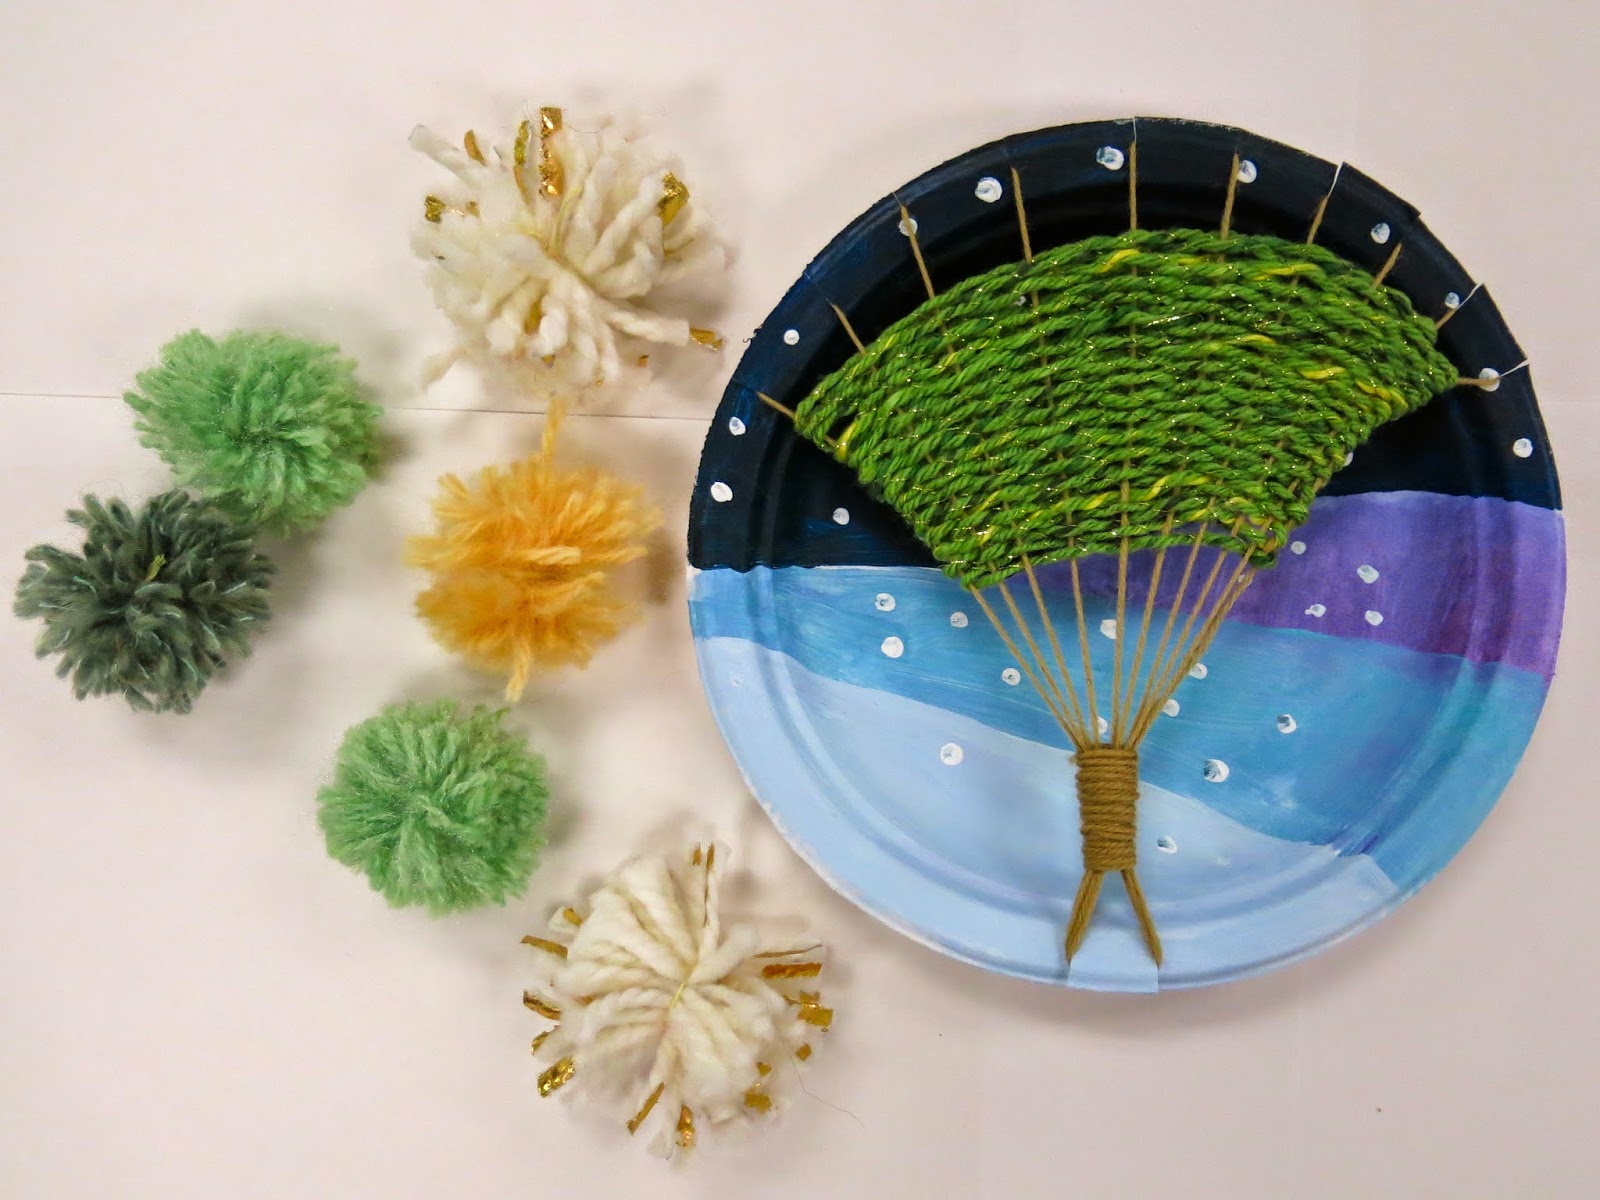
Hello there, weavers! I present to y'all today one of my fave weaving projects: Tree Weaving! If this looks familiar to you, that's cuz I shared this process with you a coupla years back and it's one of the most viewed posts on this here blog (which means, like 10 people read that post, yay!). I hope means a good amount of y'all have given it a go! 
My third graders finished these lovelies off in the early fall with summer still on their mind. However, many of them opted to weave with fall colors for the leaves which turned out super cute as well. I originally stumbled upon this idea when trying to dream up a different weaving experience for this age group as I was kinda feelin like our past project of weaving on peg looms had grown kinda stale (read: I was super tired of it. I have a really hard time repeating projects. Are y'all like that? It would make my life so much easier if I did!). So, playing around one day, I created this:
Which then I got me so excited I created another one! 
So just what does one need to create a tree weaving? Lemme see, rustle up the following:

* Chinet Plates. Don't skimp, y'all. They are pricey but they are the best. The thickness of the plates is what makes them a stable weaving surface. 

* Paint. I don't think it matters what kind. The Chinet plate is so thick, you might be able to even use watercolor on it. Hmmm...

* Warping Yarn. I had a variety of browns, tans and grays on hand for the tree trunk.

* Weaving Yarn. Whatever colors your heart desires! Let's get started.

For the complete lesson of how we painted these plates, please follow this link. It's way more in-depth about that portion of this here lesson. Today, I'm just sharing clips of how to do the actual warping and weaving. 
In this clip, I'll walk you through cutting the correct amount of notches in your plate and warping your loom. If you don't like hearing the sound of my voice, go here for the visual step by steppies. 
I'll show you a coupla different methods of weaving. Start at the top or the bottom, it's up to you. Definitely give it a go first before unleashing the kids on those plates. 
My early finishers worked on their artists statements which they glued to the back of their plates. They had a choice, they could either write about the product, the process or something they learned. In a paragraph form, of course (cuz, you know, if you don't remind them of that, you'll get the word "cool" or "grate" or "ausome" on the back of the plate. Not that my students would ever do that, cough, ahem).
What I'm finding in these self-reflection/artist statement writings is that the kids often talk about how they could do better. I like that. Not that I would ever say that to a kid but I like that they are motivated to try harder. 
Need more weaving goodness? Here you go, kids!

The Weaving Series: Paper Loom Weaving (perfect for first grade)
The Weaving Series: Straw Weaving (second grade and up)
The Weaving Series: Circle Loom Weaving (second grade and up)

The Weaving Series: CD Loom Weaving (second grade and up)

The Weaving Series: Ojo de Dios (second grade and up) 

 photo signature_zpsd10b3273.png