Sunday, March 4, 2012

What the Art Teacher Wore #8

Wacky Hat Day Monday: Best student comment of the day..."Taste the rainbow, Mrs. Stephens". I always do. hat: (yes, I paid money for it) amazon.com; shirt and tights: Target; vest: vintage, thrifted; skirt: etsy.com; shoes: John Fluevog
Well, hello there! Long time, no blogginess. I'm just in from an amazing trip to New York City. I was there for an art teacher convention (that's NAEA for those of you in the know) and while I'm exhausted, I'm so excited by everything that I experienced. I only have two regrets...one, I didn't get to spend more time with Lauren before she ends her student teaching stint with me. She leaves me next week! She is incredibly amazing and I am going to miss her. Sigh.

My other regret...? That I missed part of Read Across America Week! I mean, it's the one time I get to dress like a fruitloop and no one thinks anything of it. Except for the checkout lady at Kroger who asked me, "Are you going to some sort of costume party?" Erm, yeah. It happens everyday in my classroom. But it's invitation only, so sorry, sista.

Well, that's all I got for now. I'm off to unpack my treasures. More later, friends!
For Monday's school-wide morning announcements, I read The Cat in the Hat, which is a REALLY long and difficult book to read, FYI. While doing so, Lauren and my P.E. teacher buddy dressed as Thing 1 and Thing 2 and accosted me with toilet paper and other silliness. Do you see why I'll miss Thing 1?
On Lauren: Sweet little bird shirt came from Old Navy. I went out that very afternoon and bought myself one too. I'm very Single White Female like that. Belt made by Lauren. Beret courtesy of Goodwill.
I love the clever way she made her belt...it loops through the back. She so smart, she go to college and stuff.
Wear Words on Your Shirt Tuesday: Sorry, I'm not a t-shirt gal. I did unearth this artsy one from my Goodwill/restyle stash. It shows the tools to making art.collared shirt and skirt: thrifted; t-shirt: some museum shop; dotted tights: Marshall's; shoes: Clarks; hair clip: made by me
The shirt featured a pallet...and so I made this pallet hair clip to match. I was packing-procrastinating the night before, what can I say?
Lauren wrote out the ENTIRE Harold and the Purple Crayon book onto her shirt. Adorable, right?
Hello, New York Wednesday: Our convention was held at the Hilton New York which just so happened to be across the street from Rockefeller Center. dress: anthropologie; tights: Target; boots: Hunter; sweater: Urban Outfitters found at Goodwill
Meet Me at the MET Thursday: What amazing masterpieces this building holds. We spent hours digesting some of the world's most incredible art. sweater: thrifted; skirt: Free People bought at TJMaxx years ago; hat: Old Navy; boots: Hunter
Meanwhile, back at the ranch...Lauren had an amazing time teaching the kids. Her lovely top came from Old Navy. Look at that hair!
What I wore most of my trip: coat: Benetton; scarf: knitted by me
Under the Coat: sweater: anthropologie bought at Buffalo Exchange; skirt: vintage, thrifted; shirt: Target
Dress Like a Book Character Day: Wilma, Waldo's lady friend. Cutest costume ever!


Tuesday, February 28, 2012

Backyard Antiques

We have many deer that leave in the woods of our neighborhood. We also have a lone coyote. By the way the bones were scattered, we think that is how our deer friend met his end.
 I'm not really the outdoorsy type. At all. I mean, I'll go backpacking, hiking and kayaking with hubs but it usually involves a lot of coercing. Which is so silly because when I'm actually doing said outdoorsy things, I love it. But when it's suggested, and my other option is to dig for treasures at the local thrift shops, well, I'm sure you can guess which I'd rather.
An old metal sign advertising lodging. We're thinking it must have been posted along Franklin Road and thrown into the woods after the business was gone. How I would love to have it for the house.
Until recently. Hubs came home from a walk with tales of treasures found in the woods. Apparently he had stumbled upon some old homesteads. Immediately I had visions of unearthing armoires of vintage clothing, and before he could finish telling me about his adventure, I had my ratty sneakers on and I was ready to go.
Sweet little ferns are starting to pop up everywhere.
Sadly, there were no suitcases full of like-new vintage dresses. But what we did find was just as beautiful. Here are some snaps from our adventure.

Oh, and speaking of adventure, I'm about to go on one! I'm heading to New York City in just a matter of hours for the National Art Educators Association conference. I cannot wait to attend workshops, spend time with some of my favorite art teacher friends...and, maybe, come home with my own suitcase full of vintage clothing. Chat with you in a week.
An abandoned bulldozer. I love the rusted out reds beside the spring greens.
Just a little close up. All of the great photos you see here were taken by hubs.

You know those terrariums that are all the rage on etsy right now? Well, check your backyard before purchasing, you might find a few.
Antique plow.
Oh, look, they customized it for this here Hoosier girl. Brings me back to my corn-detasseling days.
If you've got woods near your home, I highly recommend a walk in it. You never know what you might find!


Sunday, February 26, 2012

In the Art Room: Leafy Spring Prints

Negative leaf print by one of my second grade students earlier this year.
 Hey, guys! This post has been very popular on my blog...if you are interested in other leaf-y projects, look at my Leaf Relief project and my Pressed Leaf Project as well. Thanks!

I don't know what it's like where you live, but here in Tennessee, we are experiencing spring-like weather. For the most part. I mean it did snow the last two Saturdays (and, in Tennessee, "snow" means just a few flakes and a couple of inches) but the other day it was 78 degrees. Crazy, right?

For that reason, I've got touch of spring fever. You too? Well then you might enjoy this leafy printmaking project I did at the beginning of the year with my second graders. It's simple, scientific, beautiful and fun...okay, enough talking about me (!), on with the lesson.

For this project, you'll need the following:
  • gelatin, not Jell-o. Most grocery stores carry a brand called Knox which sells in boxes of 16 pouches.
  • cookie sheets
  • printmaking brayer, sold at most craft stores
  • printing ink
  • variety of leaves
  • paper
Print pulled from the same printing tray, this time the positive version.
The night before you begin, you'll need to prepare your sheets of gelatin. To do that, bring about 3-4 cups of water to a boil. Once boiling, whisked one pouch of gelatin into the pot. You don't want any clumps of gelatin, so whisk like there's no tomorrow. You'll end up adding about 12-15 pouches of gelatin into that one pot. Sorry, I'm not into exact measurements. Which could explain a lot about my cooking. If there are any remaining unwhiskable clumps, remove them with a spoon.

Pour mixture into a cookie sheet filling it about 1". Leave uncovered over night. If you see any bubbles in the cookie sheet, pop them or remove with a spoon. For my class of 20 students, I made three trays.

Pulling the first print always managed to get oohhhh's and aahhhh's aplenty.
The following day, we were ready to print. The surface of the gelatin was squishy yet very firm, perfect for holding our printing ink. I think I can explain this best in steps, so here you go:
  1. Using a brayer and printing ink, cover surface of gelatin in ink.
  2. Place leaves onto the ink-covered cookie sheet with the veiny side down. I don't recommend using anything with pine needles because that will puncture the gelatin. But experiment, you never know!
  3. Once leaves are in place, lay paper on top of cookie sheet and rub (er, we call it  "massage") the paper. 
  4. Pull paper off, as you see in the above photo, and viola! You have your first print!
Notice how clear the gelatin looks. All of the ink that was once on the tray is now on the paper.
I love her dainty fingers pulling up the second print. So sweet.
Now for the second print:
  1. Gently remove all of the leaves from the tray. It's best to pull them out by the end of the stem.
  2. Place a new sheet of paper over the now-empty cookie sheet and rub.
  3. Pull second print which will be a positive image of the first.
Looks like a black and white photo, don't you think?
Once both prints have been pulled, re-ink the tray and begin the process all over again. With a class of 20 students and 3 pans of gelatin, about 10 kids were able to print per half an hour class. The pans of gelatin can last about two days with an endless amount of printing. I tried to cover the gelatin and keep it for a little longer, but condensation droplets created strange little craters on the surface. If left uncovered for too many days, it begins to dry and crack. For that reason, if you plan to do this project for longer than a couple of days, you'll just need to prepare more gelatin pans the night before.
Our second go-round of printing involved using white ink on black paper. Just as pretty.
This project is so easy and the results so stunning that everyone is successful. I've now had a couple of craft get-togethers and this is always a hit. Once those leaves start growing in your neck of the woods, I do hope you'll give it a shot!
I love the photo negative quality of this print.

Friday, February 24, 2012

What the Art Teacher Wore #7

Workin'-on-Prez-Day Monday: sunflower sweater: Anthropologie picked up for cheap at Buffalo Exchange; skirt: Anthropologie; tights:  Target; shoes; Anthropologie. Holy cow! I'm head-to-toe anthro!
Well, hello there! This week's wacky is-it-winter?-is-it-spring? wardrobe is a reflection of the weather. One day it was a summery 78 degrees and the next there was a 30 degree temperature drop and a sky full of spooky clouds. As Lauren put it, "I'm waiting for the sky to turn green or purple or something."

In other news, since we did have school on a holiday, one of my favorite coworkers and I dressed as ole Abe and George for the school-wide morning announcements. We have more fun hamming it up than should be allowed. A word to the wise: Abe hats and bumpits do not mix.

Well, here's hoping the weather where you are is a little less wackadoodle, Yankeedoodle.
George and Abe: This is right before my friend George looked at me and made me lose it to a case of the giggles. On George: shirt: I know you can't see it, but she's wearing one of my wannabe goth shirts from high school; wig: handcrafted by Lauren from fake fur and toilet paper tubes. On Abe: beard and hat: Party City; jacket and shirt: thrifted
You know you're meant to be an art teacher when you look this happy on a Monday! I believe both Lauren's shirt and skirt are thrifted. She created her own bow. She's holding her example for the fourth grade lesson on sculpting heroes and standing in front of her lesson on Kandinsky's circles.
Cowgirl Tuesday: I just realized that annoying neighbor who walks her dog through our yard saw me snapping pictures of myself...and then tripped over her dog. Tee-hee. jacket and belt: thrifted; dress: Target, embroidered by me; tights: Target; boots: Frye, ebay
Well, I know she snagged that sweater at Goodwill...I was with her when we were doing a little pre-Valentine's Day wardrobe shopping. I love her pencil skirt, don't you? Target, people.
Wainy and Wet Wednesday: I've been waiting for a good spring day to wear this jacket and my new rain boots. However, wearing rain boots with no ventilation makes for janky feet syndrome. jacket: Anthro; boots: Hunter, ebay
Under the jacket: sweater and dress: thrifted; bow belt: made by me
Look at this outfit! Love...
Spring Chicken Thursday: I'm proud to say that with the exception of the belt and undergarments (like, ew), this outfit is head-to-toe thrifted! I've never worn this dress before as it's knitted and a little warm. Perfect for spring.
Totally diggin' the burnt orange. I've got to get some in my closet -- she's totally rockin' it with the green and navy.
Lions, Tigers and Bears, Oh, Friday!: sweater: thrifted; tiger striped dress: BCBG; lion buckle: gift from a friend; fishnets: Marshall's; shoes: Dolls by Nina
Look at that Kandinsky-esque scarf she scored! I love how it matches the project she did with the third graders...and so did they. And check out those splatter paint shoes she made. Awesomeness.


Wednesday, February 22, 2012

DIY: Turn Him Loose, Jill!

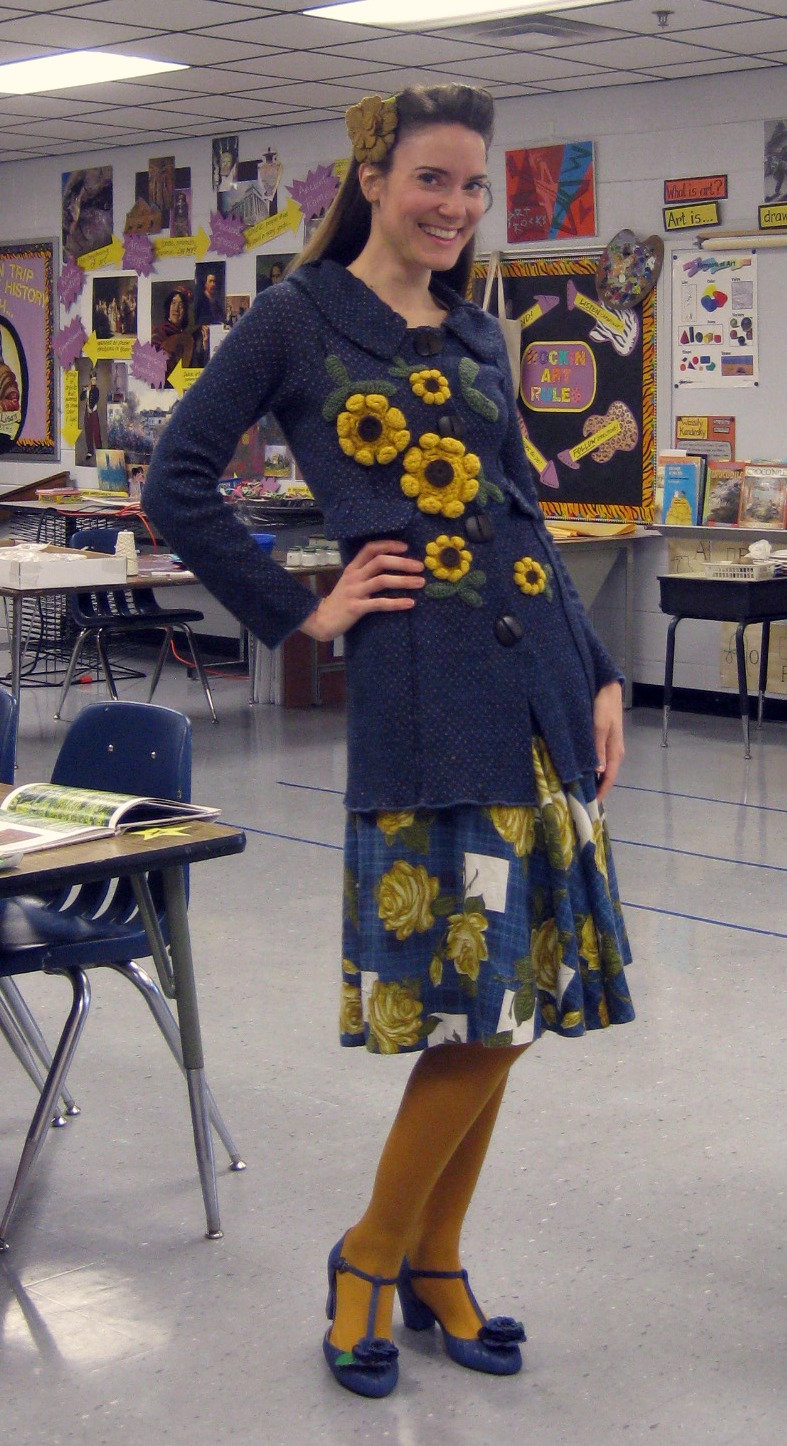
Oh, you know. Just another day of wranglin' those wild and wacky children in the art room.
Well, howdy thar, partner! It's yer Cowgirl of Suburbia here to show off my latest embroidered ensemble. I finished 'er off with a lick and a promise. Wanna hear how? Well then saddle up, 'cuz yer in for a hog-killin time. This weekend, I decided to quit beatin' the devil around the stump and finally finish the dang thang. Now lemme stop shootin' my mouth off and tell ya how I did it.

(So you too can annoy your friends by speaking in cowboy slang, visit here: http://freepages.genealogy.rootsweb.ancestry.com/~poindexterfamily/OldWestSlang.html )
Turn Him Loose, Bill by Frederic Remington, late 1800s
This latest embroidered venture began with a rather ho-hum dress I picked up a Target several years ago. It had been sitting in my Give-to-Goodwill-or-Restyle pile for quite some time. After my embroidered pin-up girl sailor dress (seen here: http://cassiestephens.blogspot.com/2012/01/apparently-ive-much-to-learn-about.html ), I was inspired to create another stitched look. With it's raw-hide tan color and collared style, I thought this dress could easily be cowboy-ized.
My Sweethearts of the Rodeo.
With that in mind, I began pinteresting and googling  "pin-up cowgirls". Which produced nothing. So I tried "vintage cowgirls". Nada. Then "cowboy rodeo"...and this amazing painting by Frederic Remington popped up. I loved it and I knew I wanted that same image across the bottom of the skirt. But with cowgirls.

So I began sketching out the scene replacing the gents with the ladies. Once I'd settled on a design I was happy with, I traced my drawing with sharpie. Using my light table, I redrew my design in pencil onto the dress. A big embroidery no-no. I think you are supposed to pin a tissue paper drawing to the fabric, embroider through that and then, once finished, remove tissue paper with tweezers. All that sounds entirely too pro for this cowgirl.
My spin on Remington's painting which I've titled Turn Him Loose, Jill.
I usually only embroider when I'm traveling. I like to have something to do while sitting for long periods of time. But this weekend, I experienced a craft fail (more on that in a later post) and needed something to keep me from finding solace in a tub of Blue Bell. So I pulled out my cowgirls and decided to finish them off.
One thing I did differently with these girls is I used one strand of embroidery thread to create the eyebrows and eyes. This gave me the ability to really capture their expression. I also added a tiny stitch of white for the reflection in their eyes. I think this girl's my fave.
During my embroidery breaks, I decided to do a little research on the cowgirl. These women were so strong physically and mentally. After reading about several of them, I choose my favorite three and christened my cowgirls in their honor. Without further ado, lemme introduce to you Lucille Mulhall. This cowgirl was once described in a 1900 New York article as "only 90 pounds, can break a bronc, lasso and brand a steer, and shoot a coyote at 500 yards. She can also play Chopin, quote Browning and make mayonnaise." Wow. I didn't even know  you could make mayo.
Okay, this gal has a bit of a nose on her, doncha think? She's my Barbara Steisand Cowgirl.
Cowgirl Bertha Kaelpernick (aka "Jill") was most famous for entering a horse race after all the menfolk refused due to the muddy track. This amazing cowgirl managed to remain in her saddle despite the conditions and put the men to shame. Later she went on to compete and often beat legendary cowboys of her time.
I've decided I need three items added to my wardrobe: spurs, a pair of cowboy boots (these Frye one's I snagged off ebay are too big), a vintage cowgirl dress. With fringe, of course.
Following in Bertha’s footsteps was Prairie Rose Henderson. She had to force cowboys to allow her to ride and compete with them. She's actually my favorite cowgirl as she's most famous for her affinity for all things tacky-tastic. Her faves were dressing in bright colors, sequins, and ostrich plumes over her bloomers.
Best compliment of the day: "You look like a Cowgirl Art Teacher!" Sounds good to me!
Can you believe these incredible cowgirls?

Well, little doggies, I'm about played out. Guess it's time for me to skedaddle or I'll be paying through the nose tomorrow! See ya's at the ranch.