Wednesday, September 5, 2012

DIY: The Zipper Blowout

"Vintage 911, please state your emergency." ..."Well, aside from the fact that my hair is beginning to get so long that it's resembling Cousin It (sorry, still stuck in that Horror Flick Phase), I believe I just blew out my zipper! Please send help (and hair clippers) right away!"
Have you ever found yourself in a dress (and guys, if you have, you are welcome here) that was a little, um, snuggish? And when in said dress, did you ever take a deep breath and hear that horrific pop! of a button or nightmarish rrriiiip! of a seam? This has happened to me in too-tight, no-room-for-stretch, Spanx-ain't-gonna-save-you-now vintage more times that I'd like to admit. I feel like The Hulk bustin' loose of my garb but without those fab pectoral muscles and that delightfully green skin.
This beauty was found at the thrift store. Half off. I know, right! So that totally justifies the old lady I pushed out of the way and the toddler I booty bumped, right?
Ah. Look at this dress, would you? I mean, it's just divine. The Thrift Store Gods were good to me on this day. However, the Waist Line Demons were not. Their temptation of Jeni's Goat Cheese and Berry Ice Cream has been too great for this weak mortal. And, thus, The Zipper Blowout.
To be fair to my ice-cream-lovin'-waistline, the zipper did look like this when I purchased the dress. I think. Regardless, it had to come out. As heavenly as this dress is, a Holy, ahem, a Whole-y zipper just won't do.
Now putting in zippers used to be my least favorite thing, right after squeezing into Spanx and busting out of vintage, but I've since found a way to do it that's relatively pain-free. So I thought I'd share it with you. The thrifted vintage dress is handmade and a wee bit of a mess so I thought I'd demo with my Horror Flick Dress

Step 1: Set your sewing machine to a baste stitch. That means you are going to have very long, temporary stitches. Baste stitch the fabric together 5/8" away from the seam from the top of there the zipper will be placed to the bottom. Iron seam open like shown above.
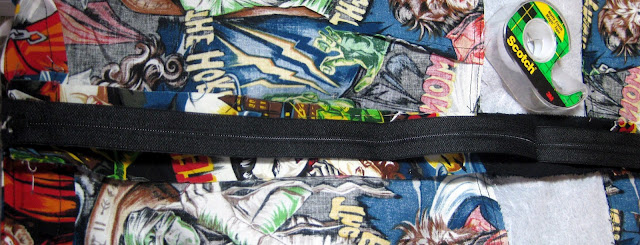
 Step #2: Once you have ironed the seam open, lay your zipper on the open seam.
Step #3: For my dress, I tucked the top of the zipper in between the fabric to hide it and make it so the zipper reached the top of the dress.
Step #4: Align the zipper on the open seam.
Step #5: And tape it down on open seam with Scotch tape.
Step #6: With tape still on the dress, turn the dress right side out. Change your sewing foot to a zipper foot (not sure which is the zipper foot? Read that neglected manual. I promise your machine came with a zipper foot. It should be shaped like the letter "I".) Change your setting from a basting stitch to a sewing stitch (which means your stitches will be shorter and more permanent). Sew 1/4" away from the basting seam.
Step #7: Don't forget to sew across the bottom of the zipper with a teeny tiny little stitch as seen on the left. Turn the garment inside out. Start the fun process of picking off the tape.
Step #8: Turn garment right side out. Using a seam ripper carefully remove basting stitches. Once complete, you have installed your zipper! I'd give you a high five, but I don't want you smacking the life outta your fancy ipad. Goodness knows my uber chic Compaq can't handle it.
And there you have it. Fixing a Zipper Blowout. Piece of cake. Which I won't be having anytime soon in this teeny (can't breathe!) tiny (I think I'm gonna pass out!) dress (you call this a dress?! I call this a Medieval Gut-Squeezing Torture Device!).
Vintage 911 Update: Thank you so much with your help on my last Vintage 911. I asked for suggestions on removing the stain from my dress and I got so much great advice (none of which I've taken but that's besides the point). Jenny of The Southern Institute and Casey over at Casey's Elegant Musings both suggested Oxiclean. I also had advice on trying Windex, Dreft and Flortex Carpet Cleaner. And, if all else fails, fellow art teacher Phyl suggested applique. A girl after my own heart.

Monday, September 3, 2012

DIY: The Horror Flick Dress

My cardboard suitcase is packed and I'm ready: Horrifying Haunts, here we come.
Ah, Labor Day weekend. A time for cookouts, catching up with friends and, of course, sewing a Horror Flick Dress. Oh, you didn't know that was on the agenda? Well, you best get crackin, friend.

I know what you are thinking: Dude (feel free to call me Cassie), it's September! Halloween isn't for weeks!

Or maybe your thought is: Wow! That dude (seriously? It's Cassie) has cured her infamous Pro-Cass-tination problem. 

Or perhaps, in all of your ADHD-ness, you are comtemplating: Another dress? From the same pattern as the Empire Strikes Back, Presley Poodle and the I-See-London-I-See-France frocks? Huh. So versatile (hey, is that sarcasm?). I think I need more chocolate. My feet itch. Is the cat reading my mind right now? Duuude! (I give up).
As soon as I saw this Horror Flick fabric by Robert Kaufman, I knew I had to have some. I shared some extra yardage with Jen over at Peachy Tuesday. I cannot wait to see what awesome hair accessories she busts out with this fabric. I snagged my yardage from Lady Buttons Fabric.
 Okay, so lemme explain. I'm actually not way ahead of schedule because here, at Creepy Casa de Cassie, Halloween begins very early (in less than 10 days!) and continues for every weekend until the end of October. I confessed in this post that hubs and I love going to haunted events. You know, the kind where you pay money for someone in their zombie-finest to chase you with a chainsaw. After seeing this fabric, I knew I had a make a dress for the occasion.

 Our addiction to these haunted events started at Universal Studios Halloween Horror Nights (I dare you to say "Candyman" three times and click on the link). I remember walking up to the first haunted house behind a group of girls. Whatever they saw at the entrance of the house scared them so much, they shrieked and took off running. This left hubs and I staring into the eyes of an actress dressed as a psych patient complete with bloody gown, crazy grimace and one big butcher knife. After escaping that house with sweaty palms, nervous knees and laughter, we were hooked.

It's very fitting that Universal Studios would host such a spook-tacular event as it's kind of like the Godfather of Horror. Founded by Carl Laemmle in 1912, the studio is the oldest in the U.S. In the 1930's Carl's son, Laemmle, Jr., began producing a series of monster movies, nicknamed Universal Monsters. Those movies can be found in the posters above...and in the fabric of my dress.

If you find yourself at Universal Studios in Orlando, please make sure you see the Universal Studios Horror Make-Up Show. It gives a great history on the horror movies of Universal all while being super silly. Not gonna be in Orlando anytime soon? Check out this bootleg.
When I wear this to the haunted houses, it will not be in these shoes. I'll be pairing this dress with my less-than-glamorous-but-oh-so-comfy Chacos. Perfect for running from chain-saw-wielding-homocidal-maniacs.
Not that I'll be doing any running. Oh no. This year, I'm gonna put on my best Morticia Addams face and be brave. Look those monsters right in the eye and not even blink, take my hands off my hips or have a hair out of place. My evil eye will have them running from me.
Dude, seriously?! If I could perfect that glare, I'd never have a single ounce of backtalk in my class room. The only thing more frightening than that stare is that drive-in movie screen sized fivehead, er, forehead.
Oh who am I kidding. My evil eye will quickly fade and become a Big Fat Baby Cry. Like every year. It's the only time the monsters break character and give me a "Duuude! Relax! Can someone please come get this crazy?!"
 Thanks for dropping by. I'll keep you posted on the haunted events the dress and I visit. Enjoy your Labor Day, dudes!


Sunday, September 2, 2012

What the Art Teacher Wore #32

Red Monday: Please pardon the completely distracting and slightly messy background. Because, according to the background, if you do not there will be consequences. And I don't think you want to experience A Long Time Out. dress: picked up at one of the lovely vintage shops in Amsterdam this summer; shoes: Dolls by Nina; belt and bow: made by me.
 Holy Moly Me-O-My, thank goodness for a long weekend. I am currently doing my favorite things: chillin' with the hubs, catching up on sewing projects, celebrating with friends (check out my friend Zach's big accomplishment!)and day dreaming about what the little artists will be creating next week. I couldn't ask for a more perfect end to a very colorful week. Why so colorful, you ask? Well, to help the lil kindergarteners learn their colors, my school wore different colors for each day of the week. In addition to my monochromatic duds, I've added some of my most pinteresting pins.

All of this color got me thinking about my favorite colors. I never really thought about what color I was drawn to until I started my attempts at decorating. It seems I love a very specific slightly-greenish sky blue. Surely there's a better name for the color. I've got it everywhere: in the painting I created in our front room (seen in the background of this post), in the rug I'm hooking, in the countless pillows. And now that I think about it, that was the color of my bedroom growing up. Surprisingly, that color is not very present in my wardrobe. There I have a lot of reds and pinks.

How about you? What color do you find yourself most drawn to? Do you know why you have such a connection to the color? I'd love to hear your colorful comments!
Woman in red Christian Dior dress, courtesy of pinterest.
Yellow Tuesday: I have to say, colors really do evoke emotion. Seeing all my kindergarten friends in their bright sunny yellows really made me quite happy. dress: Buffalo Exchange; shoes: vintage, thrifted; hair flower: made by me
Do you know the artist Raphael Soyer? I love his work. He's considered something called a Social Realist which is just fancy talk that means he liked to paint people living their lives. Doing what they do. Raphael had two brothers, Issac and Moses, who were also artists.
Blue Wednesday: I've really taken to wearing these waist aprons during art class. I have a small mountain of vintage ones that I wear in rotation. This one's pretty groovy because it's just translucent enough that you can see the floral pattern. dress and apron: vintage; shoes: Anthro, coupla years ago
Abstract painter Helen Frankenthaler in her studio.
Green Thursday: On this day, one of my new students said, "You are like a wacky work of art everyday." dress: vintage, thrifted; shoes: thrifted and DIY'ed by me here.
I am currently fascinated with the idea of creating my own fabric. I've had my nose stuck in my favorite fabric design books like Marimekko. I need to jump on this idea because that little voice that likes to convince me that my ideas are foolish is starting to get to me. Do you have little voices that try to talk you down from ledges? So annoying, I just wanna jump head first!
Orange Friday: More like Sherbert Friday but whatever. Turns out I don't have a lot of orange in my closet. So sad, I love the color! dress: vintage, thrifted; belt: Pinky Otto, NYC; shoes: Anthro
And I'll leave you with this orangie goodness. Enjoy your long weekend!


Thursday, August 30, 2012

In the Art Room: Welcome to the Jungle

During their first week in art class, all of the artists were asked to create a monochromatic self-portrait on a 3" X 3" piece of paper. I love how their excitement about the Parisian theme in my classroom inspired their work.
 Well, I thought I'd do something a bit different in this In the Art Room blog post. I usually wait until the kids have finished a masterpiece to share it with you. However, I just don't see a completed project in the very near future. You see, we are neck deep in self-portraits, passports, suitcases and airplane sketches. And just when I thought I might have that madness managed, the teeny tiny kindergarten artists invaded the art room. On top of all that, I went nuts and decided I needed to do some redecorating. Long story short, that's just real life in the too-many-things-going-on-at-once art room. And we really wouldn't have it any other way.

That being said, I will share these projects with you again once completed. Until then, here's a peak into the art room jungle. Enjoy!
In preparation for our art adventures around Europe, we've been chatting about what we would pack in our suitcase. Best item packed to date: "I'm taking nail polish and beauty products. I want to look good in Paris!"
If you are an art teacher that has been on pinterest for more than 5 minutes, then you've seen the Rainbow Self-Portrait mural. It's a stunner. We created one last year and it was a hit. This year I had the genius idea that we'd use the same concept but for a map of the world. The only prob? Self-portraits that need to be half land and water. That's been a bit tricky, but we're getting there.

Seeing photos of our school mascot Jes in front of the Eiffel Tower have us dreaming we were there. By the way, don't you love the design of this shirt with the cut-out shoulders? I think we may have a future fashion designer on our hands.
Passport Control: Creating these passports with the kids gave me a new appreciation for the hard work that our classroom teachers do everyday. We did a lot of writing which was a task for some. However, I never heard one complaint. They loved creating these little books. Our next step will be to stamp a golden eagle on the cover and add our first stamp (France!) to our passport.
We've even begun speaking a little French in art. We can actually have a little conversation! We've learned "Bonjour! Ca va? Bien, merci. Je m'appelle..." It's really quite fun.
And then there was kindergarten...I love them. Their first day in the art room was just last week. Already these little geniuses have begun creating paper sculptures. This project is a great on in that everyone is successful and just knows they are the best artist ever.
When I teach this lesson, I tell the kinders that they must take their strip of paper and give it feet so that it can stand. Once they have folded the paper and created feet, they tickle the feet with a little bit of glue that they paint on with brushes. I stopped using glue bottles years ago. I just got too stinkin tired of unclogging the things. So we keep our glue in little cups with lids and spread it on with old paint brushes.
Once they've mastered creating a curved line, I introduce zigzags and spirals. Our last addition to these sculptures will come on the final day: lines becoming shapes.
I have been in my beautiful classroom for years. I always take time to decorate my windows but I've always been at a loss as to what to do with my cabinets. Because I have many, I have to label them. And last year, I created a world wall with them. This year, I decided to decorate the back of the shelves with the elements of art.
This was so simple I couldn't figure out why it took me so long to come up with the idea. I simply measured the back of the cabinet, cut bulletin board paper to size and painted away.
I don't have enough cabinets for all seven elements of art so some were combined. These two seemed to make sense.
So there you have it. A Plate-Too-Full, Too-Many-Things-Happening, Busy-All-The-Time art room. Nothing short of tres chic!


Sunday, August 26, 2012

What the Art Teacher Wore #31

Forgotten Monday: Geez, it seems so long ago I hardly remember it. I'm standing in front of my Art History Wall and my Clean-Up Drums, courtesy of Fork's Drum Closettop: on a recent visit, my mother-in-law brought me a bunch of delightful duds from her friends. This sweet top was one of them. skirt: oh my, a new favorite. I scooped it up at this lovely etsy shop: Past Times Vintage; belt and shoes: sale, Anthropologie
Hi there, friends. This week in art teacher land was so busy it was just plain silly. I snapped about 400 photos of the kids for the faux passports they are creating; they completed their miniature self portraits for a group mural we are working on; we covered fire drills, tornado drills, how-to-make-Mrs.-Stephens-coffee-just-how-she-likes-it drills, you get the idea. My head is still spinning. But that may be from the kid who didn't quite have the coffee-to-sugar ratio down pat. Sigh. We'll get there.

This week I thought I'd share with you some details from these nutty outfits. And since I love pattern design in my clothing, I have included some of Raoul Dufy's textiles designs. You remember him...the dude I spent the last post cussing over. I just can't help it, he's that awesome. I hope you enjoy and we'll chitty-chat soon.
I love this pattern: the vintage suitcases, travel stickers, scale, destination signs. So clever.
A lovely print by Raoul Dufy, found here.
Poochie Tuesday: dress: Made by me; headband: Peachy Tuesday, created with fabric from the dress and vintage buttons, so cute!
Could this headband be any cuter? The kids loved it, thank you, Jen!
More Dufy goodness. I found many of these images on this lovely blog.
Bonjour, Wednesday: On this day, when we practiced for the fire drill, one of the kids lined up at the door that leads to the hall instead of outside. His reason: "The fire will probably be in here, with your kiln." I assured him that I would not be setting the school on fire anytime soon. His MacKayla Maroney face lead me to believe he wasn't buyin' it. beret: made by me; top: Anthro, gift from a friend; skirt: from the etsy artist PossessedN1.
I wish the fabric that was for sale these days looked more like this. If I had a clue about textile design, I might be inclined to create some of my own.
This Dufy design is a gouache on paper. That I understand. But to create textile patterns these days, you have to know how to scan and use computer programs that I haven't the foggiest ideas how to use.
First Day with Kindergarten Thursday: As if my room isn't enough of a distraction, I thought I'd jazz myself up as well. You know, so the wee ones won't be confused about what it is I teach: Crazy Kookiness. top: Target; shoes: made by me, tutorial here; skirt: made by me, tutorial here
A pencil hairclip? Really?! I know, I know. Sometimes I even embarrass myself.
I had visions that kindergarten would be a jungle of wild animals but there were...perfect! Such sweet little artists. Raoul Dufy, Jungle, printed cotton, 1920
A Rough Friday: I would compare this day to a pooh sandwich: the beginning and end were fine, but the middle really stunk. Sometimes it happens in the art room. AND this outfit was given an "eh" review by the kid critics. So harsh! Sweater, dress, owl sandals: Anthro sale room
Poodle pin, antique store.
Thankfully the weekend has been like a buncha roses with hubs and I hitting every estate, garage and thrift shop within a 60 mile radius. More on my finds soon. Lovely floral pattern by Dufy.