Monday, April 15, 2013

DIY: More Dip Dying and High/Low Hemline

There's something you should know about me: I'm a fads-hater. I ain't proud. But there are current trends that make me wanna punch a pillow (kinda wimpy, I know, but I've got soft delicate hands and punching hurts!). Case in point:
  • Skinny Jeans on Dudes. Seriously? I don't know what it's like to be a dude but I can only guess that those are...uncomfortable. They make me uncomfortable. Shoot, I actually can't even wear those because the moment I get my leg half way in, I start to experience calf-claustrophobia. Every time I've tried on a pair, I have a near panic attack and can't get outta 'em fast enough.
  • Yoga Pants as Pants. Ladies, for reals? Ya'll act like it's so terrible when our Walmart friends show up shopping in their sweats and slippers. To me yoga pants is just the yuppie version of the same thing. You just worked out? Awesome. Now go change your clothes.
  • The High/Low Hemline. Didn't we do a varied length hemline like 5 years ago? So this one is now high in the front/short in the back? Yippie, I can flash my spider veins and ghastly white thighs for all the world to see...
World, you're welcome.

So, um, yeah, not only am I a fads hater but I'm also a big fat hypocrite. But I promise I didn't recreate this hemline simply because it's "in". I kinda had to alter it somehow or this dip-dyed DIY would have me lookin' like a wannabe hippie. And I gave up that look in high school.

But I'm getting ahead of myself. Let's do the back-track boogie and start at the beginning...
 So a couple of weekends ago, when I was on my dip-dying bender, I decided to dye this 1990's Express rayon number that's been hiding in my closet since high school. Because I'm an idiot, I forgot to snap a photo of the dress before...but the one on the left is very similar in pattern, color and style. And, of course, a DIY of mine wouldn't be complete without a little Antho-spiration.

I began by actually reading the directions a little bit more carefully. Turns out you are to completely dissolve the dye in a small amount of hot water before adding it to the warm water dye bath (I used warm water because I was afraid hot would shrink the rayon). Not dissolving the dye completely and simply adding the powder to the dye bath is the reason I had a couple of dark dye dots on my shirt. Live and learn.
Or not. This is my version of a measured portion of non-iodonized salt. For more dying directions, you can see my first attempts here.

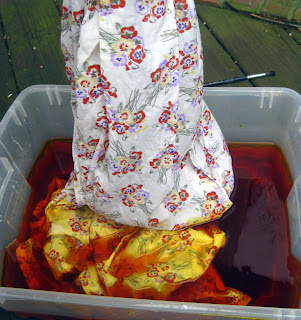
Originally, I had wanted only the bottom of the dress to be dyed. So, like last week, I double bagged the top of the dress and proceeded to slowly sink the dress into the yellow dye bath on on the left. I let it soak up to the waistline for about 5 minutes. Then I pulled the dress out about 5" and left the rest of it to soak in the yellow dye for 20 minutes. This helped achieve the gradation to yellow I was going for.

After pulling that out of the dye bath and doing the running-under-water-until-clear thing, I prepped a fuschia dye bath. I eased the now-yellow dress into that bath (see right photo) following the same routine: about 5 minutes of a soak to create a gradation and the bottom for 20 minutes.

And then I pulled a typical Cassie: I touched the top of the clean white dress with drippy fuschia dye fingers. So much for that double bagging. Knowing I'd never be able to wash out those drips, I proceeded to dye the top of the dress in the fuschia dye bath.

And, viola! One hippy-dippy-dyed dress. Now all I need are some Birkenstocks, some dreads and a couple showerless days and I'll be all set!
And that's when I decided that an altered hemline would update this dress a pinch. I figured I'd already taken this dress beyond the point of no return, why not hack into it and see what more damage I can do? Creating this high/low hemline is quite possibly the easiest thing in the world. Decide just how high you'd like the dress to go and mark the dress. Using a curved line reminiscent of an elementary school slide, stop just beyond the midpoint of the hem. Iron a 1/4" hem and stitch.
And done. One style I exclaimed not three days ago that I'd never EVER wear now happily resides in my closet between my skinny jeans and yoga pants.
Warning: High/Low hemlines are not for windy days and grannie panties. Just sayin'.
Outfit details: dress: Express; shoes: Lucky Brand; bow belt: made by me, DIY here
As I was dying this dress and the one from last week, I realized one was made up of the cold colors while this was warm. I thought for sure they'd make great teaching outfits when teaching color theory...but I've since changed my mind on this little number. It's going to have to be a fun summer frock or beach coverup. I'm stamping this one "Not Approved for the Artroom". See, I kinda know what professional attire looks like. Fishnets, yes; high/low, no. 

Until next time!


Sunday, April 14, 2013

What the Art Teacher Wore #63

Colorful Monday: The kids are glazing their clay animals this week (and probably next, they are so intent on painting carefully. I don't know what's gotten in to them!) and they are allowed to use every color in the rainbow. To illustrate, I dressed accordingly. sweater: Antropologie, found at Goodwill; dress: gift from a friend; turquoise tights and sparkly fishnets: Target; shoes: Softee; belt: Pinkyotto
In my book (which would be titled "The Annoying Ramblings of an Insane Art Teacher"), this week goes down as pretty stinkin' awesome. The weather was stellar what with super warm temps all week (I'm overriding that rainy Thursday because the other days made up for it). The kids were pin-drop quiet all week as they intently glazed their adorable clay animals. And, my favorite, the teachers and staff at our school were treated like royalty by the fabulous parents of our students. You see, it was Teacher Appreciation Week and, believe you me (is that not the weirdest saying ever?), me and my full belly feel very appreciated. Thank you, mamas and papas!

Because it was such a fun week, I thought I'd share with you the highlights instead of my flavor-of-the-week artist. Since I'm totally out of the techie loop, I don't have instagram so we'll call these insta-cam shots. Meaning I took 'em with my camera, downloaded them and posted them here. So I guess there was nothing "insta" about it. Okay, scratch that, these here are my gradual-cam photos. Enjoy!
I didn't post an "In the Art Room" this week because we are all in the middle of some project. Namely these here ceramic animals. This is an example by one of my fourth grade students. They were to create a dog or cat sculpture on a base with the freedom to add whatever they wanted to enhance their sculpture. I love the expression on this dogs face. I'm looking forward to seeing how they look when they come out of the glaze firing.
Professional Tuesday: So our school was going through something called an accreditation process and the big day was Tuesday. Knowing I'd have visitors in my room, I decided to tone it down just a pinch. Coral fishnets and matching shoes is professional, right? dress: Anthropologie, found at Goodwill; belt: Anthropologie; tights: dunno; shoes: Dolls by Nina
A fellow art teacher out of Connecticut sent me this amazing stash of vintage patterns! Can you believe this awesomeness? My fingers are itching to create that dress on the bottom right...thank you so much!
One Hot Wednesday: Seriously, at one point, we hit 80 this week. Which quickly dropped down to 40 but still, crazy! dress: vintage, Adjectives Market; bow belt: DIY by me; fishnets: Target; shoes: Dolls by Nina
My kindergarten and first grade students created their animals from an upside down pinch pot. I love how carefully this little artist is painting those wide blue eyes!
Here Comes the Rain Thursday: Tons of it. So I decided to bust out my new-to-me-from-San-Francisco coat and make the most of it. coat: Anna Sui, found at second-hand clothing shop Wasteland; dress: vintage, from St. Louis; boots: Hunter, ebay; fishnets: TJMaxx
So I have this standing date with the local coffee house and Anthropologie once a week. It usually entails me meeting up with a friend for tea, chatting it up and then taking the short walk to Anthropologie. I love this relaxing/catching up with buddies part of my week. I also love that I can now take photos inside of Anthro! Gonna have to make me a coupla these...
Friday!: So good to see you!  I just realized that everything I'm wearing is new-to-me...meaning it was all purchased at thrift stores or second hand shops. Sweet! sweater: Anthro, found at Buffalo Exchange; dress: vintage, found at Goodwill; fishnets: Target; shoes: Miss L Fire, Anthropologie


Saturday was a packed day for hubs and I: we ate at our new favorite spot, Blue Fig; did our 8 mile hike; treated ourselves to three scoops of ice cream; and hit up two Goodwills. Which is where I scored these amazing records! I cannot wait to get these framed and up in my sewing room. Or bathroom. Not sure which.


Tuesday, April 9, 2013

DIY: Dip Dying Your Closet

Know what I hate about getting older? Old Lady Knees. Do they make anti-wrinkle cream for kneecaps? I heard you can reduce wrinkles with hemroid cream, do you think that would work on my knees? Knowing my luck, I'd just end up with butt-knees. Which, if I Ben-ifer-ize it, sounds like Buh-knees. And who doesn't love bunnies!? Okay, I'll stop.
Alright, so I totally thought that the dip-dying-fad-train had left the station until I was in, wait for it...Anthropologie (gasp of surprise!) a coupla weeks ago. And that's when I saw this super summery gingham blouse with a lovely violet dip dye. Suddenly I had visions of myself enjoying summer days filled with estate sales, lazy lunches and crafty afternoons in this lovely little button-up. That is until the $79 price tag bit me like a "It Ain't Summer Yet!" snake. At which point I turned on my heel, got myself to Goodwill, snagged this gingham Target blouse and dip dyed my own. Take that, you grouchy gingham (did I just have an imaginary convo with a shirt? I think I did).

 Since we're engaging in imaginary conversations, here's what I'm guessing Anthro girl is sayin' about me as she looks on in $79-less wonder: "Oh my gawd, Becky. Look at her shirt. It is so not $79. She must be one of those Anthro-knock-off girls." (Does this reference show my age? Not gettin' it? Go here.)

Turns out I'm completely addicted to dip-dying. Who knew? I found this to be a very easy, albeit messy, craft. I've now breathed new dip-dyed life into three garments  (I'll share the third next week). The key is using the best dye you can get your mitts on...

Please, I beg of you, do not use that grocery store dye! You can pick Procion dyes up in every color imaginable at Dharma Trading Company. You'll also need:
  • Soda Ash (helps your fabric absorb and retain the dye)
  • Non-iodonized salt Hit the grocery store for this one but read the label. Most salt is iodonized.
Beautiful Blue.
For the most clear and concise of dying directions, I recommend those on the Dharma website. You can find it here.
Because I was only dying part of the shirt, I had to go a different route that what was written in the directions. So here's how I went about my dip dye:
  1. Wash your shirt. Because it's dirty and smells of thrift store. Or, if it's new, wash it to get all of those new clothing chemicals out that might prevent the dye from dying. 
  2. Double bag your shirt. If you don't want any dye on the top of the shirt, bag it accordingly. 
  3. Prepare your dye bath. You know, light some candles, pour a nice glass of wine...oh, wait, I said dye bath. In that case, dissolve your amount of dye in a small amount of water and add that to your large bucket of water. Pour in your measured amount of salt and mix until dissolved.
  4. Add your shirt to the bath. Because your want a gradation of color, you'll want to soak your shirt in certain time intervals. For the top part, I soaked the shirt, for 5 minutes; pulled it out a little bit and soaked for 10; a little more, soaked for 20 and the bottom I soaked for 50 because I completely forgot about it sitting outside. 
  5. Add the soda ash. Dissolve that stuff in a cup of hot water and add to the dye bath as your shirt is soaking. 
  6. Rinse and repeat. Rinse that shirt in hot water until it runs clear. Then rinse it some more in cold water. Throw it in the dryer and, viola! Dip dying done!

Yay, shirt complete! By the way, notice the couple drops of blue dye near my right arm in the back photo? Oops. Did I say "double bag it"? Make the triple.
And since I had that big blue dye bath, I thought I'd experiment with this super old Forever 21 dress. My original plan was to simply dye the midsection using this vintage dress (third one down) as my inspiration.

So this time, I bagged the ends, folded it in half and let that soak in the dye bath for 30 minutes. When it was finished, I found it to be just a little boring. So I mixed up some fuschia dye and this time just soaked the ends. And what you see below is the result.
Super easy and on-the-cheap craft. And I think it will be the perfect thing to wear when introducing the cool colors to the kids. Right after I slap that 'roid cream on my knees.

Monday, April 8, 2013

What the Art Teacher Wore #62

California Dreamin' Monday: Still had my mind in Cali what with all the bright colors and sunshine. I tried to make the most of it on this dreary weather Monday. sweater: Awesome, isn't it? And on the cheap too at Forever 21; skirt, turquoise tights: Target; glitter fishnets: TJMaxx; shoes: Dolls by Nina
Okay, I dunno what the weather is doin' where you are, but here it's finally divine. After a week of dreary and rainy days, I am just thrilled. So much so that I've even (foolishly) started packin' up my winter clothes and bustin' out the summer duds. However, there are some things in my disturbingly overcrowded closet that qualify as "spring wear." You know, like a pink wool dress or a long sleeved Easter-Sunday-esque frock. The kind of stuff that only works in April. So I decided to don those little numbers while there was just enough chill in the air for me to do so.

As for the artist I'm sharing with you this week, I have a confession: I've been feeling a little uninspired (read: lazy). When this happens, I like to flip through my art books that have pretty much been collecting dust since I discovered (read some more: became addicted to) pinterest. One of my faves has always been my book on the Finnish design company Marimekko. I thought I'd share my favorite designer from that company with you: Annika Rimala.
Annika Rimala: Can I just confess my secret girl crush on this amazing designer? I mean, everything about her just speaks coolness: from her bobbed hair to that awesome dress created from her designs. Annika Rimala worked her way up in the Marimekko company and was chief fashion designer for 20 years. By the way, if you aren't familiar with Marimekko, go here and be prepared to be slapped-in-the-face amazed. Image here.

Those Shoes with that Dress, What the What?!: Sorry, big hurry means big ugly. Don't get me wrong, I like the shoes, just not with that, that and that. In fact, when I walked into my principal's office to ask her a questions she screamed, " Ugh! Get out! Too much color, it's hurting my eyes!" Some people. sweater: vintage, thrifted; dress: Talbots, thrifted; tights: Target; shoes and belt: thrifted...wow! Almost entirely thrifted outfit!

Linjavitta dress, 1967 So my girl Annika is all about the bold patterns. Everything is big, bright and in your face. But in a happy way. She began at Marimekko in the children's department and I wonder if that influenced her design aesthetic. I also love that her design is a departure from the flowery and paisley patterns of the late 1960s. Her work looks modern even today. Image here.

Spring Coat Wednesday: I love this Anthro coat but it has such a small window of wear-time. It makes me super happy so I had to share it. pink dress: vintage, St. Louis; fishnets: Target; shoes: Fluevog

Everything about this photo makes me long for summer. Except the barefoot part. I've tender-bottomed feet. Image here.

Flowery Thursday: Have you planted any yet? I'm too afraid to. I just know we'll have one last freeze before the summer hits. dress: vintage, thrifted; jacket: Forever 21; tights: Target; shoes: Softt

 Gioia - Annika Rimala's Petrooli Pattern, 1963 How can you improve polka dots? By placing dots within dots. Genius. Check out this blog for an indepth account of Marimekko and Annika.

Favorite Color Friday: This color makes me happy. The color of a sunny day sky, a clear blue ocean, a fresh breeze, the super sour part of one of those red, white and blue popsicles you can only get from the ice cream man. dress: vintage, antique shop in TN; tights: Target; belt: Forever 21; shoes: Indigo by Clarks; poodle pin: ebay

Dress, 1963 Can I please have a golden yellow Vespa with an Annika Rimala vintage dress to match? Is that really too much to ask? Although the minute I'd try that no-hands, I'm-King-of-the-World pose, I'd slide off the tail end and wind up with a bruised bum. So forget it, bad idea. Just the dress please and thank you.
Oh! And by the way, thank you so much for all of your positive feedback on my last post! It was fun to try a different approach to my usual "In the Art Room" updates. I truly appreciated your kind words, they meant a lot.

Wednesday, April 3, 2013

In the Art Room: A Day in the Life

Entering the Art Room: I have a long strip of blue tape on the floor near my doorway. I'll usually greet the students at the door with a "Please stop at the end of the blue line". While there, I chat with the kids for just a moment about what we'll be up to today. On this day there was a lot of, "why are you taking pictures of our feet?!" Duh, foot fetish.
As an art teacher, I am always super curious how other art teachers run their classroom. I want to know all about their routines, procedures, how they get the kids to clean up because Lordie knows I struggle with that. So I thought I'd share with you a glimpse into just how a 1/2 hour art class looks in my room. I'm hoping this will inspire other art teacher bloggers to share a similar story. I'd love to bring some fresh ideas into my world. 

So, let me tell you what you are about to see: I attempted to snap some photos at each phase in my art class. Because my time with the kids zips by at the speed of light, I wasn't able to capture just one class. This is a montage of a second, kindergarten and third grade class. Each has a fairly similar routine so I think you'll get the idea.
The Art Supply Store: Aka "the store". At the store I lay out all of the supplies that the entering class might need. Because I see between 8-9 different classes in a day, I usually have to change out the supplies right before each class enters. That blue line I mentioned before dead ends at the store. This way, I can tell the kids what they need to grab and they can collect it as they enter the room. Side Note: I try to keep all supplies needed throughout the art class at The Store. This way, whenever the kids need anything, they know they can find it there.
Going Shopping: This is what we call our supply gathering routine. On this day the kids were beginning a self-portrait painting lesson. Once at their seats, they drop off their supplies, write their name and teacher codes in pencil on the paper. As soon as that's complete, they join me on the floor. This takes about 5-7 minutes.

Meet Me on the Floor: On some occasions, no supplies are immediately needed. That's when I'll ask the kids to bypass the store and make a first and second row on the floor.  About this Mess: I know what you're thinking, "What a mess of stuff!" You call it messy, I called it organized chaos. Each of those boxes on the left is a different class, labeled and ready for me to pass back. My demonstration supplies for each class are resting on top of the boxes.
Demonstration Time: This is a group of kindergarteners about to embark on paper weaving. I have found that when teaching weaving a giant loom really helps if they're paying attention (yeah, I'm talkin' to you, Striped Shirt). After I have given a demonstration, I run through all of the directions again using call and response. Not sure what I mean? In my room, it goes like this: I'll clear my throat and that's the signal that anything I'm about to say, the kids are to repeat. It almost sounds like a little ditty with lots of hand gestures and voice inflections. I have found that this really helps the kids remember the directions they are to follow.
Working on the Floor: This doesn't happen very often unless it's an activity where I'll need to check on a lot of children at once. So with this kindergarten weaving project, we changed our two seated rows on the floor into one giant circle. While in this circle formation, the kids wove and I could walk around the outside of the circle and help those that needed it.
Peer Tutoring: Oh how I love peer tutoring. The kids love to help each other and are often better at explaining the concepts to their friends than I am! It amazes me. In this weaving situation, I had the students who successfully completed their weavings help their friends who were struggling. The key is that they are to help not do it for them. That's sometimes a concept they don't quite grasp.


Creating: Most of the time, the kids work at their assigned seats. Each of my tables seats four students and each table is assigned a color. On each table in one of the four corners is a star that coordinates with the color of the table and has a number on it, one thru four. During art class, we have "art jobs". You can kind of see a list of these written on the board in the demo photo. Sorry, should have taken a better photo. My jobs include: Art Room Sheriff and Deputy (in charge of keeping order and quiet voices); Table Caller (calling the best tables to line up first); Hosts of the Smartest Artist (the wrap-up game we attempt to play most days); and, everyone's favorite: The Clean Up Band...
The Clean Up Gong: If this doesn't motivate you to clean up your act, I mean art, nothing will. Hubs bought me this gong for our 10th wedding anniversary (yes, you read that correctly). The kids absolutely love it. Funny story:  I was running late (as usual) and so we were scrambling to clean up. My Clean Up Gong'er for the day was OTL (out-to-lunch) and forgot to do his job. So as the teacher walked in to collect her students, one little girl yelled at the Gong'er, "Hit the bong! It's time to hit the bong!" Yeah, I had a little bit of 'splainin'  to do that day.
Clean Up Drums: I don't play drums nor do I know how. I do know how to play a "fill" and that's what I taught the kids at the beginning of the year. So, when it's their turn to play the drums, they play that little beat. As you can tell, they kinda love it.
The Clean Up Chime: Crazy, right? But it's funny, the kids have this down. They'll usually play in this order: drums, gong, chime. They will all get in their places, look at me and when I say, "Hit it!" they have at it. Then I'll usually play "Celebrate" by Kool and the Gang. With all this racket, clean up time can be a little busy. Especially since we are usually down to the wire on time. Once the students have cleaned up, they are to stand behind their pushed-in chair. Then they wait for the Table Caller to tell them to line up.


Lining Up: This is the doorway which the students entered the art room. It's also the exit. What's not shown in this photo is that blue line of tape on the floor. You can read more about The Masterpiece Gallery here.
The Smartest Artist: So The Smartest Artist is this wrap up game we play at the end of class (if time allows). There's the host and hostess on the right with their microphones looking at the contestants standing on that blue line. In the foreground is our score keeper. You can read more about The Smartest Artist here.
At the End of the Day: I love my job. I don't love the clean up. Been trying to convince the book keeper that some of my art supply funds should go toward a housekeeper.

So there you have it, a peak into a half an hour of artsy'ness. I look forward to hearing what it is you do in your room that works like a charm. Because if it's one thing I've never been called, it's charming. Thanks for dropping by!