It could easily be stated that there are many a thing wrong with me. I suffer from anti-cleaning disease. I have a super bad and unshakable case of I-despise-cooking-itis. Not to mention the car-that-looks-like-an-army-of-hobo-clowns-live-in-it disorder which I deal with on a daily basis.
However, despite all my countless flaws, I never thought I'd add Alpaca Addict to the list...and yet...
Each and every time I look longingly at the photos from my alpaca trip, I'm all...
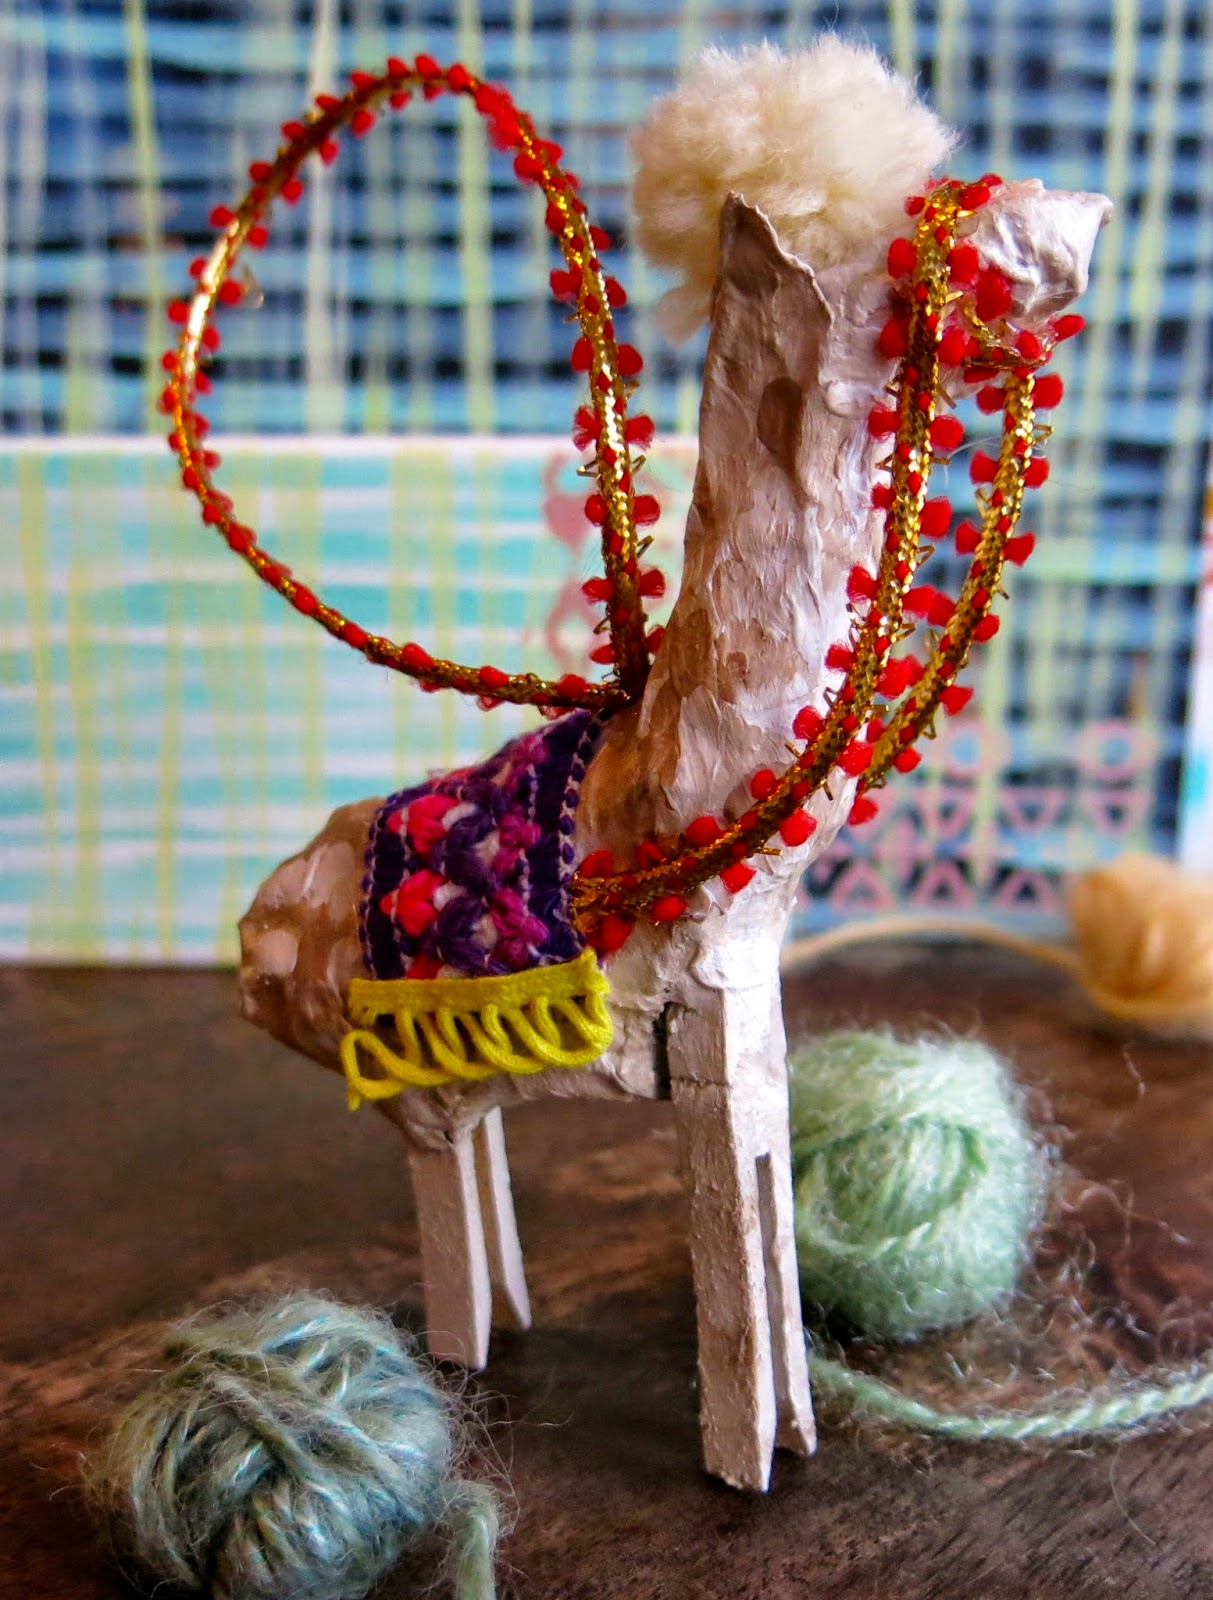
For that reason, I went on a wee bit of an alpaca-crafting bender over Thanksgiving break. With the help of my moms-in-law who, by her artsy nature, is always (willingly) dragged into my crafting adventures, we sculpted and papier mached these bad boys.I know, right? Like, so super cutes it burns your retinas. And we used a buncha scrap supplies that woulda otherwise ended up in the recycling bin. Or in the back of my car with the hobo clowns which is more likely the case.
So just how did these lil guys come to life? Lemme start by showing you what our kitchen table looked like after the tofu-kery and pumpkin pie were cleared away...
So just what did we use? Well, lemme start by saying that is not mashed potatoes in the middle of the table. To craft our Alpaca Ornaments, we used:
* Clothes pins for the legs. The ones with the metal wire hinge thingie work the best.
* Wallpaper paste. Not be confused with mashed potatoes. Like, ew.
* Aluminum foil scraps. I saved all the foil scraps from the kids' projects this year thinking that we'd come up with something to create.
* Newspaper torn into strips. What with Black Friday ads, we had plenty of newspaper to use.
To create the body, we simply stood two clothes pins on end and crumpled a piece of foil over them for the body. Another piece was then wadded up and added for the neck and head. From there, we commenced wrapping the alpacas with newspaper. The ears were created by folding a wad of newspaper up to create a triangle shape and then attached. Because of their small size, these guys really took no time at all. And they were pretty easy once we figured out how to sculpt the body. I'm thinking my third and fourth grade kids could totally handle the scandal.
After drying overnight, we give the little dudes a base coat of white to hide the newspaper print. From there, I just started slapping colors on the little guys whilst merrily scrolling through my alpaca pics for inspiration.Then came the hair stylin's. When I was paper mache-ing, I didn't have a clue how to go about creating the hair. However, on a trip to the craft store, I found these super awesome pom-pom-making contraptions that worked out perfectly.
In my bottomless stash of stuff (which reminds me, I can also had crazy-crafty-hoarder to my list of illnesses), I also happened to have yarn the exact color of my lil alpaca friends. So I promptly set to creating pom-pom alpaca afros.
Also in my stash were some ethnic ribbons for the "blankets" to drape over the backs. These were hot glued into place.
Sparkly ribbony stuff was added for the hanger and viola! All ready for the yet-to-be-dragged-outta-the-closet Christmas tree!
At some point during all this alpaca-madness, I got the crazy notion to paint some stationary. Because, you know, why not?I'm thinking that if I can fight off the urge to keep them myself, I just might gift these sets for Christmas.
I went about making them factory style on the dining room table (you know, because the kitchen table was full of papier mache and alpacas. As it should be). I started by just dry brushing some stripes...
And some more stripes before stenciling. I found this super groovy ethnicy stencil at Michael's and bought it even before I had a plan. And I'm so glad I did because I loves it so.
After the background dried a bit, I sketched in some alpaca silhouettes in paint. Half the time they ended up looking like giraffes, llamas, deer or some creature from the Black Lagoon but I was determined to just keep painting and make 'em work.
Once dry, I thickly painted stripes, dots and patterns on the back of the alpaca to mimic a blanket. I also added a lil line around the alpacas so they wouldn't appear so flat.
And there you have it! A Pack-a Attack-Alpacas! I so loved creating both the cards and the ornaments.
So, I gotta know, did you craft over Thanksgiving break? I'd love to know what you created. If you'd be so kind, share what you made in the comments and, if you have a blog where you featured your creation, please be sure to add a link below. Thanks, y'all!


I really need to come to your house for some funday of crafting
ReplyDeleteThat would be fun!
DeleteAre you by chance selling a few cards? Would love to frame 3?????? Karen at Minet1215@att.net. absolutely love your personality and whacky creativity.
ReplyDeleteSure! I'll message you :)
DeleteOK, so here I am, pinning YOUR papier-mache project! I'm loving on the clothespin legs, and totally mad I didn't think of it myself. When it comes down to it, I think I've really stolen every good idea I've ever had. Anyhoo, I'm definitely stealing THIS one! Thanks!!!!!!
ReplyDeletePS - I love the alpacapillar!
ReplyDelete