Halloween is my all-time favorite holiday. So it should come as no surprise that I start thinking about it in August, decorating for it in September and craft for the big day all the way up until October 31st! Today I thought I'd share my Top 10 Favorite Halloween Crafts. These are my personal DIY's...not ones that I've done with my students. I'll be sharing my fave fall projects for kids this week, so stay tuned. Until then, here are my Top Ten!
1. Celluclay Pumpkins These pumpkins were so stinkin' fun to create! You can read all about the process right here. I was inspired by a SUPER expensive collection of vintage Halloween buckets that I so wanted to purchase. But the price was just bananas. Once I took a closer look, I realized I could make them myself with Celluclay. This was the start of my love affair with Celluclay (I'm not ashamed to admit it: I'm addicted to the stuff!) and a whole slew of pumpkins was created. Here's a tutorial:
What I love about Celluclay is that you can adhere it to anything. It doesn't require gluing; it doesn't crack or flake off; it dries with a great texture...my list could seriously go on and on. It's just fab. Which leads me to my next craft...
2. Celluclay Book of Spells More fun with Celluclay was had when I picked up an old jewelry box from the thrift store and made it into a Book of Spells! I covered the entire box with the Celluclay and then built up the skull with additional clay. While at the thrift I picked up a stash of bottles that I decided to make into potion bottles. I simply added the clay to the bottle and it stuck!
Add a little cotton to the top for a puff of smoke and potion bottle complete!
3. Zombie Head Planters Easily my most favorite thing I created last fall were my Zombie Head Planters. These guys crack me up! I stuffed 'em full of fake plants so they could be used year after year.
Oh, look, it's my ex-boyfriend. He always was such a looker.
4. Cheesecloth Bride and Frank The miracles of liquid starch, y'all. I found this figurine at the thrift and covered it with cheesecloth and liquid starch. This gave it a great texture for me to paint. Find out more about how this was created here.
Or check out this quick tutorial!
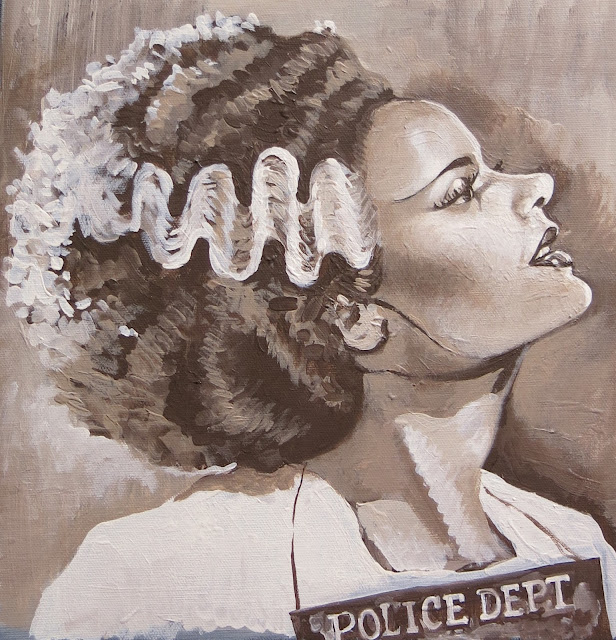
5. Bride of Frankenstein Painting My painting pride and joy is this number...I loved creating this painting! It was def a challenge as tonal paintings aren't the easiest but I really loved doing it. I was all set to create a Frankenstein version but I spent so much time on this one, I didn't have time for the other. Maybe some day!
6. Day of the Dead Clay Heads I LOVE hosting Halloween craft nights, it's one of my fave things ever. Here is one craft we created with polymer clay. More details here on our craft night fun!
7. Embroidered Day of the Dead This reversible Day of the Dead necklace was a great way to pass the time while traveling. I love embroidery but rarely have the time/patience for it unless we are on the road.
I love being able to wear this necklace two ways since it is reversible.
8. Dead Head Planters This idea I found whilst pinterest'ing and had to bring it to life. I simply spray painted some planters white and then went to town! More details here.
9. Pumpkin Marionette This paper clay pumpkin was inspired by more vintage Halloween decor. I simply created the parts of the pumpkin and, when dry, added the wire. I think I might have to make more of these. It's always fun to have a little collection of canvases and clay laying around for painting and sculpting fun!
10. Witchy Textured Painting Speaking of paintings...the base of this one was actually an old painting of mine where I was playing with texture. On an impulse I decided to paint over it and I love the result for this painting.
Okay, brace yourself. Not only do I have fall projects for the kiddos lined up to share with you but I've also got a huge blog post of JUST my Halloween ensembles! Stay tuned.
Love to hear about your fave spooky creations!


