Halloween is my all-time favorite holiday. So it should come as no surprise that I start thinking about it in August, decorating for it in September and craft for the big day all the way up until October 31st! Today I thought I'd share my Top 10 Favorite Halloween Crafts. These are my personal DIY's...not ones that I've done with my students. I'll be sharing my fave fall projects for kids this week, so stay tuned. Until then, here are my Top Ten!
1. Celluclay Pumpkins These pumpkins were so stinkin' fun to create! You can read all about the process right here. I was inspired by a SUPER expensive collection of vintage Halloween buckets that I so wanted to purchase. But the price was just bananas. Once I took a closer look, I realized I could make them myself with Celluclay. This was the start of my love affair with Celluclay (I'm not ashamed to admit it: I'm addicted to the stuff!) and a whole slew of pumpkins was created. Here's a tutorial:
What I love about Celluclay is that you can adhere it to anything. It doesn't require gluing; it doesn't crack or flake off; it dries with a great texture...my list could seriously go on and on. It's just fab. Which leads me to my next craft...
2. Celluclay Book of Spells More fun with Celluclay was had when I picked up an old jewelry box from the thrift store and made it into a Book of Spells! I covered the entire box with the Celluclay and then built up the skull with additional clay.
While at the thrift I picked up a stash of bottles that I decided to make into potion bottles. I simply added the clay to the bottle and it stuck!
Add a little cotton to the top for a puff of smoke and potion bottle complete!
3. Zombie Head Planters Easily my most favorite thing I created last fall were my Zombie Head Planters. These guys crack me up! I stuffed 'em full of fake plants so they could be used year after year.
Oh, look, it's my ex-boyfriend. He always was such a looker.
4. Cheesecloth Bride and Frank The miracles of liquid starch, y'all. I found this figurine at the thrift and covered it with cheesecloth and liquid starch. This gave it a great texture for me to paint. Find out more about how this was created here.
Or check out this quick tutorial!
5. Bride of Frankenstein Painting My painting pride and joy is this number...I loved creating this painting! It was def a challenge as tonal paintings aren't the easiest but I really loved doing it. I was all set to create a Frankenstein version but I spent so much time on this one, I didn't have time for the other. Maybe some day!
6. Day of the Dead Clay Heads I LOVE hosting Halloween craft nights, it's one of my fave things ever. Here is one craft we created with polymer clay. More details here on our craft night fun!
7. Embroidered Day of the Dead This reversible Day of the Dead necklace was a great way to pass the time while traveling. I love embroidery but rarely have the time/patience for it unless we are on the road.
I love being able to wear this necklace two ways since it is reversible.
8. Dead Head Planters This idea I found whilst pinterest'ing and had to bring it to life. I simply spray painted some planters white and then went to town! More details here.
9. Pumpkin Marionette This paper clay pumpkin was inspired by more vintage Halloween decor. I simply created the parts of the pumpkin and, when dry, added the wire. I think I might have to make more of these. It's always fun to have a little collection of canvases and clay laying around for painting and sculpting fun!
10. Witchy Textured Painting Speaking of paintings...the base of this one was actually an old painting of mine where I was playing with texture. On an impulse I decided to paint over it and I love the result for this painting.
Okay, brace yourself. Not only do I have fall projects for the kiddos lined up to share with you but I've also got a huge blog post of JUST my Halloween ensembles! Stay tuned.
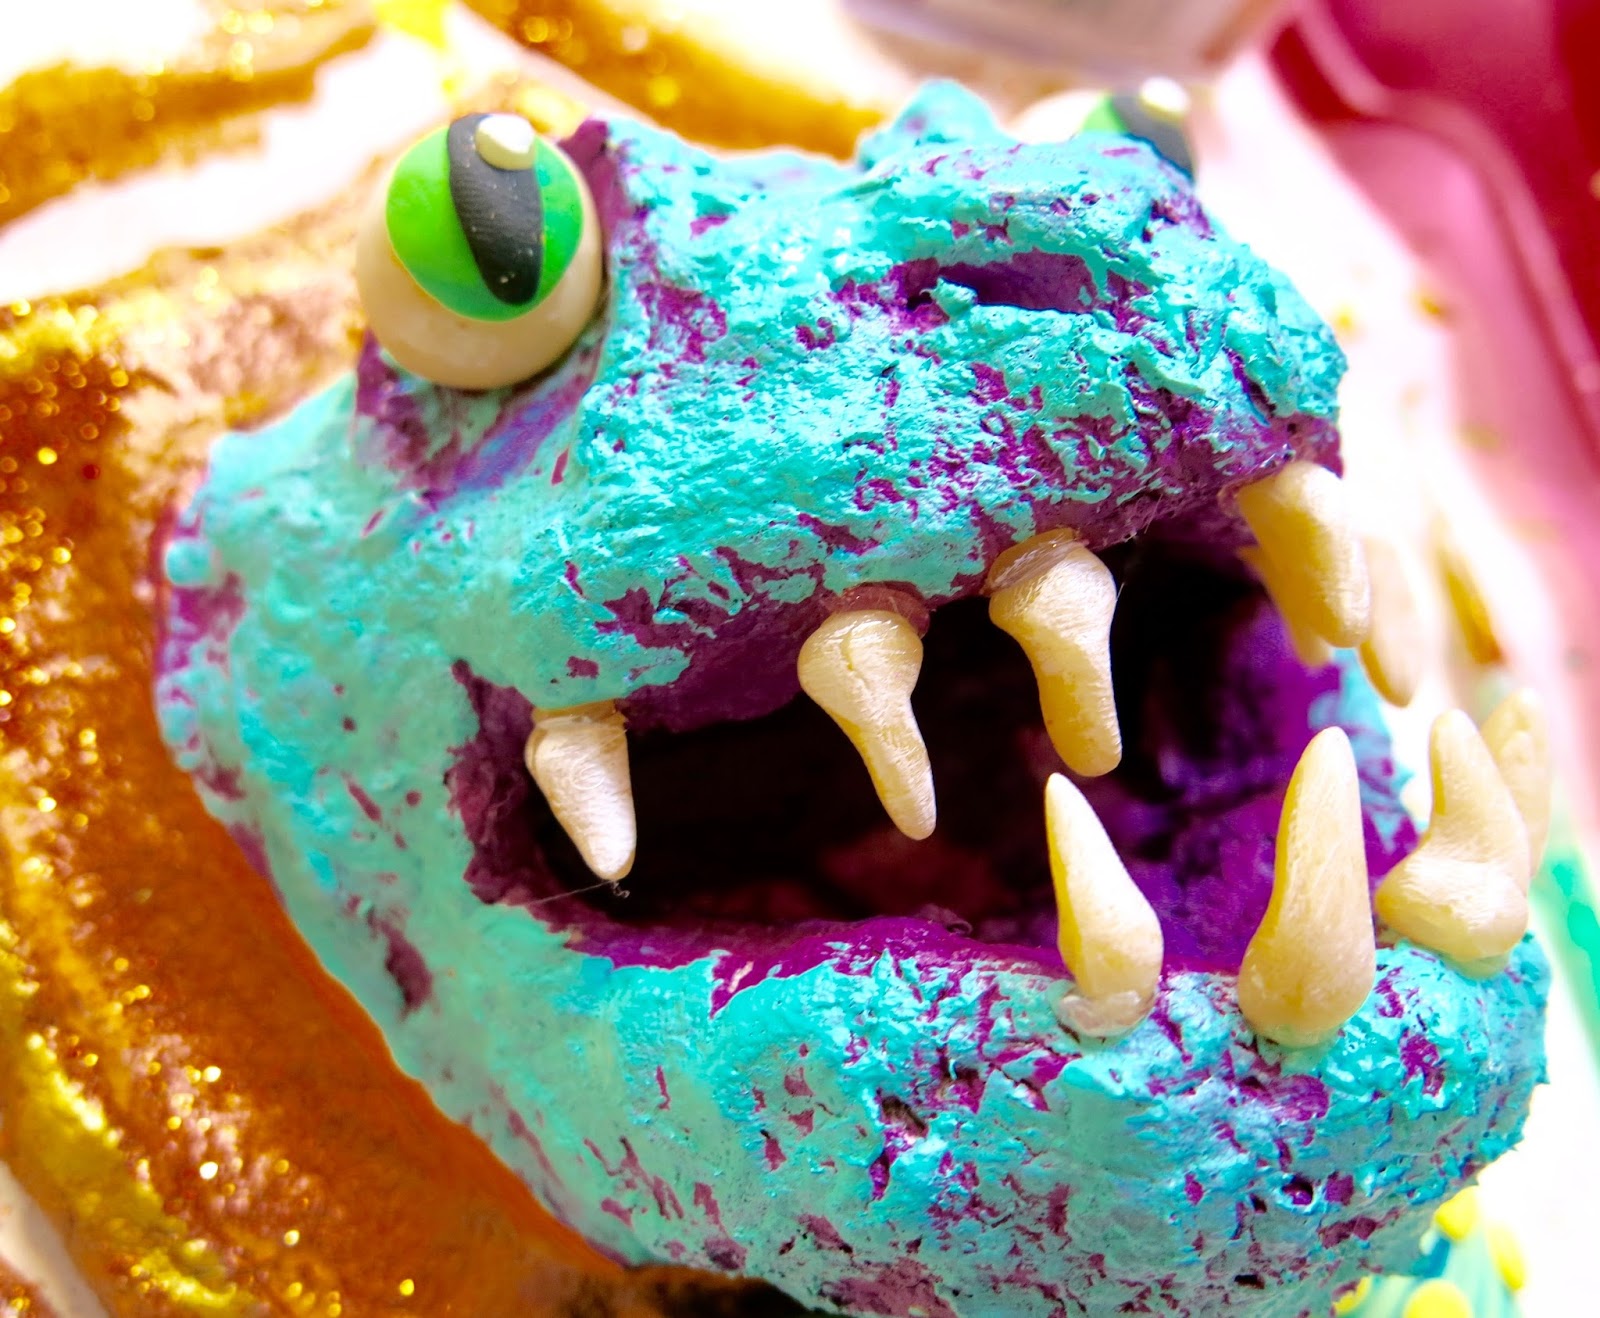
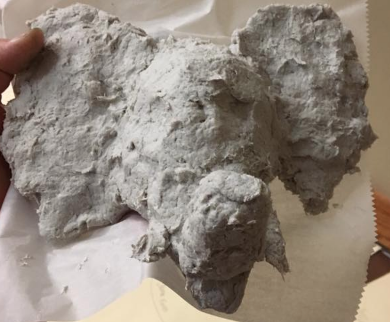
Y'all, I know. You don't even have to tell me: these are the ugliest things I've created to date. When I showed the hubs the creation on the right, he said, "that thing is scary. Like really scary." This coming from a dude who lives for haunted attractions. Mission accomplished. I got the idea for this Celluclay project when I hosting my #creatingwithcassie craft nights over on Facebook live. It is similar to a project I did when writing my book except with that project, I used air dry clay and created cute little forest animal heads. With this one, I used Celluclay and made these ugly/cute bad boys. How to here:
Supplies: * Celluclay: To say I am obsessed with this stuff is an understatement. I love me some Celluclay every since discovering it when writing my clay book. For a grade level of 80 kiddos, I'd say you'd need 2-3 bags of the 5 lb. of clay. I always premix the clay, I never let the kids do this. It's very dusty and, with a group of kids, could get real insane, real quick. I like to mix mine up the day before, creating batches the size of a large grapefruit for every two kids. I then wrap the clay in plastic wrap and store in the fridge so as not to mold. The next day, I place in a bowl and let the kids unwrap the clay. * Water: For mixing the clay. Don't ask me about measurements. This stuff should feel like clay. Not to soggy, not too dry. * Cardboard for Wall Mount: This project is geared towards kids in middle school and beyond. I'm guessing they will be able to cut through cardboard. Chipboard and mat board would work just as well. * Aluminum Foil: The Dollar Tree sells packs of 30 sheets of aluminum foil. I love this! The stuff is already cut for you. I will say, it's a very thin foil. You and your students may have to use more than one sheet to build a strong armature. It will need to support the weight of the clay. * Paint: I used acrylic but tempera would work. I always cover my Celluclay pieces in a varnish like ModPodge to seal and protect. * Polymer Clay: Totally optional! I used this to create the eyes and the teeth. I thought the difference in texture would be fun.
This guy is small, only about 6.5" in height. What I love about this project and working with Celluclay: 1. You don't have to wrap your project to prevent from drying when class is over or you need to take a break. Allow your clay to dry out. You can simply work the wet clay back into the dry. YES! 2. It sticks to everything! Seriously. I've adhered this clay to plastic, cardboard, tagboard, foil and plaster and I've never had to bust out the hot glue gun. 3. For that reason, no need to slip and score! Yippie! 4. I love the rough texture it creates. However, if that is not your bag, then good news, you can sand the clay once it's dry. Use a fine grit paper and do this either outside or wearing a cute lil paper mask thingie.
I always and forever, amen dry my Celluclay in front of a fan. It can dry super fast that way. Otherwise...it may take much longer to dry and mold. No one wants that.
I've used both the white and the gray clay. Both take to paint very well...so no reason to purchase one over the other.
Because the Celluclay sticks to everything in the universe (in the best possible way), you can use such things as air dry clay in combination. We found that out while I was leading a clay session at Art Scouts (details on that amazing adventure later this week!). The participants were adding tooth-shaped clay right into their masterpieces while it was wet...the next day, they were stuck in to place.
I also shared this process during my online craft nights. I LOVED seeing everyone's spin on this project. Imagine where our students could go with this idea. This amazing unicorn was created with plaster trips instead of Celluclay...which works just as well!
Here are just a few of the incredible creations I managed to snag a picture of at Art Scouts. Love this elephant!
And this dragon! At Art Scouts, I had about an hour for the participants to create an armature and make their masterpiece. Pretty impressive that they could knock it out so fast. The method I share in the video makes it a simple process. Once home, the Art Scouts started sending me photos of their finished pieces.
Love this one by Polly Blair. Notice she did not cover her cardboard in Celluclay. Totally optional. It really giver her piece a great contrast between the smooth wall mount and the rough texture of the dragon.
And this cutie from Jennifer Day. That face is a total crack up.
Here's a peak at the other clay creations our Scouts knocked out in just two hours! These were created by my Joliet pal Nora Gleason. The heart was created with Celluclay while the wings were made with plaster trips.You can find that project here.
And these cuties created by Ryann Hawkins. LOVE them! I can't wait to share more from our Art Scouts adventures in a future post. Until then, I leave you with these faces only a mother could love...
Ah! I failed to mention that the "retainer" on the dino on the left was created with an unfolded paperclip and attached with hot glue. The cat eye glasses were some I had in my stash where I just removed the legs and attached to the bridge of the nose with hot glue. The bowtie on the dino on the right, was created from polymer clay and simply attached to the finished piece with hot glue. Now...where to hang such craziness. My art room, of course!
So by now y'all know that my love for Halloween and Celluclay run strong. I discovered my love for Celluclay this summer when working on that clay book I wrote (stay tuned, we're getting closer each week to being finished with it and I'm so excited!). About a month ago, I used Celluclay and old trick or treat buckets to create these retro-inspired Halloween decorations. Then I went all Zombie-fied and made these Walking Dead Head Planters. This time around, I decided to create a Book of Spells that serves as my treat holder for all the trick or treaters!
And I learned how to make a gif. My apologies in advance.
When the hubs and I were in Orlando last month, we hit The Wizarding World of Harry Potter which is INSANE. Everyone should go there, it should be required by law. It is so incredibly inspiring and wonderful that you just gotta stand back and soak it all in. With a Butter Beer, of course. Now, I've not read any of the Potter books (much to my husband's dismay, he's a HUGE fan) but it's on my To Do. In the meantime, I'm just going to continue to be inspired by the park, the movies and create Halloweenie-themed stuff like this.
So I went to the thrift store on Monday with the intention of scooping up a large hardback book. I already had reservations about the idea because I thought the water in the Celluclay would cause the book cover to warp. But I was all set to cross that bridge when I got there (cuz planning head really isn't my thang).
But what was waiting for me at the thrift turned out to be much better: this old jewelry box! Best part is that I can use it tomorrow to serve up some treats to the neighborhood kids. The jewelry box does have that special old-lady-perfume-smell but I'm pretty sure no kid is gonna turn their nose up at a pack of skittles that smells like The Golden Girls. And if they do, they don't deserve to taste the rainbow anyway.
So just what is Celluclay and how do you work with it? I made a video when creating the pumpkins that walks you thru the simple steps. All you need is the clay (which can be found on Amazon and at your local craft joint) and water.
I did try to air out the old-lady-perfume smell but it really doesn't bother me. Since I wear a lotta vintage, I'm kinda used to smelling like a lil ole lady. Shoot, man. I kinda am one!
Now usually when I go about creating, I start with some sort of plan in mind. This time, I decided to live life dangerously and just start slapping the Cellulclay onto the surface.
Disney's the Haunted Mansion and it's silly/spooky ghouls were what inspired the faces on both the spell book and my potion bottle below.
I worked on this guy a little each night. It took some time to cover the entire book, the sides and the binding. I was worried it wouldn't have enough time to dry so I placed it in front of a fan during the day. Also...the great thing about Celluclay is that you can continue to work on it and add to it even if the other parts are dry. This is totally different than kiln fire clay. I dig that about Celluclay. Also, I made a huge batch of the clay for this project. When I wasn't using it, I just wrapped it in plastic wrap and stored it in the fridge.
Once dry, it got a coat of black acrylic...and from there, I forgot to snap any more photos of the process. Sorry, my bad. However, I used the same dry brush technique that I've used in the other Celluclay projects I've shared.
I had a lotta fun with the details...like this little knob that was on the side of the box that I transformed into a shrunken head.
Please pardon the cat hair, we save it for the magic spells.
So, like I said, I started this on Monday. On Tuesday, I went to a different thrift store (guess who has a shopping problem? GUESS.) with the idea in mind that my book needed some potion bottles. I had seen folks using cheesecloth and liquid starch for projects and I was excited to give that a go for some bottles. However, when I got home, I realized that I had forgotten the cheesecloth at the grocery (anyone else make grocery lists and then LEAVE THEM IN THE CAR?! My life). But I was so excited to get started that I used my left over Celluclay to create a matching bottle for my book.
Boom! Take that grocery-list-lookin-all-smug-sitting-on-my-dashboard.
I started with this funkily shaped bottle (yes, funkily is a word).
After hastily sketching my idea on the bottle, I set to work. This took all of 15 minutes to create. I put it overnight in front of the fan and started to paint it this morning.
This time, with photographic evidence! Try to ignore the pj pants who are making a feature in this photo. I stay in pj's during the weekend. True story.
Painted black. Y'all, I gotta tell you, I am loving this crafting outside thing. The weather is perfect and great for drying.
Dry brushed it with some gold and done! This was one of those crafts that looks complicated (says me) but went off without a hitch. I really would love to do something like this with my students sometime. Sans skull and crossbones, of course.
I love how they look together. Just a coupla goofy guys.
And a weird chick. But you knew that already.
Mitch had the idea of putting some pillow stuffing in the bottle for smoke. He's so clever.
Of course I had to see if it was really poisoned.
It wasn't...but, seriously, what used to be in that bottle?! Yuck!
I actually have TWO more Halloween crafts to share with y'all after this one...so be sure and pop back by soon. I just might have to do a double header tomorrow.