 |
| "Vintage 911, please state your emergency." ..."Well, aside from the fact that my hair is beginning to get so long that it's resembling Cousin It (sorry, still stuck in that Horror Flick Phase), I believe I just blew out my zipper! Please send help (and hair clippers) right away!" |
Have you ever found yourself in a dress (and guys, if you have, you are welcome here) that was a little, um, snuggish? And when in said dress, did you ever take a deep breath and hear that horrific pop! of a button or nightmarish rrriiiip! of a seam? This has happened to me in too-tight, no-room-for-stretch, Spanx-ain't-gonna-save-you-now vintage more times that I'd like to admit. I feel like The Hulk bustin' loose of my garb but without those fab pectoral muscles and that delightfully green skin.
 |
| This beauty was found at the thrift store. Half off. I know, right! So that totally justifies the old lady I pushed out of the way and the toddler I booty bumped, right? |
Ah. Look at this dress, would you? I mean, it's just divine. The Thrift Store Gods were good to me on this day. However, the Waist Line Demons were not. Their temptation of Jeni's Goat Cheese and Berry Ice Cream has been too great for this weak mortal. And, thus, The Zipper Blowout.
To be fair to my ice-cream-lovin'-waistline, the zipper did look like this when I purchased the dress. I think. Regardless, it had to come out. As heavenly as this dress is, a Holy, ahem, a Whole-y zipper just won't do.
Now putting in zippers used to be my least favorite thing, right after
squeezing into Spanx and busting out of vintage, but I've since found a
way to do it that's relatively pain-free. So I thought I'd share it with
you. The thrifted vintage dress is handmade and a wee bit of a mess so I thought I'd demo with my Horror Flick Dress.
Step 1: Set your sewing machine to a baste stitch. That means you are going to have very long, temporary stitches. Baste stitch the fabric together 5/8" away from the seam from the top of there the zipper will be placed to the bottom. Iron seam open like shown above.
Step #2: Once you have ironed the seam open, lay your zipper on the open seam.
Step #3: For my dress, I tucked the top of the zipper in between the fabric to hide it and make it so the zipper reached the top of the dress.
Step #4: Align the zipper on the open seam.
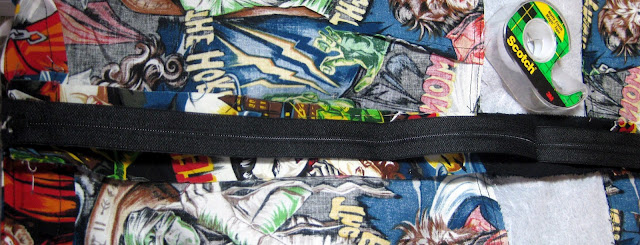
Step #5: And tape it down on open seam with Scotch tape.
Step #6: With tape still on the dress, turn the dress right side out. Change your sewing foot to a zipper foot (not sure which is the zipper foot? Read that neglected manual. I promise your machine came with a zipper foot. It should be shaped like the letter "I".) Change your setting from a basting stitch to a sewing stitch (which means your stitches will be shorter and more permanent). Sew 1/4" away from the basting seam.
Step #7: Don't forget to sew across the bottom of the zipper with a teeny tiny little stitch as seen on the left. Turn the garment inside out. Start the fun process of picking off the tape.
Step #8: Turn garment right side out. Using a seam ripper carefully remove basting stitches. Once complete, you have installed your zipper! I'd give you a high five, but I don't want you smacking the life outta your fancy ipad. Goodness knows my uber chic Compaq can't handle it.
And there you have it. Fixing a Zipper Blowout. Piece of cake. Which I won't be having anytime soon in this teeny (can't breathe!) tiny (I think I'm gonna pass out!) dress (you call this a dress?! I call this a Medieval Gut-Squeezing Torture Device!).
Vintage 911 Update: Thank you so much with your help on my last Vintage 911. I asked for suggestions on removing the stain from my dress and I got so much great advice (none of which I've taken but that's besides the point). Jenny of The Southern Institute and Casey over at Casey's Elegant Musings both suggested Oxiclean. I also had advice on trying Windex, Dreft and Flortex Carpet Cleaner. And, if all else fails, fellow art teacher Phyl suggested applique. A girl after my own heart.


