Showing posts with label weaving lessons. Show all posts

Tuesday, January 30, 2018

How to Teach Paper Weaving!

I'll never forget my first year teaching. It was: wonderful, traumatizing, exciting, nerve-wracking and, most of all, a HUGE learning curve! I'll never forget seeing "weaving" in my first grade curriculum and breaking into a sweat. I'd gotten a C in fibers in college (which is so funny as fibers are my favorite thing!) BECAUSE OF MY WEAVING! When warping that big ole loom, I missed a couple of warps. Instead of going back and fixing my mistake, I thought, "eh, that professor will never notice." Little did I know that it'd leave a huge run all the way down the length of my weaving that seemed to scream, "THIS SLACKER DESERVES A C!" And a C I got.

I remember introducing weaving to my first graders that year and a boy named Jonathan shouted out, "Weaving's for GIRLS and I ain't doing it!" It was then that I realized I had to make weaving (and teaching in general) fun, silly, wacky and engaging. For all my learners, boys and girls. The thing is, he turned out to be my best weaving and biggest fan of the medium. As most boys do!

Introducing kids to weaving is something that I've been doing now for 18 years...and this lesson hasn't changed all that much. I read the same book, show them how to make a loom on the first day and we weave on the next. I know so many teachers struggle with weaving. The key is, introducing them to weaving with a simple paper weaving. Once they understand the concept, they'll take off like a weavin' rocket ship. 

I thought I'd record my two thirty minute classes. Here's what we did on the very first day: creating our looms!
Here are some must-have visuals that I always use: thrift store weavings and looms; my GIANT paper loom made from laminated paper; my Goat in the Rug book.
I also love having the roving for the kids to see and touch. Normally, I'll pass it around but I had forgotten to check with the nurse for allergies so I held off on this day.
This here is my FAVORITE book on weaving and the kids absolutely love it! After we create our looms, we sign them and await the following day's weaving adventure:
If you'd like more info on paper weaving, you might enjoy this video. It will explain the process more:
Here's how we went about cutting our looms and how I explained it...

I'll keep you posted on just what we are doing with our weavings...I'm really excited and cannot wait to share. I have a TON of weaving projects both on my YouTube channel (just search my Fibers playlist) and right here on my blog. Happy Weaving!
 photo signature_zpsd10b3273.png
Read more »

Monday, January 19, 2015

In the Art Room: Tree Weaving

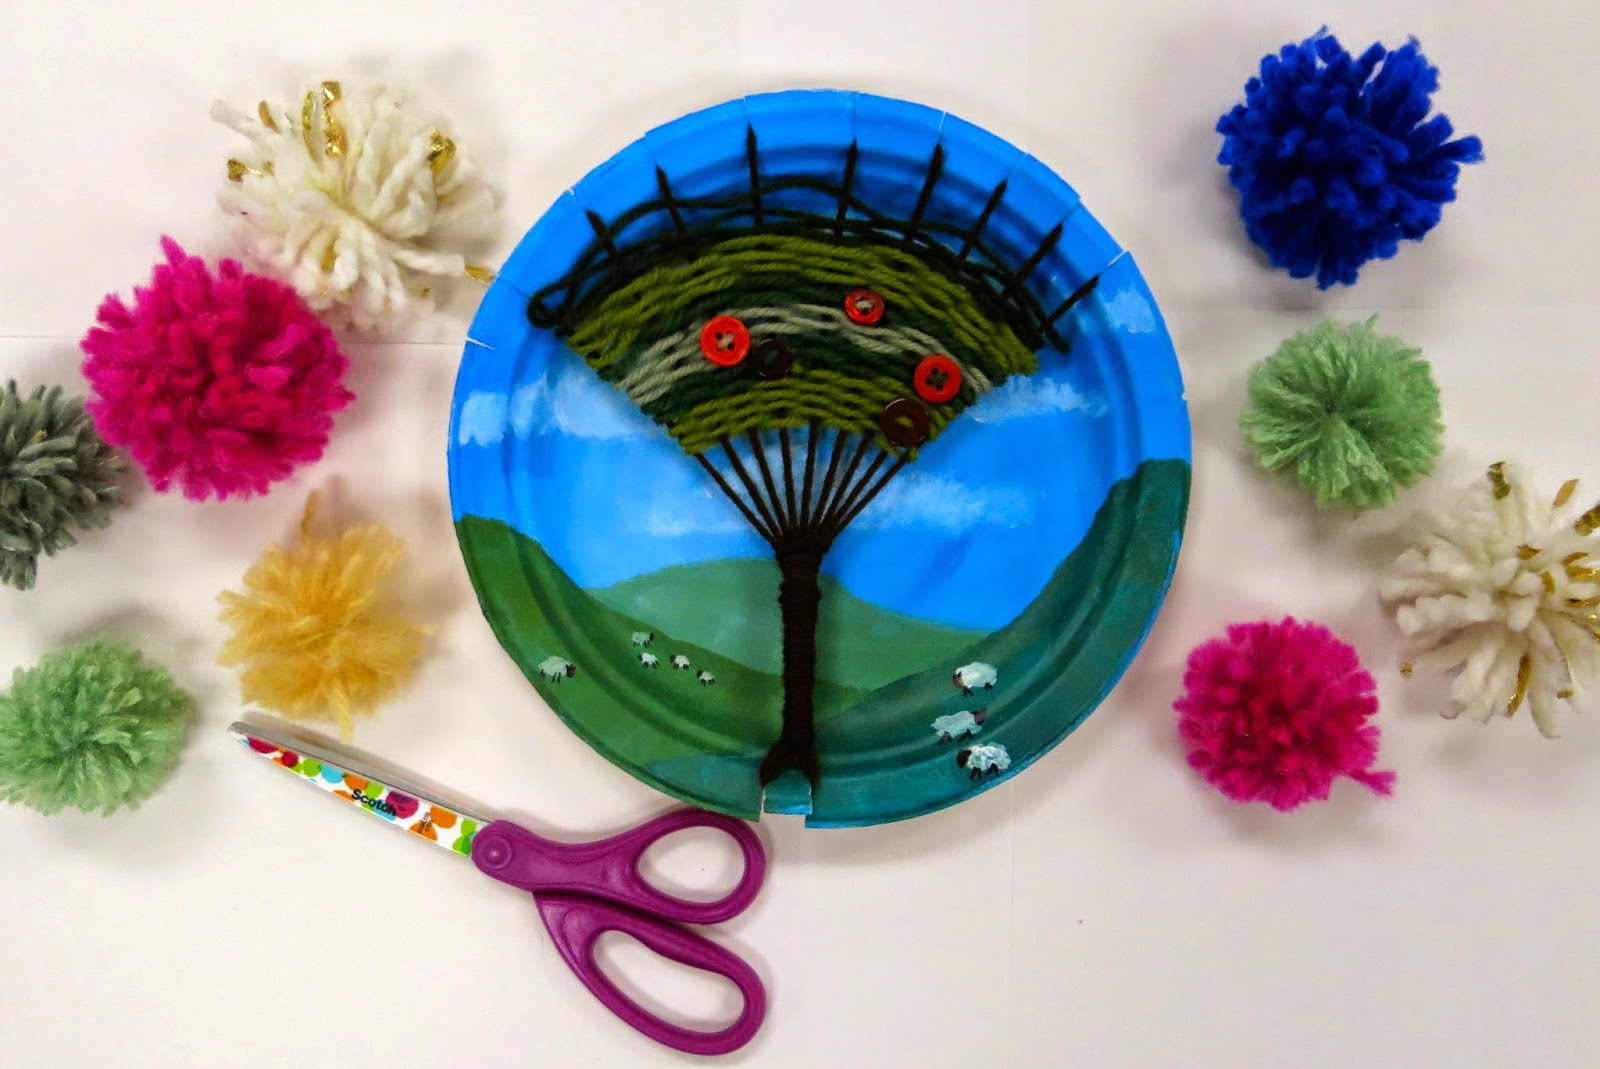
Hello there, weavers! I present to y'all today one of my fave weaving projects: Tree Weaving! If this looks familiar to you, that's cuz I shared this process with you a coupla years back and it's one of the most viewed posts on this here blog (which means, like 10 people read that post, yay!). I hope means a good amount of y'all have given it a go! 
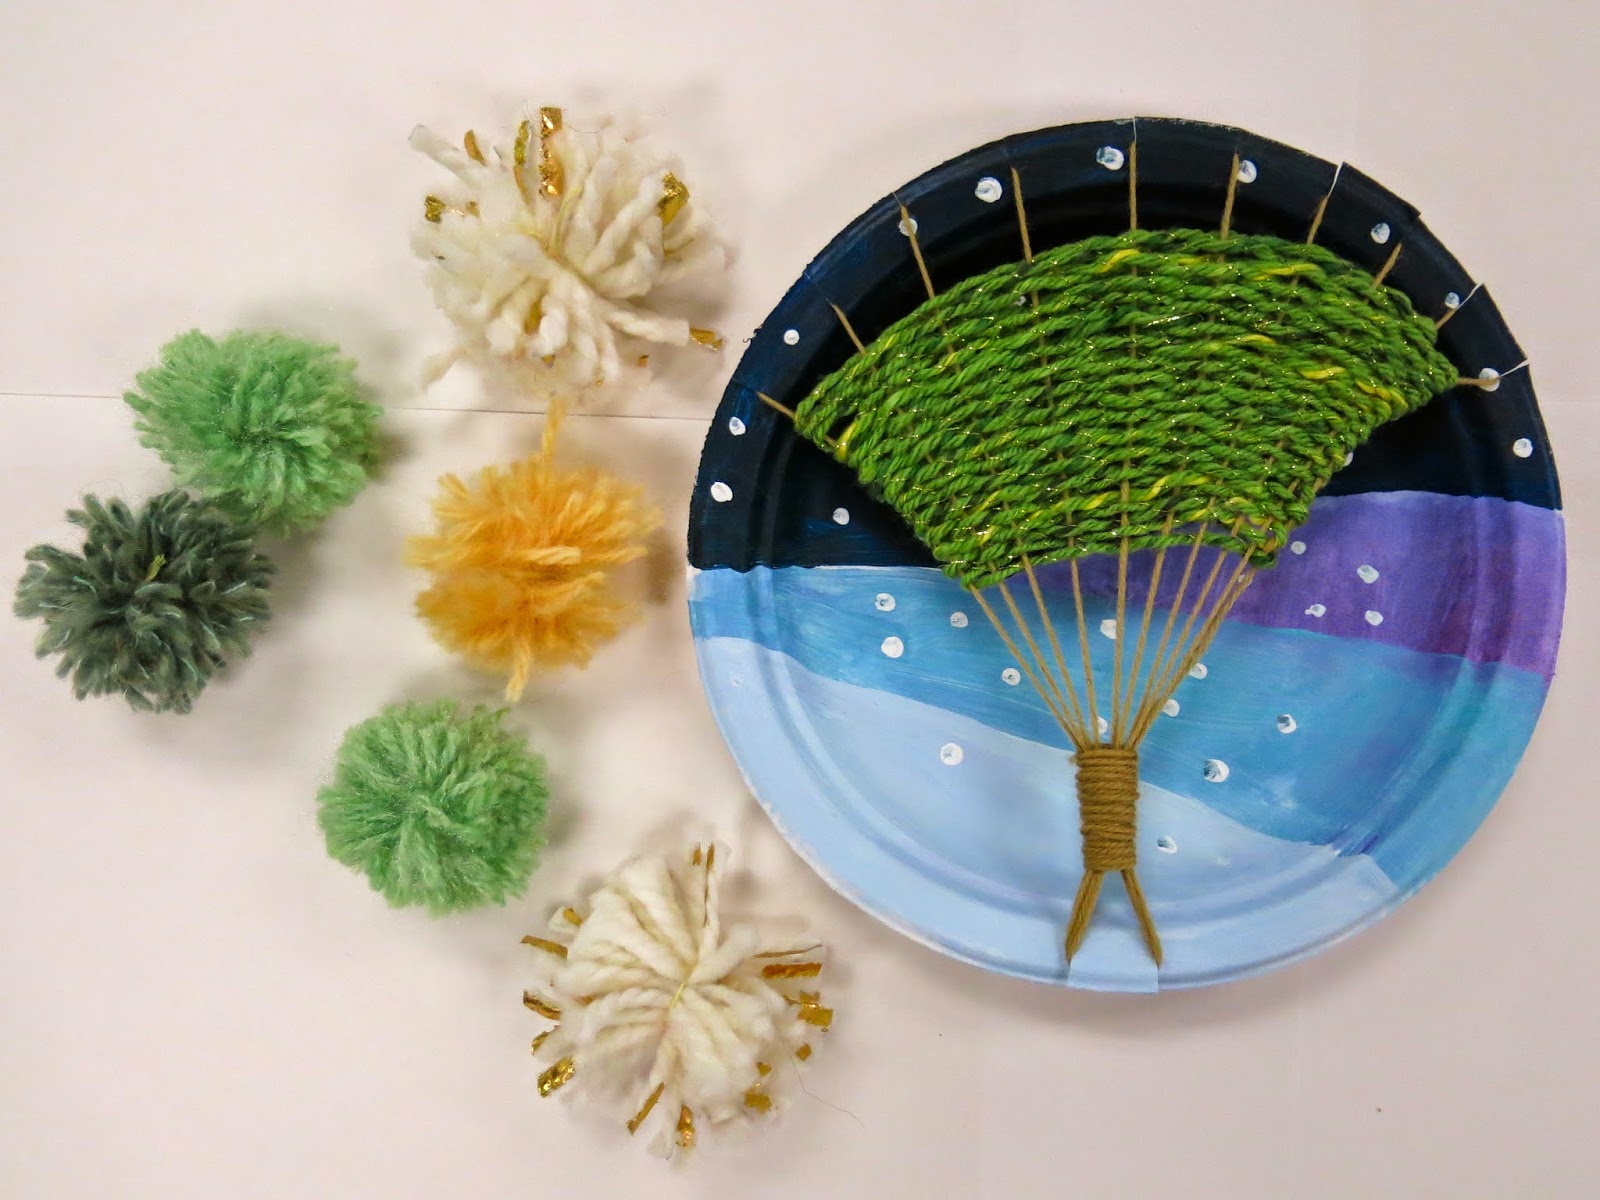
My third graders finished these lovelies off in the early fall with summer still on their mind. However, many of them opted to weave with fall colors for the leaves which turned out super cute as well. I originally stumbled upon this idea when trying to dream up a different weaving experience for this age group as I was kinda feelin like our past project of weaving on peg looms had grown kinda stale (read: I was super tired of it. I have a really hard time repeating projects. Are y'all like that? It would make my life so much easier if I did!). So, playing around one day, I created this:
Which then I got me so excited I created another one! 
So just what does one need to create a tree weaving? Lemme see, rustle up the following:

* Chinet Plates. Don't skimp, y'all. They are pricey but they are the best. The thickness of the plates is what makes them a stable weaving surface. 

* Paint. I don't think it matters what kind. The Chinet plate is so thick, you might be able to even use watercolor on it. Hmmm...

* Warping Yarn. I had a variety of browns, tans and grays on hand for the tree trunk.

* Weaving Yarn. Whatever colors your heart desires! Let's get started.

For the complete lesson of how we painted these plates, please follow this link. It's way more in-depth about that portion of this here lesson. Today, I'm just sharing clips of how to do the actual warping and weaving. 
In this clip, I'll walk you through cutting the correct amount of notches in your plate and warping your loom. If you don't like hearing the sound of my voice, go here for the visual step by steppies. 
I'll show you a coupla different methods of weaving. Start at the top or the bottom, it's up to you. Definitely give it a go first before unleashing the kids on those plates. 
My early finishers worked on their artists statements which they glued to the back of their plates. They had a choice, they could either write about the product, the process or something they learned. In a paragraph form, of course (cuz, you know, if you don't remind them of that, you'll get the word "cool" or "grate" or "ausome" on the back of the plate. Not that my students would ever do that, cough, ahem).
What I'm finding in these self-reflection/artist statement writings is that the kids often talk about how they could do better. I like that. Not that I would ever say that to a kid but I like that they are motivated to try harder. 
Need more weaving goodness? Here you go, kids!

The Weaving Series: Paper Loom Weaving (perfect for first grade)
The Weaving Series: Straw Weaving (second grade and up)
The Weaving Series: Circle Loom Weaving (second grade and up)

The Weaving Series: CD Loom Weaving (second grade and up)

The Weaving Series: Ojo de Dios (second grade and up) 

 photo signature_zpsd10b3273.png
Read more »

Friday, January 2, 2015

In the Art Room: Paper Loom Weaving

Well, hello there, buddies! I'm here today to share with y'all that I hereby declare January the WONDERFUL WORLD O' WEAVING MONTH! That's right "WWW".  Which is way better than WWF because it doesn't involve sweaty old dudes in spandex. Unless you're into that sort of thing. In which case, you might have found yourself on the wrong blog. Smell ya later.

Whew, now that my mom is gone, lemme splain to ya what the Wonderful World of Weaving Month is gonna look like on this here blog. Each week, I'm going to share with you my fave tried and true weaving lessons complete with video (including this post! Brace yourselves, people. My voice has been likened to nails on a chalkboard.) At the end of this month, I'll be sharing even more weaving goodness at The Art of Education conference on January 31st! Are y'all going? 
If you've not attended, you really outta. In my last post, I mentioned my fave things of 2014 and completely left out one of the very best things: attending and presenting at AOE twice! I do hope to see you there so you can hear me wax poetic about WWW. Unless you wanna hear someone wax poetic about WWF in which case you should call my mom. Right now she's only going by her "Wrestling Name" which is Star Blaster. Don't ask. 

Now, if you've never ever taught or attempted weaving before, have no fear. This here paper loom weaving project will lay the ground work for all other weaving projects. I do a paper loom weaving project with my first grade friends every year. However, if you are introducing weaving to kids that have never given it a go, I strongly recommend you have them do this simple project. They'll learn the vocabulary, the technique and the ability to apply what they've learned to more advanced weaving projects. So, lez get started!
To jazz up my paper weavings a bit, I'll often have the kids create some textured and painted papers. It's a fun and quick way to introduce such painting techniques as stamping (I used the back of a round clothes pin), credit card scraping (just paint a couple drops of paint at the top of the paper and pull the credit card downward), scratching into paint with a texture comb or back of a paint brush and splatter painting (everyone's favorite...except for the art teacher's.)
Once the papers are painting, some are cut by me into weaving strips (called wefts) and one is left untouched to be used for the loom. In the clip below, I'll introduce you to some of my favorite ways to share weaving with students as well as show you how I go about having the kids create a paper loom.
With the introduction to weaving and loom creating, this generally takes about 30 minutes. That's one art class for me. Oh! In this clip, I mention what my art room set up is like. You can read all about that here
If you are a step-by-step photo person, like me, here you go. I have the kids gather with their paper and a pair of scissors. We begin by folding our papers in half from the bottom to the top.
With the folded edge at the bottom and the open at the top, peel back the first layer of paper at the top. Fold it down just a pinch, about the length of your finger tip. No need to fold down both pieces of paper. It should look like the lip of an envelope. 
Next up, unfold that part and run your finger back and forth over the crease. At this point, I have the kids do the same and repeat after me: "This is the STOP! line. When my scissors are a-cutting they will STOP! at this line".
At this point, I tell the kids that I want to cut my paper almost in half. How will I know when to stop cutting so that I don't cut it completely in half? That's right, the STOP! line. Start by cutting at the bottom in the middle and, well, you know where to stop. I then hold this up and tell the kids, "hey, look, we made Sponge Bob's pants!"
Next up, cut the paper into fourths. If you are curious how I go about having 20 plus kids all cut these looms together, watch that clip. It's tres simple, y'all.
 Boom! Now I've made pants for my cat. 
 Each one of those four sections is then cut in half creating eight equal sections. Lika dis. It should closely resemble a hola skirt.
Carefully unfold your paper and, viola! You've got yourself a loom. Let's weave something, shall we?
In this much shorter clip, I'll show you how I go about teachin' that.
Using a giant paper loom really helps. Unless you have a document cam then I suppose that'd work great too. Once I feel the kids have it, we weave together whilst sitting on the floor. 
My first grade kids all know what an A-B pattern is and looks like. So explaining it to them in their terms really helps.
When I'm teaching weaving, I do whole lotta non-exampling. I'll weaving incorrectly, for example, by having the second weft do the same as the first, and show them why this is incorrect (the wefts will simply slide down behind the others). By showing the kids a non-example and explaining to them why it's incorrect, they'll more than likely understand the process even better. 
And end up with a super lovely weaving! Now, I'm not gonna like about a half the kids are gonna knock this outta the park and be finished in a blink. Meanwhile, the other kids are gonna get stuck. So we do a lotta peer tutoring in weaving which looks a lil like this...
So, what can you do with paper weaving when they are finished? Well...
 My first graders have used them for the basis of a crocodile puppet and a Starry Night-inspired collage


As well as these fish collages! My first graders used a small paper weaving as the basis for their self-portraits as royalty.  


And there you have it! I hope you are excited about the Wonderful World of Weaving as much as I am. And keep on coming back to here, y'all, as I've got plenty more weaving projects and videos to share with you in the weeks to come. 

Until then, I'd super duper love to hear what your fave PAPER weaving projects are! Let's inspire each other in the comments below. And if you've got a blog post on weaving that you'd like sot share, pretty please do. Thanks, guys!

 photo signature_zpsd10b3273.png
Read more »

Wednesday, April 24, 2013

In the Art Room: Tree Weaving with Third Grade

Every year I do a weaving project with my students, kindergarten to fourth grade. And when asked at the end of the year what their fave art project in the universe is, weaving always ties first place with clay. 
And who can blame them? Digging ones hands deep into clay or entangled in a bundle of yarn is just about the best feeling ever, says the art teacher. However, I've grown a little tired of the usual weaving project my third grade students create. So when I saw these amazing tree weavings on pinterest, I was inspired to have my students create one of their own.

Stunning, right? And if you know Russian (at least that's what I think it is) then you'll totally understand the directions. I'd click the "translate" button but I guess you gotta know the Russian word for that to make it happen. All kidding aside, the website does an excellent job of demonstrating the process. For headache-free purposes, I decided to forgo the bent twig option and have the students craft their loom from a Chinet plate.
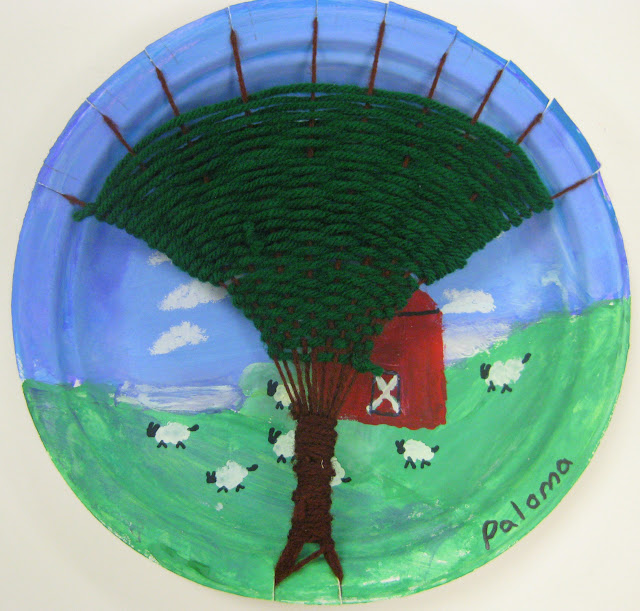
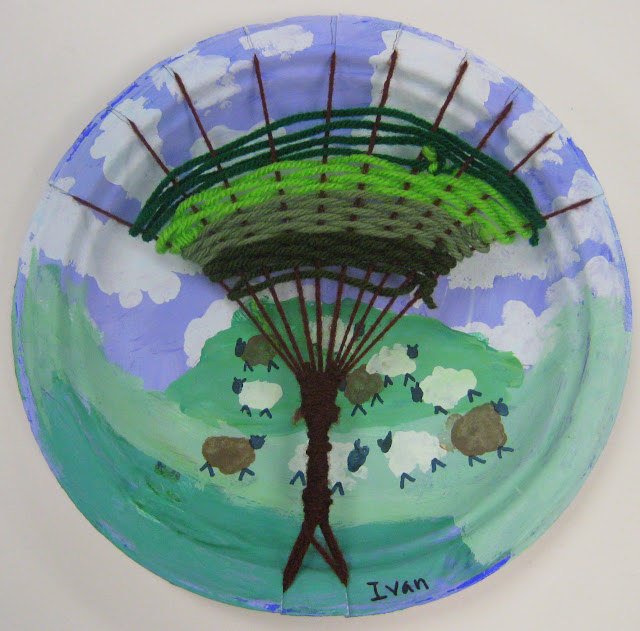
This weaving lesson was also apart of our study of the United Kingdom. We studied many landscape photographs and paintings of the countryside of such places as Northern Ireland and Scotland. Our first day was spent painting a sky on our plate. If you recall, these kids have plenty of experience with sky painting as they are the ones who created these German Gnome Landscapes. The following art class, we chatted about how to create a fore-, middle- and background in our landscapes.
 Students were encouraged to mix three different values of green to create a sense of depth. From there, they were given the option to enhance their landscape with what they'd imagine a countryside in the United Kingdom to look like. As you can see, we were feeling mighty sheepish.
Once our landscapes were complete, we were ready to begin the process of creating and warping our loom.
 By placing a Tree Weaving Template over their plate, students could draw the correct number of notches on the top (10) and the bottom (2). These notches were cut to the inner edge of the plate.
With notches cut, the students met me on the floor with their plates and about a yard and 1/2 of pre-cut yarn. Our first step was to wedge the yarn into the bottom left hand notch as seen above.
With the long end of the yarn, we put the yarn into the far left top notch, out the notch beside it, into the bottom left, out the bottom right and back up to the top. This process was repeated until all top notches were filled in. We ended by going in the bottom left notch, coming out the right. At this point, we were ready to create our tree trunk.
Which is super easy. With the end of the yarn, begin wrapping it around the yarn at the bottom, tugging gently as you go. If you run out of yarn, simply double knot a new piece to the old. Once your trunk is tall enough, tie it off to a tree branch.
Some bare trees ready for weaving.
To begin, we double knot tied our chosen color to one of the tree branches on the end. From there, we began the process of weaving over and under. One thing the students struggled with was weaving loose enough. You see, they wanted to pull tightly which caused the weaving to slide down the branches and pull the warping threads inward. However, once they got the hang of it, it was smooth sailing.
 When we first began this lesson, we chatted about wool and where it came from. I passed around some natural wool roving, some cream colored some brown. We chatted about how different colors of wool come from different color sheep. I guess that inspired the sheep in this landscape.
New colors were added with a double knot tie. Weavings were ended with a double knot tie off as well.
So that we could hang these for our upcoming art show, students tied a piece of yarn to the backside of the plates.
And that's it. Honestly, the warping/weaving portion took no time at all. And I foresee so many variations of this project in the future: a woven peacock, a turkey...okay, that's all I've come up with. But I'm sure to think of some more (your input would be greatly appreciated and promptly stolen as an idea of my own!). 

I do hope my explanations helped and that you're encouraged to try this lesson with your students. If you're still not gettin' it, just translate it into Russian and it'll all become crystal clear. And if you'd like some more weaving projects, you can check here. Chat with you soon!

Read more »