I'd like to take you on a trip back in my Art Teacher-in' History, if I might. It all began some 15 plus years ago when I'd just returned from attempting to teach art to some seriously cheeky Irish kids ("Miss, have you ever been in a drive-by?"; "Miss, do you think your president really messed around with that Monica lady?"; "Miss, Americans think we are all leprechauns, don't they?!"). Upon my return from student teaching in Ireland, I found that my pops, in great fear that I'd never actually land an art teacherin' gig, had sent out some 50 odd job applications to all over the country (Alaska, dad? Really? {not that there's anything wrong with that, Alaskan friends, it's just that temps below 30 are my kryptonite}). One of those places just so happened to be Nashville, Tennessee. On a whim, my Grandma Rosie (who passed this spring) and I decided to drive the 6 hours from Indiana, go on a coupla interviews (sans grannie, of course) and take in the sites. Little did I know, I'd end up loving the town, meeting my husband and callin' this lil place home.
OH! Funny side story about that road trip with Grandma Rosie: the night before one job interview we treated ourselves to the delectable delight that is Cracker Barrel. If you aren't familiar with these restaurants (which are based outta Tennessee, yahoo!), they pride themselves on some seriously high- fat/heart-attack all-American fare. At the entrance of these restaurants, they sell a ton of Americana chachkies (all made in China, of course) in hopes that you'll spend even more dough whilst paying your dinner bill. After exploring the shop a bit, G-ma was ready to roll. And just as we were pulling onto the highway, G-ma gave a frightened gasp, held up the dinner tab that she'd had in her hand and said:
"Cassandra Lane [you know it's bad when your first and middle name are used]! We forgot to pay the bill!"
 |
| This is fabric too! I know, right?! Go here. |
Despite my dining-n-dashing ways, I managed to land my first art teaching gig. With only a coupla days before school began, I found myself living in an unfurnished apartment just a mile from my school. I didn't know a soul, the other teachers weren't especially friendly and my art room was a portable beside the school that had been left in shambles by the previous occupant. In the tiny closet of the room I found a bucket of crayons, some paper and lots of trash. I started to Freak The Funk Out. Where are my art supplies? What am I going to teach with?!
I approached my principal with my bucket of broken crayons. He was chatting with one of those not-especially-friendly teachers. They turned to look at me and, in my school-starts-tomorrow panic, all I could manage was:
"The only thing I have to teach art with is this bucket of crayons!"
To which the N.E.F. teacher said:
"Well, some teachers have nothing."
Which is true. And I mightah actually taken her more seriously had her arms not been loaded down with brand new boxes of Crayola makers and bottles of Elmer's Glue. All of which I gawked at shamelessly. My principal took pity on me and gave me a meager budget to get me through that first year.
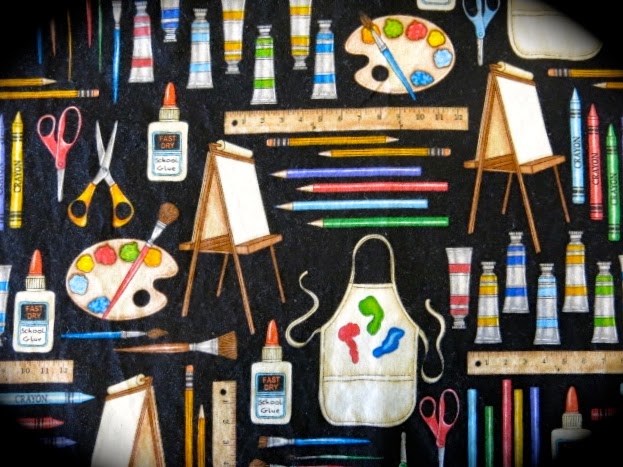
Several years later, I got a gig at a new school with an improved budget (it's not glamorous at 3-ish bucks a kid but I'm never without). At first I was thrilled to spend the money as this is a girl that loves to shop. However, with the high cost of supplies and the endless choices, it's actually one of my least fave things to do. I'm guessing it might be yours as well. For that reason, I thought I'd share a little of what my annual supply order entails.
In this post, I'll be sharing with you what my 2-D order looks like. I'd LOVE it if you'd share what you order instead or perhaps some things that I've left off my list. If I get enough feedback, I'll create a follow-up post about 2-D supplies. AND I'll also be sharing some of my fave 3-D supplies in an upcoming post. In the meantime, let's go shopping!
 |
| FABRIC! If you didn't wanna join the Sew-Along before, I betcha do now! I'll keep you posted, promise. |
Let's first chat about art supply catalogs, shall we? I mean, if you're an art teacher, you prolly have a million. I've ordered from just about all of them and I've yet to have a bad experience with any. Please check your catalog for rates and sales (oftentimes, shipping is free if you enter a code!). Here are some that I've shopped in the past:
 |
Paint: I teach elementary aged kids but that doesn't mean I want that crap watery paint that doesn't mix. I've tried my share of the budget-friendly stuff and, lemme tell you, it's not so friendly when it won't mix or the paint dries and flakes off the kids' artwork. After trying many, I've settled on Crayola's Washable Paint. They are close to $20 a gallon so I don't buy every color. Here's what I usually order for a year of art with about 400 plus kids:
* 2 Gallons of Black, White and Yellow (not in love with the yellow as it's not the most opaque of paints...still looking for an alternative brand of yellow)
* 1 Gallon of Blue, Red, Brown, Magenta and Turquoise (not pictured but they do sell them) |
 |
| Watercolor Paint: Okay, I used to HATE teaching watercolor until I was introduced to these Crayola Color Mixing Sets (I promise that Crayola is not endorsing this post, their stuff is just pretty stinking good). Now, IF YOU ALREADY HAVE WATERCOLOR SETS, don't buy these, buy the refills. The earth doesn't need more plastic waste and you don't need the white watercolor paint that comes in this set. So! When I am ordering paint pan refills, I order the following colors (the "mixing colors" have an * next to them): Red, Red-Orange*, Orange, Yellow, Green, Turquoise*, Blue, Blue-Violet*, Red-Violet* |

Tempera Cakes: I don't think tempera cakes are necessary and I went years without them. However, now that I've got 'em I do love using them with my kindergarten friends. I like the Alpha color Biggie Cakes but the plastic holder the cakes come in pretty much blows. It's the cheapest plastic around and the bottom of the holder will break and leak water paint everywhere within a year. Despite that, I'll keep ordering the individual cakes and you can see my solution to leaky paint pans here.
 |
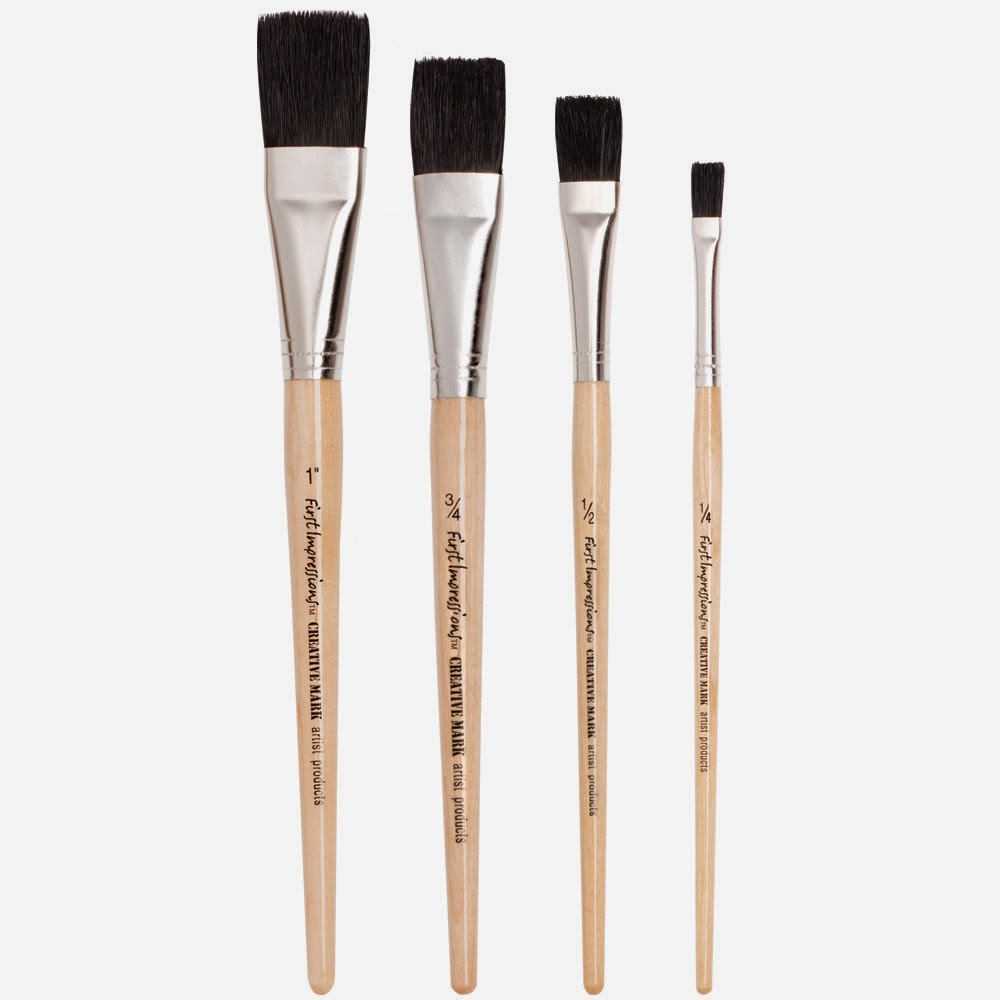
| Paint Brushes: Royal Langnickel, y'all. This is the set I buy every couple of years and I love them. They work great for glaze, watercolor, those tempera cakes, you name it. |
 |
| Bristle Brushes: For these, I admit, I'm not too picky. We don't use them as often as the Royal Langnickel rounds so they last longer. I usually order the generic version of these...however, if you go too cheap, you'll get the ones where the bristles are constantly falling out. And if it's one thing the kids don't like, it's hairy artwork. |
 |
Construction Paper: For construction paper, the only way to go is Tru-Ray, I think. I hate that fade-y thin stuff. I usually order the 12" X 18" and cut it down to whatever size I need. I usually order about 5 packs of black (they come in packs of 50 sheets) for framing and for the rest, I usually get a rainbow of variety.
Paper: For multi-purpose paper, I order about 4 reams of 80 lbs drawing paper, 12" X 18". I like the heavier paper because I can then use it for drawing, painting, collage, etc. I don't order watercolor paper or thin drawing paper. |
 |
| Tissue Paper: Fun but not necessary. I do like to order the kind that bleeds so we can do projects like this. |
Pencils: When I first started teaching, I thought they were all alike. Not so, these are the best as they don't break so easily. I like to use the Biggie ones but I try to have both sizes for the kids.
Erasers: Gah, what a headache. Why do we have to stab them? I mean, what's that poor eraser ever done to you? I usually invest in the white erasers as they work the very best. I try to encourage the kids to leave the clothes on the eraser (eraser condom?) to help keep it clean. For my 4th graders, I like to let them use kneaded erasers and charcoal sticks. They think these are the very best things ever but you have to be careful, they might walk outta your room. Oh, this reminds me! In Ireland, the kids called 'em rubbers which always threw me, having a kid shout, "Hey, Miss, pass me a rubber!"
 |
| Colored Pencils: Ticondergoa used to make colored pencils and they were the jam, y'all! Since they've stopped I've been on the hunt for the very best. I needed some new ones this year so I decided to give these a go. I'll have to share a review with you when I get them. My biggest issue with colored pencils is that they 1. Are Crap and 2. Break So Easily! I'm hoping this at least solve #2. |
 |
| Art Sticks: Now I've ordered these guys in the past and while the color is great the kids' biggest complaint is that they never have a sharp edge. Meaning that if a kid wants to color in a detailed area, these aren't the best tool. That's why I'm hoping those woodless colored pencils fill the gap. |
Oil Pastels: An art room staple, y'all. I usually order that box of Cray-pas on the left. This year I was really only in need of yellow, white and black so I simply ordered refills. If you wanna get fancy, I love those Crayola Portfolio oil pastels. They're so great because they are water soluble and fun to work with. I also love the variety of colors that the Cray-pas seem to lack.
 |
| Sharpies: Okay, I've never ordered these "Brush" Sharpies and I don't plan to with my little ones. However, I've used them and they are fantastic! If you have older kids, I'd recommend them. I do order a ton of the standard Sharpies in a wide variety of colors as they are great. |
 |
| Sharpie Ultra Fine: There are two kind of fine tipped Sharpie makers and the one above is my fave. The other fine tip seems to run out ink faster. While the tip of these sometimes splits, I do find that they last a bit longer. I also invest in the larger tipped black Sharpies. |
 |
Oh, Markers: I really don't have a strong love for using markers in the art room. For me, they are like crayons: the kids can use them any time. I get it, I should teach "proper crayon/marker use" but whatever, they're boring. I do like to use them for other things like coloring on coffee filters and painting them with water or for printmaking. For that reason, I invest in one of these every other year. Crayola is okay when it comes to makers (they do seem to run out fast, if you ask me) but they are better than Mr. Sketch. Don't get me wrong, I love the vibrancy of Mr. Sketch but the constant marker huffing wears me out. Not to mention when the principal walks in and the kids say, "You should SMELL these!" it never sounds good.
By the way, if I were to order crayons (which I don't, I get those donated from classroom teachers constantly), I'd go with Crayola. |


Scissors and Glue: I used to be a Fiskars Girl, all the way. But, sadly, their quality has gone downhill fast. My last couple of orders the scissor handle would overlap causing me to pinch my hand. This year I'm going to give Westcott a go. I'll let you know how that goes. With glue, I use Elmer's School Glue. I hate glue bottles so I don't use them at all. Instead I keep the glue in small lidded cups and the kids apply it with an old paint brush. This has worked for me for years and has prevented that new-scissors-jammed-into-the-glue-tip phenomenon that we all know so well.
And there you have it! Okay, what'd I forget?! And what would YOU recommend?