A while back, when my second grade was working on the Ojo de Dios, our lil table top trash cans were becoming filled to the brim with yarn scraps. When I asked a student to empty the trash cans and throw away the yarn, the kid paused, looked at me and said, "What?! Throw all of this pretty yarn away? BUT WE NEVER THROW ANYTHING AWAY IN HERE." Okay. So I may or may not have created mini-hoardering monsters. They learn from the best, what I can I say?
After the kids planted the seed of creating with our scrap yarn, I began to give it some thought. It was then that I thought a lil foil relief project might be just the thing. This project was quick, easy, environmentally friendly and tied in with our year long study of Mexico.
Here are the supplies we used: * Matte board cut into 6" X 6" squares * Scrap yarn * Cheapo foil * Spray adhesive. I like 3M the best. * Super cheapo black matte spray paint. I buy the $1 a can junk. * 000 steel wool * Sharpies * Tempra paint * Matte board for the frame 8" X 8" To start this lesson off, we read The Legend of the Poinsettia by Tomie de Paola. We did start this project before the holidays so it was a great tie-in. Each student was given a 6" X 6" piece of matte board that had been sprayed with a light shower of spray adhesive. At their seat, the students were to create a miniature still life of a poinsettia. Once finished, they brought the board to me where I hit it with another shower of adhesive and placed a piece of foil on top. At their seats, the students used their finger tips to "massage" the foil and reveal their yarn design. The following art class, I had spray painted their design and passed it back to them. It looked a lil like this:
Using the finest of steel wool, the kids took to burnishing off the spray paint and revealing their design.
This was then given a wipe down with a tissue to remove any spray paint dust. From there, the kids used Sharpies to add some color to their masterpiece.
Most of them chose to color on the raised areas which was fine with me. Some decided to color the entire piece which was cool...but did not make for a happy Sharpie.
I love the tulip look of the flowers in this pot.
In the story, the young girl is helping her mother weave a new blanket. We looked carefully at some examples of Mexican blankets that I brought in and then began the second phase of our project. On our first day, we simply painted a variety of thick and thin lines in different values of color on our 8" X 8" board.
The following art class, the kids learned how to create different patterns in their painting by printing with cardboard. They loved experimenting with different designs. I loved these so much I was kinda sad to see 'em covered by their metal pieces!
This project was so easy and fun and I totes loved the results. I keep thinking of other ideas for this kind of project. Like if the kids learn about Picasso, they can create a yarn-y abstract portrait. Or maybe a cool landscape that is continued onto the frame of the piece. So many ideas! Do you have any that spring to mind?
Our next unit of study is circle loom weaving which you know I love. The kids have already started to paint their plates which have a similar design as these painted frames. This also proved to be great because we gained some experience in color mixing and pattern making before diving into our plate painting for the circle loom weaving project.
Whatcha think, would you give this a go?
I promise your students would love it! AND moral of this story: Not throwing anything away, even bits of scrap yarn, can yield some pretty fantastical results. Until next time, y'all!
Okay, I know what you're thinking: Holy crap, Stephens, Dot Day ended, like, a month ago! Y'all. I know. But I never did tell ya the whys and hows and who's-its of these here Reversible Dot Paintings. So don't gimme none of that "holy crap" biznatch, ya hear?
Way back when I started dreaming up ideas for Dot Day, I knew I wanted to use some cardboard pizza rounds. I dunno why. You know how it is when you get an idea stuck in your head for no reasonable reason and you just can't get rid of it. Kinda like herpes. Well that was me with this cardboard pizza round thing. So I ordered a hundred of 'em from School Specialty and got the notion that we'd make some reversible abstract paintings out of 'em.
What gave me that thought was the movie Six Degrees of Separation (if you've heard me tell this tale before, sorry for the repeat. I'm a repeat-asaurus, it's what I do). I knew I wanted the kids to learn about Kandinsky because he's got a big fat showing at our local art museum. And then I recalled this movie clip and was all: YES! REVERSIBLE KANDINSKY PAINTINGS. I'M. A. GENIUS. That is until I found out that Kandinsky never actually did paint any reversible painting. Which could only lead me to one conclusion: The Prince of Bel Air is a LIAR (okay, so it was Donald Sutherland in the clip, whateves).
I still thought the idea was a good one and a fun way to start the school year so I went with it any ole way. Whatcha see above is one child's reversible painting. I love how different one side is from the other. Lemme tell you how we did it. It all started on the first day of school...
Yeah, I know. You've prolly seen this thing too. Told ya I'm a repeat-asaurus. Just ask my students.
On our first days of art class, after our chats about Kandinsky and his painting to music, we tackled our own abstract paintings. We listened to music and musical instruments to inspire a variety of lines. Our first Word of the Week was "artist" which we all decided we most definitely are.
The following classes were spent painting and our word of the week was "unique". I really wanted to emphasize that our paintings are all going to be different, no one better than the other. We also talked about how color could evoke mood and that was the focus behind our color choices. This wasn't a color mixing lesson, per se (gah, I've always wanted to say "per se" on this blog. Today's my lucky day, I dare per se!). If the kids created new colors, HURRAY!, we celebrated that. But our focus was on using colors to show emotion.
And by the looks of things we were all pretty happy. By the way, the paint we were using was whatever-was-left-over-from-last-school-year. My art supply order hadn't arrived yet (because, um, I forgot to place it. Der.) so we may have been scraping the bottom of some bottles. I do have to tell you that upon YOUR recommendations, I ordered VersaTemp from Sax and, y'all. I LOVE IT. Best paint I've used with the kids yet. I can't wait for you to see their new paintings! But, um, back to this.
I think a kid's personality really shines in an abstract painting. This dude is very meticulous, organized and precise.
And this little girl is very free and comfortable with her sense of expression. She's already decided she's an artist now and when she grows up (gotta love that!).
I see a landscape painter every time I look at this painting.
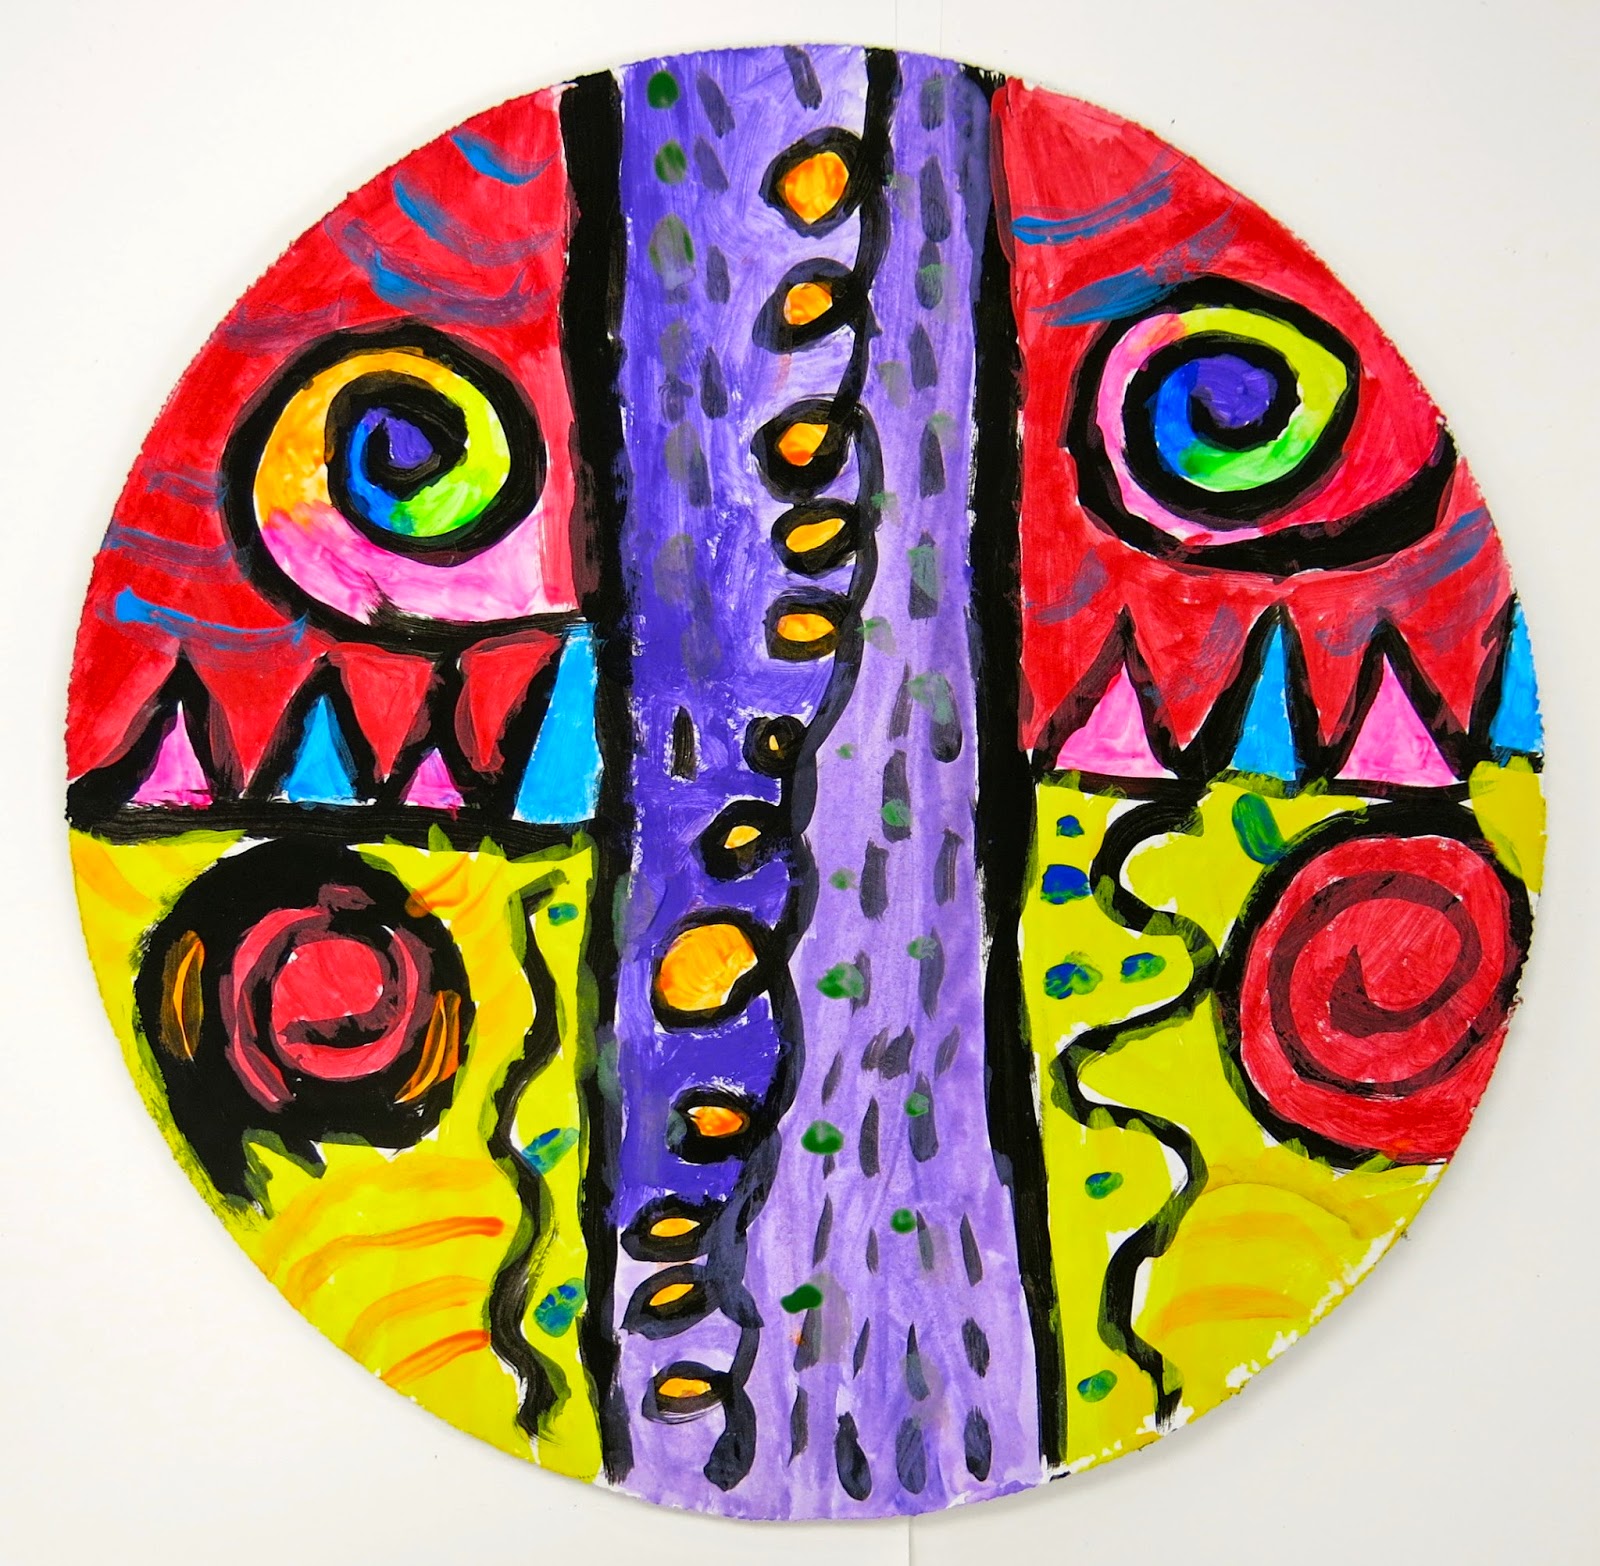
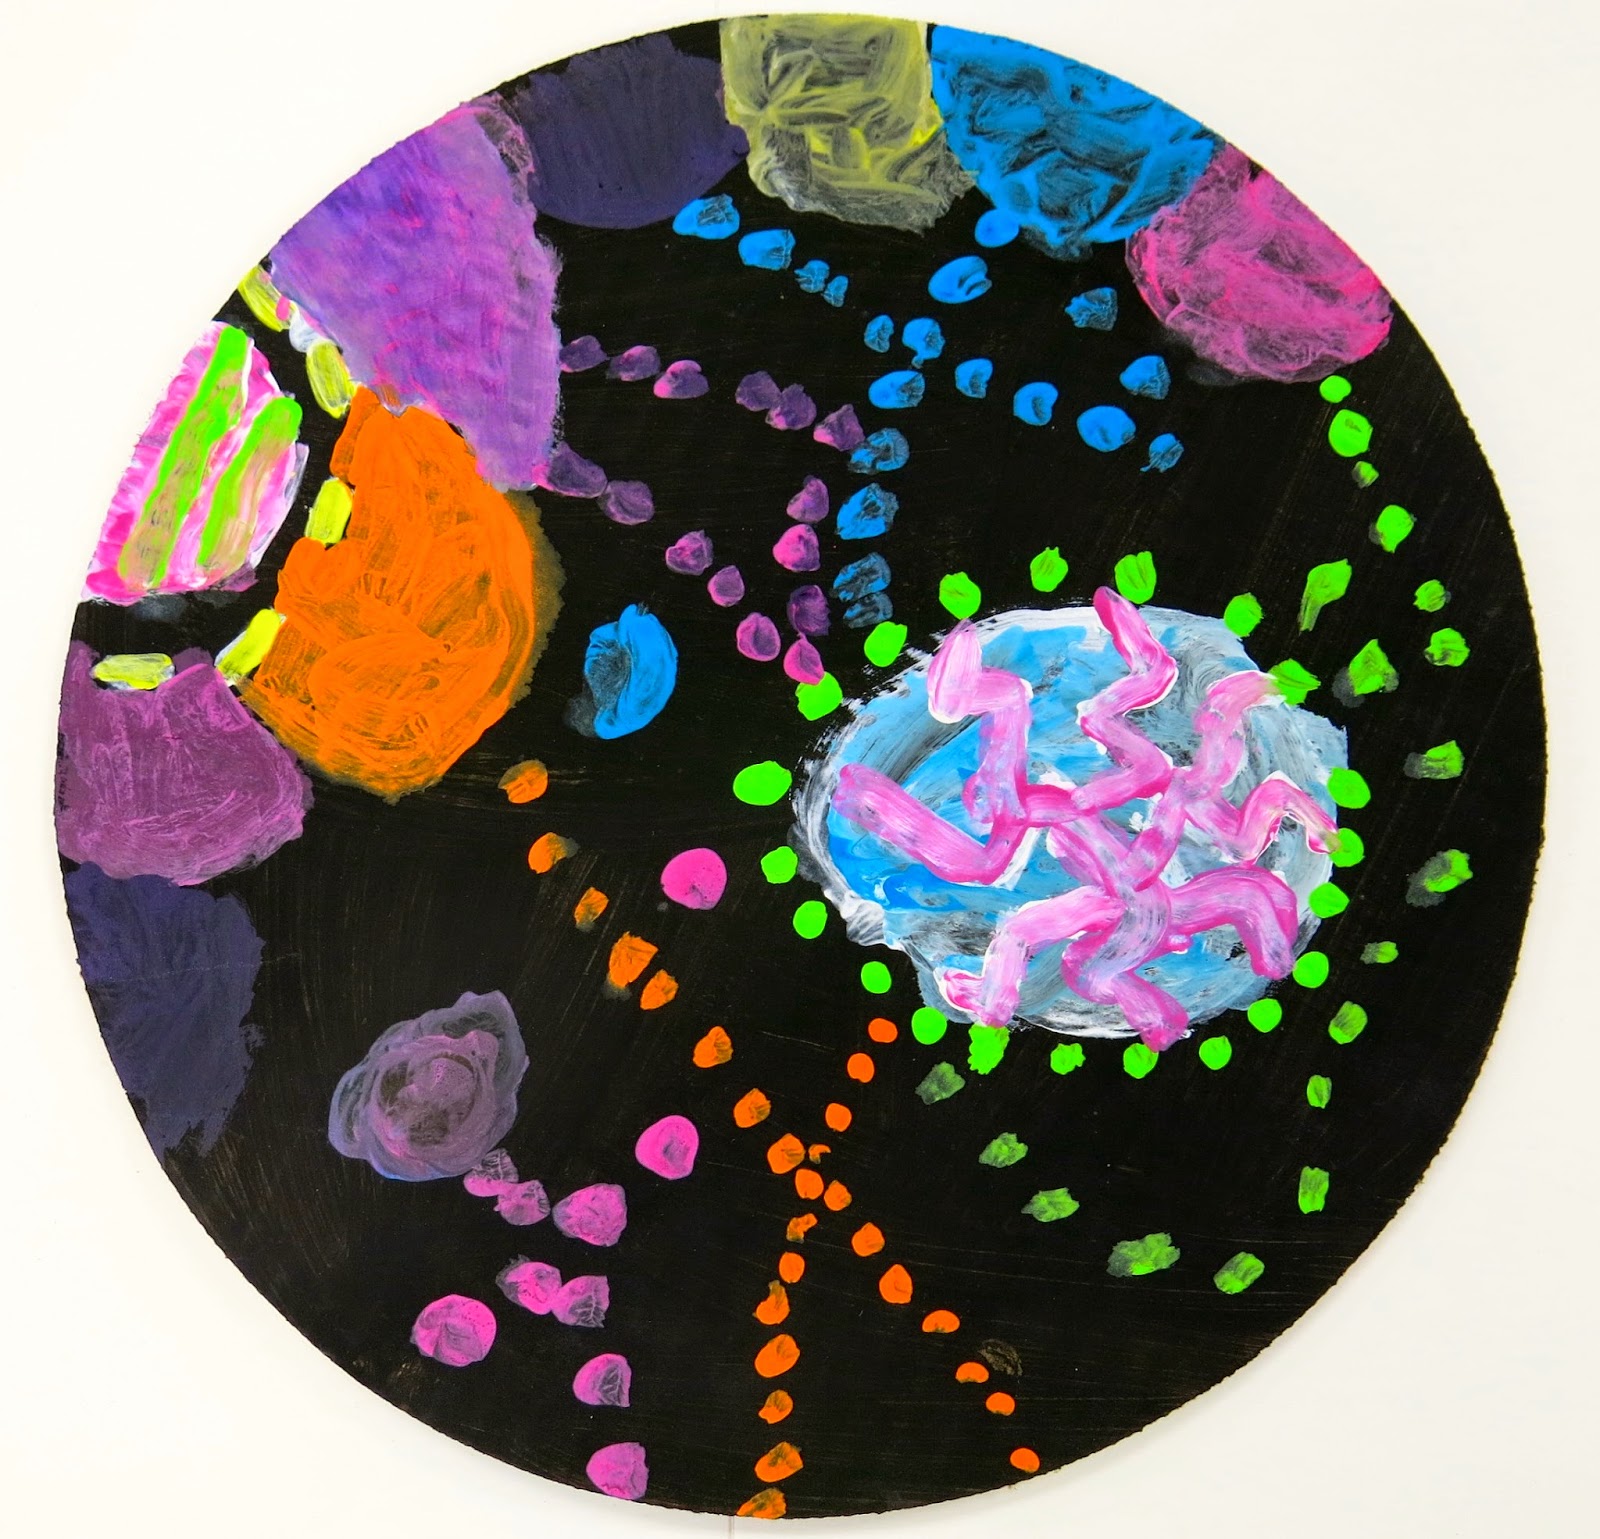
Because I thought the boards should be the opposite on the back, I did go ahead and paint them all black. Which really didn't take as long as it sounds...but I didn't want the kids to use one of their precious art classes painting something black. We looked at a couple of Kandinsky's circle paintings and I gave the kids a "creative challenge" ("creative" being our Word of the Week): Create a painting using only circles.
Because the surface was black, the kids did have to paint the circles white first and then add color. Which was great because then we could learn all about tints and value.
I see a budding Edvard Munch, don't you?
So clever, I love it!
The week of Dot Day, our word was "inspire". This was because our beautiful reversible paintings were to inspire the school just as Peter H. Reynolds had inspired our dot theme. To hang, I simply punched a super small hole in the top and bottom of each painting and paper clipped them together.
And the serve as this super colorful reminder of the unique and creative artists that made them. They're so happy, I think I'll leave 'em up for a while. By the way, I now have a thing for cardboard pizza rounds. I gotta know, what have y'all ever used 'em for? Until next time!