Showing posts with label international dot day. Show all posts

Sunday, August 17, 2025

15 of My Favorite Lessons for Dot Day!

If you are like me, then you often struggle with those initial first couple of art lessons. I find a theme always helps me get the wheels turning. And The Dot, a wonderful picture book by Peter H. Reynolds, is always a great place to start. 
I've used this book so many times in my art room that I actually had to buy a second copy as I wore the first one out! I read it ever year to all grades on one of those very first days of art. Speaking of, I shared a little of my first day in a blog post a while back...and realized I had not done a follow up post! I'll be working on that this week. 

For now, I thought I'd share my very favorite Dot Day lessons...all 15 of em! Many of these have videos that you are welcome to use in your art room as well as free downloads. As I share, I'll let you know the level of difficulty and time each of these requires. Okay, let's dive in!
Let's Create Round Things!

Let's kick things off with an EASY one (and a lesson that comes with a free drawing sheet and video!) For this one, you'll probably want to purchase the Prang Mixed Media Circles so that you aren't left cutting tons of circles yourself.

After reading The Dot, have students brainstorm and draw as many 'things that are round' that they can think of. Try sliding this free download into a sheet protector so students can draw on it with a dry erase...and save some paper!
Dots on a Dot!

Here's a fun and easy one that can also be done on the round paper: Dots on a Dot! I love to have a stash of colorful dot sticks in my art room because they come in so stinkin' handy this time of year! For my kindergarters, we usually just use one dot in the middle and paint around it with watercolor or tempera cakes. For my older students, I like to allow them to place a couple of dots and paint. They always look so colorful and fun! Lesson plan here!
Kindergarten Dots!

Here's the second lesson I do every year with kindergarten. You can see the little dot right in the middle. I have a video of myself teaching this lesson, including introducing painting to my youngest artists, here!
Dot Day School-Wide Collaborative!

If you have ALL of your students do that same kindergarten lesson, once the painting is dry, try having students cut it into fourths and piece it back together on a sheet of construction paper. THEN...put 'em all together! It truly looks amazing. You can see the lesson details and a look at the collaboration of my entire school here. 
Dot Day Stations!

Probably my all-time fave dot day lesson was this one where my students got to explore a variety of media from walk to marker prints to tempera paint and even spin art! While it was mighty messy with a lot of clean up, it was a blast! You can check out all the details here. 
To make things a little easier, I created short videos to show my students how to create at each station. If you'd like to use those videos or check them out, visit here! 

Printed Dots!

If you need a fast and fun activity, this is it! All you need are pizza pans from The Dollar Tree and some tempera paint. Allow the kids to paint on the pan and then pull a print by pressing paper onto the wet surface. You can find a videos and lesson details here. 
Paper Sculpture Dots!

I took my FAVORITE kindergarten lesson and just made the paper round...and viola! We had ourselves some dots! These are so fun springing from the hallway walls. You can find the lesson for this here. 
Cardboard Painted Dots!

A lesson that I LOVED and did over and again for years was this first grade painted dot lesson. We used cardboard pizza rounds (I found mine at Gordon Food Services) and tempera paint. We began the lesson with the black lines created with either bingo daubers or a paintbrush and India ink. Complete lesson here!
I loved hanging these with paper clips in the ceiling...they always lasted until the Fire Marshall came to visit. 
Coffee Filter Dots!

Of course, making a coffee filter dot is the good ole standby that never fails to look beautiful! However...I do have a word of advice: ALWAYS add the water and allow these to dry on Styrofoam plates. This way, they will retain the color...otherwise, the color will leave the circle and stain the surface below. Details here!

Also! Did you know you can buy those GIANT coffee filters? They are HUGE and would make epically fun dots!
Dot Day Sub Plans!

Need some sub plans OR...just need something simple because you are covering rules and routines with no time for the messy stuff just yet? Try this FREE download! 
Dot Day Weaving!

Feeling adventurous?! Why not try some circle loom weaving for Dot Day? It's actually the painting portion that you could stop at and skip the weaving...these painted plates always look so fabulous and the kids love making them. We use Chinet plates and tempera paint for the best results. You'll be amazed how pretty these turn out! Check the lesson here. 
Sparkly Dot Relief!

My third graders created these one year. They built their dots with Styrofoam plates before covering them in foil and coloring with sharpies. They were so simmery and sparkly in the halls. Details here!
Stitched Dots!

Okay, I only recommend this for small groups or kids who are in fourth grade and up! Once we got the hang of these, it was AMAZING fun and the kids loved it. But, just like learning anything new, there was a learning curve we all had to get over. I did create a video that helped a lot! You can check it out here. 
First Grade Flowery Dots!

Yes, first grade! This big mural hung outside the art room for months, it was just too pretty to take down. You can check out how we made it here. 

Okay...I actually have EVEN MORE Dot Day lessons but I'll leave you to check them out here. 

AND...did you know that I have an email list? I share lots of freebies and lessons there too. To join, just visit here...it will take you to my store with my books but a pop up will allow you to sign up for email. 
photo signature_zpsd10b3273.png

Read more »

Thursday, August 27, 2015

In the Art Room: Dot Day Ideas!

Hey, kids! September 15th-ish is International Dot Day in the art teacherin' world. In case you aren't familiar, Dot Day is a super fab-o artsy holiday based on the book The Dot by author/illustrator Peter H. Reynolds. My young artists have celebrated Dot Day for the last couple of years and I thought I'd share their projects with you in one big ole fat blog post! It's always been a big hit with the kids and a great way to talk about what it means to be an artist. So, without further ado, let's get down to this Dot-making business! 
A new video created to show y'all how I teach line sculpture to kindergarten! 
Last year, each grade level created a different type of dot. For my kindergarten friends, I stuck with my unit on line (because I love this unit so!) but added a dot-tastic twist: the base for our paper sculpture was a dot
My first grade friends created this lovely dot-inspired landscape that still hangs outside of my art room (it's about to be replaced by our current jungle-themed masterpieces...I can't wait to share that with y'all!). Each child created a dot-flower and worked on the patterned papers seen in the background.  
At the start of the school year, our vocabulary words were: unique, unusual, creative, artistic and fun! I think these flowers definitely qualify, don't you?
Second grade artists learned all about Kandinsky who's work was on display at our local art museum. The kids created a reversible line painting on pizza rounds that I purchased via Amazon. 
I love hanging the kids' work in this large bank of windows we have in the hall. Do you guys do window displays? I'm always looking for more ideas so if you have any, please drop 'em in the comments!
Third grade was all about the metal relief sculptures with these styro plate/aluminum foil/Sharpie numbers. They were so pretty and reflective that they seemed to catch everyone's eye. 
 What a fun way to introduce line, shape, pattern, repetition, you name it!, to these young artists. 
But the biggest hit among the kids: these string stitched dots, y'all. Oh my. I can't wait to do this project again. All the kids loved it and were successful. Art teacher win!
For that, watching this video and sharing it with your students might make understanding the process a lil easier. 
I did string art in 5th grade and I loved every minute! I was so excited to share such a fun project with my students. 
 My first year hosting a Dot Day event, I had each child do the same project. We each created a coffee filter dot... 
 That were both displayed in windows and in the halls. 
Not only that, but students created large dot collaboratives on black paper in oil pastel that served as the backdrop to the words of the book. This was a great way for me to ease back into the school year: same project, each grade level and yet a powerful effect. AND ready for open house! 
So! How about you? Are you celebrating Dot Day this year? I'd love to hear about what your students are creating!
 photo signature_zpsd10b3273.png
Read more »

Thursday, October 2, 2014

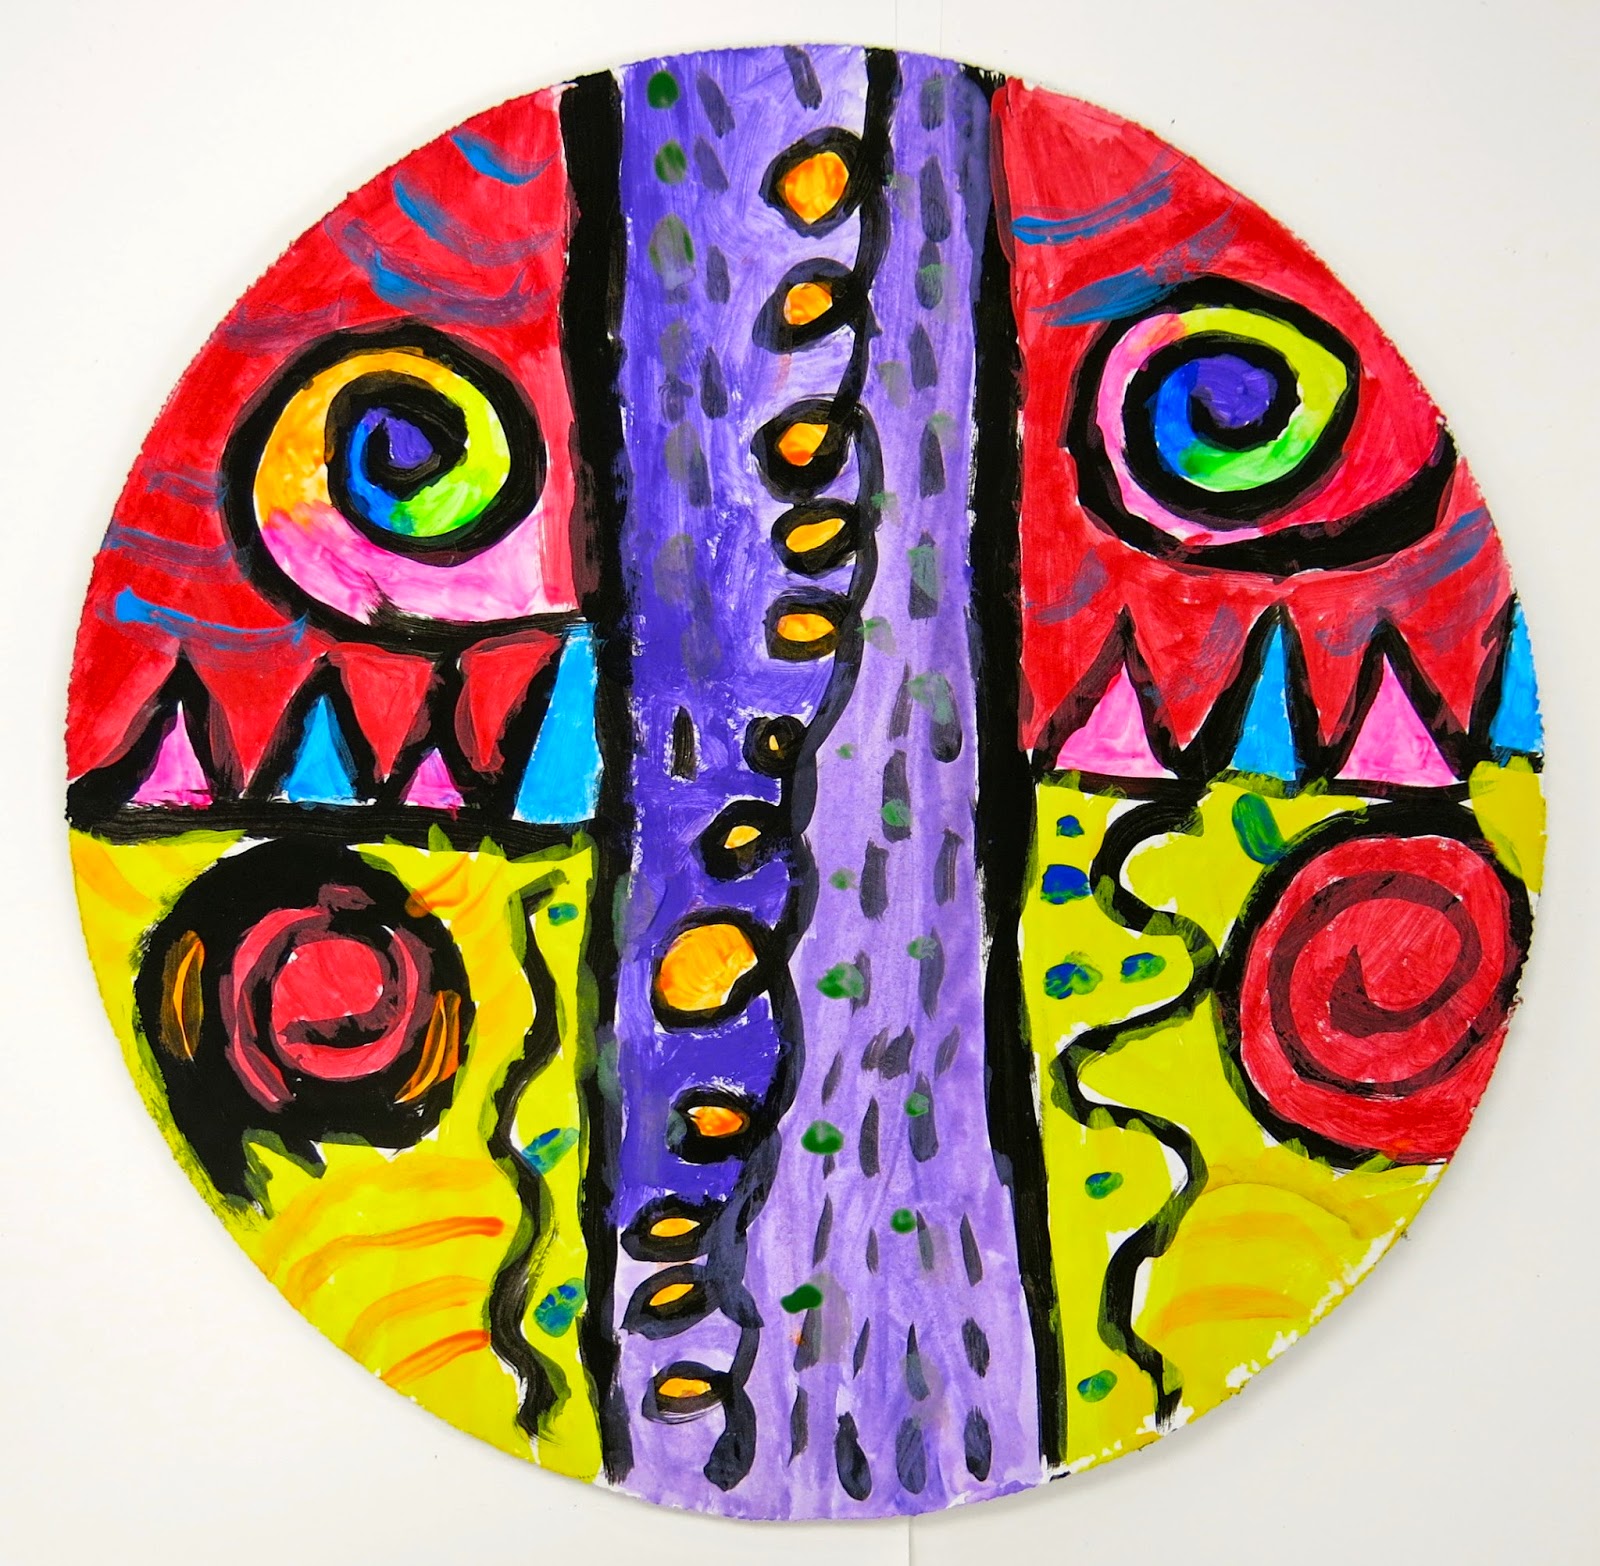
In the Art Room: Reversible Dot Paintings

Okay, I know what you're thinking: Holy crap, Stephens, Dot Day ended, like, a month ago! 

Y'all. I know. But I never did tell ya the whys and hows and who's-its of these here Reversible Dot Paintings. So don't gimme none of that "holy crap" biznatch, ya hear?
Way back when I started dreaming up ideas for Dot Day, I knew I wanted to use some cardboard pizza rounds. I dunno why. You know how it is when you get an idea stuck in your head for no reasonable reason and you just can't get rid of it. Kinda like herpes. Well that was me with this cardboard pizza round thing. So I ordered a hundred of 'em from School Specialty and got the notion that we'd make some reversible abstract paintings out of 'em. 
What gave me that thought was the movie Six Degrees of Separation (if you've heard me tell this tale before, sorry for the repeat. I'm a repeat-asaurus, it's what I do). I knew I wanted the kids to learn about Kandinsky because he's got a big fat showing at our local art museum. And then I recalled this movie clip and was all: YES! REVERSIBLE KANDINSKY PAINTINGS. I'M. A. GENIUS.

That is until I found out that Kandinsky never actually did paint any reversible painting. Which could only lead me to one conclusion: The Prince of Bel Air is a LIAR (okay, so it was Donald Sutherland in the clip, whateves).
I still thought the idea was a good one and a fun way to start the school year so I went with it any ole way. Whatcha see above is one child's reversible painting. I love how different one side is from the other. Lemme tell you how we did it. It all started on the first day of school...
Yeah, I know. You've prolly seen this thing too. Told ya I'm a repeat-asaurus. Just ask my students. 


On our first days of art class, after our chats about Kandinsky and his painting to music, we tackled our own abstract paintings. We listened to music and musical instruments to inspire a variety of lines. Our first Word of the Week was "artist" which we all decided we most definitely are.
The following classes were spent painting and our word of the week was "unique". I really wanted to emphasize that our paintings are all going to be different, no one better than the other. We also talked about how color could evoke mood and that was the focus behind our color choices. This wasn't a color mixing lesson, per se (gah, I've always wanted to say "per se" on this blog. Today's my lucky day, I dare per se!). If the kids created new colors, HURRAY!, we celebrated that. But our focus was on using colors to show emotion.

And by the looks of things we were all pretty happy. By the way, the paint we were using was whatever-was-left-over-from-last-school-year. My art supply order hadn't arrived yet (because, um, I forgot to place it. Der.) so we may have been scraping the bottom of some bottles. I do have to tell you that upon YOUR recommendations, I ordered VersaTemp from Sax and, y'all. I LOVE IT. Best paint I've used with the kids yet. I can't wait for you to see their new paintings! But, um, back to this.
I think a kid's personality really shines in an abstract painting. This dude is very meticulous, organized and precise. 
And this little girl is very free and comfortable with her sense of expression. She's already decided she's an artist now and when she grows up (gotta love that!).
I see a landscape painter every time I look at this painting.
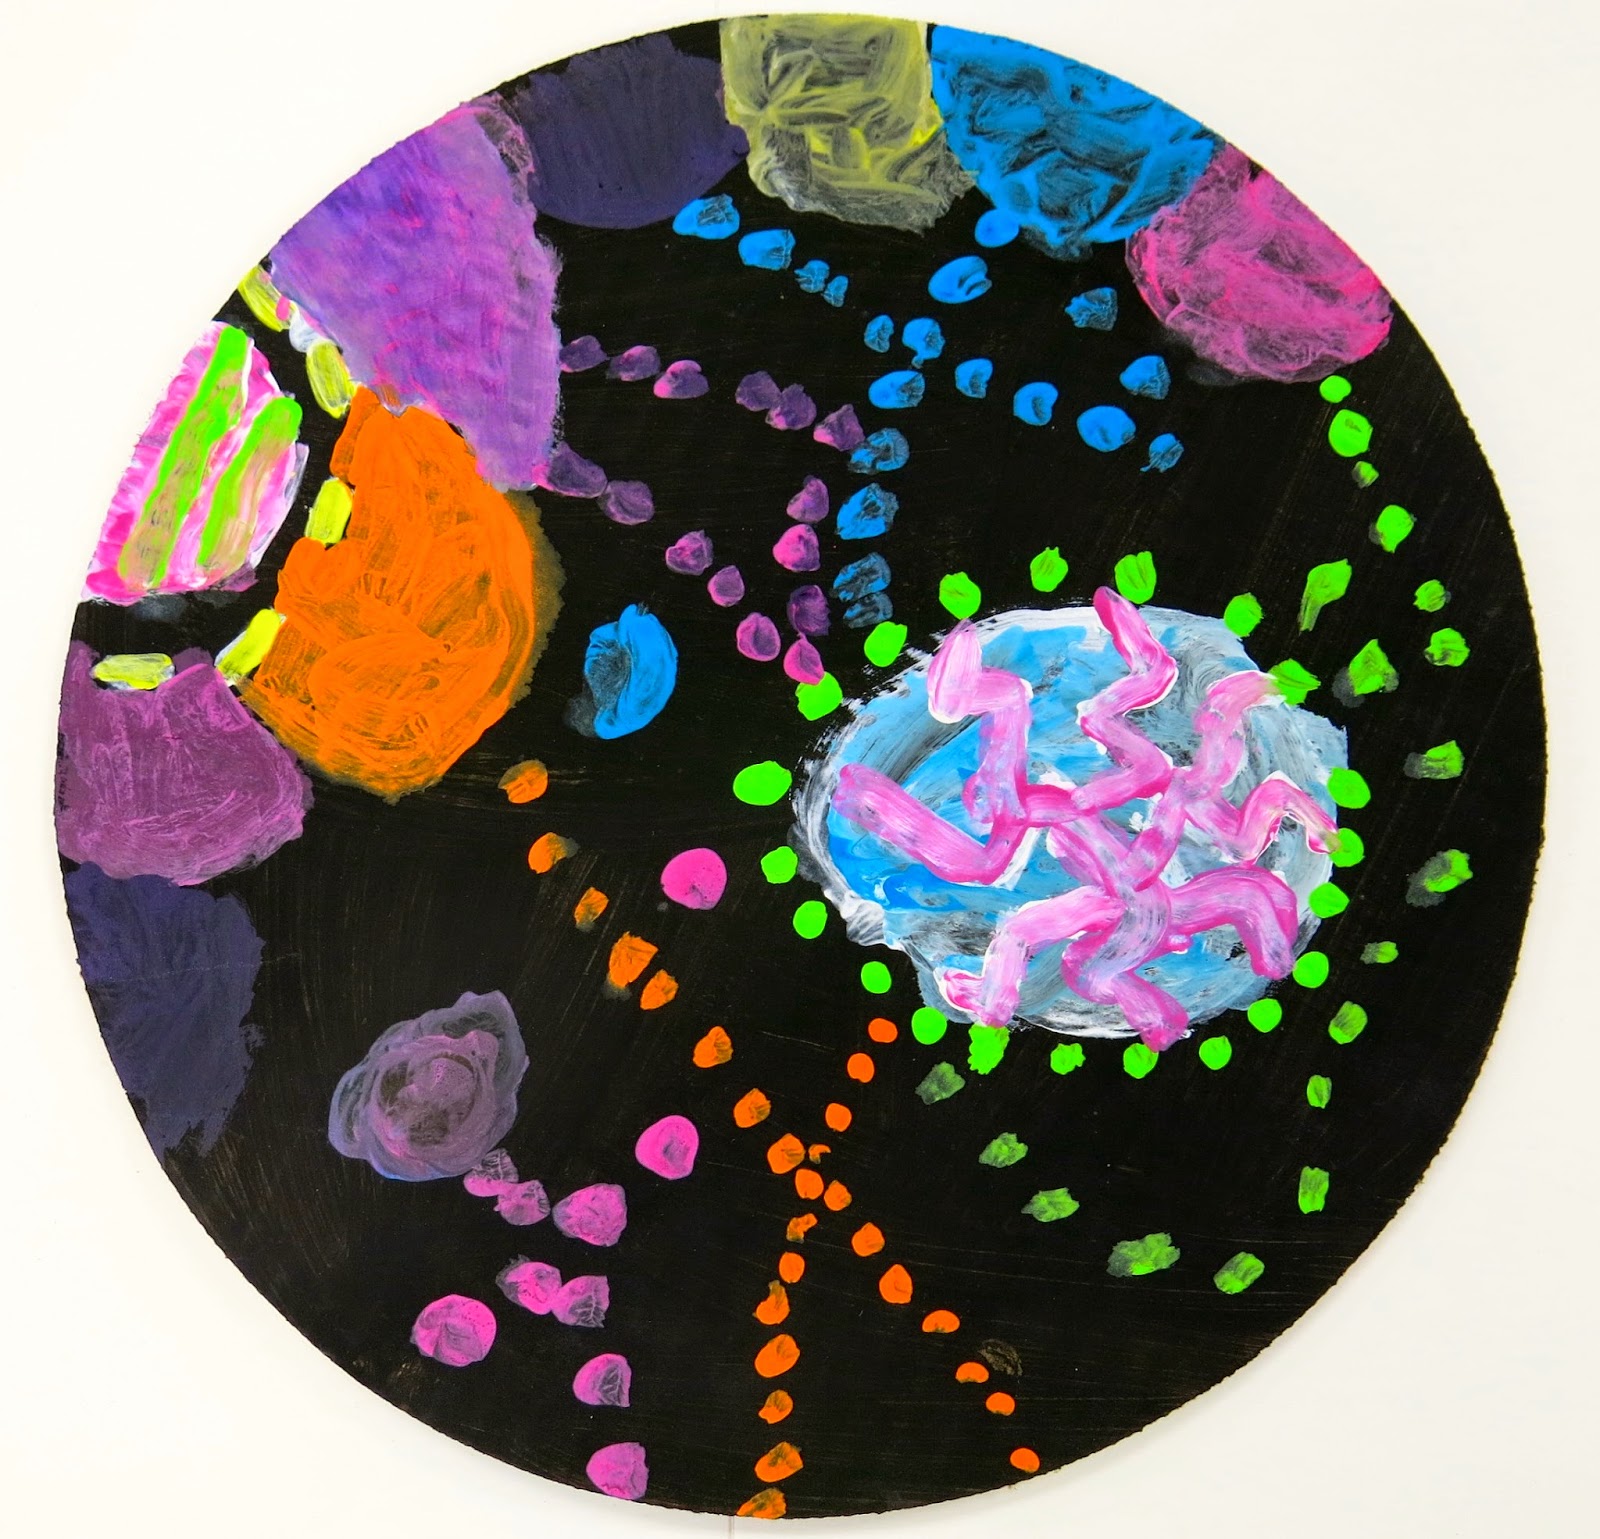
Because I thought the boards should be the opposite on the back, I did go ahead and paint them all black. Which really didn't take as long as it sounds...but I didn't want the kids to use one of their precious art classes painting something black. We looked at a couple of Kandinsky's circle paintings and I gave the kids a "creative challenge" ("creative" being our Word of the Week): Create a painting using only circles. 
Because the surface was black, the kids did have to paint the circles white first and then add color. Which was great because then we could learn all about tints and value.
I see a budding Edvard Munch, don't you?
So clever, I love it!
The week of Dot Day, our word was "inspire". This was because our beautiful reversible paintings were to inspire the school just as Peter H. Reynolds had inspired our dot theme. To hang, I simply punched a super small hole in the top and bottom of each painting and paper clipped them together. 
And the serve as this super colorful reminder of the unique and creative artists that made them. They're so happy, I think I'll leave 'em up for a while. 

By the way, I now have a thing for cardboard pizza rounds. I gotta know, what have y'all ever used 'em for? 

Until next time!
 photo signature_zpsd10b3273.png

Read more »