I hope this blog post finds you either A. Experiencing a Snow Day; B. Enjoying an electric blanket/hot chocolate combo or C. Somewhere other than the subzero temperature land the rest of us seem to be enduring. As for me, I'm enjoying myself a two-hour school delay with a cat on my lap and a cuppa hot tea. And weaving. Because that's what days like this are perfect for! In case you didn't know, I've declared January the Wonderful World of Weaving month (or something like that). Here's what I've shared so far: The Weaving Series: Paper Loom Weaving (perfect for first grade) The Weaving Series: Straw Weaving (second grade and up) The Weaving Series: Circle Loom Weaving (second grade and up) In my last post, I shared with you Circle Loom Weaving which, if you go about it like I do by having the kids spend a couple of classes painting their plate, can be a long project. If you don't have that much time to invest in a project, then this CD weaving is just the thing for you and your kids. It's fast and fun and teaches the same weaving skills learned in circle loom weaving! Now, I gotta tell you, everything I learned about CD loom weaving came from my friend Julie O'Brien who has the super fab art teacherin' blog Art Matters. In this particular post, she does a great job walking you through the steps of CD weaving. I'll be sharing with you a coupla short clips today but go to her post for detailed photos and printable step-by-steppies.
Supplies: CDs: Send out a school-wide email and you'll end up with more than you could ever image. Yarn: A lil for warping and a lil more for weaving. That's it! Let's get started:
In this short clip, I'l show you how to warp you loom. I always avoided CD weaving because I thought the warp strings would move around on the circle of the CD. Surprisingly, it doesn't! Well, not much anyway. And if it does, you can easily just slide it back into place.
And there you go! Please feel free to ask any questions in the comments. I'd also love to hear some alternatives to teaching CD weaving you might have. Or what you've done with the finished result!
I think this project would be great for an art club since it would require each kid to have an embroidery hoop. Again, ask around. I bet you'll have embroidery hoops comin' out yer ears. I made a bunch of these guys this summer and currently have them hanging like a mobile in my art room. I'd love the kids to weave a collection of them and hang them in front of my school's large bank of windows. Wouldn't a bunch of these kind of weavings in a variety of sizes look great? Here's the method I use to create these weavings:
Very similar to circle and CD loom weaving, right?
And there you have it! Stay warm, kids. Looks like my two hour delay is just about up, time to get ready for the day. Enjoy yours!
Wuz happening, my wild and wacky weavers?! I hope the return to art teacherin' (if that's your bag) has been a smooth one. Personally, I find it a cruel joke to return to school the week of a full moon but, once again, the powers that be neglected to ask my opinion. When will they ever learn? So, show of hands, how many of y'all decided to go down Weaving Street this month? If you need a refresher, you can start with this paper weaving lesson then transition to this super fun straw weaving project. I just had my fourth graders start their pouch weaving and they were beside themselves with excitement. Like, they were all, "enough with the History of Weaving prezi, lady, let's weeaaavvveee." I'll be sharing that prezi with y'all later this week (still tweaking it) but you can find the complete steps for pouch weaving starting here.
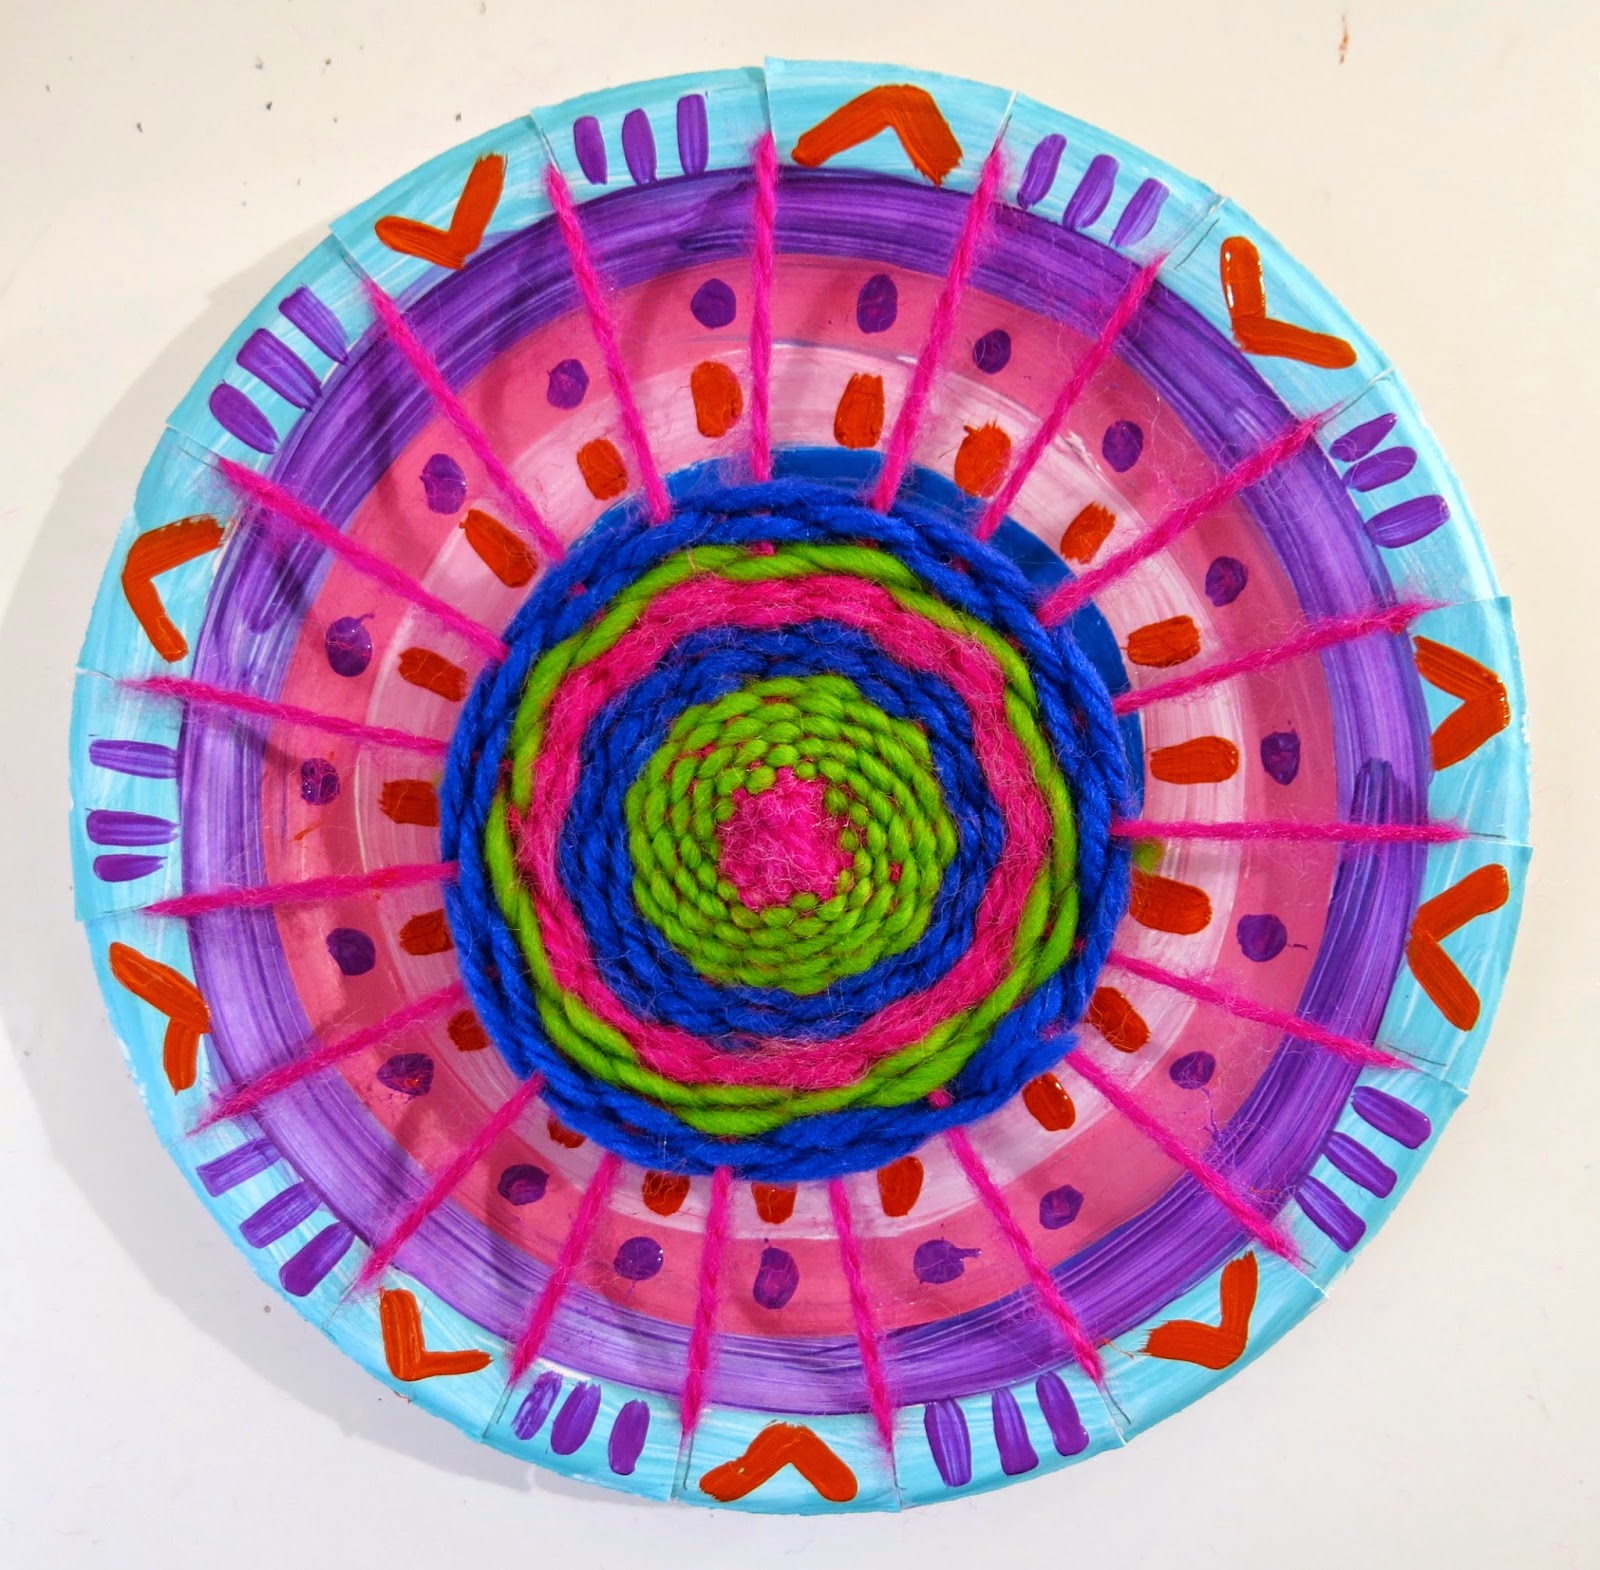
But let's talk Circle Loom Weaving, shall we? This lesson I do with my second grade kids but if you've never taught weaving to your students before, I recommend teaching this to third grade. Again, always start with that basic paper loom weaving as it teaches all the vocabulary and techniques making all weaving projects that follow much easier.
Supplies:
Chinet Plates: When plate weaving, I always use these. They are the thickest and most durable plates. I like to use the smaller size.
Yarn: Any kind will do. Funky yarn is fun but only use that for the actual weaving portion. For warping, use regular yarn.
A Loom Template: I have two for each of my five tables so the kids can share. Each template has 19 notches on it.
Masking Tape: You'll need this to tape down the initial warp strand. And for closing the mouths of those "I Can't Do It" kids. Oh, I kid! Kinda.
Last year I typed out all the steps which you can find here. I'm hoping that you'll find the video even more helpful. If you still have any questions, please ask in the comments and I'll get back to you.
For those of you that don't like video, here's some pitchers and werds. Place the loom template on the painted plate. Trace and cut the 19 notches. I always encourage the kids to count and be certain they have 19 lines drawn before cutting (as some will end up with 190 which is not what you're going for).
NOT GONNA LIE: Warping is the least fun part. Especially when some of the kids stop listening and get stuck on repeat: I Don't Get It. When that happens, I have everyone put everything down, we stand up, we stretch, we shake it off. Then, I tell 'em that they are going to sit back down, not touch a thing, and listen to me. Again.
I have also found that peer tutoring is priceless. These kids speak the same language. Have them help each other, they communicate much better with each other I have found!
Once you are beyond the warping hump (um, the whuh?), the weaving portion is much easier. That is WHEN you get beyond that initial confusion I mention in the second clip. However, if you do that little trick that I share with you, I think you'll find that the kids get it and will really take off with weaving. They love to sit on the floor and weave and chat. I let them sit with buddies, sometimes we go outside if the weather permits. It's just such a fun, relaxing project...once you are beyond the warping and initial day of learning to weave. Stick with it, you'll find that you and the kids will love the process!
Granted, this weaving project does take time. However on Thursday I'm going to share with you a similar weaving project that takes have the amount of time for those of you that are limited. Until then, I do hope you found this helpful and will consider giving weaving a go! And I'd love to know, what weaving projects do you just love to do?
Hello, weaving friends! Welcome to the second installment of The Weaving Series during this Wonderful World of Weaving month formerly known as "January". In case you didn't know, I'll be sharing with y'all some of my favorite weaving projects all this month each complete with step-by-step photos and short video clips. So, what's in store today? Drinking Straw Loom Weaving! Straw Loom Weaving is a great follow up project to Paper Loom Weaving as it builds on all of the previously learned skills. The youngest grade level I've done this sort of weaving with is second grade. However, I believe upper grades would enjoy this fun, easy and totes educational weaving project as well. Let's get started, y'all!
Supplies: Large Drinking Straws: I like the big ones without the bend in them. I've scored them at fast food joints and the grocery. I cut the straws in half. Each kid will need four straws. Scotch Tape: You'll need this to adhere the yarn to the straw. I like this kind of tape better than masking because it can lie flat against the straw and not impede on the weaving process. And don't nobody like their weaving process to be impeded upon. Yarn: Four strands cut to the desired length of the finished weaving. In this demo, mine was cut to about 9". Even More Yarn: For weaving. Let's get started!
You'll begin by warping your loom. This is the fun part, at least according to the kids, a you'll be "drinking" the yarn. If you watch my clip, you'll bet an even better idea on the process. Start by holding the end of the yarn at the bottom the straw. Place your mouth on the opposite end and inhale. The yarn will pop out the other side! Warning: do NOT inhale too much as you'll end up with a yucky mouthful of yarn.
Yee-ouch, nice nails. Tape down that little yarn tale with some Scotch tape.
And do that four more times.
Tie all the ends together with an overhand knot.
Once you're warped (and, admit it, you've always been warped), you're ready to weave! If you watch this short clip, you'll get the process.
Hold the straws together in your non-dominate hand with a tiny bit of space between 'em. Use your thumb to hold the end of the warp string while your other hand begins the process of over and under.
When you reach the end of the row of straws, go around the end straw and begin the process again.
In this final clip, I'll show you how to finish off the weaving and remove it from the straw loom. Take heed: the kids will often want to slide their weavings completely off their straw loom as they weave. It's important that they do not! Their weaving should slide off the ends of the straws naturally as they are weaving along. Also, they will freak out when their weaving begins to slide off because it will look a little loose. Set their minds as ease and tell 'em that it's perfectly normal. No need to freak out.
So what do you do with a straw loom weaving once it's complete? Well, my kids love to make them into bracelets by simply tying the ends of the warp strings together. They've also made belts, bookmarks and wallhangings. I'm personally dying to get some yellow and blue yarn and create woven Minons. What about you? Have you done this kind of weaving with your kids before? If so, what have y'all created! Please keep the convo going in the comments, kids. ALSO! ARTSY BOOK CLUBBIN' KIDS (that's you, you can join the fun here!) don't forget that we'll be reading The Art Spirit by Robert Henri beginning Monday, January 12th! The winner of the Artsy Book Club Giveaway is...Leah! Congrats, buddy!