Showing posts with label crafts. Show all posts

Wednesday, October 4, 2023

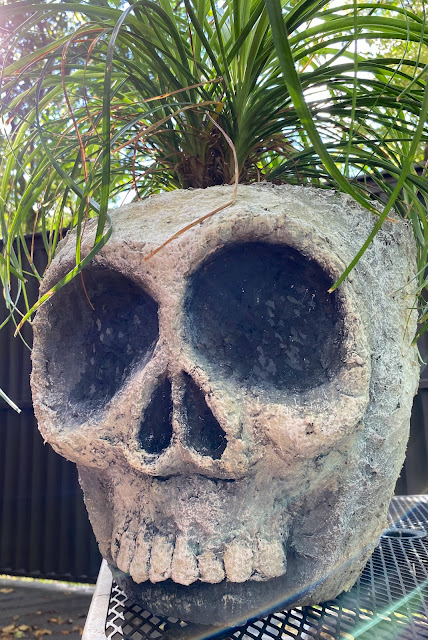
DIY: Skull Planter!

I spotted the coolest planter ever the other night at Cracker Barrel: it was a large plastic skull planter and I just had to have it!

Until I saw the $40 price tag.

Then I remembered how a while back I made TONS of Halloween decor with one of my long forgotten favorite art supplies: CELLUCLAY. You can check out all of those creations (well, most of them anyway), here. 

Here's the how-to video!

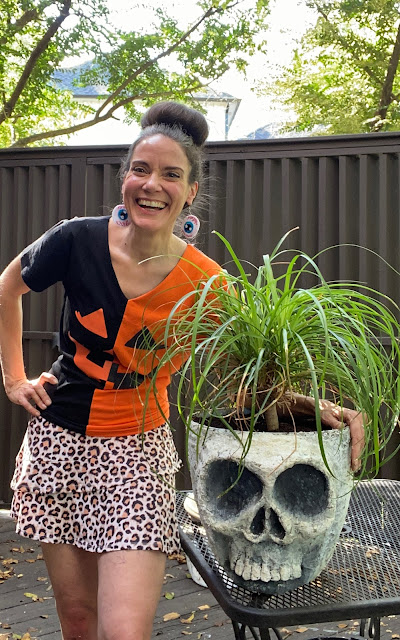
The process is super easy! All you need is Celluclay and a plastic planter...and acrylic paint. That's it! Oh...and maybe a cute little plant. This is one I scored at Walmart years ago on sale. It was so sad and almost dead that I named it Peanut. Peanut is now living it's best life in my brand new skull planter!
Part of the magic is in the painting when it comes to this kind of thing. I used a base coat of gray and then added a darker gray to the eye sockets and the nostrils to really deepen the look. Then I used diluted off white paint to go over that in the light areas. Finally I used a dry brush and white paint to add the highlights. 
I won't be leaving this outside. Celluclay, since it's waterbased, would probably not fair well outdoors. 

So in my over-crowded plant window, she will go!
Thanks for letting me share! I actually think I need to make more of these. Why, I have no idea! But it was just so fun and Halloween season is my absolute favorite!

photo signature_zpsd10b3273.png
Read more »

Wednesday, January 2, 2019

DIY: Latch Hook and Needlepoint Frida!

This pattern is now available! Get you one right here!

Y'all. I had so many artsy-craftsy-teachery goals for my break. And then I went and designed a Frida Kahol latch hook pattern and completely forgot about my other ideas! So, I present to you Frida two ways: Plastic Canvas Frida (left) and Latch Hook Frida (right).
I rediscovered latch hook at year when I bought a kit on a whim at Joann's. Y'all might recall from this blog post. Once complete, I stitched it onto what has become the most petted jacket by my students EVER (saying "please don't pet me" isn't something I thought I'd have to say...but such is the life of an elementary art teacher). I was "hooked" after completing this jacket. When I returned this winter to buy another design I was pretty disappointed by my choices. It seems that latch hook patterns have not been updated since I was a kid...in the 80's. 

That's when I got the idea over break to design my own. I got some graph paper and went to work...then I decided to hook it, not knowing if my design would work or not.
 But she did! I present to you Furry Faced Frida!
 Personally, I LOVE the look of latch hook because it's a multitude of things: tacky, vintage, bizarre, retro, kitsch, you name it. Now, since this design was my own, I did have to cut all of my own yarn. If you are not familiar with latch hook, it is the process of taking a 3" piece of yarn, folding it over a latch hook tool (found in all craft stores for a couple of bucks) and "latching" it to one of the openings in the latch hook canvas (I'm not sure what the stuff is called but you can also buy it blank at the craft stores). It's pretty easy! To cut my own yarn into the correct lengths, I just wrapped it around a 3" piece of cardboard and cut it. I kept the colors organized with this jewelry hanger I found at Five Below:
I have one of these for storing my embroidery floss also...they so handy!
 Since I was bringing back latch hook in all of it's retro glory, I decided to try my Frida design out on plastic canvas too. Y'all...I think I may like her a bit better that way!

 Even if the back looks like Zombie Frida (according to my husband). If you've never used plastic canvas, it's also available in the craft stores for CHEAP. I used the same yarn as I did my latch hook. When using plastic canvas, you'll need a tapestry needle. It can be a touch confusing because of the diagonal line the stitch creates. When counting out the stitches and figuring out your design, simply count the top of the diagonal, not the bottom left, if that makes any sense. 
I think at one point, every grandma was required by law to create a plastic canvas tissue box. So...y'all know that I'm gonna have to create one full of artists! I've already finished my Andy Warhol latch hook...I can't wait to share that with you.

IF YOU ARE INTERESTED...this pattern is now available to you! You can buy the pattern here. I'll be creating some how-to videos on plastic canvas and latch hook soon. Also, stay tuned for my Warhol pattern!
 photo signature_zpsd10b3273.png
Read more »

Thursday, October 26, 2017

Halloween Crafts: How to Make a Monster Head!

First of all, can I just tell you how SAD I am that next Tuesday is Halloween?! I still have two more Halloween DIY's in the queue to share with y'all! If you are looking for some spooky crafts this weekend, look no further...I've got you covered! I'll be sharing a dozen or more in this here blog post. I kinda went bananas with the Halloween crafts this year...but it truly is my most favorite thing ever. I'm gonna be super sad to pack all of this up next week. Tho, let's be honest, it will probably stay up a pinch beyond Halloween. I mean, there is Day of the Dead to consider, after all!

But, on with the craftin' of these Monster Mash Heads!
 Let's talk supplies:

* Styro Monster Heads. I picked mine up here last year after Halloween for next to nuthin. They still have them this year too! 

* Sta-Flo Liquid Starch. This stuff is my jam, y'all. I have used it for that super fabulous chalk project and for a MILLION Halloweenie crafts. I've been asked where to get it...I found it on the cheap here

* Cheesecloth. You can find this both at the craft stores and at the grocery. It's probably the cheapest online. 

* Acrylic Paint. Durable and leaves a shine...I love the stuff. Even the cheap stuff!
Now I did mention Halloween crafts...I thought I crafted hard for the spooky holidays last year. Well, this year, really went all out. Lemme share with y'all what I created:
Draculas! These dudes just might be my favorite.
Chatter teeth were super easy to create. 
No, wait. These dudes were def my favorite!
Although these eyeballs were definitely the most easy to crank out.
If you need a fun, fast and easy craft, check this one out!
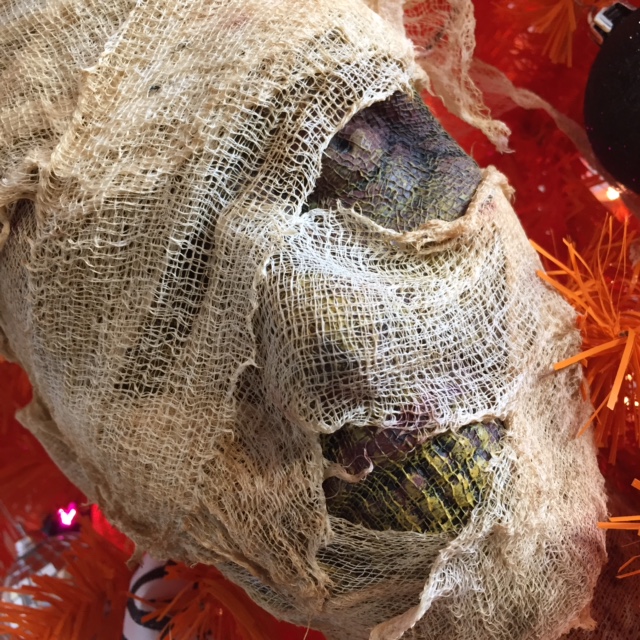
 Okay, the hubs takes total credit for how The Mummy came to be. I think the original intention of that styrofoam head is for it to be a zombie...but zombies weren't in my vintage movie line up. So hubs suggested wrapping him in strips of cheesecloth and YES! Look! He's so stinkin' spooky!
 Who's your dentist, bro? You might wanna ask for a refund.
 Frank is quite the looker, don't you think? Bride didn't know what she had, silly girl!
 Best part about having these in my tree was that I didn't have to hang them or do anything...just place them on the branches!
 I love using the cheesecloth because I love the effect I can get with the textured surface. Painting the entire thing black and then going over it with a dry brush is my new favorite thing on the planet. It's so freeing for an uptight and particular artist like me. 
Oh, what's that? You need more Halloween crafts? Here you go!
Check out my Top Ten Halloween Crafts from last year, right here! 

 photo signature_zpsd10b3273.png
Read more »

Tuesday, January 6, 2015

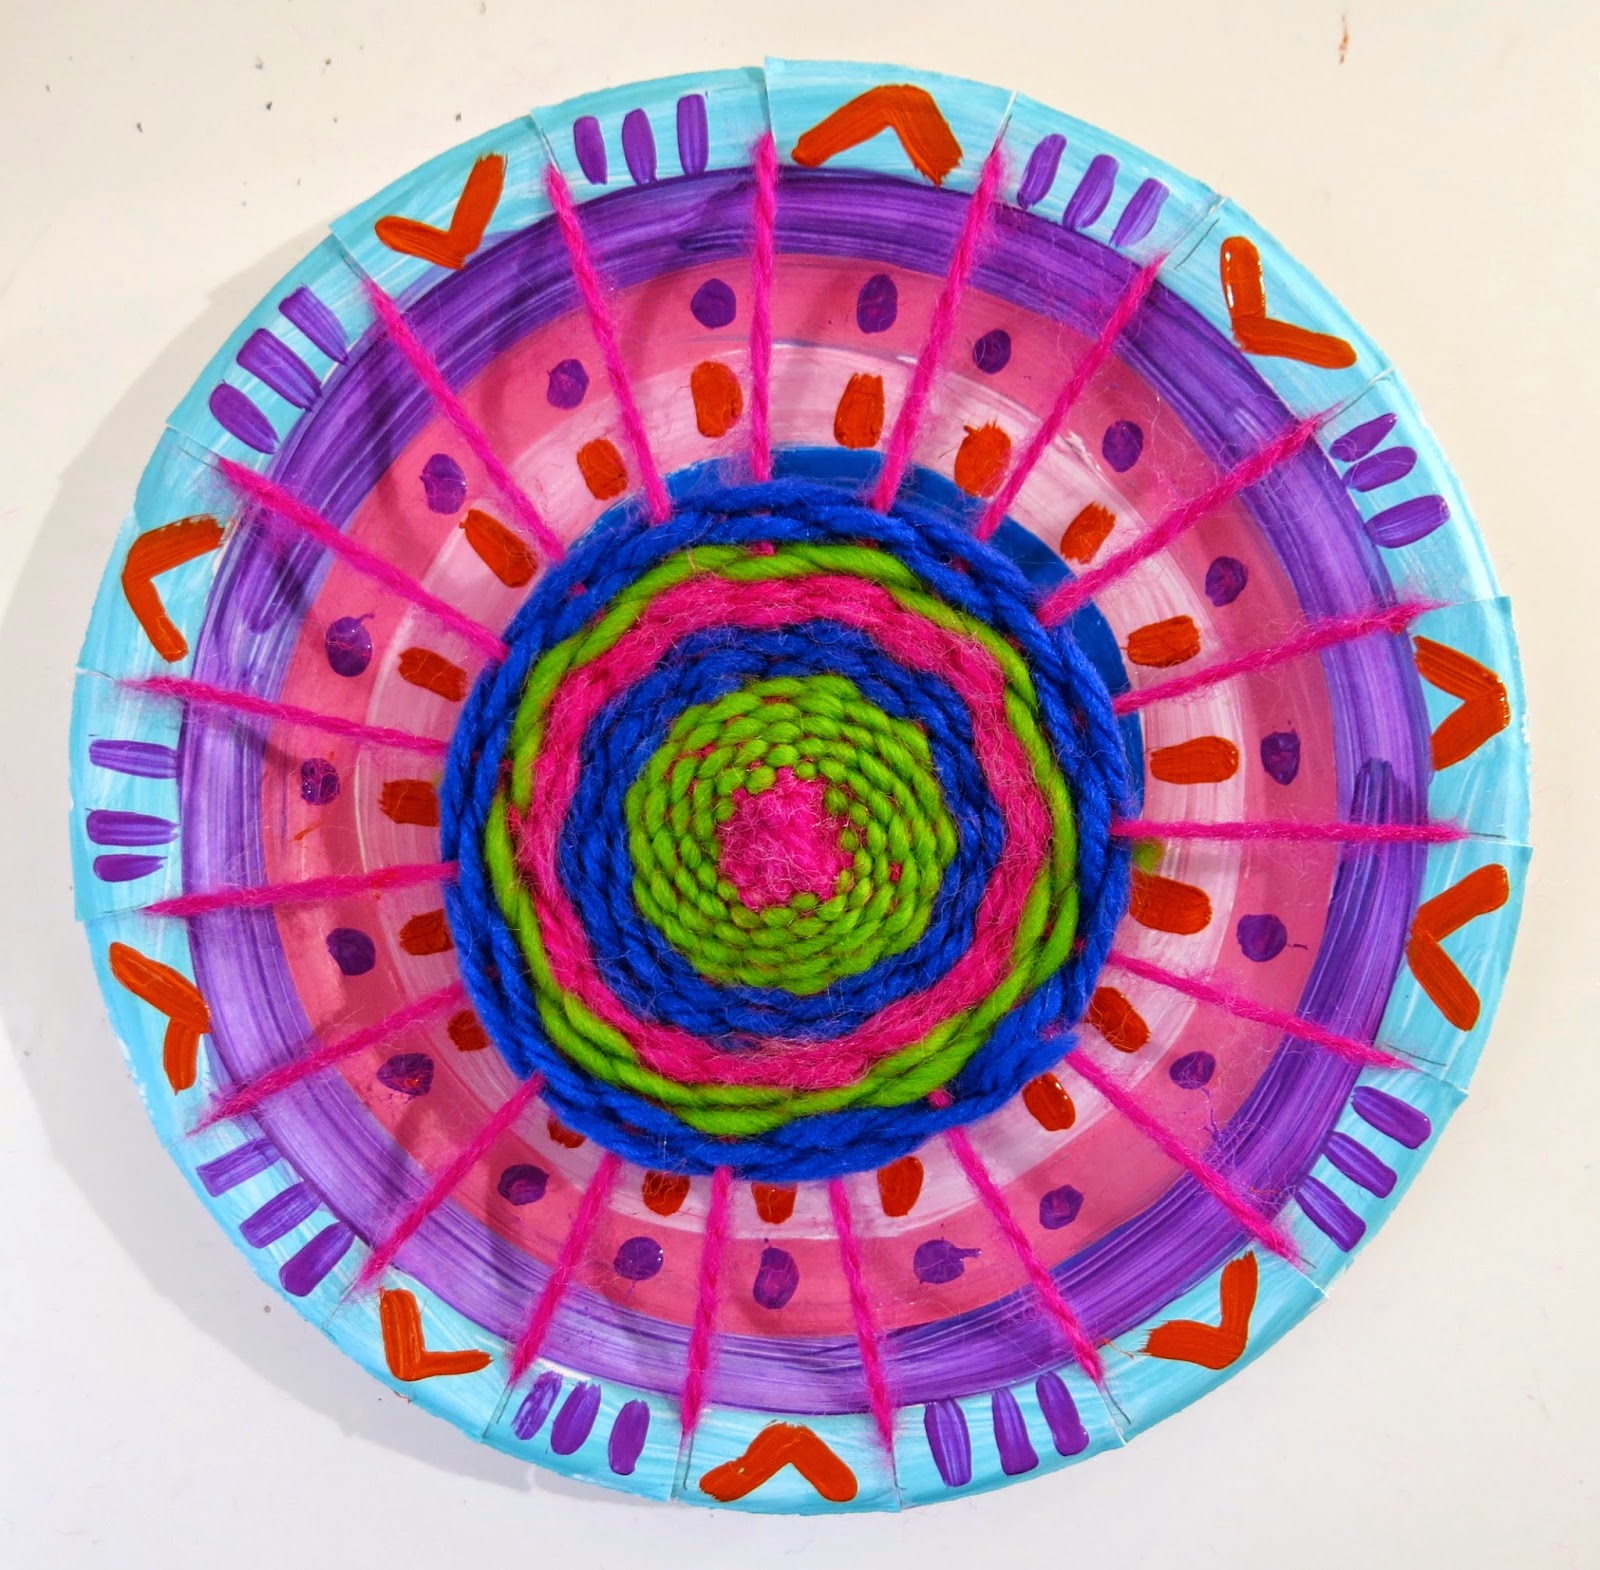
In the Art Room: Circle Loom Weaving

Wuz happening, my wild and wacky weavers?! I hope the return to art teacherin' (if that's your bag) has been a smooth one. Personally, I find it a cruel joke to return to school the week of a full moon but, once again, the powers that be neglected to ask my opinion. When will they ever learn?

So, show of hands, how many of y'all decided to go down Weaving Street this month? If you need a refresher, you can start with this paper weaving lesson then transition to this super fun straw weaving project. I just had my fourth graders start their pouch weaving and they were beside themselves with excitement. Like, they were all, "enough with the History of Weaving prezi, lady, let's weeaaavvveee." I'll be sharing that prezi with y'all later this week (still tweaking it) but you can find the complete steps for pouch weaving starting here
But let's talk Circle Loom Weaving, shall we? This lesson I do with my second grade kids but if you've never taught weaving to your students before, I recommend teaching this to third grade. Again, always start with that basic paper loom weaving as it teaches all the vocabulary and techniques making all weaving projects that follow much easier. 
Supplies:

Chinet Plates: When plate weaving, I always use these. They are the thickest and most durable plates. I like to use the smaller size.

Yarn: Any kind will do. Funky yarn is fun but only use that for the actual weaving portion. For warping, use regular yarn.

A Loom Template: I have two for each of my five tables so the kids can share. Each template has 19 notches on it.

Masking Tape: You'll need this to tape down the initial warp strand. And for closing the mouths of those "I Can't Do It" kids. Oh, I kid! Kinda.
Last year I typed out all the steps which you can find here. I'm hoping that you'll find the video even more helpful. If you still have any questions, please ask in the comments and I'll get back to you.
For those of you that don't like video, here's some pitchers and werds. Place the loom template on the painted plate. Trace and cut the 19 notches. I always encourage the kids to count and be certain they have 19 lines drawn before cutting (as some will end up with 190 which is not what you're going for).
NOT GONNA LIE: Warping is the least fun part. Especially when some of the kids stop listening and get stuck on repeat: I Don't Get It. When that happens, I have everyone put everything down, we stand up, we stretch, we shake it off. Then, I tell 'em that they are going to sit back down, not touch a thing, and listen to me. Again. 

I have also found that peer tutoring is priceless. These kids speak the same language. Have them help each other, they communicate much better with each other I have found!
Once you are beyond the warping hump (um, the whuh?), the weaving portion is much easier. That is WHEN you get beyond that initial confusion I mention in the second clip. However, if you do that little trick that I share with you, I think you'll find that the kids get it and will really take off with weaving. They love to sit on the floor and weave and chat. I let them sit with buddies, sometimes we go outside if the weather permits. It's just such a fun, relaxing project...once you are beyond the warping and initial day of learning to weave. Stick with it, you'll find that you and the kids will love the process! 
Granted, this weaving project does take time. However on Thursday I'm going to share with you a similar weaving project that takes have the amount of time for those of you that are limited. 

Until then, I do hope you found this helpful and will consider giving weaving a go! And I'd love to know, what weaving projects do you just love to do? 

 photo signature_zpsd10b3273.png

Read more »

Tuesday, October 29, 2013

In the Art Room: Vicious Vikings!

If ever the words adorable and Viking could be used together in a sentence, it would have to be upon viewing these painted and collage-tastic works of art. I mean, just scroll down and take in the hilarity. Super-Awesome-Cuteness-Overload. With a touch of axe-wielding angst. The perfect combo for a Viking, says these first and second grade artists.

(hey. I'm whispering this to you. that's why it's in italics and lower case. all images of children that you see here are published with permission of viking parents. because i like my job and would prefer not to get fired.)
Now before I go into the details of this lesson, I have to give a big fat hairy shout out to my (sadly, former) student teacher Rebecca who taught these young artists as well as Laura of Painted Paper who inspired this lesson. Rebecca taught the first through fourth grade students a Viking unit based on her summer travels through Norway. You can see the third graders' Viking ship collages here. For the younger artists, she decided to create a lesson that turned the kids themselves into Vikings.

On the first day of the lesson, the kids painted the papers for their backgrounds. In one (insanely busy) half hour class, the kids chose one 12" X 18" piece of construction paper for the back ground and two pieces of 12" X 9" paper in white and green. And here's how it went down in bullet points. Because I love me some bullet points:
  • (oh, so pointy!) The kids began with the larger paper. Using a sponge the size of their hands, they stamped white paint all over the top half of the paper. Once finished, they chose a smaller sponge and two colors of their choice to blend into the white paint for their sky.
  • From there, the children moved onto the two smaller papers. On these, they were to use a dry brush technique with green, white and yellow.
All that in 1/2 hour. Hence the gray hairs
The following class, Rebecca showed the kids a Power Point (is that one word? Should it be in caps? Do I really care?) of her travels and the beautiful landscape of Norway in the summer. The kids were then shown how to tear each of their green painted papers lengthwise and glue them down. The trick to teaching this lesson is making sure that the children begin gluing the background land first and slowly work toward the foreground. I'm kinda in love with this collage technique. I used it here for our Paris collages and here for our Egyptian ones.
For the body and assorted details of the Viking, the kids created another piece of painted paper. I wrote an entire blog post about this process which you can read all about here, if you wanna.

Our end result looked a little like this. The side on the right was used for the body of the Viking. For this, the kids cut the entire painted paper in half, folded the side you see on the right in half and, along the fold, traced half of a Viking body template and cut it out. Now before you freak out because a template was used, lemme 'splain myself: 1. I have a half an hour. Sometimes short cuts are a necessity. 2. Folding the paper in half, tracing half a template, cutting and opening the paper to discover (surprise!) a whole Viking body is an excellent means of teaching symmetry.

As the children worked on that, Rebecca called the kids aside for their Viking photo-op. She took two photos of the kids: a picture day smile and a fierce Viking face photo. In the following class, the children were able to chose between the two.
At the start of the next couple of classes, Rebecca would introduce a new fact about the Vikings to the children. They learned all about Viking culture, clothing, the long ships and long houses as well as their fierce ways.

The kids learned that they'd have to create a helmet, shield, weapon and some clothing for their Viking. Oh and "weird animal skin shoes" as one student called them today.
One of my favorite things about these Vikings is how some appear to be missing some teeth! This Vike-ette musta been in some rough battles to get her teeth knocked out. Either that or she's from Kentucky (just kidding, Kentucky friends!).
Once the kids chose their photo, they carefully cut around their face and glued it to their body. Braids and beards were added with construction paper which is much easier than it sounds. For this, Rebecca and I split the boys and girls up so that we could give individual demos to each group. Once the hair stylings were complete, helmets were added.
The next couple of classes were spent collaging boots, belts, sheilds and, everyone's favorite weapons! Well, almost everyone's favorite. I did have two sweet students who asked if their Viking could be reading instead of wielding a weapon. What were they reading, you ask? One was holding a book titled "How to be a Good Viking." Adorbs.
Don't tell anyone but this Viking's face is secretly my fave. With his expression and that mustache, he reminds me of Salvador Dali, don't you agree? I love it.
As a wrap up, I asked the kids the following questions today: Who were the Vikings? What did they do? Where did they live? I jotted down their answers on the board and I was so proud of everything they had learned. I wish Rebecca could have been there, it was a happy teacher moment for sure. 

The students were to then write a small paragraph about their Viking. With the exception of the one that said his Viking "cills peepel" (yikes! Gonna do a rewrite!), what they wrote was so fun to read. Almost as fun as those Vikings themselves! 


In other news...I now have a Facebook page for this blog! You can go and like it (or not, be that way) here:


Because I'm super computer un-savvy, I've yet to figure out how to create a link on this blog to take you directly to my facebook page. My apologies. I blame my pea-sized brain. If any of you computer geniuses out there would like to offer some advice, I'll gladly take it. In the meantime, up there's the linky-loo, "like" if you like. And thanks for dropping by!
Read more »

Friday, June 15, 2012

In the Art Room: Weaving, Part 1

Woven pouches created by fourth grade artists. You can see more of their masterpieces at our school-wide art show here and here.

Since I shared with you photos from our art show, I've had several questions about the woven pouches that were featured. Because this project is so easy and fun, I thought I'd share it now that the kids are out of school and getting a little...well...restless. It's the perfect summer what-can-we-do-now-? craft.

In the art room, this project has become a rite of passage for my fourth grade students but can easily be created by kids as young as second grade.  Because this craft involves multiple steps, I've divided it up into four posts: Weaving Part 1: Getting Started; Part 2: Weaving the Flap; Part 3: Removing the Weaving and Finishing; Part 4: Weaving a Cord

Please, fellow art teachers and parents, leave comments below on how you teach this lesson differently. And, of course, questions if you got 'em. Have fun!
 Supplies: 
  • Scissors
  • Tape
  • a loom. I purchase ours through Sax but you can create your own with thick cardboard.
  • Thin cotton string. This was bought for a couple bucks at Walmart but in a pinch, you could use yarn.
  • Big-eyed needles. Again, Walmart would carry these in their craft department.
 Preparing your loom:

These looms that I purchase through Sax have notches in them that are too far apart. When you weave with them like this, it creates a pouch that is a little too loosely woven, in my opinion. So I have the kids cut the part that sticks up (we call them "teeth") in half. It's a struggle because the cardboard is thick and there is some moaning and groaning but they can do it. 

If you are creating your own loom from cardboard, you will want to space your notches about 1/4" apart. I'm not really into exact measurements, so I say just eyeball it. However, make sure that you have the same number of notches on the top as the bottom.
 Warping your loom:

Warping your loom is the process in which you are putting the string on your loom that you will weave over and under. To do this, start at one corner of your loom and tape your warping string into place. I have the kids put the tape at the bottom of the notches. This will prevent the kids from accidentally weaving over or under this small string.
Now begin wrapping the warp string all the way around the loom. For example, from the taped end, go down to the bottom cut notch, wrap string around the back and up to the top notch and then go to the bottom again. You should have strings on both sides of your loom, making certain not to skip any of the pre-cut or notches-you-cut.

While you are warping, keep the string attached to the cone. I do not allow the kids to cut the string from the cone unless I have checked their loom. If they have skipped a notch, this allows them to go back and fix it without wasting any warping string.
 Once you've checked the loom and are certain no notches were skipped, cut the string and tape it down. Again, tape as close to the notches as possible. Use your creepy bending finger (shown above) to scoot those other warp stings over to tape the string underneath.
 Weaving:

The process of weaving is that of going over and under the warp strings in an A-B pattern. The string you weave with is called the weft. No long needle like this one? Tape your string to the end of a pencil or skewer stick.
 Pull yarn through until you have left behind a 1" tail. Turn the loom over and weave over and under on the back. Once finished with that side, turn loom over to the original side.
 Now, this time, weave the opposite of the previous string. For example, in the photo above, I wove over and under because the string underneath was under and over.
 You know you are weaving correctly when you see something like this. Looks a little like the netting of a tennis racket.
 But it's too loose. Do you see all of those white warp strings through your weaving? Well, you don't want to. Use a fork to pack down your weaving until those warp strings disappear and all you see are the weft strings.
 Adding a new weft: 

Okay, this one is debatable. Technically, you are not to tie two stings together but overlap the strings to add another. Or something. But at this point, if I throw one more piece of info at the kids, they are likely to have an aneurysm. So, we simply double knot tie a new string to the old, snip the "tails" and keep on weaving.
 Incorrect weaving: 

How do you know if you are weaving incorrectly? Well, you'll see a lot of vertical warp strings, like you see in the yellow portion of my weaving above. This happens when you are not weaving the opposite of the previous string, but weaving the same over and over again. If you see this, you have to take it out and redo.
 Weaving away...

I tell the kids that their weaving must be somewhere in between 4-7" tall. This allows room at the top of the loom for weaving the flap and tying off the weaving. This should keep those kiddos all tied up (heehee, tempting, right?) until next week. I plan to take mine on an upcoming trip to keep me occupied.

Remember, you are weaving on both sides of the loom, front and back. Ya hear?
 So stay tuned!

Next week, we'll learn how to weave that flap. Again, feel free to leave any questions or comments and happy weaving!

Read more »