Showing posts with label still life. Show all posts

Tuesday, October 14, 2025

Sunflower Still Life Collage


Hey friends! Today I'm sharing with you a fun sunflower still life lesson that is the perfect review for lines and shapes...while introducting collage and monoprinting! This lesson is perfect for your 1st grade and up...and I'm going to share with you a bunch of alternative art supplies just in case you are on a cart or don't have the supplies I am using on hand. So, like many of my videos of late, I'll walk you through a 'teacher talk' at the start of the video to help you think through how you can best make this lesson work for you. Here you go:
Before we dive in, I do want to share...my book, Art Teacherin' 101, has been sold out for the last month. I'm happy to say that I now have it back in stock! If you have been waiting to get a copy or just want to find out more details on my book, you can find it here. 
I'm so excited that my book has sold 10K copies! It's so amazing to think that I've been able to share with so many incredible art teachers. A big thanks if you have ordered a copy! And...just so you know...I sign all copies before packing them up. That's right...my books are packed and sold by yours truly. I'm an independent book publisher and seller. If you ever have any questions about that, feel free to reach out! 

And now...back to the lesson:
To begin, I used my tempera paint filled bingo daubers! You can pick up your empty daubers here.  And my preferred paint (and supplies) are here.

Knowing that not everyone has bingo daubers or the time to fill them, in the video, I share a couple of alternatives. Students could use tempera sticks to create their line papers or...they could paint the lines! So even if you are on a cart or short on supplies, I got you.
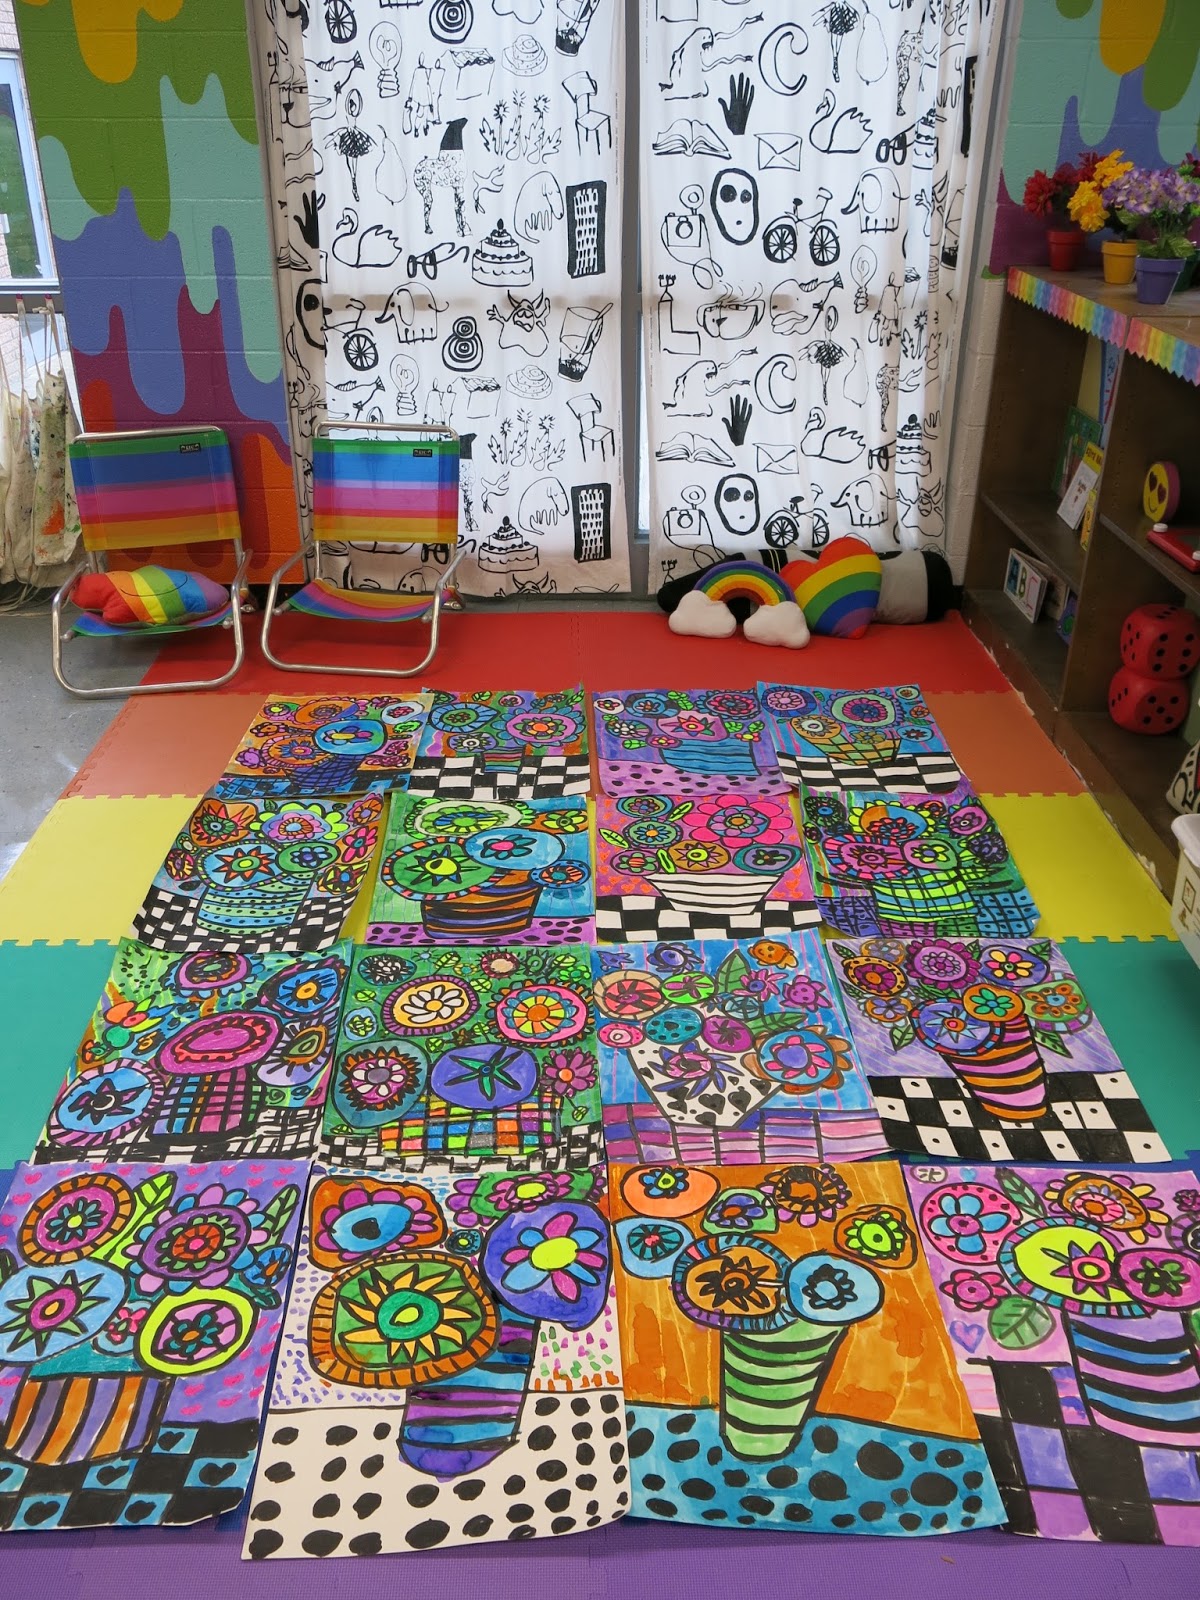
This lesson could be done on 9" X 12" paper as the final result or, my preference, 12" X 18" paper. I like the larger format only because it allowed more room for the bigger flower prints. 

For the flower prints, I would recommend using a pizza pan. I got a class set at Dollar Tree for $1.25 each and use them ALL THE TIME. We print on them so much! 
By the way, if you are new to using tempera paint with students and are looking for some pointers, I got you covered right here!
I would split this lesson into three days: 

Day #1: Creating the line papers! Do a Line Review with my friend Larry the Line, of course!
Day #2: Flower Printing! You could include a shape review here! In the video, I talk about both organic and geometric shapes. Alfred the Ape Knows his Shapes would come in handy here!
Day #3: Collage it all together! On the final days of this lesson, it's time to create a collage! If students need a reminder on how to use their scissors and glue...well, I think I can help!
AND...if you are looking for a way to have a Calm and Focused art class, you may want to check out my tips here...and my book that kids LOVE to hear while they work...here!

Have a great week, friends!


photo signature_zpsd10b3273.png
Read more »

Wednesday, January 30, 2019

In the Art Room: A Glennray Tutor Inspired Marble Still Life

 So this was a lesson that I came up with just the other day as a way for my fourth graders to 1. have a quickie lesson after working FOREVER on their snow globes ...which look amazing, by the way! Check it out:
(these just need their bases!) and 2. Use the practice papers they created before painting their snow globes. You see, before making the background of their globe, they had to do three painting sketches:
The kids asked me several times what the plan was for their sketches and I was like, I dunno, planets?! The other day, I thought marbles would be more fun...and a shorter lesson. A friend over on IG (thank you Mrs. Cook! Y'all give her a follow!) suggested the artist Glennray Tutor as an artist inspiration...and that's how the lesson came to be. Here it is, if you are interested:
I was SO EXCITED to do this lesson today with my kids that I actually got to work EARLY (which never ever happens) to prepare. The minute I walked in the door, they'd cancelled school for snow. C'est la vie. I did stay and get a bunch of stuff accomplished. Including editing my I Can board!
 If you are interested, the kindergarten lesson can be found here, first grade weaving lesson is here, second grade LOVE lesson is here, third grade is getting ready to create these guys and you already know what fourth is up to! 
I hope y'all enjoy this lesson...and I'm really hoping my kiddos do. I'll keep you posted!
 photo signature_zpsd10b3273.png
Read more »

Saturday, April 7, 2018

In the Art Room: Heather Galler Inspired Bouquets by Second Grade

 Hello, friends! I'm here today to do some oversharing of my second grade masterpieces as they are giving me so much LIFE! Both my young artists and I are beyond excited with how our Heather Galler-inspired masterpieces have turned out. These works of art are HUGE as we created them on 18" X 24" tagboard. I cannot wait to share them at our upcoming art show. Here's the video lesson I created for y'all to explain the process:
I only see my second grade kiddos for 30 minutes, twice a week. On our first day together, we managed to knock this out:
 This lesson could easily be done on a much smaller scale. However, while going through our pieces for the art show, I realized that my students had yet to do a BIG show stopper. Many of the second grade works of art were on the smaller side. I knew I wanted one piece that they would be super proud of. So this big masterpieces were destined to happen.
As y'all know, I have a slight bingo dauber addiction. I have created so many lessons based on my new favorite art room tool! You can find lessons where my third grade students created our school mascot; my first graders created Britto hearts and my kindergarten kids created pigeons and TWO alphabet paintings which can be found here and here
 On our second 30 minute art class, we started to add color to the flowers with both our florescent oil pastels (my favorites are made by Sargent) and liquid watercolor. I don't normally bust out the liquid watercolor but for this big scale, I knew my pan watercolors would just not do. 
 The following two art classes, we wrapped these bad boys up. The kids were THRILLED with their hard work! And so was I.
 But, like I said, this project would have worked out just as beautifully on a smaller scale. In fact, I'm so tempted to do the same lesson with my fourth grade students!
 Some of my students decided to leave their tables or vases unpainted and black and white. I loved their work no matter what they decided.
 These paintings were so much fun to create....we played loud music and even did a little dancing while painting. Who wouldn't be happy while working on these. If you follow me on Instagram, you've seen my kiddos in action. 

 Our art show is now a little over a month away. I will be keeping you posted on our progress. These will be such a beautiful addition to our show!
 When working so large, my students really had to spread out. 
 Can we talk paper for a hot second? I LOVE tagboard, it can easily withstand the weight of the ink that we filled the bingo daubers with as well as the watercolor paint.
 As did the poster board. The only problem was that the shiny side of the poster board did not take to the paint as well as the matte side. Just something to keep in mind. 

 Of course, those kind of papers can be costly. So I would recommend 80lbs. paper. That's what I always order in reams of 500.
 As far as watercolor paint goes, I have found that the paint I get from Sax works just as well as the other brands...I've yet to find a favorite as each is very vibrant. How about y'all?
 I get A LOT of questions about the bingo daubers...y'all! They are my fave but are probably on backorder everywhere as I've told everyone to get some. Try just searching "bingo daubers"on The Google and see what pops up. I fill mine with diluted India ink...I have no favorite brand of ink, they all seem to be great. 
 LOVE to know if you are doing this lesson. Please be sure and tag me if you share on social media!

 photo signature_zpsd10b3273.png
Read more »

Tuesday, March 20, 2018

In the Art Room: Heather Galler Inspired Bouquets with Second Grade

 As we draw toward the end of the school year (okay, I know I'm early BUT in "art teacher years" a couple of months means time for just a handful of projects until the end!), I am thinking about ART.SHOW. Like, 24/7. And my art show isn't until MAY 15TH! I'm trying my hardest NOT to be my usual procrastinating self. So I've been pulling out grade level artwork and seeing what masterpieces we have to hang (we hang everything...if you search "art show" in that search bar on the right, you'll get a taste of our art shows). In doing so, I noticed that my second graders didn't have that one BIG masterpiece. So I pulled out the bingo daubers (yet again) and some huge tagboard and we created these! We did the drawing portion in the first 30 minute art class and we are slowly adding color. These are not finished yet...but the lesson has been so fun that I thought I'd share it with you as we make progress. Here's the lesson video:
For this lesson, we are using our bingo daubers filled with slightly diluted India ink, oil pastels and liquid watercolor. To finish, we'll simply be painting the flowers and the backgrounds...with the option to add color to the vase and table. I rather like the black and white because I find it to be a beautiful balance with all of the color but I'll let the artists decide.
 After our first 30 minutes. It wasn't really a guided drawing...more of a "here's how you can draw some flowers and here's how you can draw some vases and patterns...go to town." We never use pencils first, we just go for it. If they painted something they didn't love, they had to wait until next art class to try again on the back of the paper. This tag board was thick enough for them to do that. The reason I have them wait is because they usually forget about it as they move on. Also...if one kiddo starts over, THEY ALL WANNA START OVER. So, I nip that in the bud.
 Today we began adding color with oil pastels and watercolor paint. It's a big task as the papers are huge. We literally spread all out over the room because only two to three kids can work at a table at a time due to the size. 
 I don't have a favorite liquid watercolor, do you? I find that they are all pretty fantastic. Except the fluorescent ones. They universally stick. 
 I don't dilute my liquid watercolors much...I love how vibrant they are!
I got the great idea from Katie Allain (@mrsallainart on IG) to put my watercolor paint in these color coded cupcake liners to eliminate the guesswork! 
 I'll be sure to do a follow up post on these once complete. I'm so excited! They make my heart happy. 
 Also...this is now my fourth bingo dauber project! The only grade who has not worked with them is fourth and I totally have a project lined up for them using these bad boys. They my fave this year!
 
Are you a bingo-dauber-aholic like me?! I wanna know what you and your young artists have created!

 photo signature_zpsd10b3273.png
Read more »

Thursday, March 9, 2017

In the Art Room: Folk Art Still Life

 Hey, y'all! A handful of my second graders got really close to being finished with their Folk Art Still Life which was my sub plan while I was out last week. I am so thrilled with their hard work (as are they) that I just had to share. Many of them are still adding flowers and leaves so I'm only sharing a handful. Their next step is adding small details with puffy paint which you know I love as much as they do. Here is the lesson video that my sub used with all of my students, kindergarten thru fourth grade:
Speaking of sub, if you need any tips, tricks and/or sub plans, I just hosted a Facebook LIVE chat last night on that very topic! The chat and all of the commentary is archived on my official Facebook page if you are interested. We have been doing those live chats for the last couple of months and they are blast. Well over 100 art teachers join in each time and it's a great way to share. So if you aren't busy on Wednesday night at 8pm CST, be sure and pop by!
While they were with the sub, some of my students had one 30 minute art class while others had two. So what the sub was able to accomplish was beyond her control. What I love about having a recorded lesson (and a project that the kids are in progress) is that when I return, I don't have to scramble to slap together lesson plans. I can just pick up where the sub left off. 
 With the sub, my students were able to get their sticks done and glued down to the background. When I came back this week, my students worked on their vases and flowers. By next week, they should have all of their flowers and leaves complete and be ready to add some puffy paint. 
One thing that was not in the video was the oil pastel background. One of the kids added color to the background with the bright oil pastels and we all lost our minds...brilliant! So we all had to do the same. You know how that goes, right?!
I know they aren't complete...but I just had to share! I think these are so pretty and perfect for spring and Mother's Day. If you give this project a go, you'll have to let me know. 

 photo signature_zpsd10b3273.png
Read more »