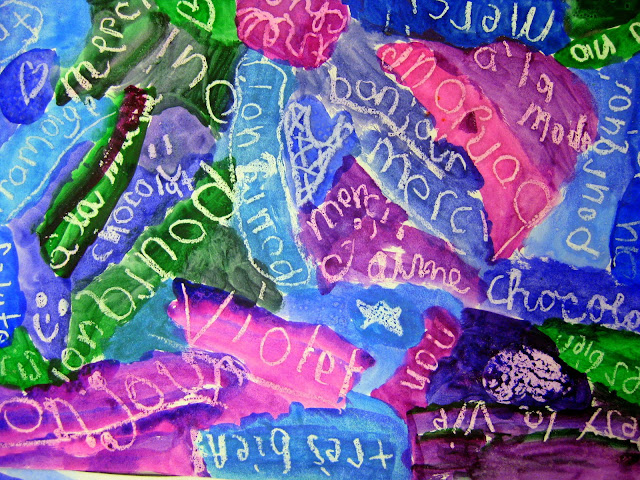
I'm here to share with you the second Parisian-themed project my totally awesome third grade artists just finished up. We actually began this project at the introduction of our French unit when we were learning how to speak and write in French (you might recall a certain pink poodle named Fifi introduced us to the language of love). If you take a close look at the crayon resist in the background, you'll notice a little of our French vocabulary.
 |
| I just now noticed how this incredible artist somehow managed to cut out a tiny person in her hot air balloon. These artists always amaze me. |
But I'm getting a little ahead of myself. Let me tell you how we went about creating our Super Silhouettes:
- We began with 12" X 18" heavy stock drawing paper. I learned a long time ago that anything below 60 lbs paper is just junk. We used white oil pastels to write French words all over our papers. We chatted about variety, fonts and threw in a couple drawings of the Eiffel Tower and the Arc de Triomphe when the writing became too tedious.
- From there we began our water color painting portion of the project. I never really was a fan of watercolor paint with children because I always found the colors to be very, well, watery. And pale. However, when I learned about Crayola's Mixing Sets, I became an overnight watercolor-with-children convert. These are available in most art supply catalogs. Don't want another plastic case of watercolors? Remember, you can purchase individual colors. My favorites in the set are fuschia, turquoise, red-orange and blue-violet.
3. I did limit the kids to either warm or cool colors with fuschia being the swing color. When introducing watercolor, I demo to the kids how to moisten each color with a drop of water and twirl the brush around in the color on it's tippy-toes like a ballerina (no scooting the brush around on it's bottom and giving it spider legs). I emphasize how the colors should be translucent, not opaque. Painted areas should have a watery appearance, not dry, scratchy brush marks. And, of course, everyone lets out a squeal when they see how the oil pastel resists the watercolor. Much better than a crayon, by the way.
4. On the second day of Watercolor Wonderland, I introduce a couple of tricks. I demonstrate double dipping the brush, first loading it with one color and then adding a different color to the tip. When the brush is laid on the paper on it's side, it produces a gradation of a couple colors. You can see that best in the word "violet" in the painting above.5. Another trick is the introduction of salt. When sprinkled on damp paper, it absorbs the paint and produces a beautiful snowflake effect.
6. Once finished, we had a chat about some of the most famous places in Paris. We also discussed what a silhouette was and brainstormed some ideas of what we could add to a silhouette landscape. I created the above poster so the kids could see some ideas. Symmetry was emphasized.
 |
| I love the "Paris" above the Eiffel Tower. |
 |
| A kite?! Genius. |
When I told the kids that we were going to be saying "au revoir" to Paris, France and "guten tag!" to Germany, they seemed sad to go. When one of them asked if I was going to repaint my windows for Germany I believe I said the words, "are you crazy?! No!" To which the questioner replied, "good! Then we aren't really leaving Paris!"
And that made me pretty happy. Almost as happy as these sweet silhouettes.


Oh my gosh. I am literally squealing over how cute this is. I love Paris! And oh my goodness, I love the french words in the background.
ReplyDeleteI'm with Jen about the wordy backgrounds. Excellent. It will make the viewer take a second look for sure. Pinned, with thanks.
ReplyDeleteJ'adore! These are so much fun!
ReplyDeleteThese are awesome! The kids must have loved them! :)
ReplyDeleteHi Cassie,
ReplyDeleteSome time has passed since 2012, but I found these while searching something fun to create with my Finnish 7-years olds who are learning french. Can I borrow this excellent idea of yours? I would, of course, name you as the source for this artwork.