For as long as I've been at my current school (closing in on 15 years, y'all!), we've had an end-of-the-year/school-wide/hang-everything-up-that-every-kid-has-made-all-year art show. Along the way, I've learned many a thing which I've shared with y'all here and here. This year, I learned that I have The Best parent volunteers in the world (thank you Molly, Terri and Donna for making sure every child felt like a mini-Monet!) and that deer mesh and clothes pins were a match made in Art Show Heaven. Last week, I shared with y'all the clay display portion of the art show in our 1950's style diner. This week, I thought I'd take you on a tour of the halls of my school (with links to the projects shown) which were PLASTERED from floor to ceiling with masterpieces. Like, y'all. We didn't have a space to spare. Which truly is my style of decorating. So, let me show you around! Let's start in Kindergartentown.

I see my kindergarten students once a week for forty minutes. Our clay tacos from the diner can be seen here. We worked on lines at the start of the year and built on that knowledge throughout with lessons on abstract painting, shape castle drawing and collage, winter landscapes, self portraits and guided drawings to name a few.
One of my favorite lessons came from my buddy Laura Lohmann of Painted Paper. Those Model Magic flowers were so fun!
I love doing guided drawings with my younger students throughout the year. That pigeon is an example. We read Don't Let the Pigeon Drive the Bus, which is short and awesome, draw together and work in watercolor paint. This reinforces line, shape and color. Not only that, but guided drawings build confidence in my students. If you've never done guided drawings with kids or are new to teaching art to children, I've really learned a lot from this book over the years.
Of course, selfies and abstracts are something that kindergarten has down, y'all. Here's a link to my fave self-portrait lessons.
With kindergarten, I usually stick with the same lessons, unlike all my other grades. Although, I do like to change the lessons up a bit. Here is an altered version of our winter landscape lesson.
First grade comes to art twice a week for thirty minute blocks. I don't know how they did it, but first grade ended up with the most amount of work out of all the grades. I mean, that's ONE class, y'all! AND that's not even all of their work.
We did so many fun lessons this year. From the van Gogh-inspired trees to the Robert Indiana printed LOVE, these were a busy bunch of artists.
We did these selfies at the start of the year and those stars at the end.
Of course, they went all mad scientist on me!
Occasionally, if we are between projects or simply have one art class before heading into a break, we'll create a guided/painted project too. That's how these Party Pandas came to be!
Second grade has the same schedule as my first grade: twice a week/thirty minutes. They were also super busy this year!
Many of you have asked about the deer mesh and Gaffer's tape. You can see the tape at the bottom in this photo. More tape is used across the top just so the mesh does not sag. Then the tape is hidden behind artwork by my super crafty mama helpers.
One project we always do is circle loom weaving, a kid fave. And we created these Heather Galler-inspired cups of hot cocoa!
Everyone in the school started the year learning about Rousseau. I love the second grade collaged version of his adventures!
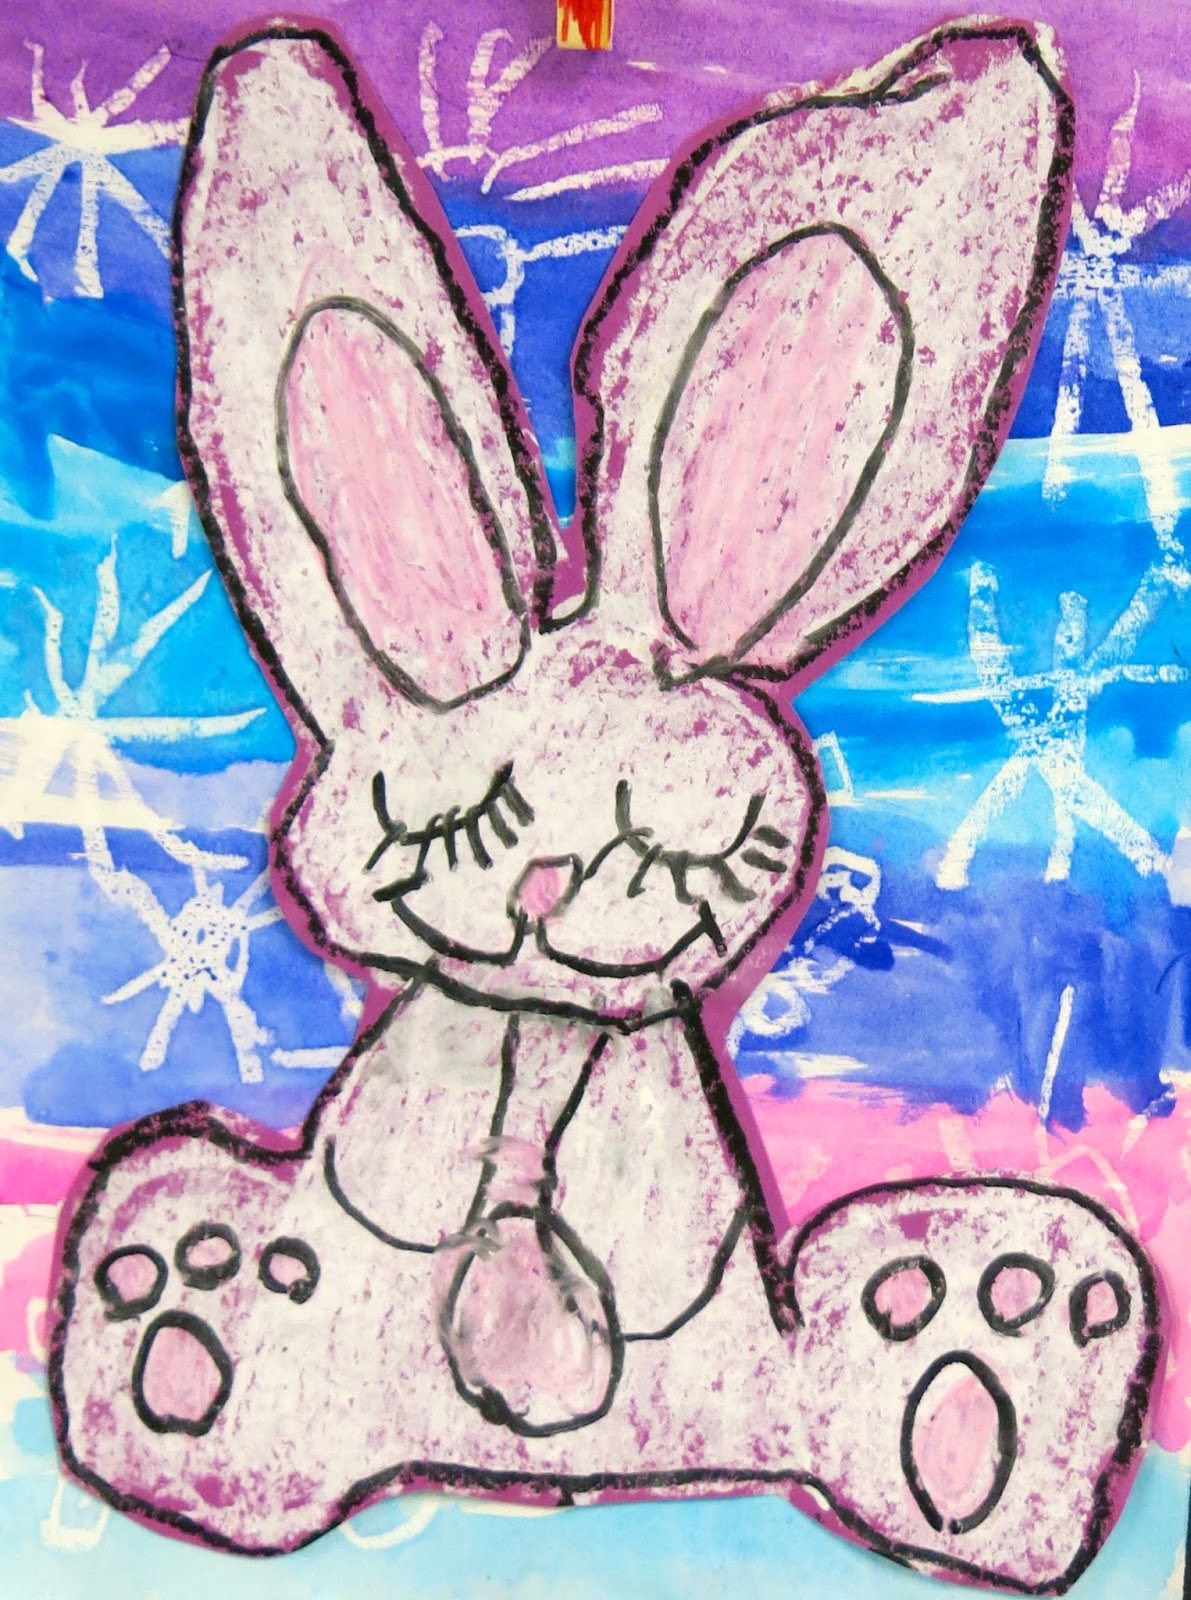
The bunny was their guided drawing/day-before-break project. So sweet!
My third grade students come to art once a week for an hour. this means we do longer projects. We end up with less work...but bigger/greater things, says me!
By the way, my early finishers worked on decorating the clothes pins that we hung the artwork from! They loved doing it and it added an extra layer of kid-created to the show.
My husband snapped many of the photos of the art show as I was swamped with young artists in my art room. He said this lesson was one of his faves. I realized I've not shared it with y'all...so stay tuned! I'll have a video of this lesson up soon.
We finished off our stitching with metallic frames that added a bit of pop. And, of course, we created exactly ONE MILLION prints to achieve those printed landscapes.
Third grade's answer to Rousseau were these painted paper tiger collages inspired by the art lessons of my buddy Laura!
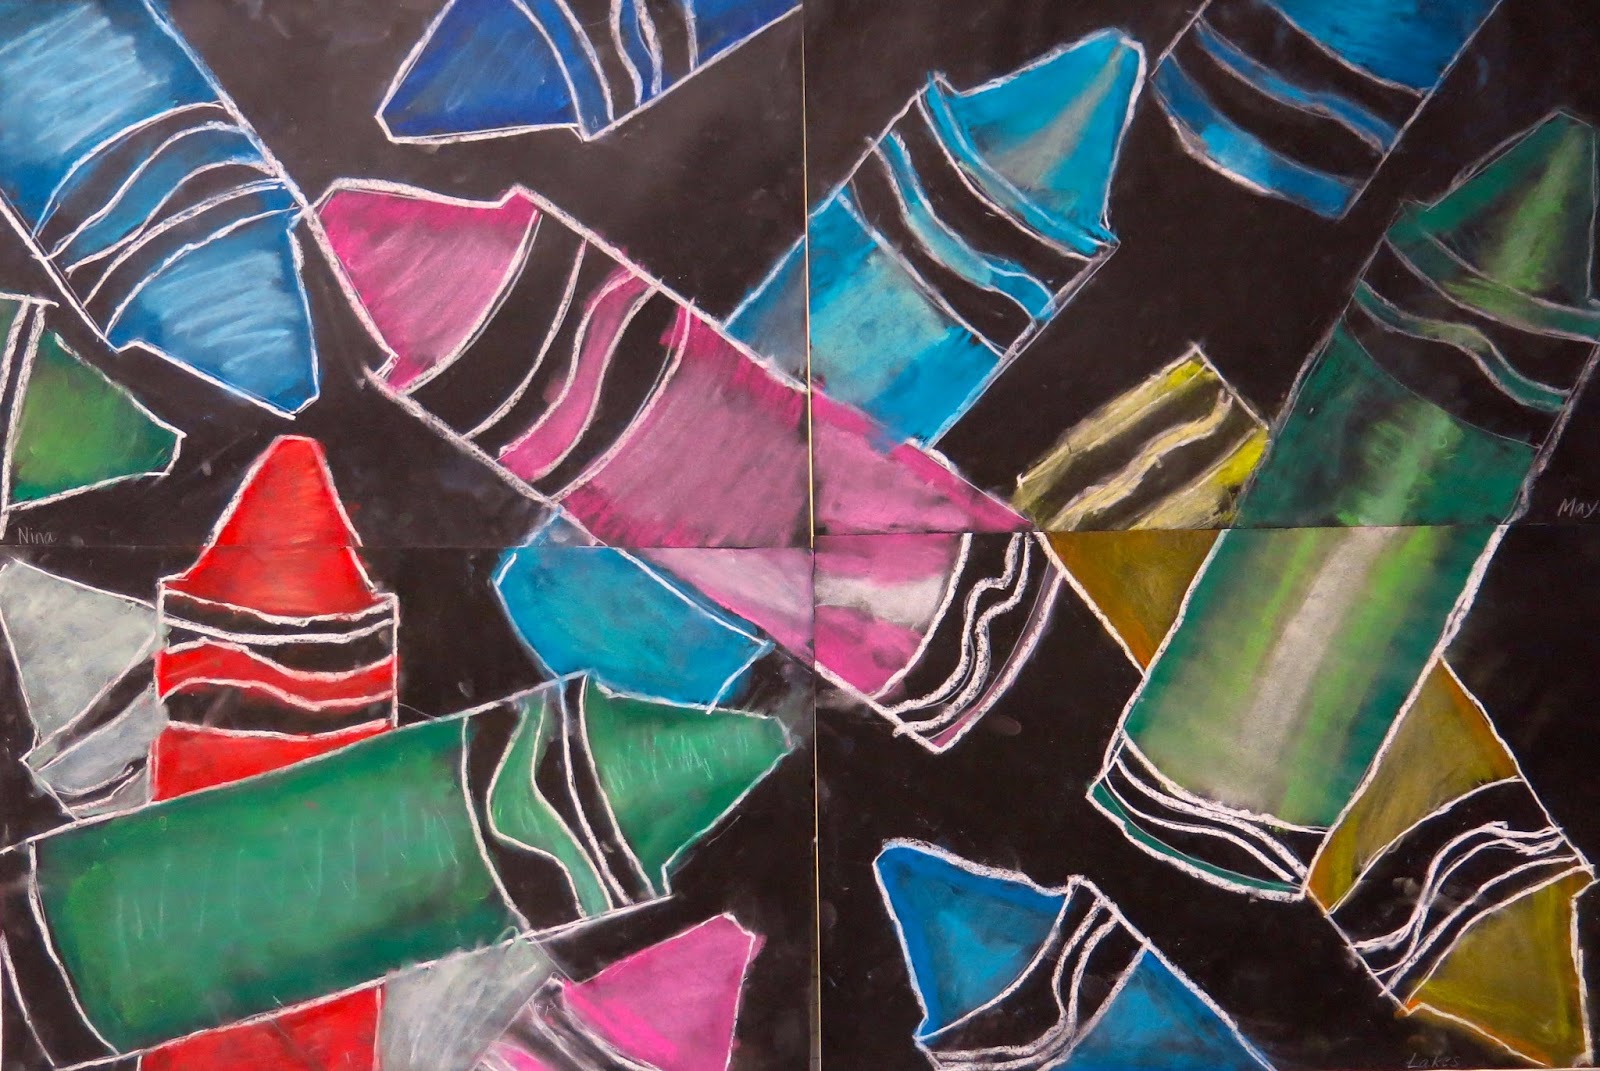
Fourth grade not only created clay food and pencil/crayon sculptures, but they stitched, collaged, painted and chalked just about everything they could get their hands on.
Instead of doing woven pouches like we usually do, our fiber arts alternative were these string art pieces. I really love them on those round pieces of cardboard and may have to do that again next year.
The abstract pieces the students created with artist Hannah Lane was also one of my faves.
But who could forget the cuteness of their Rousseau-inspired pieces?!
Or their Super Hero Selfies?
I've not done much collaborative projects in small groups (usually big stuff!) but this one was a crowd fave.
Another crowd fave were these diner signs and advertisements we made for the art show! Snapping these photos and creating these pieces was a great way to build excitement for the show. You can see the video lesson of those diner signs here.
I mean, check out all that cheesiness! If you give a kid a mustache...isn't that a book? It really should be!
Every year, I make a lil list of what I plan to do differently. Here it is in short order:
1. Start matting and framing work earlier (like, as they finish the work!)
2. Don't let the children of the parent volunteers EVER leave our school.
There! Done and done.
If you'd like to see Art Shows of Years Past, here you go!


Wow! An amazing display of talent! :)
ReplyDeletethank you, I'll pass along the kind words!
DeleteHow do you attach the deer mesh to the walls? Thanks!
ReplyDeleteIt is attached with Gaffer's Tape. We simply taped the mesh to the walls with it! If you follow the link to the video, you can learn more about it.
DeleteLots of great work! :D
ReplyDeleteThank you! I worked 'em hard all year!
DeleteAmazing, inspirational, and exciting to see so much incredible, optimistic art. Very impressed!
ReplyDeleteLove your displays! Do you re-use the deer mesh yearly? Does it tear easily?
ReplyDeleteYour hanging systems are very clever. Jan
ReplyDeleteDo you reuse the same mesh each year or buy new? I used it for the first time this year and I'm unsure whether to keep or toss (it's currently wadded up and covered with paperclips, of course).
ReplyDeleteThis is amazing! So amazing. My faves are the super hero selfies and the lesson you haven't blogged about yet. I do an art show at Christmas but I only hang one work per kid. But we have over 900 kids at my school. Definitely going to look into the deer mesh.
ReplyDeleteWOWZA!! That is a LOT of kids! Look into that deer mesh, I think you'll dig it!
Delete