Sunday, March 28, 2021

20 of My Favorite School-Wide Collaborative Projects!

Collaborative projects! Collaborative projects are one of my favorite things. I love them at the start of the year and the end. I love doing them with the whole school or just a grade level. I love using songs, themes, artist-inspiration...you name it. I just love collaboratives!

We've done a TON over the years and I thought I'd put them all together in one big ole blog post. So, here you go: my 20 Favorite Collabortive Projects. Be sure and click on the links, many of these have how-to videos. 


Check out this blog post on how we created several canvases in this style for our school and the school library!


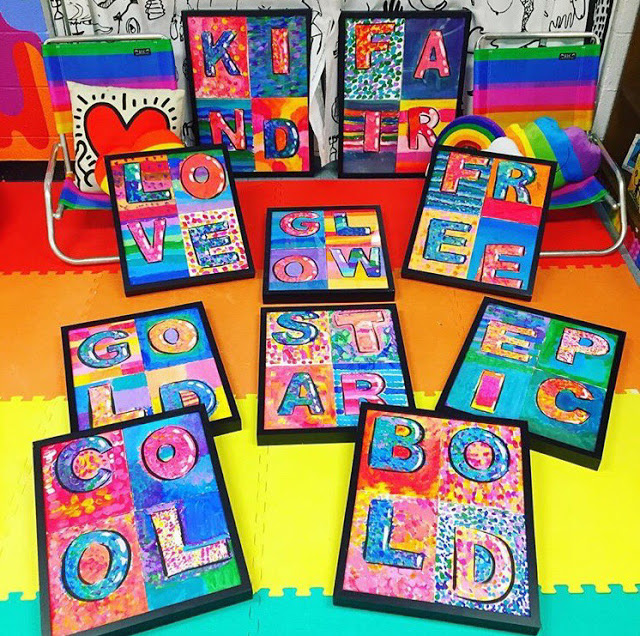
Students worked in table teams to create these positive four-letter words to describe our school

A fun mural based on the book You Be You was created by nearly all of my students. You can learn about the process of creating our fish here. Read all about the making of the mural itself here!

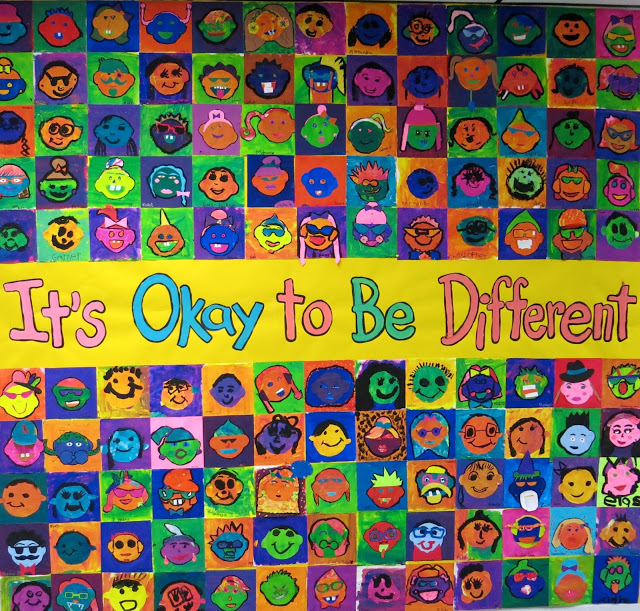
Another book we used for inspiration is the book by Todd Parr called It's Okay to be Different. You can check out how we created these collages here!

The Our School Has Heart mural was a piece with a contribution from each student in the school. You can see the breakdown of who created what in this blog post
Our clay collaborative mural is a bright and shiny beauty that hangs in a prominent place in our school. Each student contributed something to this piece...you can read more about the process here

One year, we created a Village of Kindness as apart of our art show! Each student upcycled a milk carton that our cafeteria queen cleaned in the dishwasher. The students made little doors that opened and said kind words to those who peeked inside. Students worked together to create the landscape on the bulletin board. 

I love to do collaboratives at the start of the school year. I especially like ones where students celebrate our school and that set a postive tone. That was the idea behind this collaborative!
Another fun way to start the school year is with some selfies! We've created them for a monochromatic mural. You can check out the video here. 
Inspired by the artist Romero Britto, this mural was created by my students when I was out for jury duty! My sub just played the video and when I returned, I assembled the mural!
A collaborative mural that definitely made the rounds was this one! The kids loved creating the feathers and it was a beautiful thing while in the hallway but I will say...it was a lot of work to assemble. All the details here. 
My fourth graders created this collaborative one year that lives at the front entrance of our school. We even 'wrapped' it for Christmas and brought out admin out for them to unwrap it as it was hung on the wall of our school. 
We kicked off this school year with our What a Wonderful World collaborative mural. Details and video tour here. 

Here's another look of our school mural. Above that, you'll see our Learning for All collaborative!
During our field day one year, my students rotated through many art stations. One of them was this alphabet and number series. My librarian requested them and we just love how they turned out. Click here to see them framed and hung in our school library. 

Much like our monochromatic collaborative, this map collaborative was created with a self-portrait of each of my students! 

We are the tigers at my school so we do tiger-themed artwork every so often. This mural was created by first graders of all of their tiger drawings. You can find a how-to video right here!

In table teams, my third graders created a Rizzi City inspired by the artist James Rizzi. 

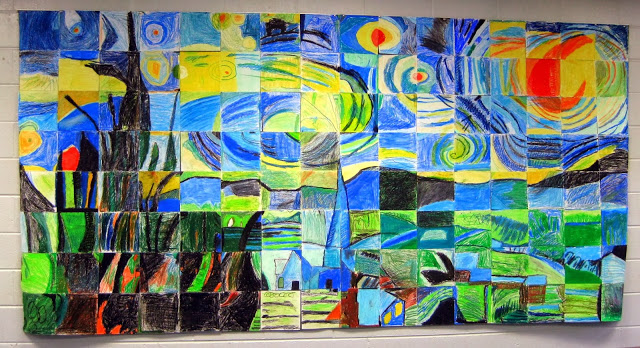
One year, we did super-sized works of art inspired by Andy Warhol and Vincent van Gogh! When these came together, they were stunning. All the details can be found here


photo signature_zpsd10b3273.png

Tuesday, March 23, 2021

Are You an Art Teacherin' Workaholic?

Pop quiz time!

* Do you forego bathroom breaks so you can fill paint trays despite your about-to-burst bladder?

* Do you eat junk food for lunch because it's fast and easy and that kiln ain't gonna load itself?

* Have you given up your own creative pursuits because you 'just don't have the time' but spend hours after school hanging a bulletinboard? 

GUESS WHAT?!

You just might be an Art Teacherin' Workaholic!

The other day, I made a comment in an art teacherin Facebook group (my first mistake). Someone said they were having headaches and I suggested they drink more water. Every time I am overwhelmed and stressed (usually during art show prep time), I start to feel sick: headaches, dizziness, I stand up and ask ‘who turned out the lights?!’ before feeling like I’m about to faint. Went to the doctor and was told: you are dehydrated! So now I think water is the magical elixir (cuz it is). But when I suggested that this art teacher drink more water, another said (paraphrasing here): who has the time?! Who has the time to refill on water and then have time to relieve the bladder when there is so much Art Teacherin prep to do?

L👀K...I get it. I survived on granola bars and Diet Coke (terrible, right?!) for lunch my first couple years teaching and, up until last year, frozen burritos (frequently consumed still mildly frozen) and Halloween candy because I just thought 1. I don’t have time and 2.  My health can wait.

If you are doing that, you are an art teacherin workaholic.

What to do about it? Well, let's talk about it. I'm chatting all about it on my podcast today, take a listen right here. 

You can’t be the best art teacher you can be if you don’t take care of yourself. So! For heavens sake, drink water and go pee. Love y'all! Mean it!

photo signature_zpsd10b3273.png

Monday, March 22, 2021

Art Teacherin' Extravaganza, 2021!


Hello, friends!

I am so excited to share BIG NEWS! The Art Teacherin' Extravaganza 2021 registration is now open!

I opened registration to those who are members of the Art Teacherin' Extravaganza Facebook Group and I've made mention on my Instagram. Today I thought I'd share all the Extravaganza details because we are going even bigger and better this year!

However, if you are just ready to skip me chatting and secure your spot now, you can do so right here!

In case you are wondering just what is the Art Teacherin' Extravaganza, this is my vision behind it...

Let's talk about what's going to be different this year and that might also give you a better idea of what to expect, if you've not attended before:

1. We are going bigger! We are utilizing the full conference center at Montgomery Bell State Park. This means we can host more friends and have more space for creating. It will also allow us to continue to socially distance.

2. Last year, the Extravaganza was the same line up and presentations for two days. Meaning, you could either attend Extravaganza A or B but if you did both, well, you'd be hearing me all over again. We listened to your feedback and many of you said that you'd love for the Extravaganza to be four days! So this year, you have three options when attending. You can attend the first Extravaganza, The Sequel OR The Whole Shebang! Below you can see a breakdown of our schedule. 

3. No repeated presentations from last year! So if you attended last year, brace yourself. New projects, lessons, tips and tricks just for you!

4. We have PRESENTERS! I am so excited about this line up of educators that will be presenting with me. Between the four of us, we have 77 years of art teacherin' experience! Here's a look at them:
While in town, you'll definitely want to visit Danielle at The Clay Lady Campus!
Those of you who attended last year know our buddy David well! I cannot wait to learn from him!

Jen's love of colorful projects is as bright and happy as her personality! 

Here's a breakdown of our daily schedule of events! I'll be presenting fibers, printmaking and sculpture...my faves!


Just like last year, a binder FILLED with lessons will be provided along with all art supplies and tons of giveaway goodies. We want you to leave with a year's worth of hands-on goodness to share with your students.

But, most of all, we just want you to have fun. Last year, we had an absolute blast and made so many new friends. We cannot wait to see you all once again. To take a peak inside, check out this video that our very own David created:

Feel free to reach out if you have any questions. If you need a PO for your school, drop me or David a line at artteacherin101@gmail.com

Thanks, friends!


photo signature_zpsd10b3273.png

Sunday, March 21, 2021

My 15 Favorite Art Lessons for Spring!


Not sure if spring has sprung where you are but, according to my allergies, it's in full swing here! You know, I never had allergies in my life until moving to Tennessee. Now I have the pleasure of a sneezy nose, watery eyes and sinus pressure like a hammer through the skull for a couple weeks on end twice a year. Good times, for sure. But I suppose the floral and fauna make it all worth is. Or something.

Anyway, I thought I'd share with you my very favorite art lessons for spring! I'm just wrapping up my spring break and trying to get my 'head in the game' as I think about how I'd like my students and me to close our school year. So today I'm sharing my very favorite Springtime Art Lessons!

First up is this lesson I posted way back in 2012! It is one of my most popular blog posts but, to be honest, not a lesson I've repeated frequently. Why? Well, it does involve a lot of prep work, especially if you are going to make your own gelatin plates. Making your own gelatin plates is a lot of work, a lotta smelly and it's not vegetarian friendly. Gelatin is made from the bones of animals (which is totally gross if you think of all the Jell-o we ate as kids) and that always made me feel badly. However, these days, you can do a couple different things: make permanent gelatin plates (the ones in my blog post last for ALMOST a week before getting rather funky) or you can purchase the permanent Gelli plates. That's what I've done. And that's what I used for this lesson...
This Andy Warhol-inspired flower print lesson (and video lesson!) was so much fun to do and a whole lot easier because we used our Gelli plates. Springtime is when we embark on a whole lot of printing in my art room so I am definitely thinking that this project will be on the agenda. We used fake flowers found at the dollar store but real ones would work as well. They just tend to fall apart a little more. Initially, I did this lesson at the beginning of the year with a second-grade class...and I think they were too young. This time, I may try it with my fourth graders or my second grade after they finish their first printing project. Printmaking is so fun to teach because once they have the basics, the kids become their very own printing factory!

You can also print on fabric! I created a bunch of these printed squares using the same materials and method and then stitched them onto a dress from the thrift store. Your students could make a quilt with this idea! More info here. 
Nothing says spring like a big, beautiful and colorful mural! I have done two versions of this mural. Details on how my first graders created the flowers for this mural in this blog post. Curious about our What a Wonderful World mural? Video tour and more photos can be found here. 
Something we do every spring is a ceiling tile project. You can read how we started on this adventure here. The back story is that it was all by accident! We were hosting a sidewalk chalk artist and we were all to draw outside on the sidewalk. Unfortunately (or fortunately!) the day was to be a rainy one. So I had to think fast and we had the idea to draw on the backside of ceiling tiles with chalk. The back side has the same texture as a sidewalk and holds chalk perfectly (much better than paint!). Since then, we've done a ceiling tile each year! One year, we did flowers...which could easily translate to paper as well. Video and lesson for this right here. 

Looking for a fun springtime lesson for your students? These clay flowers were created by my third graders and were a hit! They came out of the kiln just in time for Mother's Day! Complete lesson here. 

Nothing says spring like these second-grade butterfly prints! This could also tie in perfectly with those Andy Warhol flowers as these look like early Warhol paintings! Video demo here. 

Whenever we are weaving, we always have tons of yarn scraps. The kids and I hate to throw them away so one year, we decided to create little still lives with them! These are the results. It was so fun to create and recycle. 
Looking for something for kindergarten? Look no further than these super cute collage flowers! We tied this in with a flower pot painting project too. So much fun!

Nothing says spring like landscape paintings! Especially colorful ones like these. Check out this lesson here. 

If you're hesitant about using chalk in your art room because of the mess ane the fact that it never seems to set, then you might want to try this lesson on for size. It's always a hit and the results look like a cross between oil painting and watercolor...and it's done with chalk and liquid starch! Lesson and video here. 

This collage lesson began as a sub plan! And as a way for us to use up our bottomless supply of popsicle sticks (anyone else have exactly one million trillion?!). Less own with video here!
A lesson I come back to year after year is this one! We go big with these drawings and the results are always stunning. Full lesson here!

Love these beautiful cherry blossom paintings created by second grade! Lesson details right here. 

And there you have it, friends! 

My top 15 art lesson for the spring. Thanks for dropping by!


photo signature_zpsd10b3273.png