Thursday, December 4, 2014

In the Art Room: 10 Totes Amazing Field Trip Tips

Do y'all take your students on field trips? I remember my very first year teaching (some 17 years ago, ahem) when I was informed that taking kids on a field trip was apart of my curriculum (which reminds me, New Teachers: Don't confuse your curriculum with a Bible. Ya don't hafta live or die by the thing. Think of it more as a suggestion. More than likely from someone who hasn't been in an art room for a handful of years. Possibly because they couldn't handle the scandal [oh, now, curriculum writers, don't get your artsy pants in a wad. You know it's kinda true.] Now, if you'll please help me down from this here soapbox, I'll return to the post at hand. Thank you). And I just about freaked out. I mean, here I was, in my first couple months teaching, just trying to wrap my absurdly small brain round the fact that the art education of 400 students was in my constantly-paint-covered hands and now I also had to take 'em field trippin? Are you kitten me? Cat's crazy!

But I did. I took 100 first grade kids to see some Impressionist exhibit.

And, what? You want me to tell you it went off without a hitch? That the whole thing was a magical experience? Well, it wasn't, y'all. I made many a mistake (One being I paid for 100 first graders to wear headphones for the exhibit. You know, like a Walkman, y'all [17 years ago, remember?] As you can imagine, that ended badly). After that first experience, you'd have thought I'd never give it another go. But afterward, the kids talked about our field trip for weeks (and so did their classroom teachers, unfortunately. Ahem). They loved the art, they loved the bus ride, they even loved those ridiculous Walkmans. And it made me realize that the kids just loved getting out and experiencing the world. Which immediately made me thing of The Most Famous Field Tripper in the Universe...
That's right. Ferris Bueller. 
Because our Word of the Week had been "gratitude", some of my second grade students wrote thank you notes to the Frist Center for Visual Arts. I shipped 'em out just yesterday.


I mean, you've gotta take 'em out to see the world so they won't miss it, right?

Since that first year, I've taken my students on field trips to the local art museum or botanical gardens nearly every year. Now, I don't take 'em all (I'm not that crazy) but the grade level where it most pertains to what we are studying. Or, if I'm being really honest, to the grade level that is the least likely to run amuck and act a fool. Which changes every year, as y'all know.
 Now over the years, I've learned a thing or three and I thought I'd share 'em here with you. To ease your field trip anxiety (which never actually goes away. I suffer from Field Trip Night Terrors before each and every outing.) I thought I'd share with y'all my 10 Totes Amazing Field Trip Tips. Are ya ready? 

1. Preview the exhibit before planning a trip. So, the art museum has a great exhibit on Pablo Picasso? Sweet! Just be sure to check it first to be certain it's not Picasso's lots-of-boobs-and-naked-chics period, emrkay? Seriously, be certain it's kid-friendly and interesting. Don't no (under 10) kid care about Picasso's philosophy on Cubism.

2. Get the lay of the land. Before you take kids, you really outta know just where the bus will drop the kids, what door you'll enter, what time the art museum actually opens (last year I got us there about 10 minutes before the museum opened. It was freezing outside! I seriously ran from one locked door to the next, banging on the door,  looking for a way in. I felt like Dustin Hoffman in the final wedding scene of The Graduate). It's also super important to know just where the bathrooms are. I mean, do you really wanna be known as the art teacher whose student peed in the middle of a Picasso exhibit? "Clean up in the Rose Period!" Me thinks not. 
3. Talk to your teachers and get 'em on board (i.e., have them do your dirty work). The teachers at my school are super supportive and have always been corporative with field trips. These folks take their students on field trips more regularly than we do, so they are used to this field trip game. So, put them on the case! Use their permission form format when writing your own (they may even be kind enough to just write it for you!). Also, have them collect the forms and the money. Think of it this way: it's a lot easier for them to collect from the 20 plus kids they see daily then the 100 you see only every couple of days. 

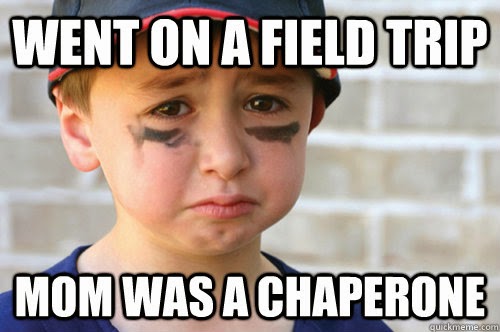
4. Bring in the reinforcements: CHAPERONES! My fave chaperone? Our school nurse. She's there "just in case" and I'm so happy for that. I also love it when grandparents are able to make the trip as I can tell it really means a lot to them. And, as a general rule, the meaner the mom-chaperone, the better (oh, I joke. Kinda).
5. Tell the kids what's up. I created this prezi before my most recent field trip. Cuz the more informed the kids are, the more excited they are going to be. Many of my second grade kids had not been to the art museum. Don't assume your students have either. This might be a once in a lifetime for them (fingers crossed that's not the case!). 
One of my fave things to do before a trip to the art museum, is to write about it as a class. I usually start with, "What do you know?" either about the art museum or the exhibit, "What do you want to know?" which encourages the kids to reflect on their upcoming trip and, when we return, we talk about "What did you learn?" As the kids tell me this info, I'll jot it down on a large piece of bulletin board paper. Often times, I'll display this along with some photos from the experience in the hall upon our return.
Our art museum has a lot of history. So I really enjoy sharing that with the kids along with what's inside. When the kids make more of a connection with a place, they'll be more excited about going there and, hopefully, want to go back. 
6. Museum etiquette. Look, even school-skippin Bueller knew how to behave in an art museum.
We spend a whole lotta time on this here chat. My biggest concern is always disturbing the artwork and/or disturbing the patrons. I tell 'em, people pay big bucks to visit an art museum. They're there to see the art. Not some children with no sense of etiquette. After all, that's just down right uncivilized and might cause people to look at us like this...
 Like, ew, what's wrong with that kid and why is he hanging all over Picasso's Blue Boobie Nude Number 23?

Now, you'll most def wanna silence your cell phone but don't forget to bring it! You never know what kind of emergency call you might have to make to your school (I had to ring the bookkeeper last year in a panic. I hadn't paid the admission cost! Thankfully she came through with a credit card payment...but I woulda been in hot water with out my phone). 
7. Tell 'em what they'll experience. You know, like the artwork. Show them examples of the art and how they'll see "the real thing" (which is a mind-blowing concept that I don't actually own the real thing, to my students. "Wait, you mean that poster isn't the real Starry Night?!" Um, no). 
At our art museum, we spend one hour touring the exhibit and the following hour creating stuff. I explain that process to the kids so that they completely know what to expect when we arrive. AND because I completely hate answering, "What are we doing noooooow?" twenty-thousand times. Ahem.
8. Bus behavior. Oh, the bus. Not my fave part of going on a field trip, not gonna lie. However, on my most recent trip, the teachers I went with did something which I thought was simply genius. They requested that the kids remain silent while we were on the city streets so that the bus driver could focus. As soon as we hit the highway, they were free to chat. The noise level was hardly noticeable because of the sound of the highway. Once we turned off the highway toward the museum, it was back to silent bus. Smart, right?

Speaking of bus rides, before that bus even reeves up to leave for the museum or return, please be certain to do a head count. Like 20 times. Those teachers I mentioned above? They were constantly counting their kids. Once on the bus, once after we got off the bus, again inside the museum -- you get the idea. Count those heads like there's no tomorrow, y'all.

And don't sit with the kids. Definitely don't eat any gummi bears they've been keeping warm in the pockets all day (please tell me I'm not the only one who remembers this scene?!). Personally, I like to sit at the front with the bus driver. Because I'm always a little concerned s/he might not know where to park or drop us off. Oh, and speaking of bus drivers, I always have a map to the museum on hand for the drivers as well as chaperone passes (because I hate the idea of them sitting on the bus for two hours). 
9. Reflect fondly on our experiences. 'Kay, so I already told you about the one writing thingie we sometimes do. This year some classes even wrote Thank You cards which were pretty sweet to read. You've gotta have some sort of reflection time after such a trip, right? Get 'em talking about what they learned and loved. 
 I mean, can I get an "awww...."? 
Reflecting can also come in the form of creating. We actually created these paintings at the start of the year when we first began exploring Kandinsky (lesson here, kids). So it was a great tie-in to what we saw at the museum.
10. Be inspired! Seeing an artists work in a museum is inspiring for the kids and me as a teacher. The kids are excited to return and create and I'm thrilled that I squished some culture into their lil heads. It's a win-win-inspirational experience, y'all.

So, tell me, do you take your kids on field trips? What are some of your Totes Amazing Field Trip Tips?! 
 photo signature_zpsd10b3273.png

Tuesday, December 2, 2014

DIY: A Pack-a Attack-a Alpaca (AKA, Tales from an Alpaca Addict)

It could easily be stated that there are many a thing wrong with me. I suffer from anti-cleaning disease. I have a super bad and unshakable case of I-despise-cooking-itis. Not to mention the car-that-looks-like-an-army-of-hobo-clowns-live-in-it disorder which I deal with on a daily basis.

However, despite all my countless flaws, I never thought I'd add Alpaca Addict to the list...and yet...
Each and every time I look longingly at the photos from my alpaca trip, I'm all...
For that reason, I went on a wee bit of an alpaca-crafting bender over Thanksgiving break. With the help of my moms-in-law who, by her artsy nature, is always (willingly) dragged into my crafting adventures, we sculpted and papier mached these bad boys.
I know, right? Like, so super cutes it burns your retinas. And we used a buncha scrap supplies that woulda otherwise ended up in the recycling bin. Or in the back of my car with the hobo clowns which is more likely the case.
So just how did these lil guys come to life? Lemme start by showing you what our kitchen table looked like after the tofu-kery and pumpkin pie were cleared away...
So just what did we use? Well, lemme start by saying that is not mashed potatoes in the middle of the table. To craft our Alpaca Ornaments, we used:
*  Clothes pins for the legs. The ones with the metal wire hinge thingie work the best.
*  Wallpaper paste. Not be confused with mashed potatoes. Like, ew.
*  Aluminum foil scraps. I saved all the foil scraps from the kids' projects this year thinking that we'd come up with something to create. 
*  Newspaper torn into strips. What with Black Friday ads, we had plenty of newspaper to use. 
To create the body, we simply stood two clothes pins on end and crumpled a piece of foil over them for the body. Another piece was then wadded up and added for the neck and head. From there, we commenced wrapping the alpacas with newspaper. The ears were created by folding a wad of newspaper up to create a triangle shape and then attached. Because of their small size, these guys really took no time at all. And they were pretty easy once we figured out how to sculpt the body. I'm thinking my third and fourth grade kids could totally handle the scandal. 
After drying overnight, we give the little dudes a base coat of white to hide the newspaper print. From there, I just started slapping colors on the little guys whilst merrily scrolling through my alpaca pics for inspiration.
Then came the hair stylin's. When I was paper mache-ing, I didn't have a clue how to go about creating the hair. However, on a trip to the craft store, I found these super awesome pom-pom-making contraptions that worked out perfectly.  
In my bottomless stash of stuff (which reminds me, I can also had crazy-crafty-hoarder to my list of illnesses), I also happened to have yarn the exact color of my lil alpaca friends. So I promptly set to creating pom-pom alpaca afros. 
Also in my stash were some ethnic ribbons for the "blankets" to drape over the backs. These were hot glued into place.
Sparkly ribbony stuff was added for the hanger and viola! All ready for the yet-to-be-dragged-outta-the-closet Christmas tree!
 At some point during all this alpaca-madness, I got the crazy notion to paint some stationary. Because, you know, why not?
 I'm thinking that if I can fight off the urge to keep them myself, I just might gift these sets for Christmas. 
 I went about making them factory style on the dining room table (you know, because the kitchen table was full of papier mache and alpacas. As it should be). I started by just dry brushing some stripes...
 And some more stripes before stenciling. I found this super groovy ethnicy stencil at Michael's and bought it even before I had a plan. And I'm so glad I did because I loves it so.
After the background dried a bit, I sketched in some alpaca silhouettes in paint. Half the time they ended up looking like giraffes, llamas, deer or some creature from the Black Lagoon but I was determined to just keep painting and make 'em work. 
Once dry, I thickly painted stripes, dots and patterns on the back of the alpaca to mimic a blanket. I also added a lil line around the alpacas so they wouldn't appear so flat. 
And there you have it! A Pack-a Attack-Alpacas! I so loved creating both the cards and the ornaments. 

So, I gotta know, did you craft over Thanksgiving break? I'd love to know what you created. If you'd be so kind, share what you made in the comments and, if you have a blog where you featured your creation, please be sure to add a link below. Thanks, y'all!
 photo signature_zpsd10b3273.png

Sunday, November 30, 2014

DIY: Crafts on a Plane!

Well, hey there, long lost friends! I trust y'all had a super fab and totes turkey-tastic Thanksgiving. We don't eat meat in our house so ours was simply tofu-licious (just kidding, we don't believe in the senseless slaughter of tofu either). I'm quite positive that I devoured my weight in good food goodness this past week. However, I'm sticking with el elastic-waistband-o for another 24 hours before I gotta find out the ugly truth.  

Since I seriously was in pajamas and/or the same ensemble for three days in a row, Ima gonna have to skip sharing with y'all what I wore this week. Howevers, I did manage to whip up a coupla crafts during our travels and this here post is the result.
 Oh, okay, one outfit pic. Since I did manage to get dressed, comb my hair and put my face on, I outta show you the product of my one day of effort. sweater: Free People, found at Buffalo Exchange; top: JCrew on super duper Black Friday sale; skirt: TJMaxx years ago; floral fishnets with orange tights underneath: Urban Outfitters

Yay! Match-y embroidered jewelry! Y'all, whipping up these little do-dads took no time at all since the embroidery work was so minimal. Which is perfect for me because embroidery is not my fave thang in the universe. I mean, I've done plenty of it (check out this embroidered necklace and this one, an embroidered blouse, an embroidered dress and this thing). And I was super inspired by Mary Beth who's jewelry and etsy shop was featured in my last post. Her work is so amazing! By the way, you can still leave a comment to enter to win her whale ring. If you don't have an instagram account, don't sweat it, leave a comment anyway! 

Okay, what was I saying again? Oh yeah, CRAFTS ON A PLANE!
 One of my fave things about travel is that it gives me plenty of uninterrupted crafting time. And a four hour flight to Cali is the perfect chance to catch up on all things crafty, dontcha think? I had picked up some alpaca yarn from my trip to this sweet place and had my sights set on knitting myself a scarf. Nevermind the fact that I suck at knitting. Forget all about the thought that I hate knitting. Totally disregard the idea that the last thing I knitted was this gawd-awful hat that ultimately became the cat's chew toy. I had four hours, I was gonna knit me a scarf, y'all. 
AND about 30 minutes in, this was pretty much how I felt about my life as a knit-wit. Thankfully, I'd brought my embroidery backup. 
Please note all the alpaca hair strands all over the black cotton. 

Oh, how was California, you ask? So thoughtful of you to inquire. It was swell. We hit Disnatch a coupla nights in a row to check out the final days of the Mad T Party Band (sniff-sniff!) hit the rides and see the castle at night...
Oh, sparkly. I was also able to catch up with a couple of my fave Californian buddies (thanks for lunch, Jane and Hayden!) and shop. Because there's always time to shop. The hubs loves to hike so we try to tackle a new trail each time we are there. On this trip, we hiked to a grotto where the hubs captured this footage of me being obnoxiously (albeit totes normal) whiny and annoying. It's what I do best. 

I thought he was simply snapping photos until we sat down to look at our pictures together. The video had me laughing so hard at my annoyingness that I just had to share it with y'all. 
 "Wait. We hiked down all that for this?! Where are those knitting needles, Ima bout to knit/purl sumbody."
Once we returned back to civilization, I busted out these jewelry blanks I'd picked up at Michael's. They were on super duper clearance which is always my kinda party. 
To attach my embroidery work to the jewelry, I decided to adhere the fabric to some cardboard backing. Which, in this case, was the cardboard from a dark chocolate package. I'm all about the recyclin', folks. 
 After tracing the ring, I cut out the cardboard...
and glued it to my embroidery piece. I fringe cut the edges of the embroidery so that I could tack it down with glue a lil easier. My glue of choice is Aleene's Quick Dry Tacky Glue. Mostly because I like the name Aleene and I'm totes tacky. Oh, and added bonus, I now have the nutritional facts of my dark chocolate on the underside of my ring! This way, when someone discovers my ring at Goodwill years down the road, they'll think they've found some sort of Da Vinci Code-esque (guys, why are all my movie references, like, 10 years old?!) puzzle which will ultimately unravel the universe! YES, mission accomplished!
Okay, tell me the truth: Does this giant bracelet make me look like some sort of Wonder-Woman-silver-cuff-wearing wannabe?
If so, I don't suppose that's a bad thang, do you? 

Hope y'all have a restful last day of your weekend! 


 photo signature_zpsd10b3273.png