Showing posts with label clay. Show all posts

Wednesday, November 20, 2024

DIY: Air Dry Clay Vases!

Hey there, friends! 

I'm excited to share a little something I discovered with one of my favorite art supplies: Celluclay(this link will lead you to my Amazon list of supplies). As you might know...I've created a TON of creations with my students and for myself with Celluclay. It's a paper-based air-dry clay that really lends itself to a whole lot of exploration. HOWEVER...one thing I never loved about working with the stuff is painting my creation after the fact. It's got a rough, scratch surface which is difficult to paint AND you have to wait several days for it to dry completely BEFORE you can paint it. That is...until I discovered...you can TINT the clay! Let me show you how:

In this video, I'll share with you two ways of tinting your Celluclay with acrylic paint (although I've not tried it, I'm sure tempera paint would work just fine). You can prep the clay by tinting it ahead of time, wrapping it in plastic and storing in your fridge. This is what I'm doing for a 2-hour class I'm leading today. I've got all my colorful balls stashed in the fridge (ahem). OR...at another class I lead, I had the participants mix up their own clay! I demonstrate both methods in my video. 

What I love about this method of tinting the clay is that I also don't have to struggle to paint in the small areas. For example, painting around those squiggles would have been a struggle and definitely would have had me questioning my life's choices. Now...I can just create the color of clay that I want!

I did cover each piece with a layer of satin-finish ModPodge to help further anchor the pieces in place, give the vases a finish and waterproof them a bit. ModPodge comes in so many different finishes now that it's awesome! They make a sparkle finish, and indoor/outdoor finish...you name it! In a pinch...diluted Elmer's glue also works in place of ModPodge if you can't get your kitten mittens on any.


I have worked with Celluclay with my students in the past. It's fun stuff, especially if you don't have a kiln or you have sculpture projects in mind. For a smaller scale project, my second graders created these sculpted hearts. If you tap the link, you'll find a video of the lesson for you to share with your students:
This was a lesson we did in just a few 30 minute classes! We used foil that we shaped into a heart as our armature. I pre-prepped the Celluclay which made it so much easier! Once dry, the students used acrylic to add color. We hung these in a little popsicle stick frame.
My older students created these Celluclay taxidermy heads that were a blast! You can see all the details here. 
But back to the vases...I was going to include in this post all of the things I've created with Celluclay BUT...I've made so much that I think it deserves it's own blog post. So...that will be coming soon. I also have a ton of videos on my YouTube channel if you are curious about more Celluclay exploration. Check the playlist Clay Projects for Adults and Children for more. 

I will warn you: making these vases is HIGHLY addictive! I even thought for a split second that I was going to go into the vase-making business and started day dreaming about opening a booth at a local craft fair! And then I looked around at all my other half finished art creations which were giving me the evil eye and thought....well...let's just take it one day at a time ;) 

I don't know if you can see this but...look closely at the top of this vase. When the squiggles dried, they did pull away from the vase a little bit. I assume that is because I didn't have the squiggles secured to the vase well enough and they dried, thus pulling away, before the vase itself did. So really make sure you have your bits and pieces anchored down. That seems like a good rule of thumb for all aspects of life ;)

Please do let me know if you have any questions! You can always drop me a line on my YT channel. Unfortunately, due to spam comments, I did have to turn the comments off here. So sorry! 
BTW...I know I've only shared a little of this big news on my Instagram but...did you know I wrote a Decide Your Direction art adventure book for kids? That's right!! I'm so excited and I'll be talking about this more super soon but until then...yay! I always read to my students while they work but I could never find the perfect "art" novel...so I wrote one! This book introduces 7 different artists and the reader decides which adventures to go on. It has 32 different endings and over 80 illustrations! Like I said, I'll share more here soon but if you just can't wait, you can get yourself a copy here! It's perfect for the holidays...and I'll even sign it for you!

photo signature_zpsd10b3273.png
Read more »

Wednesday, October 4, 2023

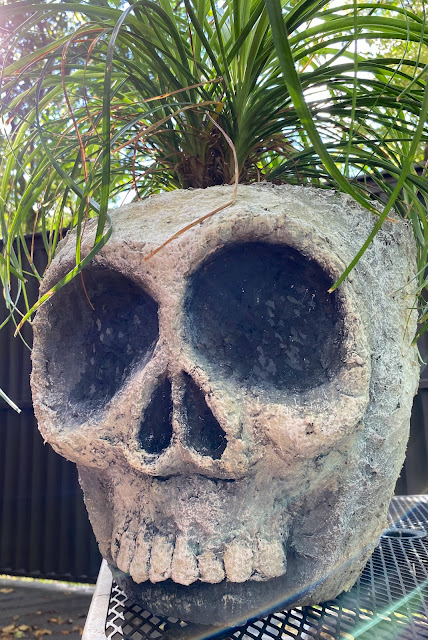
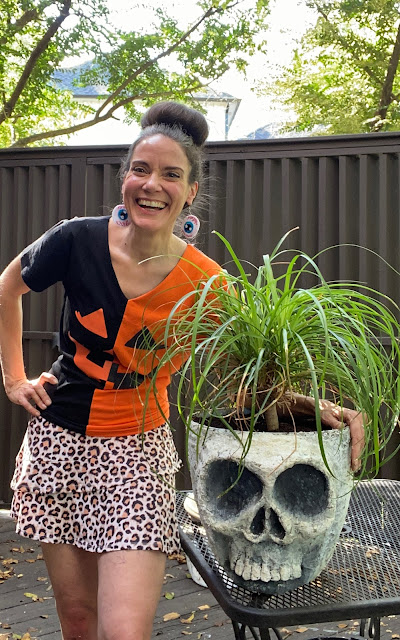
DIY: Skull Planter!

I spotted the coolest planter ever the other night at Cracker Barrel: it was a large plastic skull planter and I just had to have it!

Until I saw the $40 price tag.

Then I remembered how a while back I made TONS of Halloween decor with one of my long forgotten favorite art supplies: CELLUCLAY. You can check out all of those creations (well, most of them anyway), here. 

Here's the how-to video!

The process is super easy! All you need is Celluclay and a plastic planter...and acrylic paint. That's it! Oh...and maybe a cute little plant. This is one I scored at Walmart years ago on sale. It was so sad and almost dead that I named it Peanut. Peanut is now living it's best life in my brand new skull planter!
Part of the magic is in the painting when it comes to this kind of thing. I used a base coat of gray and then added a darker gray to the eye sockets and the nostrils to really deepen the look. Then I used diluted off white paint to go over that in the light areas. Finally I used a dry brush and white paint to add the highlights. 
I won't be leaving this outside. Celluclay, since it's waterbased, would probably not fair well outdoors. 

So in my over-crowded plant window, she will go!
Thanks for letting me share! I actually think I need to make more of these. Why, I have no idea! But it was just so fun and Halloween season is my absolute favorite!

photo signature_zpsd10b3273.png
Read more »

Wednesday, March 1, 2023

Let's Talk Clay! Part 1

Well hello there, y'all! It's been a minute...and, if you haven't heard, a lot has happened around here. Like, for instance, me stepping away from teaching art in a classroom setting after doing so for 25 years! I KNOW. CRAZY. All the details on THAT very soon but first...a little something that I've been promising on Instagram for quite some time: a big ole post on all things CLAY. 

Let's first cover my supply list of Must-Have's for working with clay:
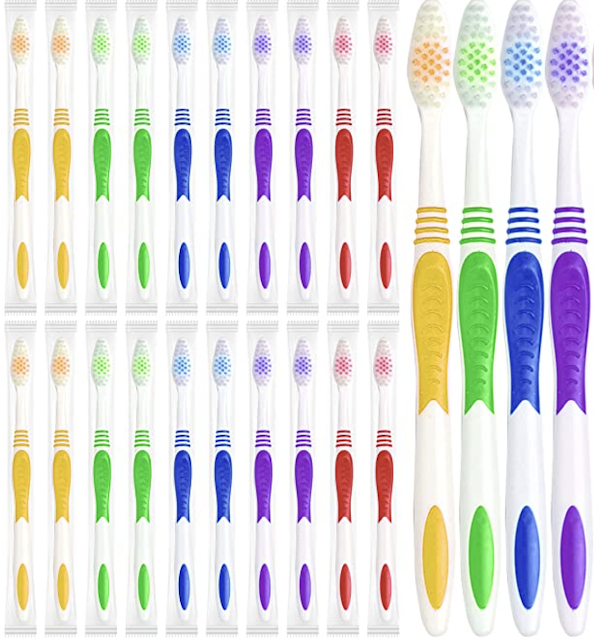
* TOOTHBRUSHES! I'm so sorry to shout...actually, I'm not. You will thank me later but THIS is what your kids should be using when they slip and score. Buy this set and use them year after year!
* WATER DISHES! This is where we keep our slip. In fact, I use the same set of no-spill cups each year, just add more clay to it. When clay time is over, I let the water evaporate and just leave the dried clay inside. When the new year begins, I just add water and we have insta-slip! Kids dip their brushes here. We also have a set of these just for painting...so I don't have to worry about cleaning them out when we switch from clay to painting!
* DOGGIE DISHES! Okay, so this is an alternative to the no-spill cups. I love these! We use these also when painting. So if the other cups are too much for your budget, try these!
* DOILIES! Since I started shouting, now I just can't stop. I LOVE doilies...in fact, just scroll below and you'll see a ton of my projects features a texture...it's from theses bad boys! You can also find them at your local thrift store and yard sale so be on the look out!
*SKEWERS! I think we all know about using skewers with clay but one thing that really always bothered me was how long they were. I was always thinking someone was gonna lose an eye! Not a happy thought. I discovered these shorter skewers a couple years ago and now...this is all we use. 
*TRAYS! Contain all of that dusty mess with trays. I didn't start using trays until recently and I was like WHERE HAS THIS BEEN MY WHOLE ENTIRE LIFE?! 
* GARLIC PRESSES! Oh man. You can't just get one of these. You're gonna need bunches! I found them here...but I have also found them less expensive at the Dollar Tree and Walmart. 
* REUSEABLE TOWELS! Oh man...I cannot tell you how much this saved the MESS in my room this year. Hear me out: I placed a bin of water on each table with a splash of soap and 2 towels. At the end of each art class, the kids used a towel to both clean their hands and the table. This kept the dust mess down! My custodian friend was so happy. 

The other items you'll find on my list are the air dry clays I've used in the past. I'm also sharing glaze (which is only used on kiln fire clay). I purchase my clay locally from The Clay Lady. She also sells the clay mats I strongly recommend. If you purchase your clay locally, you'll be supporting local businesses. 

And now...on with the show!

Isn't it crazy to think that we are expected to know about all things clay...just cuz we have an art teacherin' degree?! Well, I created a video sharing everything I know about clay. You can catch even more details in this blog post. 

Of course, there are plenty of ways to add beautiful color to ceramics without the hassle of a second fire and of the expense of glaze. I'll share a TON of projects in the second installment of this blog post that do not require glaze...and still look amazing. BUT FIRST...
What is Clay is a video I created several years ago to share with my students on the very first day of working with clay. With my 30 minute classes, we watch the videos and then we spend the rest of class just rolling up our sleeves and getting a little messy. It's a great introduction to clay, no matter what the project. Here's a peak at the video:
And now...a moment from our sponsor. 

Me. I'm the sponsor. 
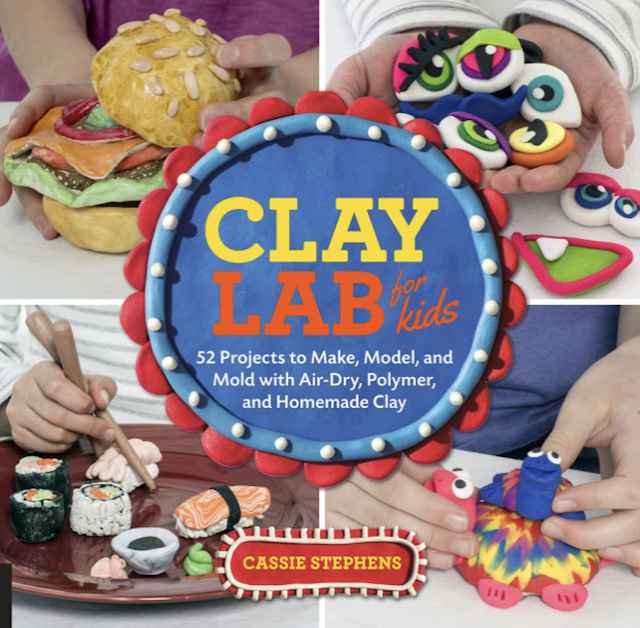
Many of my projects can also be done with air dry clays, either homemade or store-bought. And if you are kiln-less and would like a little more guidance, I wrote a whole book about it! You can find it here
Okay, y'all. I really thought I could also add all my favorite clay projects also in this blog post BUT...I think I'll save that for the second installment of this series, so stay tuned. Until then, have a good one!


photo signature_zpsd10b3273.png


Read more »

Monday, January 2, 2023

Favorite Winter Projects for After Winter Break!

Happy New Year! If you are anything like me, you've spent ZERO time thinking about returning to school next week. Like, I mean, my brain has been switched to ANYTHING-BUT-SCHOOL mode. As it should be, I say. Until, that is, the end of break sneaks up on me!
So to put your cute little head at a tiny bit of ease, I thought I'd share my favorite winter lessons here in this blog post. Be sure and tap the highlighted link to each as many feature the full lesson WITH VIDEO. For free, of course. Cuz I'm a giver, y'all. 

Let's start off with some ambitiousness, shall we? If you are feeling up to it, might I recommend this tree weaving lesson? In my book, Stitch and String Lab for Kids I share how to create the evergreen tree weaving but you can also find the details here, just flip the plate upside down!
A lesson that my students love (and everyone who gives this one a shot!) is this Jen Aranyi-inspired winterscape! We create ours on cardboard pizza rounds found at Gordon Food Service (I'm lucky to have one down the road) but they could just as easily be created on white paper! If you are on a cart and want less mess, try doing the sky with the marker/water method, found here!
Want to introduce your students to printmaking? I love this printmaking lesson that could easily be done with kids of all ages. Okay, look, I'm not gonna lie: I often do the same lesson with multiple grade levels. It's much easier with my 30 minute classes that come back to back (with up to 8-9 classes a day). So, go easy on yourself! If that's what you do, just know that I'm right here with you! Lesson details here. 
This fun lesson introduces students to a wide variety of media from bingo daubers to chalk to...watercolor! Lesson details with video right here!
I did this project with my first graders and they always love it! We work big, 12X18 paper background but you could definitely work smaller, like even half that size. No bingo daubers? Try Sharpies!
This lesson for my kindergarteners is similar to that of the penguins which leads me to my next idea: do similar lessons! Less supply prep and less worry on your part. This year I have made an effort to clump lessons by supplies. I'm too old to be runnin around like a waitress, y'all. Lesson with video here. 
If you feel like tucking into a long lesson, this one might be for you. You know, there's something to be said for long lessons...it means less planning. You could shorten it, however by just making the snowglobes much smaller! Lesson with video here. 
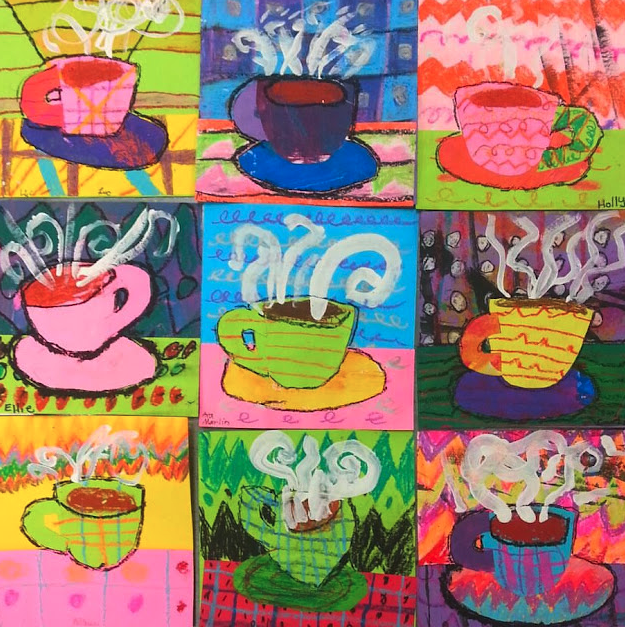
As soon as we return to school, I plan to have my students dive into clay and create clay mugs! Our tradition has been to drink hot chocolate from our mugs once complete. This was inspired by an art lesson we did where we created hot chocolate collages! If you have no kiln, creating these collages and then celebrating with a hot chocolate party may be an idea for you! 
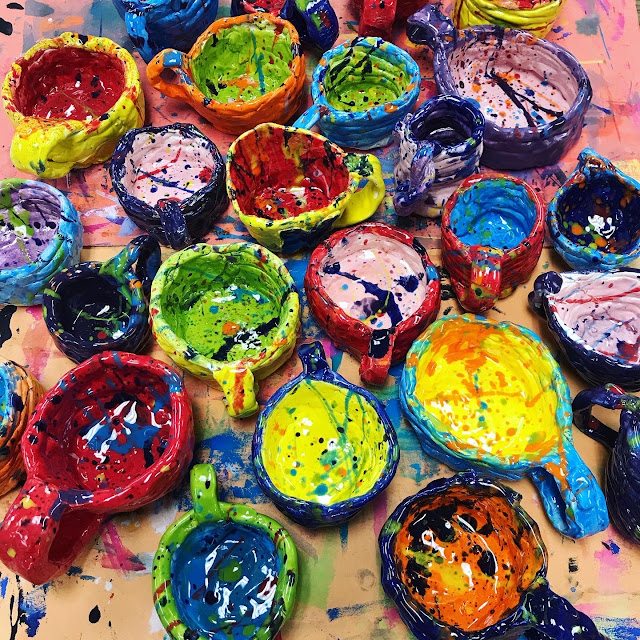
Here's a look at our mugs! Every grade level, except kindergarten, does this every year...so many of them have a collection of mugs at home! We also do another clay project but this one is easily their favorite. Lesson with a couple of videos here.
It's the year of the Rabbit! Did you know? If you need some quick lessons for your younger students, I piled a bunch of them in this blog post, check it out! 
Need even more cuteness? Here's another lesson that your kids WILL LOVE! My students had so much fun with this one and couldn't wait to take their kittens home. Lesson with video right here. 

Okay, need more ideas? Well, I actually have MUCH more! Just visit here where I did a deeper dive into all of the winter-y lessons on my blog. AND if you want to jump ahead and start working on art for Valentine's day, check out this post. See ya soon!


photo signature_zpsd10b3273.png
Read more »

Wednesday, October 19, 2022

Creating Lines with Modeling Clay

I recently shared that I created line-making stations for all of my students. You can check out a video and blog post on that here. While I was out, I created this video and sheet as a sub plan for all grades. I've since decided to add it to my early finisher centers! Check out the video I created for the kids here:

And here's how I plan to use it as an earlier finisher center. The kids loved working with it while I was away so this should be a fun activity choice for them!


photo signature_zpsd10b3273.png
Read more »

Sunday, April 3, 2022

Clay Mugs for Kids!

Hi, friends! My students are wrapping up one of the clay projects they created and I thought I'd share. Last year, my first through fourth created clay mugs and it was easily everyone's favorite clay project. When I shared that we were working with clay again, a few weeks ago, their first question was "are we making mugs again?!" I had already planned on it...so they were excited to hear the answer. Once mugs are complete, we celebrate by drinking hot chocolate out of them...so it's a whole lot of fun. 

This year, I created a video to share with them. Because I have 30 minute art classes, I only showed the pinch pot portion and a bit of coil making for the first class. The second class, we did a brief coil making reminder and then watched the portion about creating a handle. The video helped them trouble shoot and get their mugs completed in just two 30 minute classes!
This week, we started glazing! They were told they could use any two colors of glaze, one for the inside and one for the outside. They were to do at least three coats of their chosen colors and not to glaze the bottom. Once complete, they could join me at the splatter glaze station!

When my students were finished glazing, they could help a friend or work on the large banners I created to announce our upcoming art show! 

We used Prang's Creativity Street Tempera Sticks to color these with.
The glaze we used are from two companies and I like them both: Mayco's Stroke and Coat and Amaco's Teacher's Palette. Both are food safe and fire to cone 06.
When introducing clay to your students, you might find this video fun to share:


Read more »