It's the Most Wonderful Time...for Christmas Craft Night, y'all! I seriously look for any ole reason to have a bunch of boozy and crafty buddies over to blow off some steam and make stuff. And, let's be honest, nothing beats Christmas Crafts especially if they are as kitsch-mas-y as Putz Houses!
At last year's holiday craft night, my art teacherin' buddy Sara mentioned wanted to learn to make Putz houses. My moms-in-law gave me a glorious box of these made in Japan beauties several years ago and they have a place on my pink tree every year. Here's a wee peak:
 They are easily my favorite ornaments as I love the magical notion of wee people celebrating the holidays in their happy village.
You can occasionally find these bad boys in antique stores for heavily inflated prices. I've also seen them priced all over the place on ebay-land. But, let's face it, it's way more fun to create your own with a buncha buds, don't you think?
If you've never hosted a craft night, here's how I usually get the ball rolling: message a group of artsy friends and throw a coupla dates at them. Once one is settled, create a Facebook event so folks can keep up with what you'll be creating and what they might need to bring. I also love to have dinner with a theme of some sort. This time I let everyone know that we'd be having Breakfast Dinner! Folks were encouraged to bring scissors and an adult bevvie of their choice.

Our craft night was on a Friday, shortly after school. It's good to have drinks ready and snacks on hand because that's what peeps really be wanting. I had planned for the menu to have an egg scramble of some sort and pancakes. Of course, it's no fun to do all that cooking alone (especially when cooking is not your forte!) so I had the batter ready and put one buddy on pancake patrol (thank you, Tamara!) and another on egg-cellent egg-making (thank you, Virginia!). Another buddy served out the Bloody Marys (thank you, Ali!) while another mixed up mimosas. It was a delicious group effort that kicked off the night.
Once the food had filled our stomachs, we cleared the dining room table and set to work. I knew that the first coupla stages of this house making would be a lil labor intensive but once it was done, the real fun of decorating could begin.
Since I'd announced and shown a coupla photos in the Facebook event what we'd be creating, some folks brought miniature items to accompany there house like small deer and bottle brush trees.
And just look at our happy village!
I got so many sweet photos after the night of houses hanging happily on trees that it made my weekend! If you are interested in making your own Putz house, rustle up the following:
I happened to have a stash of gift boxes from my belt-making days for us to use. However, tag or poster board would work just fine.
If you do use a gift box, simply cut it open.
And cut off the tab. This tab will become the base of your house. I curve-cut the base just for interest but you could leave it square or cut it with decorative scissors.
From there, I cut off one of the box sections for the roof.
Everyone created a variety of roof shapes and they each turned out so cute! I created mine with a scalloped edge.
I then cut the rest of the box apart and used two for the front, back and side of the house.
After about five minutes of playing, I came up with this template.
You'll need to cut two of these out and fold 1/4" from the side.
Fold along the front and back of the house.
Clip at the bottom of the side fold and bend up. Then clip at the crease where the front of the house meets the side and fold both bottom edges upward.
Before gluing the house together, start to think about a door and windows. You could use an Exacto to cut these...but I don't trust a bunch of drunks with sharp blades so we just cut them with scissors.
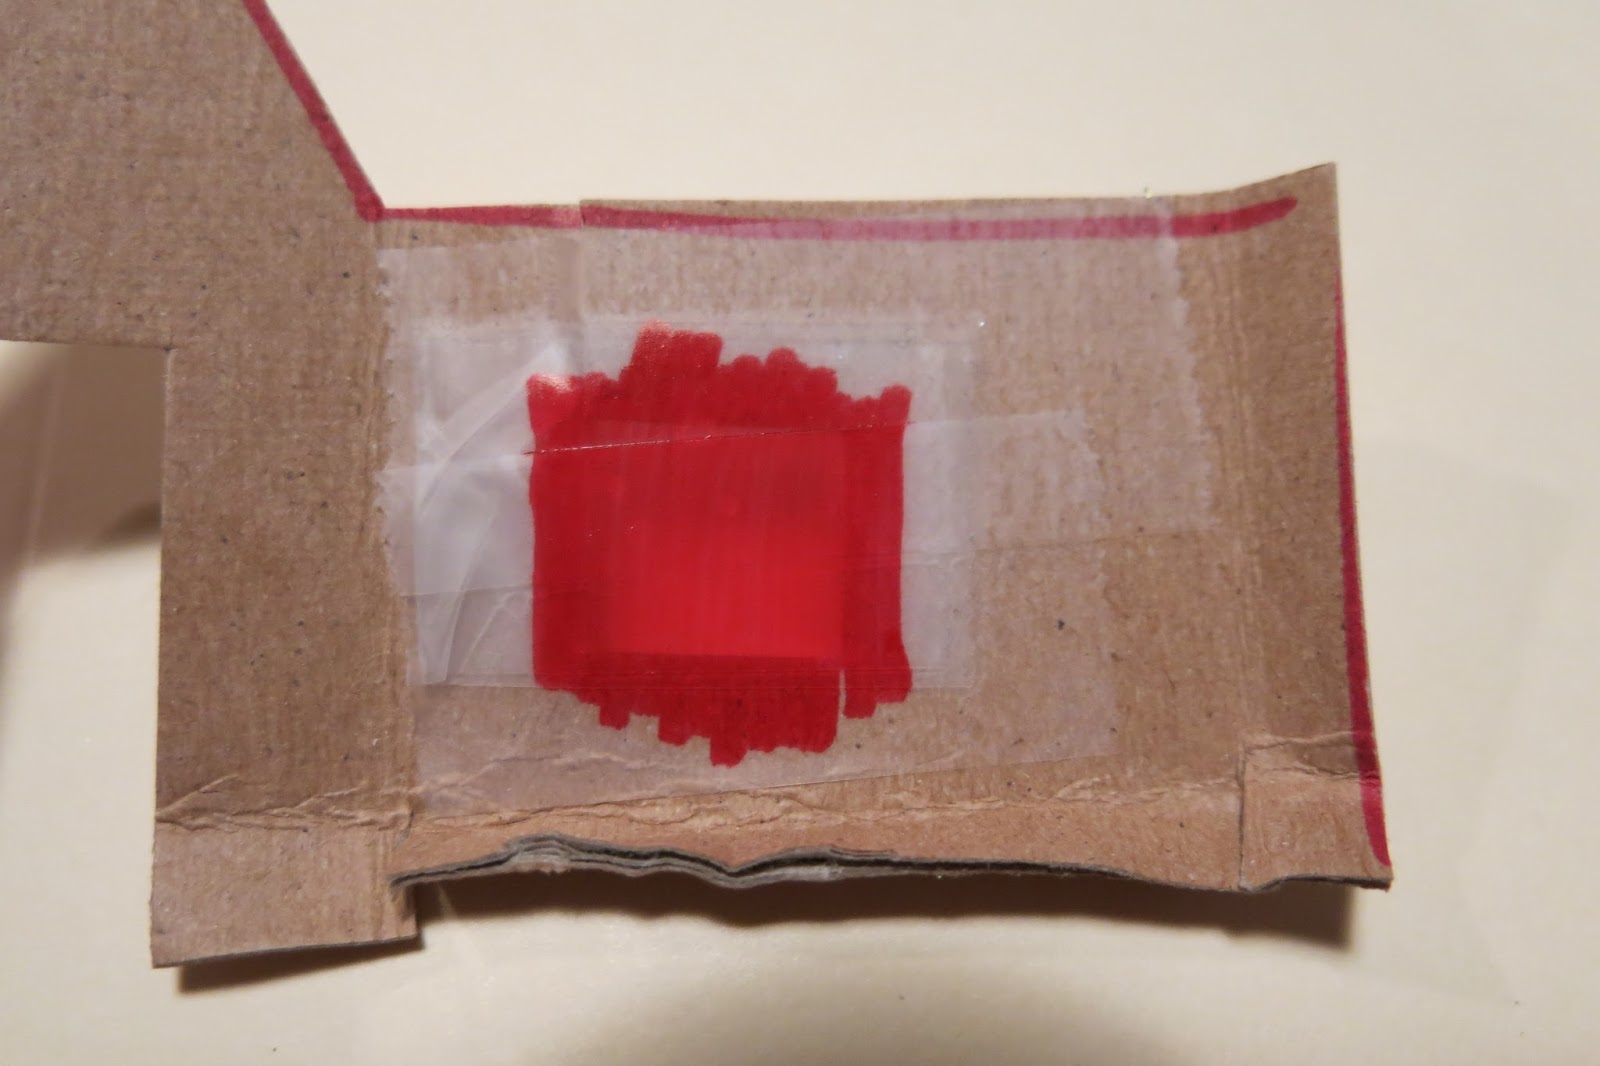
For the stained glass, you could use cellophane...or you could go the poor art teacherin' route and simply fold a piece of tape back on itself...
Tape that in the window from the inside...
Color it ever-so scribble-scrabbily...
And boom! Stained glass!
Of course the over-achievers went and did all this. People like these don't get asked back to craft night (just kidding, Ginny!).
Now you can start to bring in the corner of the house and start gluing into place. My fave glue is Aleene's Tacky Glue because that stuff sets up fast. Aleene is Tacky and she knows it. My kind of gal.
Hold long enough for someone to go and refresh your drankie-drink.
Then glue the sides...
And lay that glue on thick to add the roof.
Don't worry too much about craftsmanship, you'll be painting all over that mess anyway.
Oh, snap! I forgot to mention, don't forget to hole punch a spot in the back or the bottom to insert a Christmas tree light!
Then commence painting and decorating, the very best part!
We had so much fun testing out the house "lights" on the tree!
Aren't they lovely?
Oh, a happy home.

Made with such fun friends.
Who obviously cannot take a decent photo, ha!
Happy Crafter-days, y'all!

Read more »