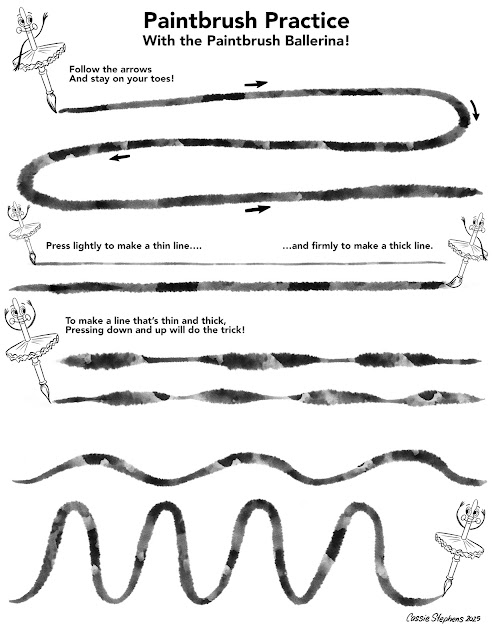
Hey, y'all! To celebrate the launch of my brand new book, The Paintbrush Ballerina, I created two FREE Paintbrush Practice downloads just for you and your young artists!
I have always found that you can TELL students the do's and don't's of ANYTHING but until they actually put it into practice does it stick. With these two sheets, your students will be able to do just that. Yay!
For over 25 years, I taught elementary art. It didn't take me long to realize that you have to teach students EVERYTHING. So many of them come to us never having painted before! So how to hold, use and care for a paintbrush is part of the art teacherin' territory.
The method of explaining that a paintbrush is like a ballerina really clicked with my students. You can check out my book here. I share more about it here too:
I would recommend using sheet protectors so that students can use these over and again. This is a low mess lesson that would be perfect for:
* Early Finishers! Keep this Paintbrush Practice available for students as a center so can practice any time.
* Intro to Painting! Students of all ages could use a painting intro or reminder when it comes to using paintbrushes.
* Short art classes or half days! With it being winter, I know your teacherin schedule can become a mess. With half days, kids behind on projects, field trips and the rest...a day to just practice painting with the lights dim and some soft music may be just the thing to get everyone back on schedule and reset the painting mood.
And...if you need a little help, I've created a painting video to share with your students. Here ya go:
Well, my friends. The time has come...it's back to school we go!
For many of us, anyway. I know some of y'all kept on teachin' until, like, the end of June which is absolutely WILD to me. First of all, the temperature here in Tennessee during that time of year is literally the surface of the sun. I cannot imagine trying to teach, let alone put kids on a bus, in that type of heat. And, second, let's be real: I'm tapped out come May. Okay...I'll be for-real for-real...I'm tapped out the week after spring break. So those of you that teach into June, y'all deserve a break.
BUT for those of y'all that are heading back, I thought I'd put together a blog post of a simple, fun and IMPACTFUL project for your Back to Schoolin' days.
Let's talk Back to School Banners!
One of the biggest back-to-school stressers for me was "what am I gonna teach on the first couple days?!" Because, honestly, that's not of great importance. What's VITAL is establishing Rules, Routines, Do's and Please-for-the-love-of-God Don't's. For that, you may want to check out my book, my videos or my podcast. BUT be sure and pop back here later this week as I've got more coming your way.
BUT...I always want a project that gets the kids excited! AND that gives me something fun, vibrant and happy to hang up as soon as possible. So, for that reason, I'll be sharing my fave tried and true
If you tap the link, I've got a video with more detail on these from how they are made to how I use them in my art room. Full disclosure: I usually create these at the END of the school year for my students to paint/color on field day. Then I hang them up in August to have some bright and happy color in the halls when students return. However, they could easily be created and utilized during Back to School!
Here's how I created these:
* Using large bulletin board paper and an ink filled bingo dauber, I draw the designs in yellow or peach chalk.
(SIDE NOTE: If you'd like to see/read more about bingo daubers and the lessons I have done with them, check out this blog post!)
* The chalk makes it easy to adjust and erase my drawings before tracing them with the "paint marker" or ink-filled dauber.
Ideas on how these banners can be used in your art room:
* So...you could go the route that you see above if you are feeling brave enough to bust out paint...on the first days of school. I would HIGHLY not recommend that. Trust me...I speak from experience.
* The above photo was taken before I discovered tempera sticks! These work far better than paint as they are less messy and the kids love them. That is what I'd recommend.
Now don't feel limited to creating giant coloring sheets as I have done. In fact, why not take it a step further and have students create a huge self-portrait banner?!
How to make this happen with a room full of kids:
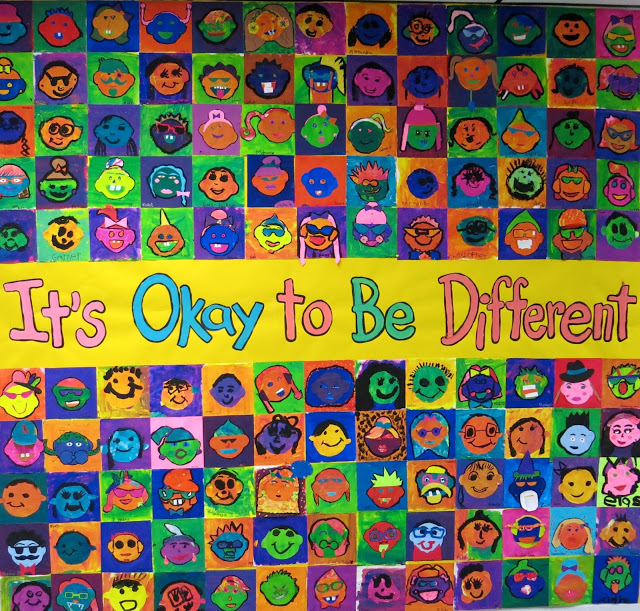
* Create stations! Have students rotate from table to table. One table could have a banner with frames like this where students can draw their self portrait. I provided construction paper crayons and Sharpies for this. A short selfie demo was given first by instructing students to use ONE frame only (ahem) and draw with their marker before adding color with Sharpies. We made the frames extra fancy by coloring those with metallic tempera sticks.
* The other table stations could include your banners! So students are always active, creative, coloring and moving around the room. This would also be a great way to get students acquainted with your art room.
* Why not include a Gratitude Banner where students draw portraits of their teachers and the faculty and staff in the frames? That's similar to a lesson that I did here and here.
Now, let's take the Back to School Banner in a totally different direction and make Back to School table covers! In my book Art Teacherin' 101, I talk about how I have my tables color coded as I'm sure many of you do too. Each table is referred to as a 'team' and expected to work together. As they do, I give them points for their table in Class Dojo.
Here's where it gets interesting. On Class Dojo, where you would normally put in a student's name, I put in the table color. EVERY class has the opportunity to earn points for their table team. So...if the Red Team earns 5 points in Ms. Smith's first grade class, those points are earned across ALL of the Red Teams in ALL of my classes. This creates a School-Wide incentive to do well of the team.
Does that make sense? Let me tell you...it works great!
During those first days of school as we get used to our table and the idea of table teams, I roll out (literally) these color coded mats. After hearing rules and routines, we often don't have much time left in class. So we spend that time adding color and kind words to our table covering.
Students use construction paper crayons to add bright colors to these banners.
In the past, I ALWAYS used paper to color code the tables on those first weeks of school. After a month, the banners were a mess so they were tossed. Usually, I only had them to signify the table colors those first few days and after that, my students knew their table.
However, when they made these, I really wanted to save them. So...here's what I did:
* Fold the table covering in half LENGTHWISE.
* Slowly put the table covering through the school laminator. Ours was the width of the paper folded lengthwise.
* Once through the laminator, cut along the unfolded edges of the folded banner.
* And Ta-Da! You now have a banner that is laminated on one side!
Because of the crease, you do have to flatten a bit. I simply taped mine to the underside of each table.
Added bonus: now you can draw on them with dry erase markers!
And there ya have it! Some ideas for creating fun and impactful Back to School art!
Stay tuned...I've got more projects coming your way!
I'm not sure if you've been experiencing it in your art teacherin' world but of late I've noticed that my students are on the squirrely side of life. It's hard for them to sit still, focus and contain their level of excitement. I can usually manage to ride that wave in 30 minute art classes as we get up and move round, do a little dance, do a whole lot of call and response and stay very busy. However, recently I decided to try something new (for me) and that was create some art-makin' centers for my students on the Friday before Halloween.
It's hard to do new things, especially if you've been at this art teacherin' thing for closing in on 25 years. However, pushing yourself out of your comfort zone is what keeps us fresh and keeps our students excited and intrigued. That's what I noticed when I created this center-formated art day.
Here's a little of what that looked like:
If you cannot view the above video, than try viewing this blog post from a laptop. Or just tap this link.
I've done open centers in my room before, most notably on our Field Day. You can read all about that here. I will say, it's a lot of work on the front end when I set up for Field Day. What I found in this most recent experience is that it doesn't have to be. Kids make the most of each center regardless of what is offered. In fact, limiting the supplies seemed to force them to really stretch their imagination.
Some of my take-aways:
* Limit the centers. Too many seem to overwhelm the kids. Instead, start with just 3-4.
* Introduce "greatest hits" as well as 1-2 new centers. At the start of art class, you will need to run through the centers to let the kids know what's in store. Too many new centers means too much time spent explaining and confusion. So maybe share ones you know the kids are familiar with (for me that was the large pumpkin coloring sheets and blocks) and introduce the new ones.
* Limit the amount of kids per center. I limited mine to 2-4 kids per center, depending on the center. I had a sign on each that let the kids know how many kids could create in one space.
* Dismiss kids to center one at a time. After explaining, I asked each student individually where they wanted to start and dismissed from there. Allowing each student to hop up at once and make a mad dash is not how you want to start your class!
* Allow students to switch centers at a designated time. With 30 minute art class, I set my alarm each 7 minutes. This allowed kids to hear my alarm and know that if they wanted to switch, they could. My rule was they had to tidy their space before leaving it. This prevented kids from center-hopping from one place to the next without digging in.
* Hold kids to your rules and routines. Sometimes when we do something different, the kids think that rules and routines go out the window. Let them know that the routines you've established for clean up, working together and noise levels still apply.
* Pay attention to what they respond to. It might surprise you! And it might give you ideas for future centers.
Hi, my name is Cassie Stephens and I like to start projects and then wait months, sometimes even years, before I finish them.
Please tell me I'm not alone.
Case in point: this project that my students began on field day last spring. You can read all about it here. You can also check out this video unless you are reading my blog from your phone...in which case you'll need to view this post from your laptop in order to check out the vid. Technology is super cool.
After the kids painted it in the spring, it looked a little rough (sorry, I don't have any photos). I was a little disappointed by the look of it until I realized that all it needed was to be outlined again. That REALLY made the colors pop and cleaned it up nicely.
I went in over my fall break and really enjoyed listening to a podcast and outlining this beast. It took no time at all. And I used my fave new hack of drawing with a Q-tip dipped in ink. It works so well, provides a consistent line and holds quite a bit of ink!
I did use a Sharpie to write the name of our school. I also would STRONGLY recommend using bottles of craft store acrylic for this painting. We initially painted it with tempra and it looked so faded, translucent and chalky.
Like many schools, the front of ours is a little boring in that it has a huge parking lot out front. So I took some liberties by adding our country and state flag, our state flower and a banner with our school district logo.
And now I'm totally hooked on the idea of creating more paint by numbers with the kids for our school!
It was really easy by just snapping a photo of the school and tracing in Procreate. I am thinking that we need a giant canvas of our school mascot next!
Pretty sure this beauty will end up in the front lobby of our school. I cannot wait to see it up! Here's what it looked like the day we started painting it. I'll keep you posted on how it looks once up!
If you know me...then you know I do my field day duties a little different than the rest of the school. After years of face painting, snow cone-ing and watching kids grow bored of sidewalk chalkin' after five mintues, I decided a couple of things:
1. It's too dang hot outside on field day!
2. It's the PERFECT way to do a collaborative because you see all the kids in the whole school all in one day!
You can read all about the field day activies that I love to do in this post. My fave: BACK TO SCHOOL BANNERS! More details here including a video!
The kids REALLY enjoyed painting on this...and I've been really excited to give this a go for a while. I'll be sure to share the final result soon. Thanks, y'all!
Collaborative projects! Collaborative projects are one of my favorite things. I love them at the start of the year and the end. I love doing them with the whole school or just a grade level. I love using songs, themes, artist-inspiration...you name it. I just love collaboratives!
We've done a TON over the years and I thought I'd put them all together in one big ole blog post. So, here you go: my 20 Favorite Collabortive Projects. Be sure and click on the links, many of these have how-to videos.
Check out this blog post on how we created several canvases in this style for our school and the school library!
A fun mural based on the book You Be You was created by nearly all of my students. You can learn about the process of creating our fish here. Read all about the making of the mural itself here!
The Our School Has Heart mural was a piece with a contribution from each student in the school. You can see the breakdown of who created what in this blog post.
Our clay collaborative mural is a bright and shiny beauty that hangs in a prominent place in our school. Each student contributed something to this piece...you can read more about the process here.
One year, we created a Village of Kindness as apart of our art show! Each student upcycled a milk carton that our cafeteria queen cleaned in the dishwasher. The students made little doors that opened and said kind words to those who peeked inside. Students worked together to create the landscape on the bulletin board.
I love to do collaboratives at the start of the school year. I especially like ones where students celebrate our school and that set a postive tone. That was the idea behind this collaborative!
Another fun way to start the school year is with some selfies! We've created them for a monochromatic mural. You can check out the video here.
Inspired by the artist Romero Britto, this mural was created by my students when I was out for jury duty! My sub just played the video and when I returned, I assembled the mural!
A collaborative mural that definitely made the rounds was this one! The kids loved creating the feathers and it was a beautiful thing while in the hallway but I will say...it was a lot of work to assemble. All the details here.
My fourth graders created this collaborative one year that lives at the front entrance of our school. We even 'wrapped' it for Christmas and brought out admin out for them to unwrap it as it was hung on the wall of our school.
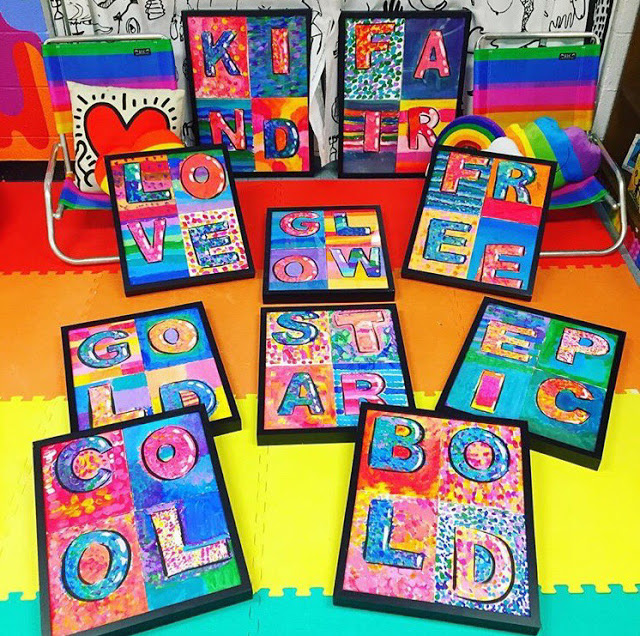
During our field day one year, my students rotated through many art stations. One of them was this alphabet and number series. My librarian requested them and we just love how they turned out. Click here to see them framed and hung in our school library.
Much like our monochromatic collaborative, this map collaborative was created with a self-portrait of each of my students!
We are the tigers at my school so we do tiger-themed artwork every so often. This mural was created by first graders of all of their tiger drawings. You can find a how-to video right here!
In table teams, my third graders created a Rizzi City inspired by the artist James Rizzi.
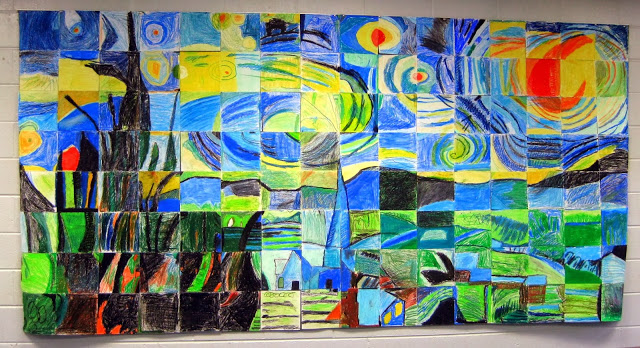
One year, we did super-sized works of art inspired by Andy Warhol and Vincent van Gogh! When these came together, they were stunning. All the details can be found here.