Tuesday, December 2, 2014

DIY: A Pack-a Attack-a Alpaca (AKA, Tales from an Alpaca Addict)

It could easily be stated that there are many a thing wrong with me. I suffer from anti-cleaning disease. I have a super bad and unshakable case of I-despise-cooking-itis. Not to mention the car-that-looks-like-an-army-of-hobo-clowns-live-in-it disorder which I deal with on a daily basis.

However, despite all my countless flaws, I never thought I'd add Alpaca Addict to the list...and yet...
Each and every time I look longingly at the photos from my alpaca trip, I'm all...
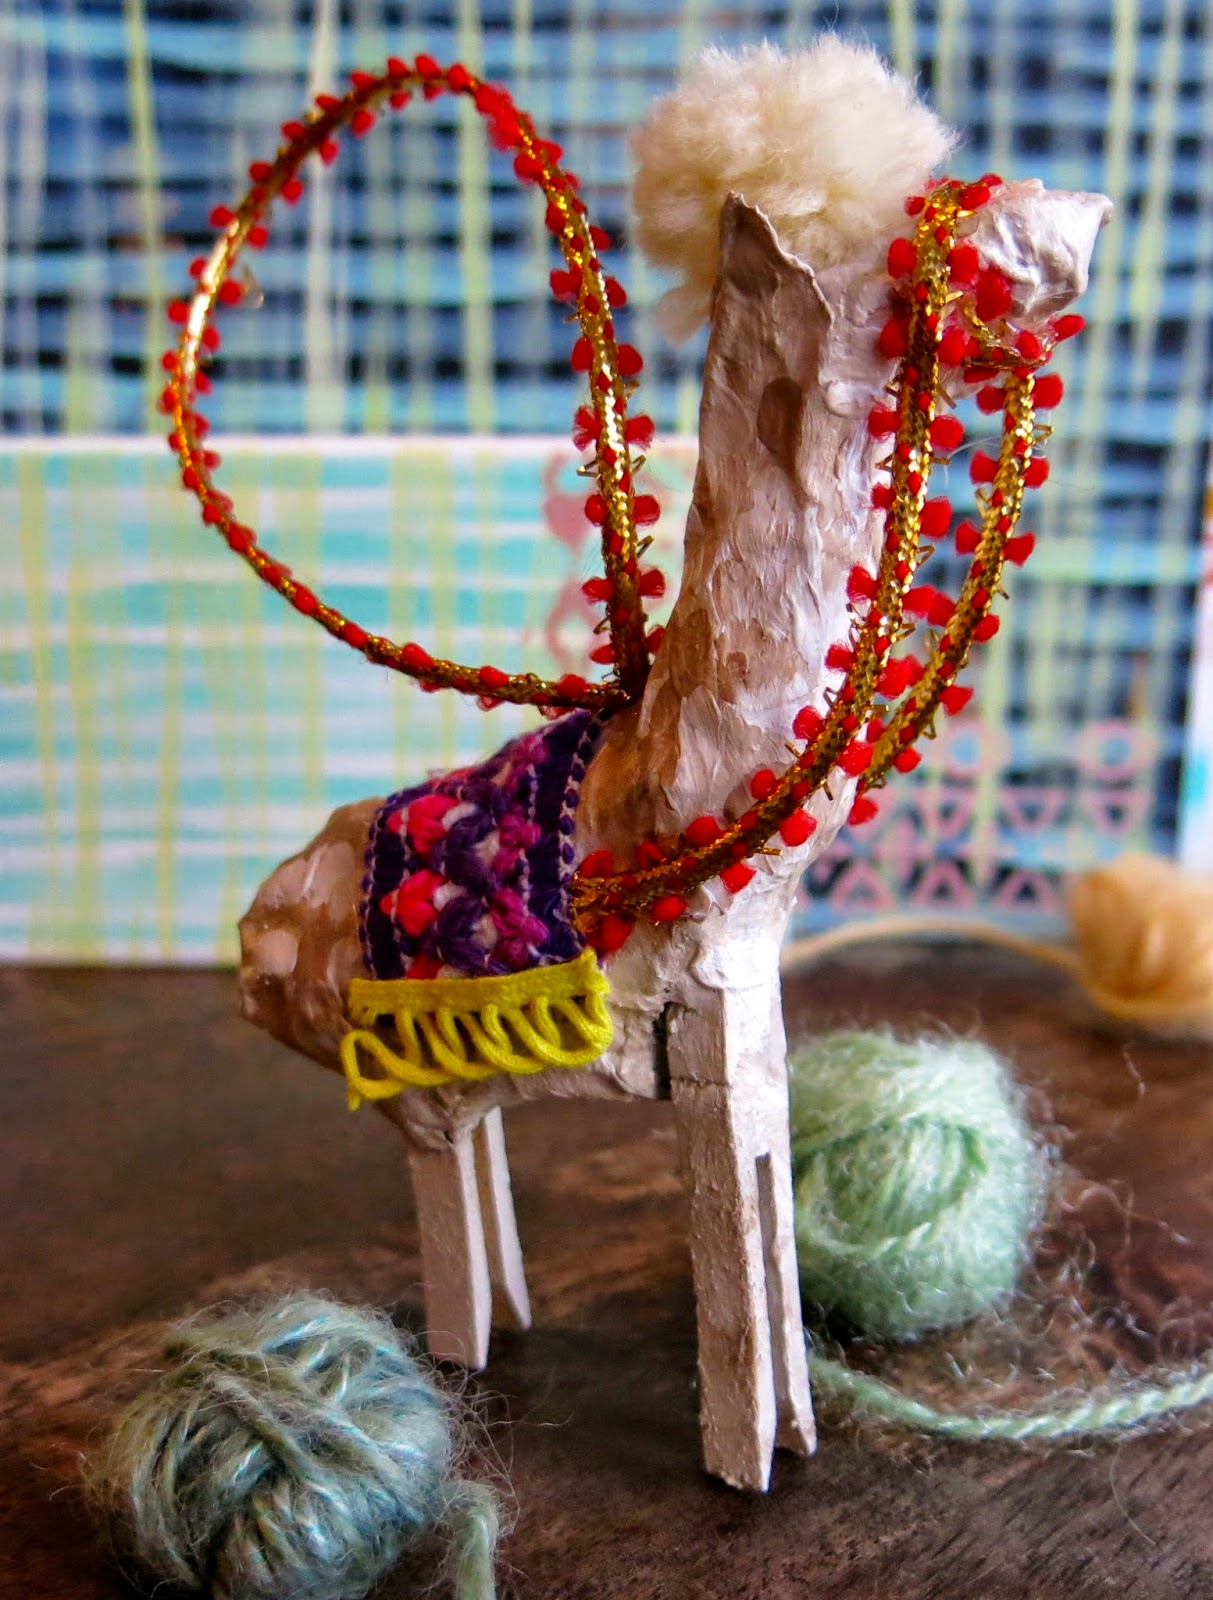
For that reason, I went on a wee bit of an alpaca-crafting bender over Thanksgiving break. With the help of my moms-in-law who, by her artsy nature, is always (willingly) dragged into my crafting adventures, we sculpted and papier mached these bad boys.
I know, right? Like, so super cutes it burns your retinas. And we used a buncha scrap supplies that woulda otherwise ended up in the recycling bin. Or in the back of my car with the hobo clowns which is more likely the case.
So just how did these lil guys come to life? Lemme start by showing you what our kitchen table looked like after the tofu-kery and pumpkin pie were cleared away...
So just what did we use? Well, lemme start by saying that is not mashed potatoes in the middle of the table. To craft our Alpaca Ornaments, we used:
*  Clothes pins for the legs. The ones with the metal wire hinge thingie work the best.
*  Wallpaper paste. Not be confused with mashed potatoes. Like, ew.
*  Aluminum foil scraps. I saved all the foil scraps from the kids' projects this year thinking that we'd come up with something to create. 
*  Newspaper torn into strips. What with Black Friday ads, we had plenty of newspaper to use. 
To create the body, we simply stood two clothes pins on end and crumpled a piece of foil over them for the body. Another piece was then wadded up and added for the neck and head. From there, we commenced wrapping the alpacas with newspaper. The ears were created by folding a wad of newspaper up to create a triangle shape and then attached. Because of their small size, these guys really took no time at all. And they were pretty easy once we figured out how to sculpt the body. I'm thinking my third and fourth grade kids could totally handle the scandal. 
After drying overnight, we give the little dudes a base coat of white to hide the newspaper print. From there, I just started slapping colors on the little guys whilst merrily scrolling through my alpaca pics for inspiration.
Then came the hair stylin's. When I was paper mache-ing, I didn't have a clue how to go about creating the hair. However, on a trip to the craft store, I found these super awesome pom-pom-making contraptions that worked out perfectly.  
In my bottomless stash of stuff (which reminds me, I can also had crazy-crafty-hoarder to my list of illnesses), I also happened to have yarn the exact color of my lil alpaca friends. So I promptly set to creating pom-pom alpaca afros. 
Also in my stash were some ethnic ribbons for the "blankets" to drape over the backs. These were hot glued into place.
Sparkly ribbony stuff was added for the hanger and viola! All ready for the yet-to-be-dragged-outta-the-closet Christmas tree!
 At some point during all this alpaca-madness, I got the crazy notion to paint some stationary. Because, you know, why not?
 I'm thinking that if I can fight off the urge to keep them myself, I just might gift these sets for Christmas. 
 I went about making them factory style on the dining room table (you know, because the kitchen table was full of papier mache and alpacas. As it should be). I started by just dry brushing some stripes...
 And some more stripes before stenciling. I found this super groovy ethnicy stencil at Michael's and bought it even before I had a plan. And I'm so glad I did because I loves it so.
After the background dried a bit, I sketched in some alpaca silhouettes in paint. Half the time they ended up looking like giraffes, llamas, deer or some creature from the Black Lagoon but I was determined to just keep painting and make 'em work. 
Once dry, I thickly painted stripes, dots and patterns on the back of the alpaca to mimic a blanket. I also added a lil line around the alpacas so they wouldn't appear so flat. 
And there you have it! A Pack-a Attack-Alpacas! I so loved creating both the cards and the ornaments. 

So, I gotta know, did you craft over Thanksgiving break? I'd love to know what you created. If you'd be so kind, share what you made in the comments and, if you have a blog where you featured your creation, please be sure to add a link below. Thanks, y'all!
 photo signature_zpsd10b3273.png

Sunday, November 30, 2014

DIY: Crafts on a Plane!

Well, hey there, long lost friends! I trust y'all had a super fab and totes turkey-tastic Thanksgiving. We don't eat meat in our house so ours was simply tofu-licious (just kidding, we don't believe in the senseless slaughter of tofu either). I'm quite positive that I devoured my weight in good food goodness this past week. However, I'm sticking with el elastic-waistband-o for another 24 hours before I gotta find out the ugly truth.  

Since I seriously was in pajamas and/or the same ensemble for three days in a row, Ima gonna have to skip sharing with y'all what I wore this week. Howevers, I did manage to whip up a coupla crafts during our travels and this here post is the result.
 Oh, okay, one outfit pic. Since I did manage to get dressed, comb my hair and put my face on, I outta show you the product of my one day of effort. sweater: Free People, found at Buffalo Exchange; top: JCrew on super duper Black Friday sale; skirt: TJMaxx years ago; floral fishnets with orange tights underneath: Urban Outfitters

Yay! Match-y embroidered jewelry! Y'all, whipping up these little do-dads took no time at all since the embroidery work was so minimal. Which is perfect for me because embroidery is not my fave thang in the universe. I mean, I've done plenty of it (check out this embroidered necklace and this one, an embroidered blouse, an embroidered dress and this thing). And I was super inspired by Mary Beth who's jewelry and etsy shop was featured in my last post. Her work is so amazing! By the way, you can still leave a comment to enter to win her whale ring. If you don't have an instagram account, don't sweat it, leave a comment anyway! 

Okay, what was I saying again? Oh yeah, CRAFTS ON A PLANE!
 One of my fave things about travel is that it gives me plenty of uninterrupted crafting time. And a four hour flight to Cali is the perfect chance to catch up on all things crafty, dontcha think? I had picked up some alpaca yarn from my trip to this sweet place and had my sights set on knitting myself a scarf. Nevermind the fact that I suck at knitting. Forget all about the thought that I hate knitting. Totally disregard the idea that the last thing I knitted was this gawd-awful hat that ultimately became the cat's chew toy. I had four hours, I was gonna knit me a scarf, y'all. 
AND about 30 minutes in, this was pretty much how I felt about my life as a knit-wit. Thankfully, I'd brought my embroidery backup. 
Please note all the alpaca hair strands all over the black cotton. 

Oh, how was California, you ask? So thoughtful of you to inquire. It was swell. We hit Disnatch a coupla nights in a row to check out the final days of the Mad T Party Band (sniff-sniff!) hit the rides and see the castle at night...
Oh, sparkly. I was also able to catch up with a couple of my fave Californian buddies (thanks for lunch, Jane and Hayden!) and shop. Because there's always time to shop. The hubs loves to hike so we try to tackle a new trail each time we are there. On this trip, we hiked to a grotto where the hubs captured this footage of me being obnoxiously (albeit totes normal) whiny and annoying. It's what I do best. 

I thought he was simply snapping photos until we sat down to look at our pictures together. The video had me laughing so hard at my annoyingness that I just had to share it with y'all. 
 "Wait. We hiked down all that for this?! Where are those knitting needles, Ima bout to knit/purl sumbody."
Once we returned back to civilization, I busted out these jewelry blanks I'd picked up at Michael's. They were on super duper clearance which is always my kinda party. 
To attach my embroidery work to the jewelry, I decided to adhere the fabric to some cardboard backing. Which, in this case, was the cardboard from a dark chocolate package. I'm all about the recyclin', folks. 
 After tracing the ring, I cut out the cardboard...
and glued it to my embroidery piece. I fringe cut the edges of the embroidery so that I could tack it down with glue a lil easier. My glue of choice is Aleene's Quick Dry Tacky Glue. Mostly because I like the name Aleene and I'm totes tacky. Oh, and added bonus, I now have the nutritional facts of my dark chocolate on the underside of my ring! This way, when someone discovers my ring at Goodwill years down the road, they'll think they've found some sort of Da Vinci Code-esque (guys, why are all my movie references, like, 10 years old?!) puzzle which will ultimately unravel the universe! YES, mission accomplished!
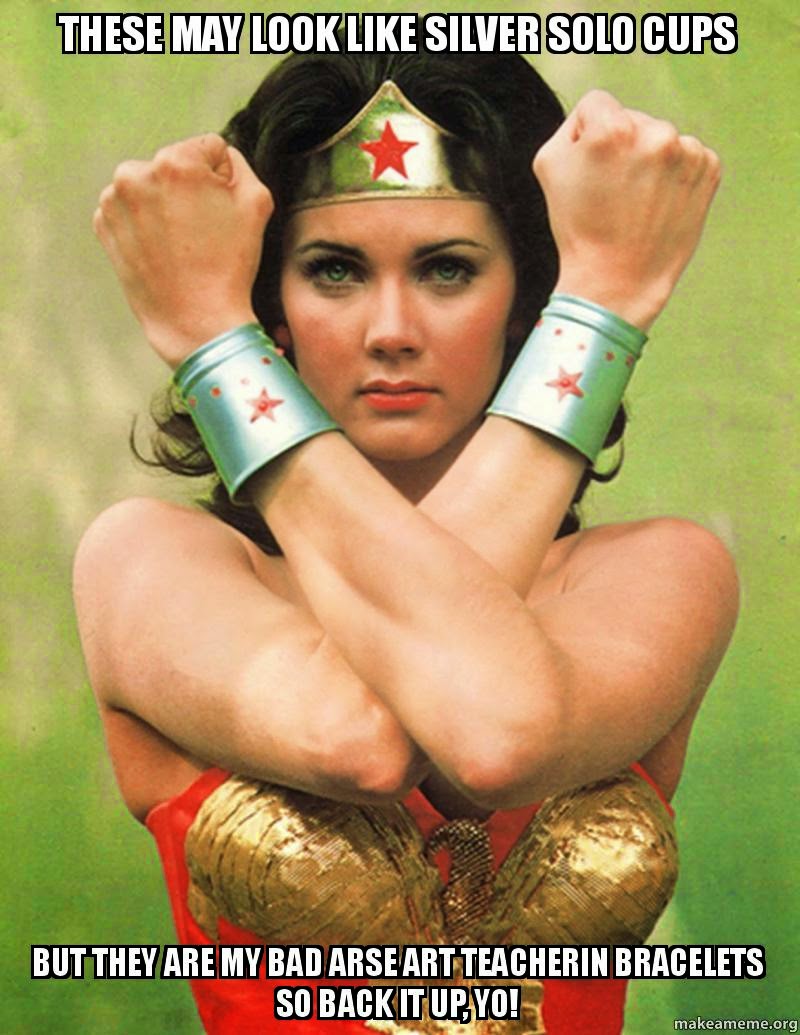
Okay, tell me the truth: Does this giant bracelet make me look like some sort of Wonder-Woman-silver-cuff-wearing wannabe?
If so, I don't suppose that's a bad thang, do you? 

Hope y'all have a restful last day of your weekend! 


 photo signature_zpsd10b3273.png

Tuesday, November 25, 2014

DIY: Selling on Etsy, An Art Teacher's How To (bonus: giveaway!)

Moon Shadow Rings, here.


I believe that just about every artist, art teacher, crafter and maker-of-many-a-thing has toyed with the idea of selling on Etsy. I mean, it's every creator's dream to share their work, have people take note and, best of all, make some spare coin (you know, for buying even more craft suppliezzz). But, if you've been down Etsy Avenue, you know it's not so simple as listing your stuff and raking in the dough. It's serious (and sometimes no-sales-for-weeks/soul-crushing) work. Which is why you find so many abandoned shops on the site (including my very own belt shop, ahem). All that aside, it can be done. Today I'd like to introduce you to one art teacher who is also a super successful Etsy seller. Meet Mary Beth Heishman!
Just who are you and where do you teach art?  

My name is Mary Beth Heishman and I teach elementary school art in Las Vegas, Nevada.


Tell us a little bit about how you got started creating jewelry. Have you always done it or is this a kinda new thing for you?

I was always in awe of my Grandmother's collection of gems and this really fueled my passion. I have been creating jewelry since I was a child.  I used to make friendship bracelets in grade school and in high school I made hemp jewelry.  I was always selling and trading my creations with friends.  Later in college I even worked at a local bead shop.  I would balance painting with jewelry making.  Right now jewelry making is all I do after I teach during the day.  
Personalized Plane Necklace, here.

What lead you to open an etsy shop? 

At an art inservice, haha, I was talking to a pal about starting an online website. She mentioned etsy and the rest is history.  I was afraid to go solo as how would I generate my own traffic to my site, so etsy was perfect. 
Life Cuff Bracelet, here. 
How long have you been an etsy shop opener? 

I have had my etsy shop since 2007.  In its infancy it was a hodgepodge mess.  I sold art, prints, hand painted vintage records, purses and jewelry.  It wasn't until 2010 when I had started fine tuning my shop and just making jewelry.  That is when I started selling more and had great buyer feedback which fueled my desire to want to make more.
 My personal fave, The Amazonite Bronze Block Necklace influenced by mid-century cinder blocks, here

Your shop is very well stocked full of beautiful pieces. And you've had a ton of successful sales! Tell us your secret: How do you find the time to teach, create AND sell on etsy (which entails photographing the piece, writing a description, shipping and costumer-service dilemmas)? 

Haha, I sometimes question myself on this. I do not know the secret, maybe it is having a loving and supportive husband.  My husband and I work together this year (I teach art, he teaches 5th grade math). We take turns making healthy meals (BIG meals) so we have plenty of left overs for lunch and an additional dinner. Food is very important to us, I may not have time to workout but we eat very well (healthy overall).
Personalized Banjo Bracelet, here

We have loving and supportive friends too that have always encouraged and supported my art and jewelry!
Hexagon Statement Necklace, here

As for product photos, I have a little mini light set up and white plastic backdrop that I shoot pics on.    My favorite is to take model photos with friend's in the nearby desert canyon.  I usually do this all after school.  Although I am behind on 8 new pieces that I need to photograph and post.

As far as customer service, I check my emails when I wake up in the morning and after I get off of work, so far I keep up that way.  My customers are always so sweet and lovely (I feel they too have a love for the handmade and crafted), dilemmas are few.
Whale Tie Bar, here

Are you actually a robot? 

 I wish, I need to upgrade my operating system, I am getting old.  haha, jk.
Can you tell us what a (totally ideal) teaching/creating/selling on etsy day looks like?  

I have taught for 14 years and it wasn't until 2011 that my shop has picked up consistent sales. I am always working during the work week, I wake up, walk our awesome dog, go to school, teach all day, come home and work on making jewelry until 7:30/8 pm every week night. I usually work a full day over the weekend on custom orders. During the holidays I start evening jewelry work until 9/10pm.  I am very thankful for the winter holiday as this is still order time but a few days before December 25th it slows down and I can unplug and relax. I love it though. I love teaching my little artists and then making my own works in the evening. So far I feel balanced.  
If you could give advice to someone who was considering opening an etsy shop, what would that be? (I know, where to start, right?!)

Really it was all trial and error for me. I had a hodgepodge shop and when I had feedback on jewelry that was the direction I went and stayed. I do not know if that is the way to do it but it worked for me. Ask yourself, what is your goal? Have a consistent product that you can replicate if the demand is there. Have fun with your etsy and try to stand out from the rest, be one of a kind.

Thank you so much, Mary Beth, for the fun and informative interview! It's always inspiring to hear from working artists, dontcha you think?

Especially generous ones. Check out this giveaway, y'all!
Mary Beth is GIVING AWAY this ring! Here's all you have to do to enter to win (it's worth $40, kids! How awesomely nice is Mary Beth?!):

1. Leave a comment below telling us your favorite piece in Mary Beth's shop IadornU

2. Follow Mary Beth on Instagram @iadornu. This way you can keep up with all of her creations AND more giveaways!

AND THAT'S IT! Winner will be announced one week from today!

***


In honor of Thanksgiving and all that I'm grateful for (that'd be you guys, thanks always for popping in and reading/commenting), I've decided to draw TWO names for the Crayola Giveaway! Congrats to...
Morgan Garcia!

Cowpoke Paintbrush!

If you lovely ladies would email me your home address (cassieart75@gmail.com) I'll have these goodies shipped your way soon!

Thanks for participating, y'all!


 photo signature_zpsd10b3273.png

Sunday, November 23, 2014

What the Art Teacher Wore #123 // Thanksgiving Day Craft Ideas

 You Don't Even Wanna Know: The most frequently asked question by my colleagues on this particular day? "Just how are you wearing your stockings today, Stephens?!" Suriously, guise. You don't even wanna know (but being the blabber-mouth that I am, I've written a tell-all below). sweater: Betsy Johnson, thrifted; crayon dress: Modcloth on super-duper sale; belt: amazon; tights: Target; crayon shoes: DIY here

Hey there, my favorite people! I come to you from the wonderful land of Thanksgiving Break (which, for me, is a whole week off. Don't hate. Remember, I did return to school in July. Even if it was July 31st, it was still July). The hubs and I are in sunny SoCal (again, is it just me or does saying "SoCal" make me sound like the jerk I am?) where we'll be hangin until we return home for some Thanksgivingness. In honor of Thanksgiving (which marks the end of fall and the beginning of Christmas-freaking-everywhere), I'm sharing with you a backlog of fall-ish projects that have been created in el art room-o over the last coupla weeks. I thought you might enjoy a wee bit of crafting with the fam after you've all recovered from the after effects of tryptophan (btw, you know that if you read about something on WebMD, A. You prolly have whatever disease you just read about and B. You will prolly be dead my morning. My advice? Don't read WebMD).
I hope all y'all have a great week of giving thanks (even my buds not living in 'merica!) and devouring entirely too much food with those you love. Until next time, I'd love to hear what Thanksgiving traditions you have, aside from participating in some super rad fall crafts, of course!
 Even Asha the Cat was perplexed by my two dif colored legs (actually, she could care less, she's just here begging for food. Because, as you can see, we never feed her). So the deal is, I really would love for some genius hose company (not to be confused with "hoes company", ahem) out there to start making two-diff-colored-leg tights. But until they do, I'm stuck wearing one pair then only wearing the leg of another and wrapping and tucking the spare leg. This works if, and only if, the spare leg that's tucked doesn't fall out and then dangle between your legs like some sort of deflated manhood. Not that I know anything about that. AHHHH-hem.
My afternoon clay class created these one-hour created-and-glazed turkeys using fall leaves and an orange-sized piece of clay a coupla weeks ago. We began by twisting the clay into two equal pieces. One piece was used for the pinch pot body. For the other piece, the kids laid a leaf down veiny side up, pounded their clay into it, traced around the shape of their leaf with a skewer stick and pealed off the leaf. The clay leaf was then attached to the pinch pot. The excess clay that was cut from the leaf tracing was then used to form a coil for the head and parts of the face. The kids really loved this easy project and even got carried away creating hats and bow-ties for their turkey.
 Field Trippin Tuesday: I took my second grade students to see the Kandinsky exhibit at The Frist Center on Tuesday. It was a ton of fun. I felt kinda silly cuz I kept forgetting I was wearing my Kandinsky dress until the docents, security guards and just about everyone else pointed it out to me. They were all, "Where did you get that dress?!" Don't ask me why but I get all goofy when I answer and always say, "Uh, I made it?" with a question mark at the end. Big Dork. jacket: Modcloth; Kandinsky Dress: DIY here; tights: Target; Frye Boots: Journeys, years ago 
Some of the kids in clay class opted to create a peacock instead of a turkey and those turned out super cute as well. And I love that one flipped her pinch pot so her turkey could work double duty (btw, NEVER say the words "double duty" to the under-10 set for they will lose their minds) as a bowl or cup or holder-of-many-a-small-things.
 Crayola Sweater Wednesday: Have y'all left a comment here to enter to win my lil Crayola Giveaway Contest? If you haven't, what in the world is wrong with you?! The winner will be announced next week so get on it, kids! dress: Anthro, last season; tights: Target; shoes: Dolls by Nina; necklace: The Paper Source

A coupla weeks ago my first grade friends printed and stitched up these leaf print wall hangings. For the printing process, we used Gelli-Arts printing plates but if you don't have those, have no fear. You can create your own gelatin printing plates by visiting here and following my relatively decent directions. I have the kids tons of different fall-colored fabric options to pick from. After they created both their positive and negative leaf prints, they had the chance to use sewing machines to stitch them together (totally supervised of course. I'm not that crazy).
 Put a Belt on It: Y'all. When I spotted this belt on etsy, I was all, OMG, I gotta have this in my life! I think it has super secret art teacherin magical powers. Although, when my fourth grade class came to art on this particular day, one girl was all, "Is that it? Where's the rest of your crazy outfit?!" And I was all, "DID YOU NOT NOTICE MY BELT?!" Kids, these days. So hard to please. vintage dress: thrifted; belt: etsy; tights: Target; shoes: Anthro
I was fortunate to have some local college kids in my room to help with the stitching portion of the project. While a handful of kids worked on stitching, the rest used Sculpey clay and skewers to create those beads that you see at the ends of the skewer sticks. For extra fall crafting fun, you could make necklaces with the Sculpey. Oh! And if you don't have access to a kiln, you could easily make miniature turkeys using the Sculpey and the directions for the clay turkey above. You see, your T-day crafting options are limitless. 
 Early Morning Saturday: I forgot to snap a photo one day this week and the totes ridic thing is, I can't even remember what day it was or what I wore! So just before our long flight on Saturday, I snapped this photo. I love to be comfy on the plane while I'm spread out with my assortment of crafts (I took along knitting needles and some embroidery madness). So far, all my attempts at crafting have been in vain. Oh well, it's vacay, right? dress: Betsy Johnson, Buffalo Exchange; jacket: Lucky Brand; scarf: Urban Outfitters; necklace: made by me, DIY here 
Enjoy your final days of fall, y'all!

 photo signature_zpsd10b3273.png