Showing posts with label art teacher blog. Show all posts

Thursday, July 16, 2026

Let's Create...Puppets! An Interview with Furry Puppet Studio!

Zack Buchman and a friend at a Barnes and Noble event, Union Square. 
Photo: Dmitri Slepovitch

Hey, y'all! I have a fun treat for you today...

I recently had the chance to chat with Zack Buchman, the Founder and Creative Director at Furry Puppet Studio in Soho. I'm a huge fan of puppets myself, having grown up in the 80's with the likes of Sesame Street, the Muppet Show and Fraggle Rock. So I was excited to hear from Zack, see the creations of Furry Puppet Studio and share it with you!

I think he and his time would be a wonderful source of inspiration for the art room, don't you? I've included some puppet art lessons at the end of this post, if interested. 

Now, let's hear from Zack at Furry Puppet Studio!

What is a puppet design studio?


We're Furry Puppet Studio, a custom-puppet design studio in SoHo, New York. I'm the founder and Creative Director. We design and build custom puppets, creatures, mascots, and marionettes for television, advertising, music videos, and almost everything happens in-house, the foam carving, the mechanisms, the costumes. A lot of people assume this kind of work is mostly digital these days. It isn't. Every puppet we make starts as a block of foam that somebody carves by hand.

How did you get into puppetry?


I've been obsessed with puppets since I was a little kid watching Sesame Street. I actually tried animation first, but it didn't stick. I wanted to be able to touch the character, not just draw it frame by frame. I never went to college. That wasn't really a choice so much as a circumstance, and I do think I missed out on some things. But it also gave me an outsider's perspective, and it pushed me to find people who were generous enough to teach me what I didn't know.

Could you share some of the artists who inspire you and your coworkers at Furry Puppet Studio?


Jim Henson is the obvious one, but I mean that honestly. Early LucasArts games really shaped how I think about a face, Sam & Max Hit the Road especially, where the graphics were so limited that a single pixel had to decide whether it read as an eye or a nose. Beyond that, our team pulls from all over: comics, film, fashion, whatever's caught someone's eye that week.

What was one of the more challenging projects you have tackled at Furry Puppet Studio?


Building marionettes of Missy Elliott and Pharrell Williams for their "WTF" music video. Marionettes are hard. They don't move the way you'd expect, and every string has to be reverse-engineered into a personality. We had street performers with very distinct movement styles operating them, so the puppets basically had to be built around how those specific artists already moved. It was completely outside my comfort zone, and I'm still proud of how it came together.

If you were stranded on a deserted island, what is the one art supply you'd need to keep creating puppets?


A Blackwing 602 pencil. This is the only pencil I've been using since 2010 and I pretty much always have one on me. For no practical reason. It's my comfort object.

What's the best way for a young artist to get started on their journey into puppetry?

Start now, and start cheap. You don't need special materials. Whatever you've already got around the house can be your first puppet. Let the early ones be bad and fun. That's part of learning how the material behaves. And find people around you who know things you don't, and are generous about teaching you. Be generous back once you're the one who knows something.

Thank you so much, Zack!

I love everything that Zack had to say and I really think his thoughts on creating will resonate with our creatives!

I've done a couple puppet lessons with my students over the years and they have always loved them. I thought I'd share them today as they are tried and true...and a great jumping point for introducing your students to puppetry!
One year, we created Crocodile puppets with first grade! 
The back of the crocodile was a weaving. The tail was printed and the rest was a lot of collage! You can find the directions and details here. 
For a kid-friendly video to walk you through the process, visit here!
The base of the crocodile puppet is this folded contraption right here...and it's how we created these "Baby Dragon" puppets! Video here!
And we even created these little pop-up puppets! You can check out the video here.

And big thanks to Zack and Furry Puppet Studio for inspiring us with your puppets and creativity!

photo signature_zpsd10b3273.png
Read more »

Sunday, June 18, 2017

In the Art Room: Fiber Arts for Kids

When I first started teaching, weaving was in our curriculum and I was scared outta my mind. The only knowledge I had of weaving came in the form of the fiber arts class I took in college...where I got a C due to my crappy weaving project. I remember warping one of those giant floor looms for what felt like hours (prob only took 15 minutes but it was dreadfully dull) and skipping a warp strand. "Eh," I thought, "what's one warp strand, the professor will never know." Well, that one strand created a huge runner throughout my weaving and dropped my GPA down...along with the C I also acquired in Karate. Turns out Indiana University takes weaving and martial arts super seriously.

Fast forward to the present and weaving, sewing and all things fiber-artsy is one of my favorite things to teach...and the kid's fave thing to learn! Since I'll be joining in on Trixi Symond's Sew a Softie in July, I thought I'd share this video I created for the Art of Education's online conference. This video is from several conferences ago...but I still use the ideas and methods in my art room. 
Are y'all signed up for this summer's conference? I'll be leading a hands-on clay and printmaking session and I'm so excited! 
My students love fiber arts...and it's a skill that just isn't taught as much any more. All the more reason it is so fascinating to them. You can find a list of my very favorite fiber art projects here. I mentioned a ton of lessons and videos in that clip...you can find them all in that link! You are ALWAYS welcome to use my videos in your art room. I just appreciate a shout out when projects are shared via social media. 

And don't forget to join the fun of Trixi's Sew a Softie in the month of July! 
 photo signature_zpsd10b3273.png
Read more »

Wednesday, May 3, 2017

In the Art Room: Clay Texture Turtles!

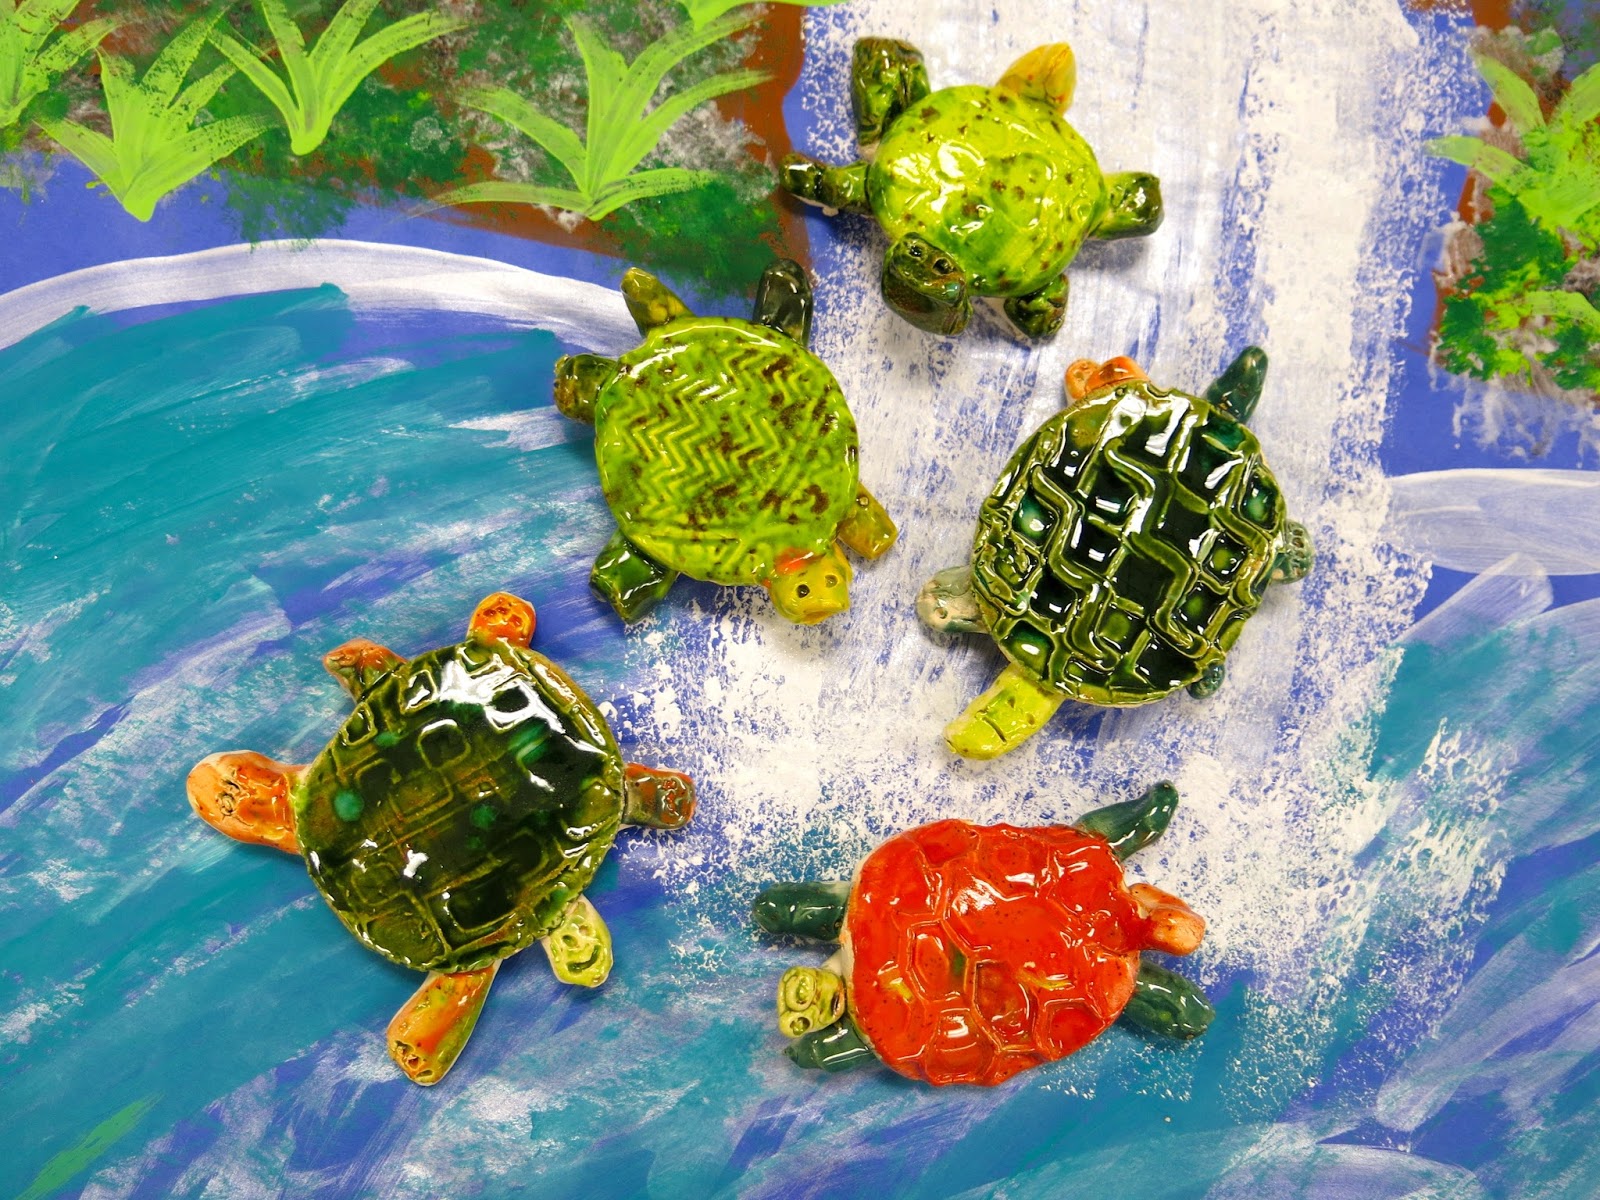
Need a fast and fun clay project that teaches kids all about texture? Try these clay texture turtles on for size! Here's a one minute how-to clip:
So easy!
 I did this project with my kindergarten (this was their second clay project...I'll share the other one soon!) and they loved it. Stepping on their clay and seeing the texture that the sole of their shoe left behind was their most favorite thing. Here are the kiddos in action: 
Stepping on the clay was def their fave part! 
 I loved using Mayco's Jungle Gem glazes for these turtles. I stressed to the kids that adding at least three layers of glaze would really make their turtles super shiny.
This is definitely a project that could also be done with air dry clay. In fact, every Wednesday night for the month of May at 8pm CST over on my Facebook page, I'll be hosting a clay chat, starting tonight! We'll also be creating in clay so be sure to bring your favorite clays...or purchase these clays as that's what I'll be working with: 
Of course, that book I wrote is nothing but non-kiln fire clay projects...I explored just about every clay medium in the making of that book. 
By the way, don't you LOVE that painting in the background? My fabulous P.E. teacherin' friend Ali is painting it as one of the backdrops for the art show! I thought it was a cute photo op for these happy and colorful turtles. 
See y'all LIVE tonight at 8pm CST...come armed with your fave clay tips!
 photo signature_zpsd10b3273.png
Read more »

Wednesday, April 26, 2017

DIY: Folk Art Fish UPDATE!

My sweet second graders had to push the pause button on this project last week to tend to painting and bedazzling their exotic birds. But now that those are done, we were able to bring back our Sandra Silberzweig-inspired folk art fish and work on them a bit more today. Almost all of the kids finished them off in 30 minutes (which is pretty awesome, considering these are 12" X 18"!) and they were so thrilled with themselves...as was I!
You can check out (and feel free to use!) the complete lesson right here: 
My students did this project in three 30 minute classes. On the first day, we chatted about Sandra, her work and the use of line and black glue. We drew our fish and went over our lines in glue. If you go to this post, I share how I make black glue. 
 The following art class, we began working with the chalk. This project is perfect for my second graders as they are about to embark on their chalked ceiling tile project super soon. You can check out what my second graders have chalked in the past both here and here. I'm not sure what they'll be chalking this year...but I need to figure it out soon! I'll be sure to share with you right here. 
The key to working with chalk is getting the kids the right stuff. So much chalk is filler and junk. The end result is usually very light in color. I love Koss Brand Chalk, even it if is hard to find. We purchase ours through Amazon. I love the subtle colors in this artist's work. 
 Compared to how bold and vibrant this one is!
 I seal all of our chalked projects with Aqua Net. I have noticed that the nozzle on the 'Net has changed and it now does not come out in a nice stream but speckled. However, if you hold the can far enough away from the work and spray, it's fine...and the speckles (mostly) disappear. It's much cheaper than fixatives.
This is usually how I lay them out to spray. Take 'em off the drying rack, spread 'em out and spray away!
They are going to look stunning at our art show!
 photo signature_zpsd10b3273.png
Read more »

Friday, February 10, 2017

In the Art Room: Candy Heart Sculpture UPDATE!

 My fourth graders are wrapping up their Candy Heart Sculptures and I thought I'd share how they turned out. The kids loved creating these and were thrilled with their work. I'm not much of a project-repeater but this one might have to be done again! Here's the process video I created to share with my students and you:
I know several of y'all did this project with your students and mentioned that paint was flaking off. I only saw a little bit of that...so I'm thinking it might be the paint used. It's a constant search to find paint that is both nontoxic and good quality paint without being super expensive. We used a combination of Blick tempra, Sax Versa Temp and Chroma paint. I did seal the hearts with a quick couple swipes of ModPodge to prevent chipping and add a little shine. 
I knew the struggle would be with the lettering...which is why in the video, I cover it so thoroughly. I'm happy I did, I think they did a great job painting their words on that lumpy bumpy plaster. 
Knowing that I'd have some early finishers, I grabbed four large boxes out of the recycling bin and put those kids on candy box painting duty. I had primed the boxes with white paint the night before and just drew on it in pencil. If I have time, my plan is to grab some laminating film and make it like a window in the box. Early finishers also wrapped up this drawing lesson:
I'll be certain to share their drawings soon!
The sayings the kids picked out was my favorite part. I thought it spoke so much about the kid creating the heart. 
 I had printed out a list of the hundreds of sayings that Necco has used every year on their hearts. I told the kids they could come up with their own saying...or use one of Necco's. All I asked was that I check what they planned to write first. I didn't have any issues with inappropriate sayings...but I didn't want to take my chances. 
Love to hear from y'all if you gave this project a go! I'm off to put these on display in the library. 
 photo signature_zpsd10b3273.png
Read more »

Monday, January 23, 2017

DIY: Enchanted Tiki Room

If you know me, you know I love Disney(land, preferably) and I love all things retro. So it wouldn't be a stretch to assume that I love the Enchanted Tiki Room. I know, it's so cheesy, you better bring the Ritz crackers but I just can't help myself! When I was a kid, my grandparents would take me, my Aunt Judy and my cousin Ang to a little place in Florida called Tiki Gardens. While the grandparents got all sorts of happy on Mai Tais, we explored the faux Hawaiian terrain, squawked at the parrots and picked out oysters to have pried open for pearls. I have such happy memories of that time and such a love for that sort of kitschiness, that it inspired me to create a wee corner of my crafting room into an Enchanted Tiki Room. 
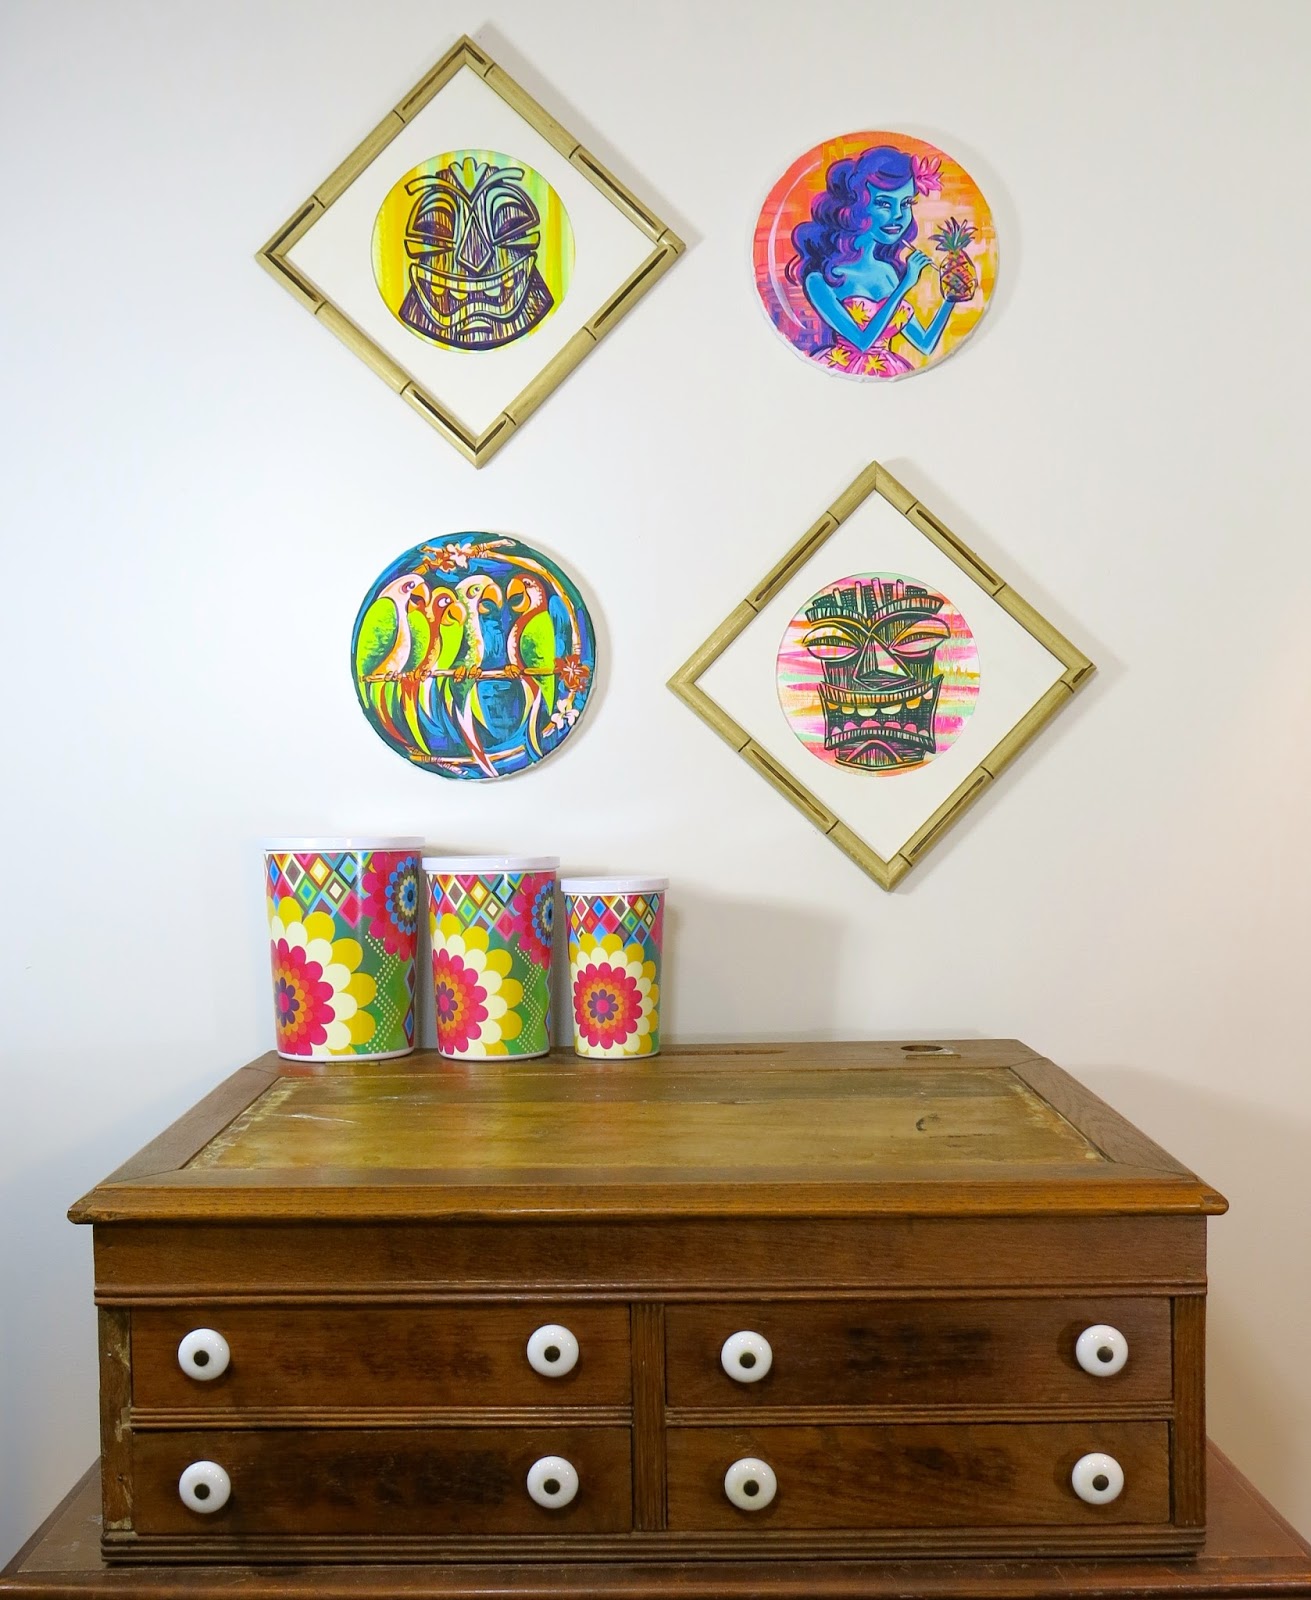
True Confession #147: I often buy things at the thrift store because I find them interesting/inspiring/neato-mosquito but don't have a clue what I'll end up doing with them. Case in point, those faux bamboo frames. I think I've been hoarding them for at least four years just waiting for the perfect project. And I'm so glad I did. They inspired this Tiki-Tastic corner! 
My other inspiration came in the form of a trip for toilet paper to Target. You know the story, walk into Target for t.p., walk out with $146.76 worth of stuff that you JUST HAD TO HAVE. That's exactly what happened when I spotted these fun round frames at Target. Did you know they now have a "craft" isle? Y'all. I am in SO.MUCH.TROUBLE. After flipping through my Tiki Pop book for inspo, I threw back a glass of my version of Mai Tai (red wine, anyone?) and started blocking in this painting. Man. How I've missed painting. 
 After a couple of nightly painting sessions, Blue Bernice was starting to take shape. I have currently been inspired by Vladimir Tretchikoff  which is why Bernice is that lovely shade of blue. If you follow me here, you've seen the nightly progress. 
True Confession #148: I did struggle with painting that cleavage. Mostly because I don't have one and I was all, "what is that SUPPOSED to look like?!" In other news, I love painting, have I mentioned that? I'm just using craft store grade acrylic here. In college, I got my degree in oil painting and I love to slap that paint on. I don't have the patience for the dry time or tolerance for the smell of oils but cranking out these acrylic paintings sure does scratch that itch. 
Once Bernice was complete, I moved on to a shameless copy of the Disney image of the Enchanted Tiki Room. 
Just a wee process photo. I start with a super quick sketch and then a blocking in of the colors. I always limit my color palette because I LOVE ALL THE COLORS and therefore want to use ALL THE COLORS. So limiting that temptation is for the best. 
 I sit entirely too close to my paintings which means they get all sorts of crazy up close. 
I tried not to get carried away with detail knowing that I would be viewing these from a distance that was not six inches. 
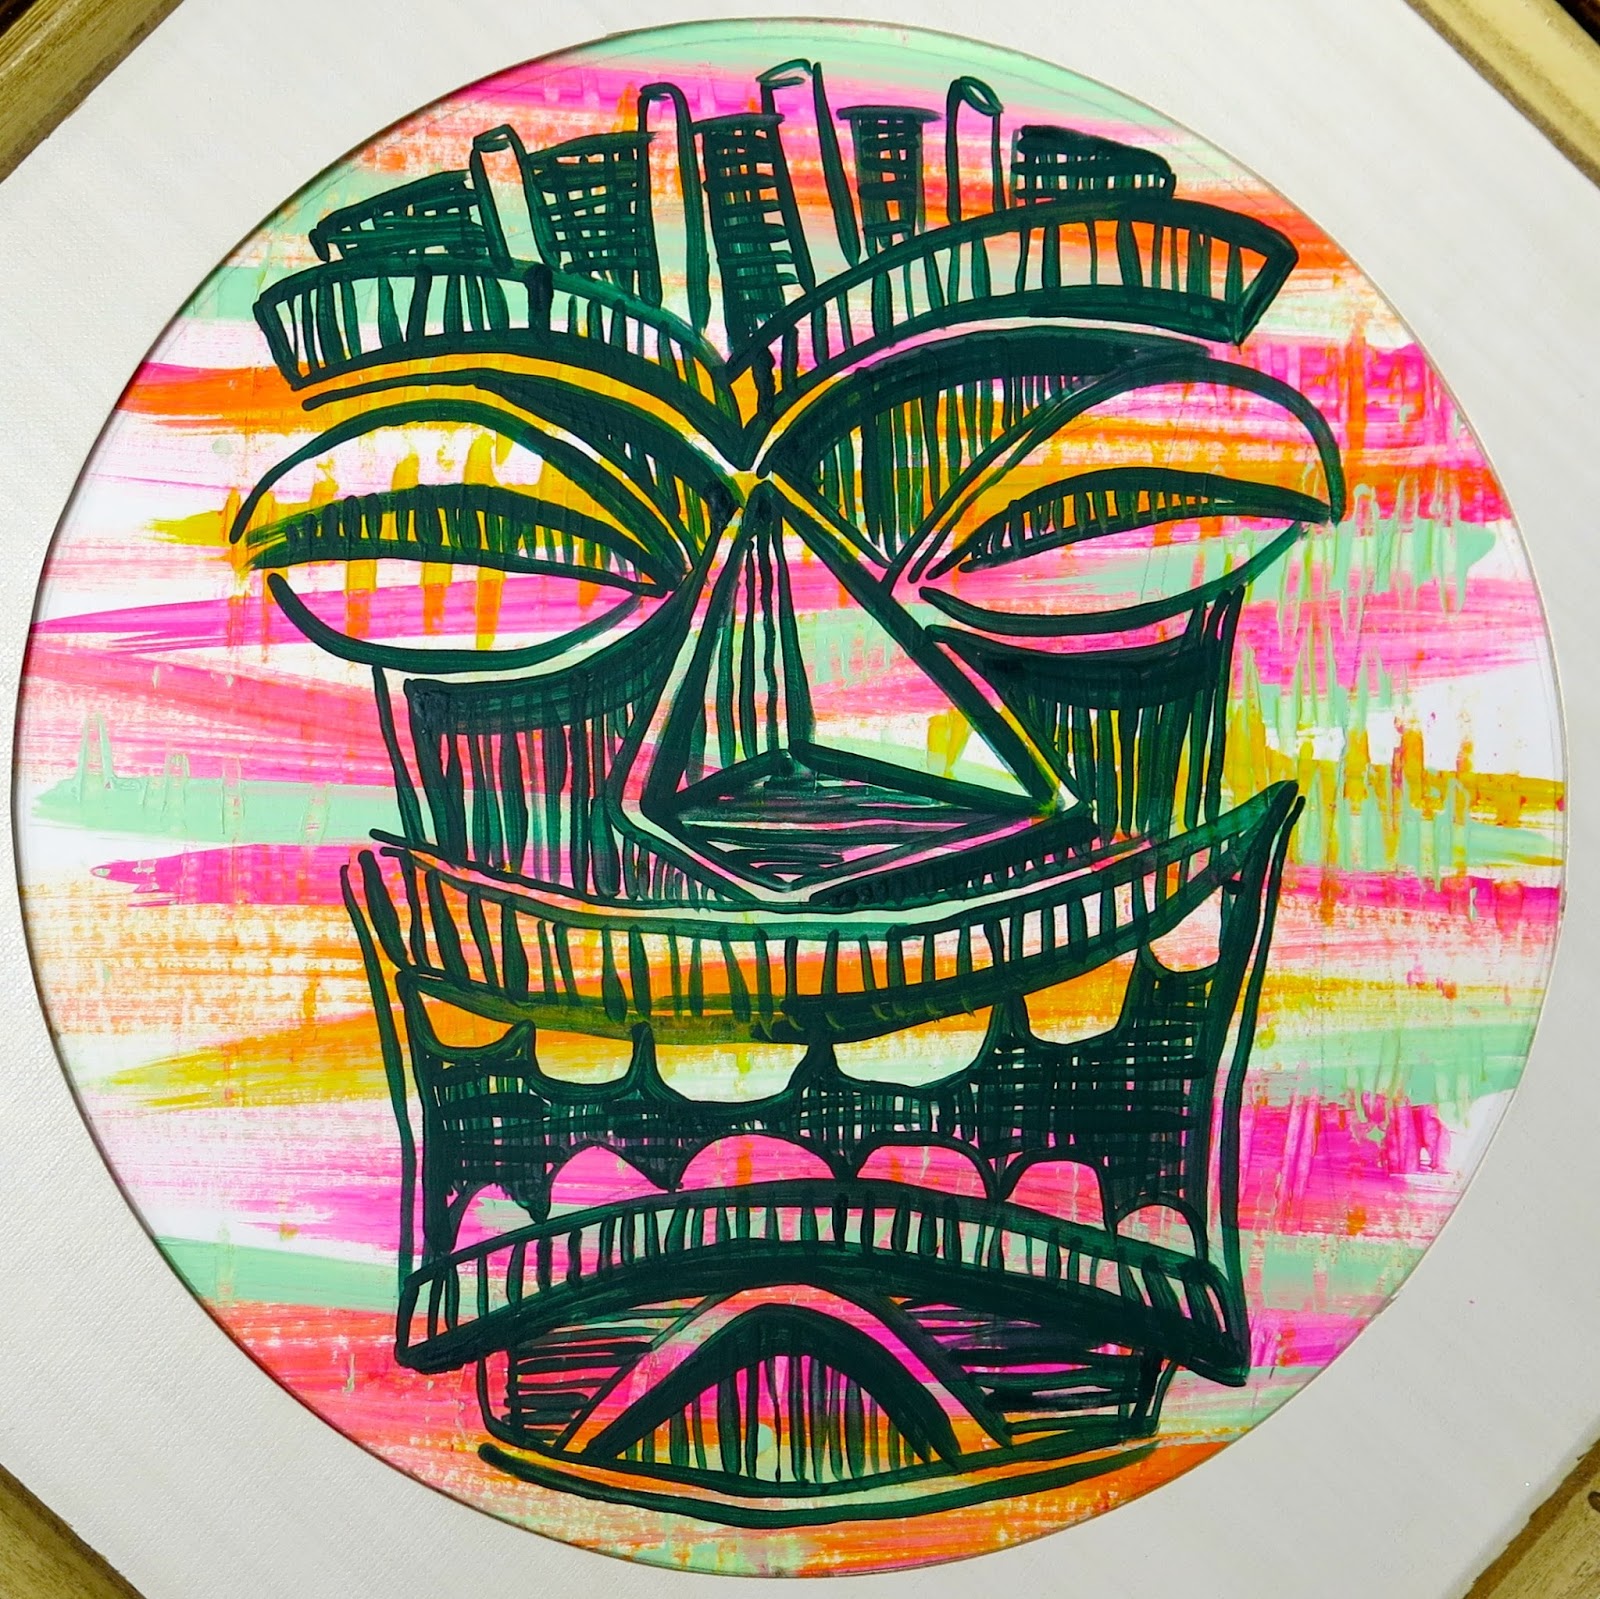
Since those two previous paintings took quite a bit of time, I was determined to bust out the two tiki paintings. I pulled together a few of my favorite colors and did some dry brushing in the background. 
Once dry, I lightly sketched out my tiki head and then just set about painting with not too much of a plan in mind. 
 Most tiki masks found online were pretty scary looking. I wanted mine to be of the friendly variety, so I painted them kind of silly/happy. I just imagined them being at Disney...and came up with these cheesy faces. 
 Originally, I was going to hang them square but when the moms came to visit this weekend (we had a double dose visit of my mom and Mitch's mom), my mom suggested hanging the squares like a diamond. I really liked that idea. It added a bit more fun and funk to the arrangement. 
This guy was painted in the same way: dry brush, one color tiki mask painting. 
Currently, these bad boys of tiki town, hang in my craft room, right above my favorite vintage chest of craft supplies. For more of a tour of my crafting space, check here and here. Until next time, kids! 

 photo signature_zpsd10b3273.png
Read more »