One of my favorite lessons (and more popular vidoes) is this Heather Galler-inspired floral painting. We did these in April and they were always an art show show-stopper! Not to mention, a great gift for Mother's Day! Full lesson with video here.
I even love them in black and white! If you are short on time, these could be completed with tissue paper squares...see my lesson below for more details on that process.
Liquid watercolor was how we finished these off. I like using liquid watercolor on larger projects. I always save pan watercolor for more detailed work.
This one was so fun! Learn a little about Warhol AND get to use Puffy Paint?! Yes please and thank you! Again, I got a video for you. Check it out here.
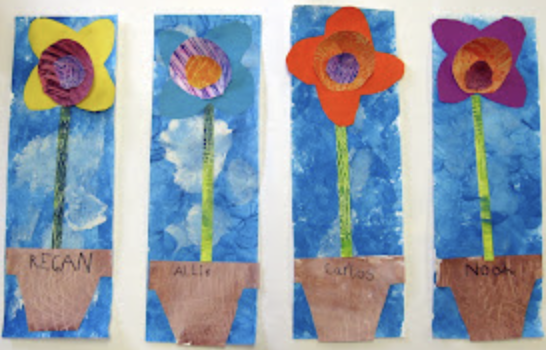
Cute little kindergarten flowers! We even painted flower pots for Mother's Day. All the details here.
I even love them in black and white! If you are short on time, these could be completed with tissue paper squares...see my lesson below for more details on that process.
Liquid watercolor was how we finished these off. I like using liquid watercolor on larger projects. I always save pan watercolor for more detailed work.
This lesson is a hit with ALL grade levels! I first did this lesson years ago with second grade. Last year, I did it with everyone and the results are always beautiful. Full lesson and simple video here!
So many ways to finish these beauties. We opted for chalk but we've also used bleeding tissue, watercolor and tempera paint too!
So many ways to finish these beauties. We opted for chalk but we've also used bleeding tissue, watercolor and tempera paint too!
THIS is kindergarten, y'all! We finished these with oil pastel and watercolor. A more updated and kid-friendly video can be found in this blog post.
Looking for a spring-time clay project? Check out these created by my kindergarten students! You can find the details and a video tutorial here. And if you are looking for a list of my favorite clay supplies (as well as were to snag my clay book) check out this link!
Looking for a spring-time clay project? Check out these created by my kindergarten students! You can find the details and a video tutorial here. And if you are looking for a list of my favorite clay supplies (as well as were to snag my clay book) check out this link!
Springtime is the best time to introduce landscapes to your students! This one is so fun...it's chalk like you might have never used it before! Chalk...that doesn't need to be set with a fixative. More here!
I will advise this: when adding paint after the chalking, use tempera cakes, they were so much better than the tempera paint I used in the video.
I will advise this: when adding paint after the chalking, use tempera cakes, they were so much better than the tempera paint I used in the video.
So, like, basically, ANYTHING you make and put in these PLATES from Hobby Lobby looks stunning. This was a quick kindergarten lesson that you can find here. Video too!
This one was so fun! Learn a little about Warhol AND get to use Puffy Paint?! Yes please and thank you! Again, I got a video for you. Check it out here.
Nothing says spring like cherry blossoms! This one was inspired by Vincent van Gogh's love of Japanese prints. I created a video and you can find it here.
I think my favorite part is the textured paper we created for the background!
I think my favorite part is the textured paper we created for the background!
What is better than neon oil pastels and watercolor?! Not much, I say. We loved creating these coloful landscapes and they so brightened the halls. For the complete lesson and the video (I told you, I got you covered!) here.
Cereal boxes for the win, friends! Start collecting now!
Honestly, I don't know who loves puffy paint more, me or the kids! Just keep a pin on hand to unclog the nozzle. The paint does tend to dry out and clog the inside!
Cereal boxes for the win, friends! Start collecting now!
Honestly, I don't know who loves puffy paint more, me or the kids! Just keep a pin on hand to unclog the nozzle. The paint does tend to dry out and clog the inside!
Looking for more landscape ideas? I put together an entire blog post of my favorite landscape lessons right here!
I want this as a quilt!
I want this as a quilt!
Here's a little lesson I created to use up popsicle sticks (ha!) and for a sub! These turned out so cute and the kids loved them! Video lesson here.
Please tell me I'm not the only one with three million trillion popsicle sticks!
Please tell me I'm not the only one with three million trillion popsicle sticks!
These clay flowers my third graders created were so beautiful!
Each one was so creative. I provide the step by step photos in this blog post.
The details! Loved the birds and bugs added!
Each one was so creative. I provide the step by step photos in this blog post.
The details! Loved the birds and bugs added!
Cute little kindergarten flowers! We even painted flower pots for Mother's Day. All the details here.
This lesson was so much fun! We used watercolor paint for the backgrounds, we drew designs on the vases, we used black ink and tissue paper! It was a big fun lesson and you can find it here.
Love the dragon on this one!
Love the dragon on this one!
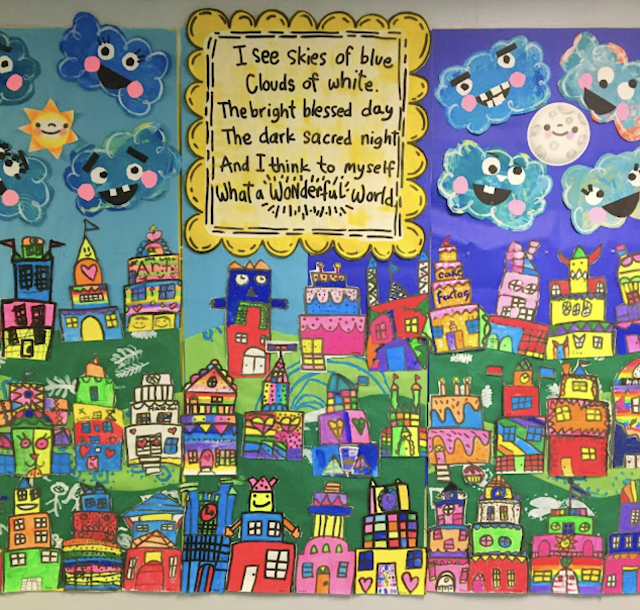
I made this mural at the start of a school year...but I also think it would be perfect for spring! It's a lot...but so many beautiful things were created. Check out the blog post here.
Speaking of murals...this one involved the whole school! And would also be a great end of the school year collaboration.
Happy and bright colors like this always put me in the mood for spring.
I hope you find a lesson or two here that you can use this spring! I'm always so happy to share with you all.








.jpg)

