Sunday, March 2, 2014

What the Art Teacher Wore #91 and Works in Progress

Wacky Tacky Day (in celebration of Read-Across-America Week) which, in my world, is simply known as Monday: I actually had several parent volunteers in and outta my room on Monday...and not one of them commented on my outfit. Which can only lead to one conclusion: THEY THINK I DRESS LIKE THIS EVERYDAY! When I complained about this to a fellow teacher, they said, "Stephens, for you Wacky would be jeans and t-shirt. Maybe you need to step it up a notch." Hmm, point taken. sweater: Target; stripey shirt: Forever 21; skirt: thrifted, originally from Target; tights: dunno; shoes: thrifted, Crocs; necklace: The Paper Source; headband: gift from a friend

Like, wow, ya'll. That last blog post was a doozy, no? It was kinda like I drizzled gas all over the post, flicked a match and BOOM! So many passionate responses from all walks of art teacher, classroom teacher, home school educator life. I appreciate all of you that commented and sent me emails. I loved reading each and every perspective. I'm still sorting through my thoughts...but I'm so glad that we were able to have a thought-provoking and open-minded discussion. I think that just shows that as creatives, we are always open to ideas. I have plans for a follow-up post in the future. In the meantime, feel free to continue the conversation via comments or email. Muchas gracias.

Moving right along, did ya'll celebrate Read-Across-'Merica Week (a link to what I wore last year for the occasion)? It's my fave week as I have outfit-inspiration all week long! I thought I'd share that with you along with some of our latest works-in-progress. Enjoy and I'll be back with a DIY on my Don't Let the Pigeon Drive the Bus dress soon!
My second grade create a circle loom weavings every year. Last year we made them on a CD which, if you are an art teacher on pinterest for, like, 30 seconds, you've seen. I loved doing it, but wanted to move back to weaving on a plate this year. After a brief chat about Kandinsky and his concentric circles, we painted our own on Chinet plates. You gotta use Chinet when doing circle weaving as they are super sturdy and make for a great canvas.
On the following art class, pattern was discussed and the kids were given the World's Smallest Paint Brushes to decorate their plates. They are so super bright and happy, I actually thought of leaving them as-is! But I know the how much the children love weaving. It's like this magical thing that reaches those kids who are more tactile learners. Like the boys. I hope to have them warping their looms by next week. I'll keep you posted.
Crazy Hat Day: Man, did I need a sushi fix by the day's end! I made the hat and matching sushi shoes...but failed to have my dress completed in time. Thankfully, a sweet friend of mine had scooped this lovely dress up at the thrift store for me (thanks, Ann!) and it fit the bill perfectly. dress: thrifted; belt: Pin Up Girl Clothing; shoes: thrifted, altered by me; hat: made by me
Once my dress is complete, I'll be sure to tell you all about my sushi hat and shoes!
When I glanced at the drying rack at the day's end, it looked like this. Painted plate looms by 2nd grade, sushi collage by 1st grade, cherry blossom paintings by 2nd grade, warm/cool watercolor paintings by 3rd grade, wet-on-wet and sumi-e paintings by 4th. It's bright cheeriness made me so stinkin' happy.
Words on a Shirt, er, Skirt Day: Pretty sure this was my get-up last year for R-A-A Week. It was so fun telling the kids all about how the skirt portion of my dress used to be my bedsheets as a kid. dotted tights and shirt: Old Navy; dotted boots: DIY, go here; Star Wars Dress: DIY, go here and see me chillin with Boba Fett. Seriously.
Wednesdays have become my new fave day of the week. Me and two absolutely lovely teachers work with a group of about 17 girls and boy (yes, singular. He JUST NOTICED last week that he was the only dude in the class as he's been so involved in his cross-stitch) teaching a hand and machine sewing class. The kids have been creating a sampler of stitches that ended with them cross-stitching their name. And adding buttons or a satin stitched shape of their choosing.
When they come in, they drop everything and want to start immediately. They are supposed to have snack first but most are like, "can we just skip snack and get started?!" I love their enthusiasm!
Most finished up their embroidery this week. These will be the front of pillows so they chose fabric for the back and were introduced to machine stitching this week as well. I can't wait to see how they turn out!
Whoops, sorry. Totes forgot to take an outfit photo on Thursday. My bad.
My school purchased some Gelli-Plates for me this year. They aren't cheap, about $10 each. I managed to get 10 and my first grade students played around with 'em this week. They thought monoprinting was just about the best thing ever.


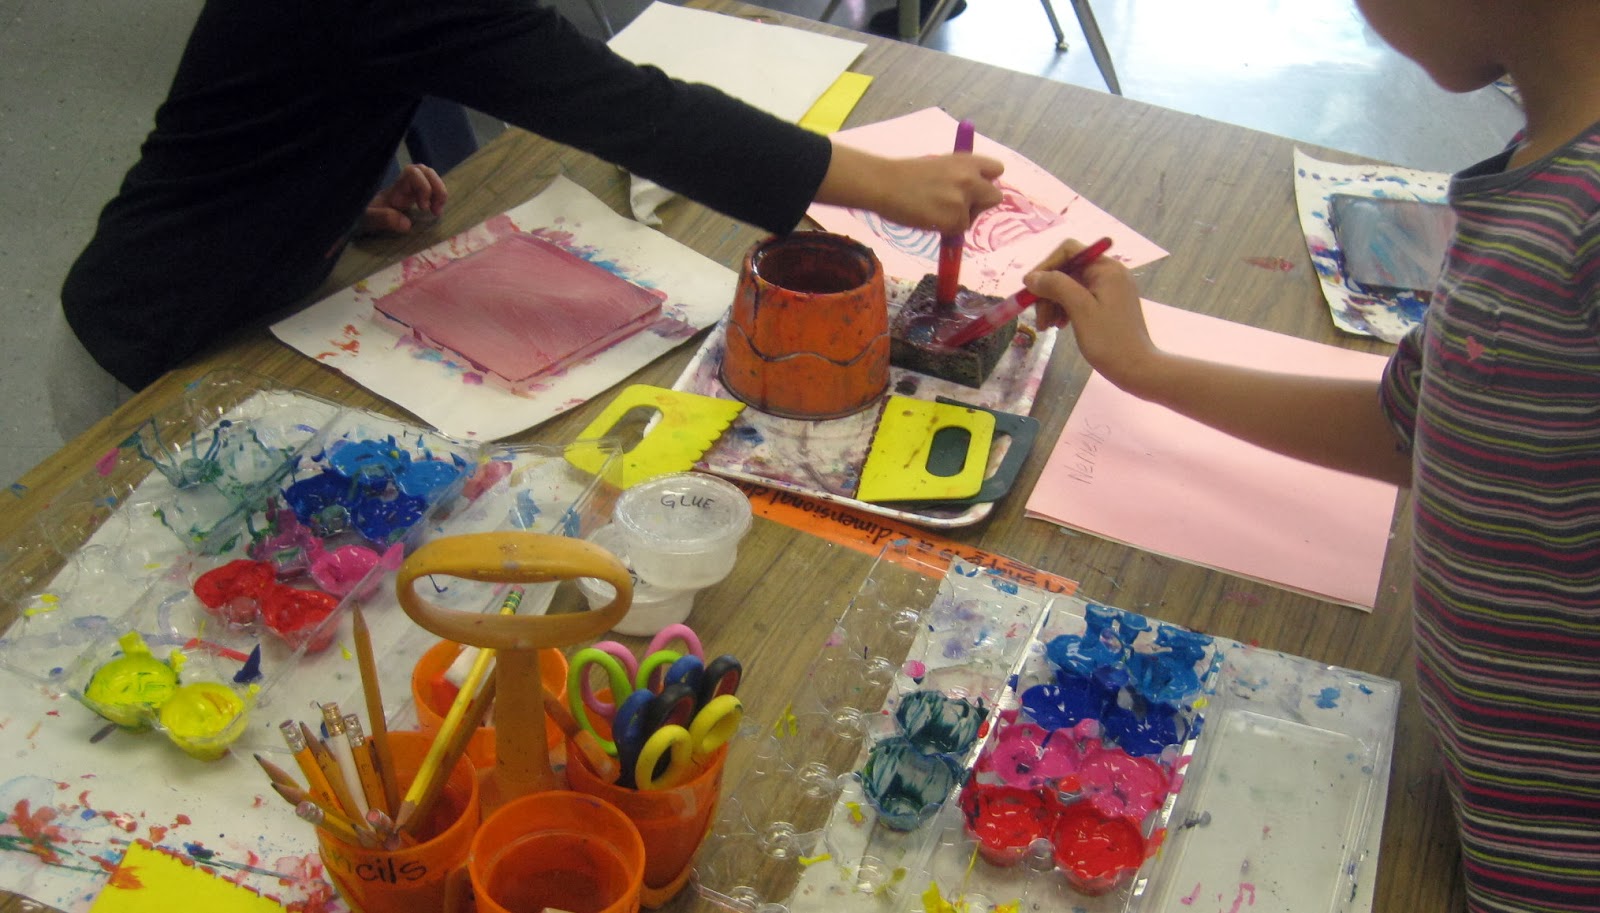
These prints will be used for our sushi platter collage which I'll share with you soon.
Dress Like A Book Character Day!: Aw, yeah, Don't Let the Pigeon Drive the Bus, ya'll! I do love this book (although, Pigeon Finds a Hotdog is my personal Mo Willems' fave). I had so much fun creating this dress. And, even though the zipper is an absolute nightmare (note-to-self: wine and zipper-sewing don't mix) AND I managed to back into a tray of red paint thus staining the hem (I'm determined to get that paint out: OUT, DAMNED SPOT!), I still love this crazy dress. DIY blog post to come, ya'll!
After reading the book to kindergartenland, they created and painted their own pigeons. I got the idea for this lesson from the always awesome blog, Mrs. Knight's Smartest Artists (thank you, Hope! I think you're rad!). Go there and be inspired!

And that's all, ya'll! I hope your week is a fantastical amazing one!

Wednesday, February 26, 2014

In the Artroom: A Starry Night Collage and Thoughts on Teaching Art

Friends, Ima be honest with you. I've been in a funk. It started with a sinus-y head cold that morphed into no-energy-itis which developed into a bad case of nobody-likes-me, everybody-hates-me, I'm-just-gonna-sit-over-here-and-pout. I have blamed my cold and lack of energy for my bad attitude but, if I'm being truly honest, there have actually been a couple things eating away at my thoughts. And one of them has been teaching art.
So here's the deal: I recently joined a group on Facebook called "Art Teachers". And it's pretty rad, interacting with art educators, seeing the work of their students, hearing their struggles and successes. But there have also been some, um, debates. It seems that there are two camps of art teachers out there: those that teach choice-based art and, well, those that don't.

Now before I go tip-toeing into a land mine (because those aforementioned debates have gotten very feisty), lemme first say that I am not a choice-based art teacher. Nor do I know very much about the concept although I am intrigued. From my understanding, in a choice-based art room, children are allowed to work with their chosen art media to express their ideas. In a nutshell.

Here's what I love about the idea: children creating art based on their own individual interests and inspirations. In a choice-based art room, the kids are routinely introduced to new media and allowed to explore their ideas with that new material. Or they can use whatever other supplies that have been introduced throughout the year. It sounds so happy and harmonious and free. In my imagination, it looks like a college art studio filled with little people sculpting, painting and weaving their little hearts out.

But here's the thing that bothers me: a music teacher wouldn't simply show a child a room full of musical instruments, teach them a couple of the basics and tell them to then make music. Not without first teaching them all that there is to know about playing, writing and composing a piece, not to mention introducing them to both classical and contemporary composers. Because without those fundamentals, I imagine children would simply bang on the instruments, grow bored and lose interest. Is it possible the same might happen in an art room? I don't know.

I've heard the argument that if you, as an art teacher, know what the end product of a lesson is going to look like, then the work of art is your own and not your students. This really really made me question how I teach. Am I doing a disservice to my students? Am I robbing them of their creativity and exploration? Is this Starry Night/collage/painting/weaving project recently created by 1st grade actually harming the creative exploration of my students?
 Again, I don't know.

What I do know is that, like a classroom teacher giving a test to check for hitting benchmarks and understanding, I can see that my students learned the following (side note: each "Day" is a 30 minute art class. Yes, 30-super-short/very-precious minutes):

Day #1: How to mix a shade of blue with black and blue. How to use a variety of brush strokes and lines to show movement in their sky like our inspirational artist, Vincent van Gogh. How to paint the secondary color green and create a texture onto that paper.

Day #2: How to create a landscape collage by tearing the green paper and creating a foreground, middle ground and back ground. How to create a paper loom for weaving.
Day #3: How to weave. How to use collage to create a house by cutting out geometric shapes from recycled pieces of paper. 
Day #4: How to add a star to my piece (see this post on how we marbled these stars) and have it tell a story in your work of art. Is it a shooting star? A falling star? An explosion of color? What can you think of?
Day #5: How to add that house to the landscape and add other elements of their choosing to that landscape. How to brainstorm ideas for their work of art (what can go in the background? a dog house? a neighborhood? trees?).

(Houses about half finished...still working out ideas for the background and the shooting star.)

Knowing that they have learned all of this, is this lesson a bad one? I like to think not. My students surpassed my notion of what their completed piece would look like by adding animals, trees, dog houses, houses in the distance, moons, curtains in the window, you name it.
But I did have a notion what their finished work of art would look like.
Which again, brings me back to where I started. Sigh. 

Look, I've been teaching art for a very long time (this is my 16th year, time seriously does fly!) and I'm not even going to pretend I've got the answers or even a flipping clue. And I think those folks that do think they have all the answers are just fools. Or maybe cowards that are too afraid to question what they've always done. I mean, shouldn't we always be looking to do what is best for our students?

So, I ask you, honestly, what are your thoughts?

And, if I've offended anyone, choice-based or not, that was not my intention. Thanks, ya'll.

Sunday, February 23, 2014

DIY: Batik Fabric, Keith Haring Style

Hey there, kids! When my students were working on figure drawing a couple weeks ago, I got the notion that I'd introduce Keith Haring as our next Artist of the Month (granted, the month is almost over...so it looks like we'll be chatting about him next month, ahem). I've been wanting to do some batiking for a while...and the designs of Haring seemed like a good fit with this technique.
Have ya'll ever batiked fabric before? I have a love for all things textiles (except for big loom weaving. I had to do one big ole weaving on a loom for a textiles class in college. I warped that thing all wonky and my finished weaving looked like something my cat threw up. Stupid project brought my grade and GPA to a new low...that and the C- I got in...wait for it...karate). I was first introduced to batik in high school and I've played around with it on and off since then. Back then I created weird wall hangings (that have more than likely met their fate in the bottom of a trash can) but this time I decided to create fabric for a new dress!
Now in the past, I always drew my design on the fabric in pencil and then traced those lines in wax. The problem with that is the wax then seals in the pencil lines. I never liked being able to see those pencil lines in my finished piece. So I got the idea that I'd draw my design on paper, trace in sharpie, place that under my fabric and trace that in wax. I know, you'd think I woulda thought of that years ago. I've never been mistaken for a genius, ya'll. 
When I batik, I use a double broiler and a wax combo of paraffin wax (found at the grocery store in the area where they keep the canning supplies) and bee's wax (check your craft store). I forget why it's important to use a combo of both waxes but if you solely use one or the other it doesn't end well. I think it's because the paraffin is pretty flaky stuff that can crack off the fabric and defeat the purpose. So combining it with the bee's wax (which is expense and a pinch difficult to remove when used alone) helps. However, I could totally be making 100% of this up, so batikin' pros, I'm counting on ya'll to correct me in the comments.
In the kitchen, next to the double broiler, I laid down some cardboard, my Haring drawing and placed my fabric on top. From there I set about tracing my designs in wax. To apply the wax, I use an old bristle paint brush. I have one of those tjanting tools for applying the wax but I can't seem to work the thing. Any suggestions? I played around with it for a bit and just switched back to my paint brush. I figured if I didn't know how to pronounce the name of the tool, I had no right using it.
When you are batiking, you've gotta make sure that the wax doesn't just simply sit on top of the fabric but soaks all the way through. If it doesn't, it won't resist the dye.
Once I finished batiking about three yards of muslin (I know, it took foreverness!), I set about dying it. I'm a little bummed I didn't use a more concentrated dye so the color of the fabric is more charcoal gray than black. To remove the wax, I ran it under some super hot water in my sink which was a big, fat, hairy mistake. That simply spread the wax all over the fabric and coated the inside of my sink. I also tried just throwing it in the dryer on the hottest temp which seemed to only soften the wax momentarily. Finally I just ironed the wax out between sheets of newsprint paper. Which is what I shoulda done in the first place. But my laziness was flaring up so I attempted those other non-functional options first.
Oh! By the way, the way, the dye I use is Procion which can be purchased through Dharma. It's the very best dye ever and the folks at Dharma will answer your questions if you've got any. They also have killer dying directions on their website that tell you everything except to check for holes in your gloves before using them. Cuz if you don't, you might end up with a fuschia middle finger. That might be good info to include, Dharma. Just sayin.


The other piece of fabric I batiked and dyed was inspired by Haring's rather tribal looking doodles and designs. I love how vibrant this piece turned out...but I'm not sure I like how it looks with the gray batik. These two might not end up in the same ensemble...but whatever happens, I'll keep you posted. 

So now I'm on a batikin' kick. I've got several other things in my little head that I want to batik-ify. And, after seeing Phyl's post on an alternative batik method for kids, I really want to introduce this art to my students. Have ya'll tried batik with children? Did you use a traditional method or something more safe like Phyl? I'd love to hear your thoughts, ya'll!

Until then, have a great week!

Tuesday, February 18, 2014

In the Art Room: Cherry Blossom Trees by Second Grade

A couple of weeks ago, I shared with you a work-in-progress painted tree project by my second grade students (ya'll can visit here for the full post as it will cover everything I'm about to skip) and I'm excited to say these masterpieces are now complete!
After learning about Japan's cherry blossom trees and their lovely blooms which are cause for celebration, the kids painted blossoms on both their practice paper and their watercolor painting. Because their practice papers were just as lovely as the finished product, I had the children matte and frame both works of art today.
But before I get to that, let's chat about how we went about painting those blossoms. The children were to paint on their practice paintings first until they were comfortable painting on their watercolor painting. For the blossoms, the kids had a light pink, a dark pink and yellow. I showed the kids how to completely dunk their brush into the dark pink, put just the tip of the brush in the light pink and lay the brush flat on their paper and wiggle it to create each flower petal. Loading the brush with that much paint meant that they could paint one whole flower without reloading their brush. Once that paint had dried a pinch, the kids used q-tips to add the yellow paint to the center.
After they were comfortable painting on their practice paper, the kids added blossoms to their watercolor paintings.
The kids loved those practice paintings so much they were constantly asking if they could take them home (because they know I hoard all their work until the end of the year for the art show, they don't even bother to ask if they can take their watercolors home. Poor kids!). I kept thinking maybe I'd come up with something to do with those practice paintings so I asked them to leave them in the art room. And I'm glad I did. They look just as lovely framed as the watercolor paintings, I think! The above is an example of a practice painting...

And this is the artist's final piece. It's interesting how some children really followed their practice paintings to the point that they match their final product and how other kids completely changed their plans along the way. I made sure to tell them that it was just "practice" and that they could create something totally different on their final piece.
But I'm blabbering. Let's chat about how we framed these, ermkay? The kids used a 12" X 18" sheet of white construction paper as their background frame. I cut a ton of large origami paper (purchased through Sax by the brand Roylco) and cut it down to 2" X 12" strips. The kids glued their chosen origami papers to the top and bottom of the white paper.

And then, because I had visions of them haphazardly mounting their watercolor piece all crooked in the middle, I had them use a ruler to measure one inch in for their watercolor paper. And then I gave myself a big ole pat on the back for including math into the lesson...even if it was just for an inch. Once both practice papers and final paintings were framed and on the drying rack our 30 minutes of art were up. I didn't even get to see these lovelies in all their colorful glory until this afternoon when I was taking them off the drying rack.
Oh! Can I please ask your thoughts on something? So, this painting you see here? The one with the super detailed sky? It took this artist about 3 classes to complete (that's right, an hour and a half). Now. I totally relate to my slower working artists as I'm a very slower artist myself. Which is why I struggle so much in workshops. I need time to: 1. Process the directions; 2. Think of an idea that I love; 3. Put my idea together in some sort of way that I'm happy with. In workshops I rarely make it past #1 when I notice that my peers are already well into #2. And I hate that! I get all uptight and anxious and who can create like that?! For that reason, I always let my slower students work at their own pace...almost to a fault. But I want them to feel comfortable creating and never feel that stress that I often do. So, art teachers: what do you do in these situations? Do you hold your students to a set time frame and move on? If I do that then I have these beautiful half finished pieces. Or do you allow those students to continue working...and if you do, what do your early finishers do? Mine have been content with our current options of origami, free draw on dry erase boards or reading a book with me. Just curious what you do in these situations.
I was told that the little black specks were the pollen coming off the flowers.
And viola! Cherry Blossom Tree Paintings by Second Grade complete!

Sunday, February 16, 2014

What the Art Teacher Wore #90

Primary Colors Monday: Because I saw three of my four kindergarten classes back to back on this particular day and we were (re)learning about the primary colors, I decided to dress for the occasion. top and tights: Target; dress: I forget; shoes: Anthro; belt: thrifted; palette hair clip: made by me
Ya'll. Trust me when I saw I had much bigger plans for this here blog post. Howevers. I currently feel as though I'm carrying half my body weight in my head and nasal passages. Without getting too graphic (which is a ridiculous way to start a sentence as you know I'm about to get all sorts of graphic), I'm more snotty than a cheerleading squad. (Aw, former cheerleaders, don't hate. I speak from a sad 8th-grader-who-wanted-to-be-a-cheerleader-but-my-dad-made-me-play-basketball-instead place.) For that super snotty reason, I've only got the energy to share wit ya what I wore and what I drew this week. I'm hoping to be back again with you soon with a post on a vocabulary update and maybe a DIY...if I can manage to pull myself off the couch. Until then, enjoy your weekend!
There have been so many amazing drawings pouring into the Artsy Book Clubs facebook page that it continues to surprise and thrill me everyday! It's such a motivation and inspiration to see what these artists have created. If you'd like to join the fun, it's okay to begin drawing and sharing your work any time. You can go here for all the details.
Poodle-tastic Valentine Dress Tuesday: My plan had been to wear something Valentines-y all week...but I actually have so many heart-themed ensembles that I shoulda started the week before. Sad but true. Oh well, next year. poodle dress: made by me, DIY here; sweater: made by me; belt: Pin Up Girl Clothing; tights: Target; hair clips: DIY here; shoes: Sofft
I'll be honest with you, I don't always love the assignments in the One Drawing a Day book that we are using in our Artsy Book Club. And because I'm drawing for myself and the desire to get back to more fine arts work, I've decided to only take the drawing assignments as suggestions and then draw what I want. If I want. I don't want these drawings tasks to become just that, a task. So I'm enjoying the process if it speaks to me. On this day we were to draw a picture of someone in a variety of pens. I drew my grandpa from his senior high school photo.

Our First (and probably only) Snow Day Wednesday!: Well, what a happy surprise that turned out to be! Granted, it woulda been a whole lot more exciting if it had actually snowed but I try not to ask for too much. A day of sewing, drawing and blogging turned out to be exactly what I needed to make it through the rest of the week. dress: Betsy Johnson, used; sweater: Target; scarf: Urban Outfitters; leg warmers: I forget; boots: Frye, Journeys
This drawing I definitely wasn't feeling. The assignment was to just basically doodle a bunch of stuff, trace your hand, write words and numbers...I dunno. I wasn't into it. I found myself drawing things that I thought I should draw like a cupcake and other stuff. I think I'd actually have to create a couple of these drawings to really get to the root of what would inspire me. I was also not in love with drawing in crayon...but that has since changed after the last two assignments.


Dots and Leopard Print Thursday: We had a two hour delay on this day which basically means my day is gonna be jacked up. Sure I get to sleep in a pinch but then I spend the rest of my day runnin' like a crazy person trying to figure out just what in the world my jumbled schedule is gonna look like. But it was fine, we made it though and even created some masterpieces to boot. Looking forward to sharing them with you soonish. sweater: Old Navy; belt: thrifted; dress: I added the leopard to this too-short number that I bought at the thrift store; scarf: gift from a student
Self-portrait in crayon. I sketched it out first in yellow marker and then built it up with crayon. I enjoyed working on this a lot...even if the perspective is off and I have a super large side-forehead.
Happy Valentine's Day Friday: Our school has a tradition where the kids are allowed to spend about 10 minutes in the morning delivering Valentine's to their teachers. I love getting sweets, cards and gifties from the kids. My favorites are always the handmade cards with the personalized notes. Those I keep forever. dress and sweater: DIY here; shoes: Modcloth
Still life in crayon. Seriously, ya'll. I don't even use crayons in the art room because I'm kind of a snob about them. But I might be inclined to change my mind after working so much in crayon these last couple of days. 

And that's all I got, ya'll! I'm off to go take a Vick's Vapo-Rub bath and soak my head in a bucket of hot water!