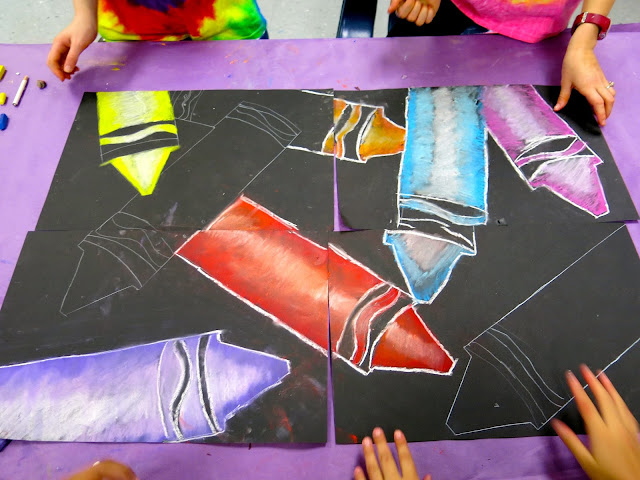
This project took my students an hour and a half (that'd be one and a half art classes). We spent the first 30 minutes of the first day priming our papier mache creations and then jumping right in to the crayon composition portion of the project. To best explain it, I created a video that you can view and share with your students if you'd like. My apologies for the fact that my hairs kept swinging into the demo portion of the video. Note to self: invest in a hair-tie!
Really, youtube? This is the photo you pick (well, they actually give you an option. Sadly, this was the best one).
I have about 20 kids per 4th grade class. To pick the groups, I randomly called on a student to pick a partner. Then I allowed that partner to pick the next and so on. My students are very sweet to each other so there wasn't any weirdness, thank goodness. I did step in when one group was assembled because I knew these particular kids would do more chatting than working. But other than that, the teams did great! Our first half of the day was spent plotting out the composition.Which looked a lil like this. I gave the kids a stack of templates because I wanted their focus to be on composition, teamwork and learning to create value. I know some folks are anti-templates but not me. With limited amount of time and the lesson focus on other elements, I like to remove as many hurdles as possible. Because, let's face it, why make the struggle even more real when it already is.
Once the team was in agreement about the composition, the tracing started. That was a pinch tricky as the kids had to think about overlapping.
From there it was the drawing of the paper. This was also tricky as the kids had to use curved lines to create the illusion that their crayon was three dimensional.
Once the crayons were all drawn, the kids cleared the messy mats off the tables and picked a table on which to work. I was fairly certain my custodian friend would not have loved chalk pastel all over the floor. We watched this video before diving in (I love Scratch Garden's videos!)...
This group only wants blue crayons. So they are having to come up with a variety of blues.
After the crayons are complete, the kids are to outline with white chalk. As y'all know, chalk is super messy so the final step was to clean up any smudges with a kneaded eraser. Side note: kids go BANANAZ when introduced to kneaded erasers.
I was walking around the room once everyone had started to check on them. This was my chatty group that I looked in on last...my mistake. They'd forgotten to agree on crayon colors and got 'em all mixed up! After correcting MOST of them, they requested to leave one mixed up because, in their words, "we are kind of crazy." Can't argue with that!
Since it is Read Across America week, we have all been decorating our doors with our fave books! I decided upon The Day the Crayons Quit since it seemed to tie in with our fourth grade project! For this, I simply had my first thru third grade early finishers cut out a crayon and shade it in a similar (albeit more simplified!) manner as the fourth graders.
I loved having the kids help me (read: do most of the work) and that it tied in so well with what the older kids are creating!
I hope y'all have a Crayon-tastic week! Until next time...


Nice work! I am going to try this ! I was originally going to have my students create one crayon but I like the idea of working together. Thanks for always posting great things !
ReplyDeleteP.s nice watch what kind of watch is that !?
Thank you! My watch is a Swatch...my mom found if for me on Amazon! :)
DeleteSo glad to see that I am not the only one whose classes are all over the place this time of year. Weather, testing, sick days, all sorts of interruptions. It seems like this happens to me every year right before spring break. It is probably the same for everyone. I will certainly borrow from this lesson.
ReplyDeleteI love this! Our theme for the Spring Concert this year is Crayons. Please...what brand of chalk pastels do you use? Thanks for sharing.
ReplyDeleteHi Maria! I use a brand called Koss. You can see the box and packaging in this post...hope that helps! http://cassiestephens.blogspot.com/2015/04/in-art-room-2nd-grade-printed-and.html
DeleteWhat a great project! I am doing this right now with my second and third graders since we have a few awkward days before break! Very cool to watch them work together so well. Thanks for the lesson!
ReplyDeleteLove the colors! Did you use construction paper or black tag? I may try it with oil pastels.
ReplyDeleteWe used black Tru Ray construction paper. It looks a lil faded in the video although it's not.
Delete