Showing posts with label how to sew. Show all posts

Monday, February 23, 2015

DIY: A Marker-Tastic Art Teacherin' Dress

 I dunno if you've noticed or not but things have gotten quite a bit...stitchy around here. I've moved into week two of Snow Daze (fingers crossed we return tomorrow, y'all) which means I've had extra time for the important things in life:

House cleaning? Negative. 
Dress-Making? Affirmative. 

It's called priorities, y'all. And I've gots 'em.
By the way, can I make a confession that's not really a confession because I betcha have figured it out already: I'm breathing down the neck of 40 and I still like to play dress up. Is that awkward? Should I seek out a support group? I'm guessing it will be the most superbly dressed support group in all the land, riiiiight? Who's hosting the first meeting, y'all and will there be cookies and grape-flavored adult drank? Count me in.
 No, you aren't experiencing deja vu. Yes, you've seen this dress pattern three times. Ahem. Remember when I done tole you last week I was making three dresses outta this pattern? There was this Mondrian number, this colored pencil piece and now whatcha got here. Do I have to tell ya that I totes dig this dress pattern? I mean, it has everything I love in a dress: a form-fittin' bodice, a fat flouncy skirt and, of course, a big ole bow. Puurrr-fectimacation.
So when I shop for fabrics, I usually buy first, think later. My hands move much faster than my brain when it comes to swiping that credit card through the lil reader. My hands are all, "hurry before that sluggish gray mass between her ears finds out we just dropped coin on even more fabric!" I usually walk outta the fabric store like I'm waking up from a dream. "Whuh just happened and who just stuck three yards of marker fabric in my bag?" Meanwhile my hands are all high-fiving each other (which looks quite ridiculous to be standing in the parking lot of a craft store clapping at your confused self, but, such is my life).

I actually scored that sweet marker fabric from here. Sadly, they are all out of the green but do have some lovely orange on super sale. The chevron came from a local shop but I did find a similar one here for you. 
 If this looks a pinch familiar that's cuz I totally used a gray version in my pencil dress. I just love this print so! You can find this orange goodness here
After throwing all of these prints together, I realize I look a lil bit like a can of Mountain Dew meets Orange Crush. Which I see no problem with atall. But I am from the South so you know that stuff is our equivalent to water. If you think I'm fibbin', go google yourself "Mountain Dew Mouth" and tell me I'm lying. Go on. I'll wait.

 Nuther refill of Dew-Crush anyone? No? How bout just a cuppa sugar with a splash of syrup and drizzle of honey. Something to dip your Moonpie in, y'all. 
 I'll have you know that this here is the only dress outta the three where I didn't screw up the pleats. And there were only, like 9 pleats, y'all. Le sigh. 
To finish off my Dew-Crush-tasticness, I decided to wear this palette hat I felted ages ago. It was just a thrifted find that I gave a lil make over to. That craft was super simple. You can go here for all the gory deets. 

In my pics you totes can't see my shoes but here they are! I painted these ages ago and they are starting to show some wear. Mostly cuz I painted them with acrylic and I shoulda gone with some sort of leather paint. You can check these out along with some other wacky painted footwear here
 And there you have it, another freaking dress thanks to my Snow Days/Sew Days. If you aren't a stitcher and have found these posts not your cup of tea, my sincerest apologies. I do hope to be back to art teacherin' sometime this decade. In the meantime, I've got a house to not clean and another dress to complete! Later, y'all!
 photo signature_zpsd10b3273.png
Read more »

Wednesday, August 27, 2014

DIY: Apron Sew-Along, Putting It All Together

As I type up this here blog post, I've got my feets up, my hair down and my Brand New Reversible Apron with Ginormous Pockets on. Yay, it's finished! As I was finishing up my apron this past weekend, I was suspiciously surprised by how smoothly everything was going. I mean, my seam ripper was actually collecting dust! I remember looking at it, flipping my hair and thinking, "Humph! I don't need that old thing anymore, I'm BEYOND mistakes," which, of course, was like The Kiss of Sewing Death. As you'll find out in the following clips, it didn't take me but a hot minute to make a big-fat-hairy omg, my apron is practically hanging down to my ankles mistake. But don't you worry, I'll fill you in on the oops-deets so the same won't happen to you.

Now, if you've not started on your apron yet, lemme direct you here. In this post, I'll introduce you to pattern and pocket making. 

In this here post, I'll share with ya how to do the following:
*  Make your neck strap (which, for some reason, in the vid clip I refer to it as a "necktie". Der.)
*  Make your tie ends
*  Assemble the neck strap and ties ends to the apron
*  Finish off the apron and call it a day!

I'd also like to invite you to share your completed aprons on this here blog!
I mean, you've already been sharing 'em on the Apron Sew-Along Facebook page (which totes makes my day when I see 'em) so why not show 'em off here? I'd love to put 'em all together in one big ole apron-tastic blog post. I know several of you made children's aprons and/or went a totally different apron-sewing route. I think it'd be a blast to see 'em all! To make that happen, I do hafta set a deadline. If you haven't started yet, no worries! You still have plenty of time. Just to give you a deadline, please email me (cassieart75@gmail.com) or share on the Apron Sew-Along page a snapshot of you in your apron by Sunday, September 7th. I'd love a brief description on your fabric choices and where you plan to wear your apron. 

But before we can do that, we gotta finish this thing! So, without further ado, let's get to work!
Neck strap and tie ends. Because I like to have a bow in the front of my apron, I decided to make my tie ends 4" X 30". You could adjust that length, of course. You might wanna cut out a couple different lengths with your wrapping paper, pin them to your apron and see how that length suits you before cutting into your fabric.
If you plan to tie your apron in the back, you could use the same pattern piece for your neck strap and tie ends, thus cutting three pieces of fabric from one pattern.
To stitch, pin those right sides together. As I mentioned, I like the ends of my pins to face my sewing needle. I don't wanna chance running over a ball with my sewing machine. No one likes squished balls. 
For the neck strap, simply stitch the long edge, flip inside out and iron. I have a tool for flipping fabric but you could just as easily use a safety pin or maybe a pencil. Youtube can help you out with tips and tricks on that.
For the tie ends, you'll not only sew the long end but also one short end. To do that, stitch the length of the long end, stop about 1/2" away from the end, lift the presser foot, rotate the fabric, lower the presser foot and stitch the short end. If that run-on sentence has left you confused, see the gif below. 
Make more sense?
To put the apron together, you'll need to pin your neck strap and tie ends on the right side of the apron (it doesn't matter which side). Now, my mistake was pinning everything in and stitching before I tried it on and checked the fit. Go ahead and pin your neck strap on and try the apron on so you can see if adjustments need to be made. Once you've got the fit where you want it, pin the neck strap 5/8" (or whatever your seam allowance is...mine is always 5/8") from the left and right ends (as seen below). For the tie ends, pin them 5/8" from the curve of the apron. 
You'll want to pin the tie ends to the apron body just to keep them out of the way as you stitch. Now, lay the other half of your apron on top of this with right sides together. Pin the top, curved side and sides. Stitch everything except the bottom.
Here I've got my right sides together and I'm ready to stitch everything except the bottom edge.


"I lay mah hands on ya apron and you'll be healed!" (said in my sad attempt to impersonate an evangelist. And that apron needed some healin' as you'll find out in that thar clip.

Here I'll talk making adjustments to my mistake and finishing the thing off.
Because my apron straps were too long, I went about fixing it by seam ripping out just the top of the apron, pulling those straps up, repinning and stitching again.
I snipped off the excess before flipping it right side out.
I finished off the bottom of the apron the same way I did the bottom of the pocket from the last apron post. I simply tucked the bottom inside, ironed and stitched. 
And, there you have it! There are definitely some things I might do differently on my next apron. I think I'd like the length longer and the pockets less tight. But I'm happy with the outcome and the kids have loved the print. I've been wearing it all week and feel kinda naked without it on when I'm in the art room!

Looking forward to see in your creations, kids!

Read more »

Sunday, August 10, 2014

What the Art Teacher Wore #109 and Welcome Back, Crazy!

Monday, Monday: Since I was painting my windows with a Mexican market theme, I thought I'd wear a colorful outfit for inspiration. Unfortunately that rogue tube of cerulean I mention in my last post managed to douse my legs, necklace and hair. Good think I was wearing my big ole plastic apron or the rest of me woulda been Smurf-a-fied as well. top: Banana Republic, garage sale; skirt: Anthropologie, found at Buffalo Exchange; sandals: Anthropologie, gift from a buddy
Welcome Back, y'all! 

If you're like me, a crazy art teacher, you just might be heading back to school this week or in the very near future. What better way to be welcomed then by my fave after-school rerun show to watch as a kid: Welcome Back, Kotter. Even though my students have been back since Wednesday, they've not come to art yet. Oh no, that starts tomorrow. Which explains why I'm still in my pj's working on lesson plans at 1pm on a Sunday. Ahem.

Oh, before I forget...Arsty Book Club friends! So as not to overload this here blog post, I thought I'd chat about this past week's readings of Teach like a Pirate to my In the Art Room post this week. It totes ties in because it's inspired just what will be going down in there this week. So read up and we'll chat soonish. 

Now, let's chat about the Apron Sew-Along (could we possibly have more going on here? Me thinks not)! I got my fabric orders in this week and I thought I'd share with you what I decided to stitch into an apron. I also couldn't help myself: I bought a buncha other prints to eventually be stitched into dresses or some MC Hammer pants or culottes. So stay tuned! 

Okay, so here's what I got...
Really? Could one person be more excited about cat fabric? I don't think so.

Now, while we're still on the topic of our Apron Sew Along, please remember to prepare your fabric for stitching by washing your fabric first. The reason being is that this will remove all the sizing from your fabric (have you noticed that it feels a lil stiff? That's the sizing. It needs to be washed out before you sew). I use a delicate and cold setting on my machine. I dry as normal. You should probably wash separately (um, I never do but I'm totes lazy) just so the colors won't bleed onto the other fabrics. 

Okay, so here's a close up of what Ima be stitching with...
I know, riiiiight?! Cray-zay. But they both make me so extremely happy that I just couldn't not get them. I also think that the busy pattern will do a bang up job hiding stains. We'll see about that. Now I've gotta pick out accent fabrics (for the pocket, neck thingie and ties). For that I think I'll dip into my own stash. I'll keep ya posted. 
Totes Tuesday: I finished off my windows on this day. My super sweet custodian popped in to tell me how much he liked them...but then asked, "Don't you usually paint both sets of windows?" I told him I was just too worn out. He took a step back, scratched his chin and said, "Hm...I think I like last year's windows better." Gee, thanks! top: vintage, thrifted; skirt: old, Anthropologie; sandals: old, Target
Oh my gawd, my inner preteen just died of excitement. I cannot wait to stitch something insane with these sweet prints. I love how the framed cat at the top in the middle looks just like our Asha. Fat and furry, just how we like 'em.
Welcome, Wednesday! It was the kids very first day. It was a half day which was weird because 1. I didn't have kids in my room and 2. I was just as tired as if it were a full day and I did have kids in my room. What's up with that?! top: Forever 21; skirt: etsy; shoes with artsy shoe clips: deets here;  necklace: Paper Source
I kinda wanna stitch this into something right freaking now. I have so many sewing projects in the works that it is absolutely nuts. I have no business buying any more fabric...and yet...sigh. 
No Running with Scissors, You'll Lose an Eye! Thursday: At least that's what I told the kids when they asked, "why are you wearing a shirt with eyes and a skirt with scissors?" What I really wanted to tell 'em was "I've got my eye on you and if you misbehave you might get cut" but I just didn't think that was appropriate. Not with other teachers around anyway. eyeball shirt: Urban Outfitters; scissor skirt: Modcloth, super duper sale
Speaking of scissors, I love this sweet print on the left. I don't know if I love it with the pin fabric...but the theme is there, right? I'm still dreaming up what I want my kids to stitch up this year. I'd love any hand sewing/machine sewing project ideas if y'all have got any!
Finally Friday, I mean, Really!: I actually thought it was Friday all week long. That is not a good way to live your life as it only ends in disappointment. dress: DIY by me; belt and necklace: Anthropologie; shoes: Frye, TJMaxx
Speaking of having the kids sew, look at this! I made a lil mention of needing embroidery hoops for my 4th grade artists and a friend shipped a big ole box of these beauties my way! The kids are going to Freak the Funk Out. Yay! So much stitchin' goodness.


I do hope you guys have a super fun week! You especially, teacher friends! Just remember, if all else fails, just act like a crazy person and the kids will love ya. Welcome back!


Read more »

Tuesday, August 5, 2014

DIY: The "Uh, Are You an Art Teacher?" Ensemble

The other night I was meeting up with a group of non-art-teacher buddies (yes, I have those. Two, actually, thank ya vury much) for dinner. I was just coming from my first day back at school so I was in my normal art teacherin' garb. Paint palette in mah hair, pencil-y shoes, some sort of embarrassingly obvious art teacher dress...you know, the norm. When I wear this wacky tackiness, I honestly don't think twice about it. In fact, I often forget that I look rather ridiculous. My non-art-teacher buddies, however, never forget. 

NATB: When we go out, people seriously look at you funny.

Clueless Me: No they don't!  

NATB: Um, yes they do. It's like they are trying to decide, "Is this a crazy person? Does she realize there are crayons in her hair and she's out in public?!" And you don't even notice!
Okay, so I totally thought this was bogus until yesterday. I got it in my big fat art-teacherin head that I needed to create some miniature art supplies. I'd seen some amazing ones here (gah, y'all! This artist must have magical fairy fingers!) and was totes inspired. So I ran to the nearest big box craft shop and loaded up on Sculpey. When I got up to the register, I realized I didn't have my teacher ID for a discount. Then this went down:

Me: I'm sorry, I don't have my school ID. Can I please get a teacher discount?

Not-Looking-Up-From-Scanning-Countless-Sculpey-Blocks Check Out Chick: You have to be a teacher.

Me: I am a teacher, I promise! I just left my ID at school. 

Still-Preoccupied Check Out Chick: I'm sorry but I don't have any way of knowing if you're really a teacher. 

Me (remembering my convo with NATB): Look at me.

Check Out Chick, startled: Huh? Oh. Wow (taking in that number above). So, you're an art teacher, huh? Kay, I believe you!

And I actually think she gave me double the discount, y'all. As she should all crazy art teachers.
Thank goodness for that wee discount otherwise Ida never been able to make these mini-masterpieces. You know, cuz every approaching-middle-age lady needs a set of Art Supply Shoe Clips, amiright? More on those in a minute, for now, let's talk about that discount-gettin dress, shall we?
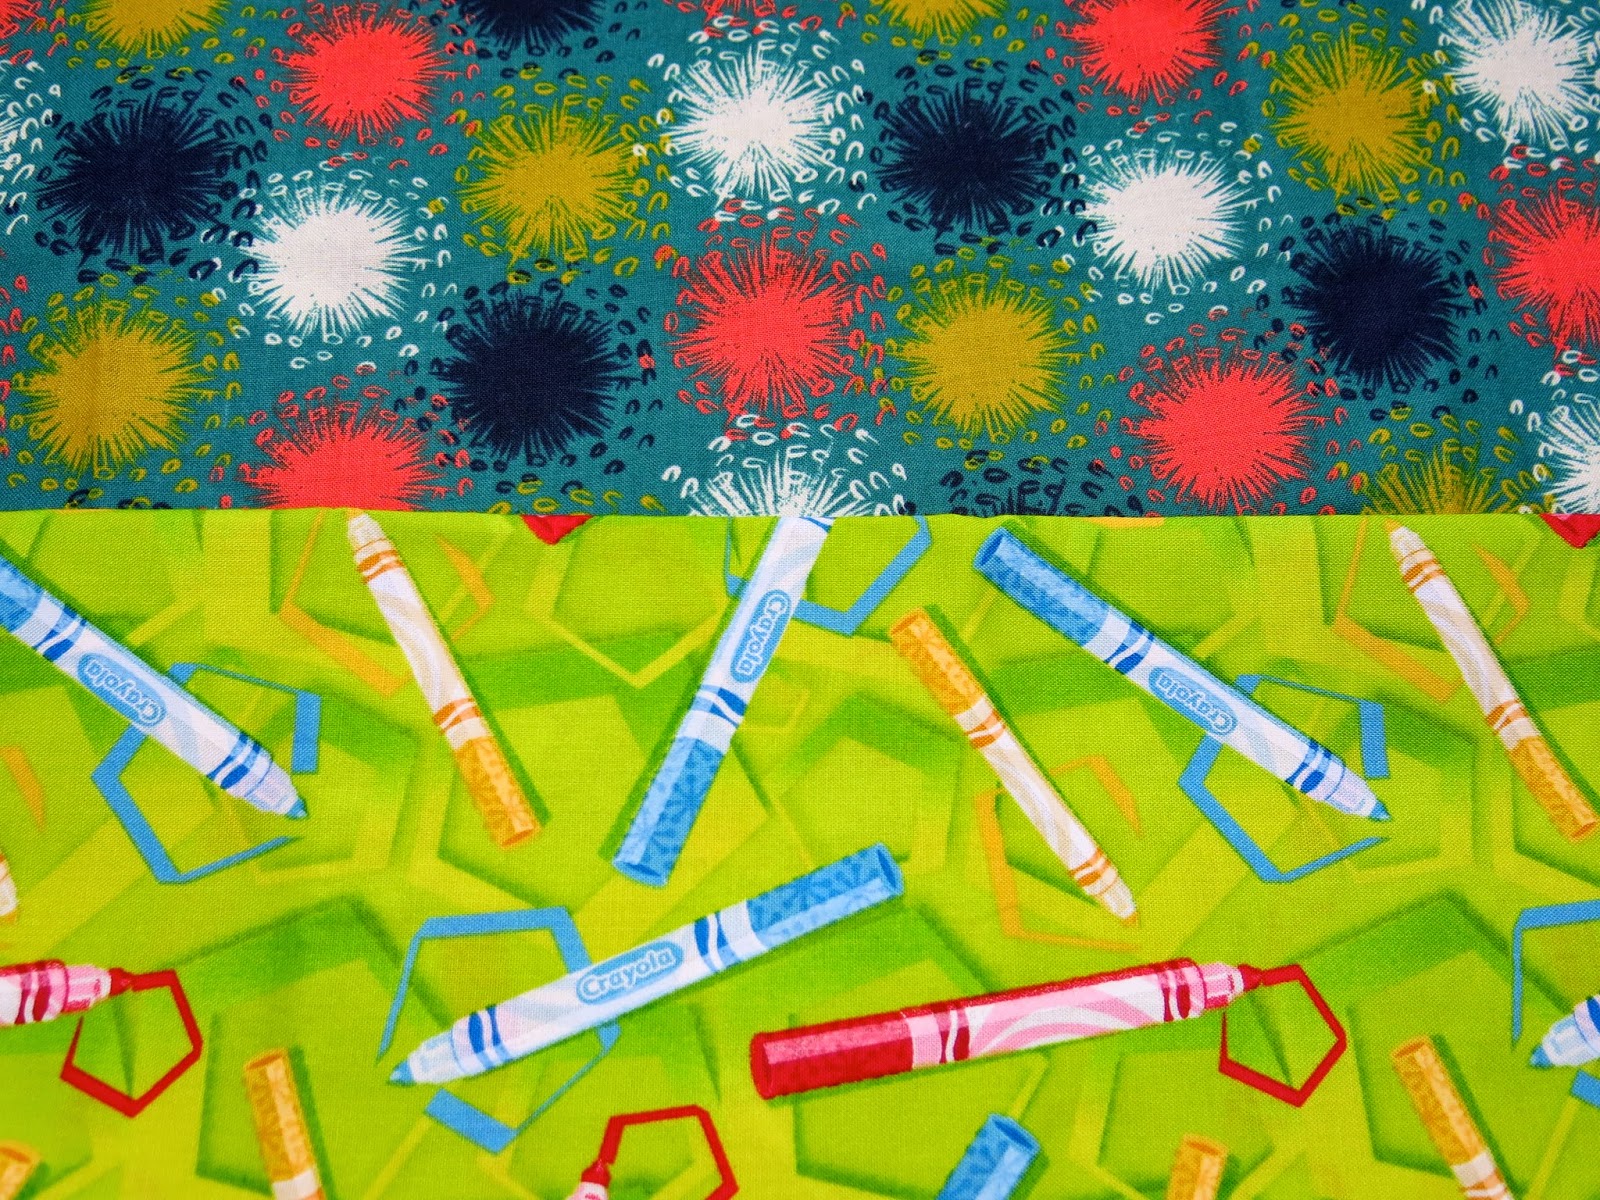
You might recognize this fab fabric from my Dreaded Art Supply Order post (which I will be posting a revision of. Y'all made SO MANY super duper suggestions that I've already rewritten my order!). I decided to pair it with some orange and red chevron fabric I thrifted years ago that were curtains in it's previous life.

As for a dress pattern, I settled on that 1970's number on the left. I totes loved the bodice (I fer realz have a thing for dresses with a midriff band. In case you've not noticed every-freakin-dress-I-stitch has a midriff band. Band? Belt? Thangie? You know what I mean). However, I wasn't loving the skirt options. Here's the deal, that mini is just a lil too mini. I don't believe in shaving above my knee caps so I pretty much look like an orangutan from there up. Just ask the hubs. Good thing he's into primates. As for the maxi, y'all, I can't do a maxi in the art room. Every time I squat in a maxi (um, that sounded bad. I mean squat down to pick something up off the ground, not like, to pee outside or something. I may look like an orangutan but I'm not an animal, geesh), I inevitably step on my hem, start to stand and fall over. It's quite classy. For that reason, I decided to go with my skirt standby, good ole Project Runway Simplicity 0320.

Now, let's address the big fat hairy elephant in the room...those 1970's bat wings...
Yeah, those. Y'all know I'm not really a lover of stitching sleeves but I was willing to forego my hate for these guys. I mean in the sketch they looked so hippie and cute! In fact when I wore this dress the other day, all my flower-power teacher buddies reminisced about the dress they had as teens with "wings". However, these guys should really come with some sorta warning label. The entire time I wore this dress, I could see those wings outta my peripheral view and kept swatting at 'em. Once I thought there was a bug on me, another time a bird and I swear I even saw a group of dancing bears. But that was after accidentally consuming some of that Sculpey clay (hazards of eating and crafting). So there's that.
I also have decided that absolutely no dress is complete without pockets. However, I really hate where the pocket are placed in this particular dress pattern. It's impossible to have your hands in your pockets and NOT look like you are piddling (scroll upward, y'all and tell me I'm lying). I opted to use some more of that chevron for pocket town.
Oh! Can we talk about that vintage pattern for a pinch? Cuz it was just about the weirdest pattern I've ever used. Tell me if you find this odd: it had me separately create the front and back of the dress...
And then stitch the front and back together at the side seams. Huh? I mean, I've always done it where you make your bodice and your skirt and attach those together. I actually kinda liked it this way as it made gathering the skirt portion a lot less taxing. I just found it kind of odd...have y'all every sewn a dress this way? What are some of the pros and cons cuz I'm thinking of going down this road again when it comes to other dress patterns.
Oh, look, crafting shrapnel. This is what you don't want your dinner table lookin like, FYI. Not unless you want Dancing-Bears-on-Shoulders hallucinations. 
To make these into shoe clips (and sweater, hair, nipple, whatever clips) I simply glued a little alligator clip on the back. I'm kinda addicted to making these right now (well, as of last night) but I'm in need of more mini-suggestions. Whatcha got for me?
And there you have it, kids! An ensemble that will most definitely get you stares and the occasional discount. Off to see if it'll work at the liquor store! 

Read more »