
.png)
Hello, friends!
Today I thought I'd put together a big ole blog post of some of my very favorite lessons that both introduce and continue to explore painting with children. So if you are looking for a fun and engaging lesson for kids of all ages, I think you'll find something here. Thanks for dropping by!
But first, I gotta let ya know that the REAL reason I'm sharing painting projects with you is because my new book, The Paintbrush Ballerina, launched this week!

If you've been hanging out with me for a while, then you've seen me share my method of painting with my students. Here's a little background on how the journey of the Paintbrush Ballerina began:
If you'd like to hear a little big of the book, check this out:

I wrote the book in rhyme as those have always been my most favorite books to read to children. In this story, our paintbrush friend who has been abandoned in a watercup in front of palette tells the tale of the Paintbrush Ballerina. You can read more of the book and see the illustrations here.


If you are curious about my teaching methods and would like to see more, I have a playlist on my YouTube channel called "A Glimpse Inside" where you can visit me as I teach my students.

Keeping that brush on it's toes is always the goal! Check out this sweet kindergartener doing just that!

Keeping that brush on it's toes is always the goal! Check out this sweet kindergartener doing just that!

Alright, now let's dive into those lessons, shall we? I have no rhyme or reason to the order of these lessons. This is just a big ole smattering of some of my faves!
Let's start with kindergarten who are my very favorite! After learning about the order of the color of the rainbow, we dive into painting our own with tempera cakes. Tempera cakes are a fave in my art room as they are low mess and, low prep and the colors are just beautiful! I'll circle back to this lesson in a moment.
To see more, check out this painting lesson here.

Now let's skip forward to third grade. By then, you'd think they'd have a better idea of how to handle their brush. BUT I gotta tell ya, 'tis not the case. Even tho it feels like we say the same things all day long (cuz we do!) we are saying it to different groups of students! So I had the same sayings and phrases on constant repeat...and the bit about the Paintbrush Ballerina was one I always said. AND they always love!


Here's what I've learned: start wherever you like! BUT start with just one thing. That's the easiest for you and your students. So, first things first, begin with how to use the paintbrush! THEN...maybe go with mark-making. I introduced my students to a wide range of color and mark-making ideas to create these beauties.

Of course LINE is a great place to start. And I do have a book on LINE...Larry the Line that is!

For many years, this is how I introduced both painting and line to my kindergarten students. By limiting the color to just black (we used a diluted black ink to allow the brush to paint more smoothly), we could focus on just the brush and the lines. From there, we were able to add color!

When it came to introducing color to kindergarten, I usually did that, like I mentioned, the day after our black and white line painting lesson. That's when we did the rainbow paintings. BUT...since I'm skipping around a bit, you'll have to scroll down a pinch to see that first rainbow lessons.

Many of my kindergarten lessons are born out of "the fast finishers need another something to paint!". And that's what happened here! After painting the rainbow, many students then got a sheet of paper and painting stripes of rainbow color. This served to be the perfect background for these adorable self-portraits!

So sorry these are kinda out of order. Truth be told, when I try to edit or move images around, they tend to disappear. So...it's easier if you just scroll then if I sprout more gray hairs.

Meanwhile, in first grade, we took the idea of our paintbrush being a ballerina a little further. We listened to music and had her paint across our page!
More info here. You can also check out how we made these into beautiful weavings!

And now...color mixing! These wee Mouse Paint masterpieces were created by kindergarten. The best part...the Hobby Lobby frames!

If you are rand new to painting with children then start here!
This is the VERY first painting project I would do with my young students each year. It all starts with a dot. The Dot to be exact!

Some years, we painted on paper and others, we painted on cardboard pizza rounds (one of my favorite surfaces for painting!).

I recently had someone give me a hard time about this...
I shared that often, at the start of the school year, I do the same lesson with all of my students, kindergarten through fourth grade. Why? FOR MY SANITY! I'm usually trying to set up my classroom, introduce a thousand routines and just keep my head above water. Once I have my Back to School footing, I feel good venturing into different lessons with everyone. But, to start, we all begin with the same supplies, same visuals and same lesson.
This commenter DID NOT like that and let me know.
Now look, I'm cool with sharing your thoughts and opinions but...there's a way to do it. AND if you aren't an art teacher then...you might just wanna sit it out, you know?
Regardless! I did THIS same lesson with all students AND put a twist on it so it ended up being a big ole collaborative. So there! ;)

Start with a dot and ...from there, you can go to here!

And it's still one of my favorite collabs we have done!

Since we are focused on painting today, I'll just be chatting about that. But for more weaving info, be sure and tap that link!

This is the same idea as my kindergarten line lesson but with first grade and on pizza rounds!

Now, let's jump forward to fourth grade! Here's one of my favorite landscape lessons based on folk art. We created these with tempera paint and you can check out more about this lesson here.

My second grade students created these paintings with either a warm or cool color watercolor background. When using watercolor, I often have my students decide if they will use one family of color or the other. This keeps their paintings from becoming 'muddy'.

Another spin on that concept of warm versus cool can be found in this spring-themed lesson.

I love a big ole painterly tempera paint lesson! This one was inspired by Vincent van Gogh. I love the cardboard printed trees!


We used cardboard circles as our base for our snowglobe. I had my students create three sketches first. They LOVED those little small circle paintings so much that we turned THEM into a project too!

Our marble "sketches" were used for a fun and quick follow up project! You can find the details on this lesson here.


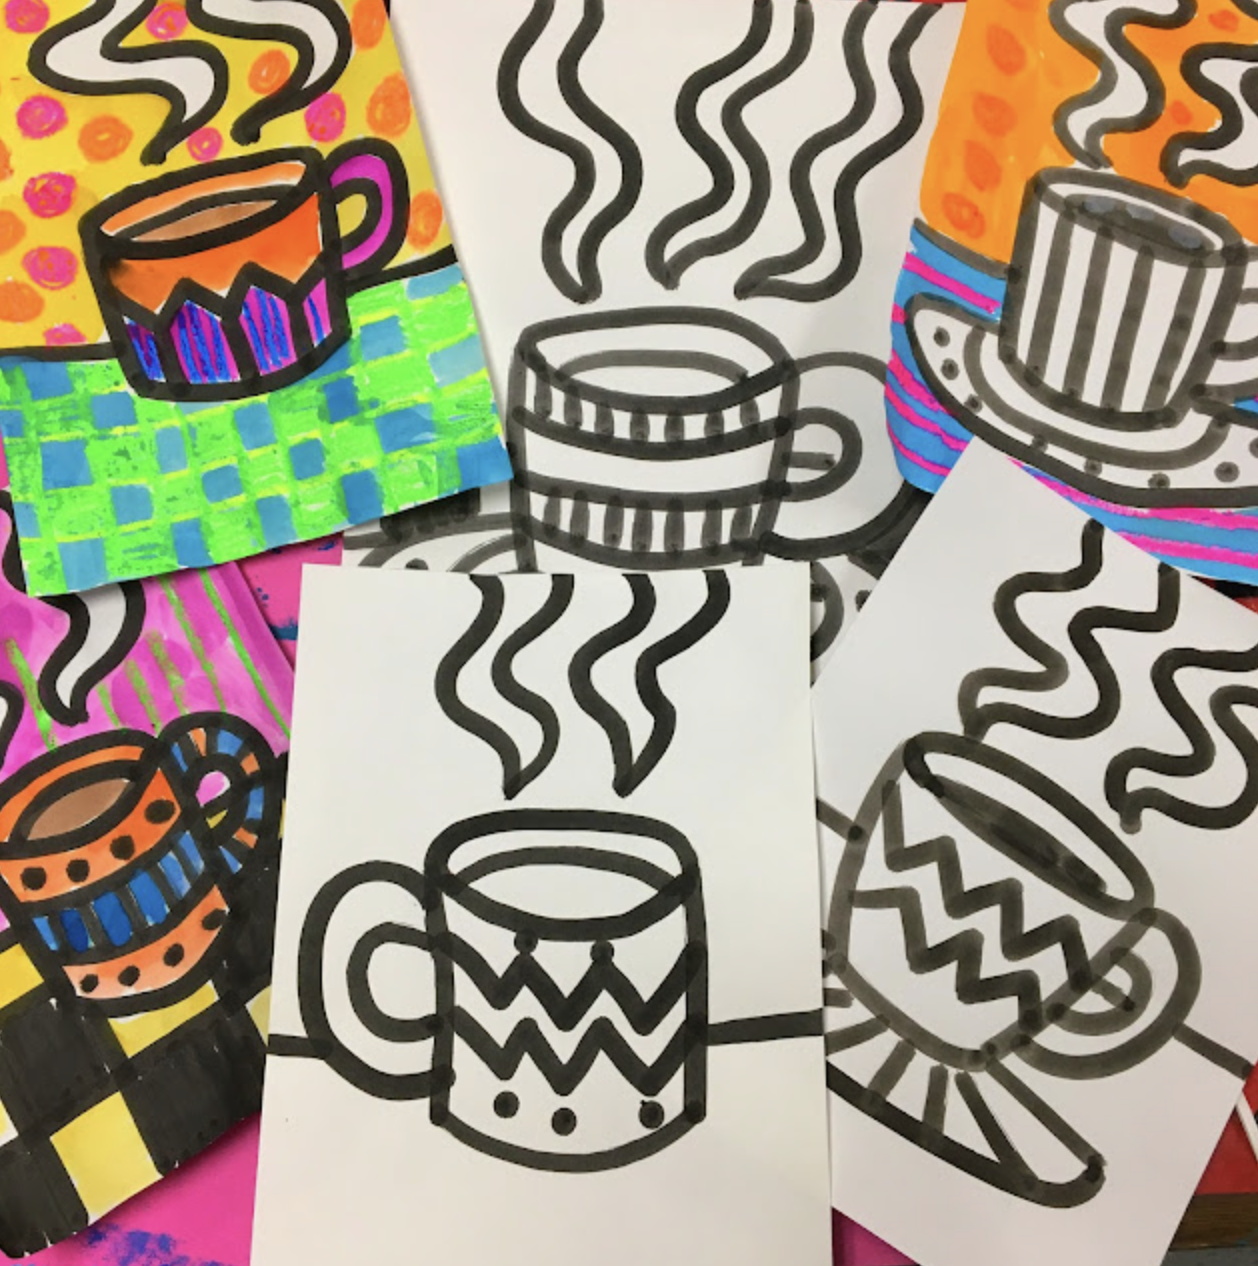
Let's circle back to the ole bingo dauber, shall we? It's like a Sharpie on steriods!

I LOVE that we can create the most epic contrast with the bold black ink and these bright paints! We are using Jack Richeson's neon tempera cakes here.

These looked epic in our Glow Gallery!


Want to introduce the magic of oil pastel and watercolor paint?

If you are looking for more Valentine's-themed lessons, check here for some short lessons and here for longer projects.
Thanks for dropping by, y'all! Until next time!


