Showing posts with label Cassie Stephens blog. Show all posts

Wednesday, March 26, 2014

In the Art Room: Teaching Vocabulary, Part 2

Way back in freezing cold January, I wrote a blog post called Teaching Vocabulary. In it, I shared with you some new approaches I've been taking to introducing words in the art room. I also asked for your advice and, holy moly, did ya'll deliver! Thanks, kids!

Since that post, I've tweaked (not twerked. See how important learning vocabulary is?!) my aforeblogged methods and added some new ones. So in this three-part post (because the Vocab Party never ends!), I thought I'd let you in on some of my new tricks (complete with video clips, ya'll! See what your encouraging words did? YOU'VE CREATED A VIDEO-CLIP-MAKING MONSTER!) as well as the words of wisdom shared. I do hope we can continue this vocabulary convo so leave your pearls of vocab-teaching wisdom in the comments below, pretty please!

Without further ado, I present to amazing reader comments, updates on my vocabulary teaching routines and some short clips...
But now a word from the Super Fab Teacher Gillian: "I often have my grade 1's answer a question, spell a word, or read something before leaving the room at the end of the day... I try to switch up the question or the words so that there's something appropriate for everyone! For example, sometimes with my lower level readers, I'll show them two words and ask "which one says _____?" whereas for a higher reader I might ask them to read the word or tell me the meaning. I try to keep it random enough that they don't really catch on to the fact that I'm consistently making it easier for some than others. Might work for you too!"

Um, Gillian, this totally worked for me, thank you so much! If you glance at my first vocabulary post, you might notice that I just had 2 sets of art words, one for my 1st - 2nd grade students and another for the older kids. The words were chosen randomly pulled from a list found on the interwebs. However, these words didn't seem to stick because we weren't making connections to them in art class (duh, art teacher!). Now I have the students read words as they enter that directly pertain to the lesson being taught. This means I have a different set of words for each grade level. For kindergartentown, I show them a shape and ask for the name and the color. My favorite part is when the word is introduced, so-n-so will say, "that was my word at the door!" 

Art Project Girl blogger Erica says:  "Oh my gosh. I totally get it. Some teachers debate with me that just teaching the word without the meaning is not an okay practice. . . but I really feel that it is the only real way that kids will learn vocabulary that I am teaching, repetition, repetition, demonstrate, practice . . . So I always just throw the vocabulary out their have them sing it, repeat me, repeat me in different voices (they love saying vocabulary while holding their nose and making nasally teacher sound) then as the year goes on we learn what the vocabulary means, how to use it."

I love Erica, don't you? Her blog is super fab and she's always coming up with fun ways to teach her students. If you attended the AOE online conference, then you know how Erica brings all sorts of games and fun into her art room. This got me thinking about how I could introduce something new in my room called "Word of the Week" (even though in the clip I refer to it as "Word of the Day".  Sorry, my bad) in a fun way. Here, lemme 'splain it to you...

After all that "whoop-whoop" craziness, I drop directly into a moments chat about our Artist Inspiration which I attempt to explain here...
(gah, that face. only a mother could love, right mom? Um, MOM?! Oh, never mind.)
A message from one of my favorite teachers, my Aunt Kimmy: "always labeled everything --and I mean everything in the kindergarten/1st grade classrooms. And in my home too, because I've done a lot of tutoring at home. There's a sentence strip still on the ceiling in my kitchen...everyone that comes to my house is just used to seeing the word "ceiling" on my ceiling. Now I leave it there for Rayleigh..:) When Kirby was two months old, I had everything labeled in his bedroom. "bed", "dresser","chair"...."wall"... You get the picture. That's how I do it. Our language is too crazy to try to teach reading by sounding out words. That's my opinion and I know a great debate can be started by saying something like that because there is something to be said for phonics...sometimes."

I love this idea of labeling everything and I'm working on it. Those words that the kids learn at the door? They go on our word cabinets (yes, I just about have enough cabinets to cover the alphabet. Don't hate.) Do ya'll label everything in your classroom? I think this is simply genius. But she is my Super Amazing Aunt Kimmy so I might be a pinch bias. 

Mrs. C of Rainbow Skies and Dragonflies blog: "I have the kids repeat vocab words also... they learn the meaning as we go along. And yes, you think they will remember the kooky way you introduced something and it would be burned into their brains forever, right? No, not so much... We have spent mucho time on color theory this fall and even though I know in my heart of hearts they know what the Primary colors are ( 1st/2nd grade) when I asked before vacation they all looked at me like I had three heads! Seriously guys???"

I love Mrs. C. Always telling it exactly how it is. And isn't that the truth, ya'll?! No matter how hard we try or what hoops we set on fire to jump through, sometimes the kids just don't get it. Maybe they're having an off day, maybe they've gotten too used to us jumping through flaming hoops, I dunno. I can only think that the connection we made with the word wasn't a powerful enough one to get it to stick. But when it does, it's so exciting it's magical. Like this "invention" by one of my third grade students. 
I mentioned that our word of the week was "invention" and that our artist Leonardo da Vinci often drew his inventions...but many times they were so far ahead of their time that they were impossible to create.

3rd Grade Girl: But can we make an invention if we wanna? I mean, instead of just drawing one?

Me: Sure! Make it and bring it in!

And this is what my friend brought me the very next day. An Art Robot. So amazingly awesome.
She even created an "advertisement" which was the previous week's Word of the Week. I was so excited that I dragged this sweet child and her robot onto our school's televised Morning Announcements. I really wanted to encourage this sweet artist. She was thrilled (despite being camera shy) and the kids loved seeing her creation when they walked into the room. Pretty sure the word "invention" will stick with her. Although we have been out of school for a week...so we'll see.

Please stay tuned for Part 3 of this Teaching Vocab series as I have more insight from you super smart readers and (joy!) more obnoxiously goofy clips! In the meantime, I'd love to hear more of your vocabulary-teaching wisdom, friends, so lay it on me! 


Read more »

Thursday, September 12, 2013

In the Art Room: Painting Processes

Precious first grade friends sharing paint and getting ready to try their (messy) hands at sponge painitng.
Hello and welcome to The Art Room. 

Which, during the week of Painting Processes, could have easily been dubbed The Day the Paint Factory Vomited...or maybe What Happens When You Give Children Double Espressos and Paint Brushes. Although just calling it The Day the Art Teacher Taught a Half Dozen Painting Techniques in a 1/2 Hour Because She's Nutz would probably be the most accurate.

Yet, despite the Big Fat Hairy mess, we had fun, the kids learned tons and their paintings look fantastical. Lemme tell you how it all went down.
How student teacher Rebecca Tenpenny and I set up the tables for the day.
I'm a huge fan of the blog Painted Paper. If you are an art teacher, you gotta get yourself over to Laura's blog because it's beyond inspiring. It's aspiring. In fact, it gets me so excited with it's awesomeness, I often find myself perspiring. Because that's what every blogger wants to hear, right? "Your blog is so amazing it makes me sweat!" I'm sure at this point, if she's reading, Laura is like, "um...thanks?"

Anyway, before this gets awkward (oops, too late), what Laura does at the start of each school year is have students create dozens of painted papers (hence the title of her blog, ya'll). The kids then have these amazing papers to use in their works of art throughout the year. GENIUS, right?! So Rebecca and I decided to totally steal, er, heavily borrow, that idea. 

If you wanna give this wild and crazy ride a go, here are the supplies needed per child:
  • one 12" X 18" paper, quarter folded
  • one large bristle brush and one small bristle brush
  • one large sponge and one small sponge
  • one texture comb
  • one toothbrush and piece of cardboard
  • a stencil
  • an apron
  • no chairs
And here's a student's painted piece to show you the processes covered during that 1/2 hour:
  • dry brush painting using a cross hatch pattern (upper left)
  • sponge painting using a stencil (bottom left)
  • texture combing with paint splatter (right)
As soon as the students entered the room, I had them grab a piece of pre-folded paper from the "store" (you can go here for more details on how we gather supplies in the art room), take it to their seat, jot down their name and teacher code, throw on an apron and gather around a table for demonstration. Once each student was at the demo table, I demonstrated how each painted process was executed. Because our time is so limited, I told the kids that they'd be working quickly but not crazy and that our painting time would be controlled by the toot of my trusty train whistle. 

Here's how I explained each process to the children before they set to work:
 Dry Brush Painting with Cross-Hatch Pattern: Believe it or not, this was one of the hardest painting processes for the kids to grasp. I found that the best way to explain it to them was like this...how would you describe the texture of a broom? It's dry, right? Well, imagine that this white rectangle is your bedroom and your mom told you to sweep it. Using any color you want, dip your brush but just barely because we want the brush to be dry. Now, using diagonal lines, sweep your brush all the way across your paper. Be sure to sweep your whole rectangle. Imagine how upset your mom would be if she found you only swept one part of your room! Once you are down sweeping with that color, pick a different color and sweep in the opposite direction. See how the lines cross over each other? That's called cross-hatching!
Now the kids didn't actually go to their seats and set to work until after I'd demonstrated all the techniques so the sequence of these photos isn't accurate. Sorry. However, I did want you to see the kids in action. So here's some dry brush painting by one of the experts.
Sponge Printing and Stenciling: Next I demonstrated using the larger sponge, picking one color and sponge printing. I emphasize that it's called printing and not painting because I want the kids to know that they are creating a texture by pressing the sponge down and picking it back up. As opposed to just wiping the sponge all over the paper. Once that rectangle is covered in the color of their choice, I show them how to stencil with a smaller sponge and this collection of holey scraps (which included a brief chat about how sparkly confetti is made!). The key here is to use very little paint. A concept that is akin to rocket science for some.
When we ran out of those little round sponges with the handle, we created these guys with a clothes pin and a cosmetic sponge. We so smart.

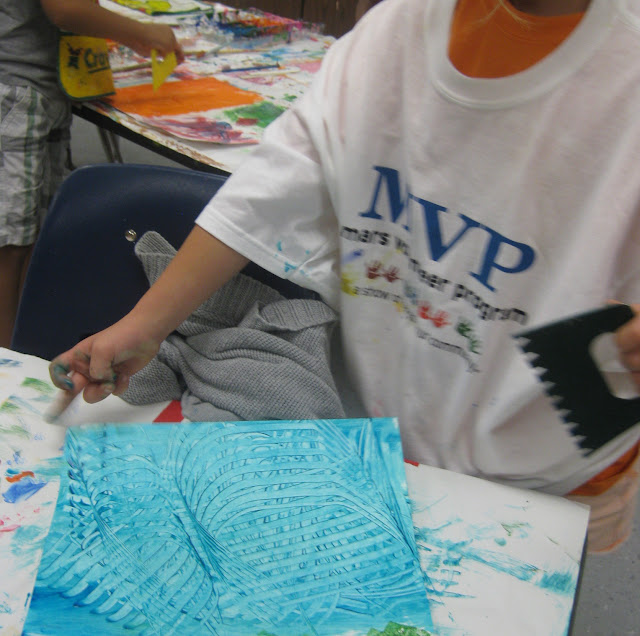
Texture Comb with Paint Splatter: For this, the kids painted the entire half of the paper. I really had to emphasize that for this process, they'd have to work the opposite of the dry brush painting in that their paper needed to be super duper wet with paint. So I told them to paint quickly and thickly but not crazily. I painted with the larger brush and only used one color. I told them that their paper should have a shiny and wet look to it before using the texture comb. Once the texture comb was used, I then showed the correct way to splatter paint. Which, as it turns out, no matter how many times you show them, they are going to attempt many other ways of splatter painting. Ways that might include splattering their face, their neighbor and the floor. Jackson Pollock woulda been proud

Painting quickly and thickly but not crazily.
I picked up these texture combs from Sax after years of cutting them out of cardboard. By the way, I don't believe flipping you the bird was intentional. But I could be wrong.
For splattering, I showed the kids how to dip their toothbrush into any color and scrap the bristles away from themselves and toward their paper. They were allowed to chose as many different colors as they liked. By the way...this technique was part of the inspiration for this dress.
After the demo, I had the kids do a quick "repeat after me" run through of the processes. From there, they were asked to return to their tables and hold up the small brush for dry brush painting. Once all brushes were in the air, I blew the train whistle which was their signal to begin that process. When the whistle was blown again about 2 minutes later, that was their signal to put all dry brushes down and hold up their large sponge. Again, whistle blows and...begin sponging. This routine was continued until all processes were complete.
At this point, we were closing in on the end of the 1/2 hour. Quickly the students took their paintings to the drying rack, put their aprons back on their tables and met me at the door to line up and receive a baby wipe ... which did little to nothing for their artsy hands. But we finished! And they loved it. And now we have all of these amazing papers for our upcoming collage projects. I couldn't be more excited. Have you tried any of these painting processes with your students? I'd love to hear more ideas! Rebecca and I are planning a water color painting processes in the near future. I'll be sure to keep you posted. Until then, special thanks to Painted Paper for the inspiration!


Read more »

Wednesday, July 31, 2013

DIY: Butterick, Who's Yo Mama?

You ever have one of those annoying sensations that just won't go away? You know, like a little tickle in the small of your back that you can't seem to reach or one of those rouge runaway hairs you feel somewhere on your face but you just can't find. OR, this one's the worst, what about a wedgie that manages to get more friendly than a proctologist?

 Oh, oops. Did I just go too far? Or maybe too close to home. I promise I didn't know this post was gonna head south so quickly when I began. My bad.

But I tell you I was going somewhere (other than south) with that there intro. Because this Red Hot Vintage Floral Fabric has been that unreachable itch, that fantom hair, that borderline sexual harassment wedgie all summer long.

Seriously. It started way back in May when I was working on my Star Wars dress. I spied this lovely piece peaking out from my Mount Fujiyama o' Fabric. And it was all, "Hey! Look at me. I'm gorgeous." and I'm like, "Wow, you are pretty sweet. But doncha think calling yourself 'gorgeous' is a little, I don't know, arrogant?" To which the fabric was like, "Look, if you don't think you are up to workin' with somethin' as amazing as me, that's fine. But let's not pretend I wouldn't make a pretty smokin' dress."

And that there sparked the unrelenting urge to find the perfect pattern to marry with this beautiful, albeit a pinch egomaniacal, fabric. 

(BTW, have you noticed just how much time I spend talking to inadament objects? Dunno what I'm talking about? What about here, here and, oh man, here. Geez, I need to get out more. Or start taking my meds. That'd probably help.)
After some serious online pattern digging, I found The Perfect Partner for my Red Hot Vintage Floral. I mean, look at that cut, that detail at the neckline, that big-drapey-hankie-thingie. It was like a match made in sewing heaven.

Then I saw it. The name of the maker at the top of the pattern envelope. And I went all Jerry Seinfeld and spit out the words with such venom and hate that I almost scared myself:

"BUTTERICK!"
That's right. The above is an accurate portrayal of my relationship with Butterick. You might recall my ever-so-slight (ha!) frustration with said pattern-maker here. In fact, I do believe I made that scrunched-up, buck-toothed mouse face complete with Wicked Witch of the West hands more than a dozen times whilst attempting to solve the riddle that is a Butterick pattern. And every time it stared right back at me with those dead-Newman-esque eyes and that smirky smile. Oh, how I loathe thee, Butterick.
(BTW, not that it would ever happen anyway, but I'm almost positive that these blatant Butterick-hatred posts are gonna make it so said pattern-making company never contacts me for an endorsement. Whatcha think?)

My frustration over the vaugeness of the directions became so great that I even started fantasizing about tracking down ole Mrs. B and asking her why, just why were her designs so great and her directions so bad. And then I realized that this pattern is super old and that I'd probably have to find Mrs. Butterick Junior if I wanted any sort of contact with my nemesis. And THEN I realized that she'd probably be just as cryptic with directions to her house (because I wanna see this evil face-to-face...which makes me think I shoulda titled this post "Butterick, WHERE'S Yo Mama?") as her maw was with sewing steps: "Oh, you know. Just drive a while and then turn at that stoplight. The one on that corner. It's a white house. On a street. With a yard. You'll find it if you're not an idiot..."
BUTTERICK!

Or, rather: BUTTERICK, JUNIOR!

One particularly difficult evening whilst attempting that big-drapey-hankie-thingie, I decided to google this pattern and see if anyone out there might have a word of advice (or an address, perhaps). And that's when I found her: Professor Pincushion. In this 80 minute tutorial, she walks you through the entire pattern and explains every single step. It was like the heavens opened up and I could hear the angels sing (which, it turns out, they like to sing G'n'R. I KNOW RIGHT, how rad is that?!) That's not even a joke, she's really that awesome. AND she's got these amazing sparkly gold fingernails that she  uses to accentuate her explanations which I have likened to Glenda the Good Witch. If she were only a set of nails.
Now I gotta admit, I still had to watch her create that big-drapey-hankie-thingie about two or twenty times before I got it. Which made me think that ole Prof Pincush could really make it big if, after a dozen replays, she could just reach her Glenda nails through the screen and do the hard stuff for you. Seriously. Are you listening, Professor? Because if this idea appears in your next tutorial, Ima gonna expect some royalties.
All moaning and groaning aside, I am pretty excited about this dress. Even with help, this pattern definitely was a challenge that put my severe lack of skills to the test. I still can't believe I managed to pull it off. With a whole lotta thanks to Professor Pincushion. And now that that annoying wedgie is finally released (ewww, sorry! But I had to do some sort of tie in with the beginning of this post. It's called Closure, reader. Deal wit it), I've two other dress-itches that I gotta scratch. Both involve amazing art-teachery fabric that I'm super stoked about. AND speaking of Super Stoked...
Me and my nutty outfits have found their place in SchoolArts Magazine! If you are an art teacher, then you know this is one of the best art education mags out there. AND, if you found this blog because of the magazine, welcome! I promise this blog is normally about much more than wedgies (haha, no it's not). For diy-details on the outfits above, just click on the following linky-loos: Applique Pencil Skirt; Gnome Dress; Embroidered Eiffel Tower; Paris Dress; Painterly Dress; and, lastly, Crayon Felted Hat and Skirt (with painted shoes!).

Stay tuned for some upcoming photos of my nearly complete art room!


Read more »

Monday, April 1, 2013

DIY: Felted Floral Sweater

Warning: This post is full of photos taken by my hubs. Usually the photos you see on this here blog are taken by me and my 10 second timer. Press the button, run in front of the camera, attempt to look natural and SNAP!, picture taken. With hubs, it's a little different. Strangely, I'm more self conscious. Probably because of the constant commentary which has me cracking up. My favorite? After I complained that the photos didn't look so hot, hubs quipped, "well, let's take some more and attempt to put some whipped cream on this crap-pie." And, yes, I do believe I was the crap-pie he was referring to. Sigh.
So, as usual, this DIY story begins with me drooling over some uber expensive piece at Anthropologie. Case in point: that lovely embroidered number on the left. Them crazies wanted something like $198 for that thang! Do you know how much whipped cream that would buy?! Why, I'd be the best tasting crap-pie in town. And I already had this thrifted Banana Republic sweater just sitting in my closet like a blank canvas. So, in normal Cassie fashion, I decided to copy that little piece. Like I said, same DIY story, different day.
I know what you're thinking: dang, girl, another felted sweater? Or maybe that's not what you're thinking, my ESP skills have always been lacking. Regardless, can you believe I've not gotten over this felting bug that bit me way back with this first Anthropologie DIY?  Since then, I've felted sweaters of birds, flowers and my cat. I've found I really enjoy the process because it combines two things that I love: creating pictures and creating clothing. 
But enough about that. Lemme show you the basics of how I crafted the flowers. To begin, hit the thrift store or your closet and get yourself some sweaterage. Wool roving and needle felting tools can be picked up at your local craft store. I began by pulling a long thin amount of roving and folding it over my finger as shown on the left. I slipped that off my finger and ended up with the loop on the right.
Lay it onto the sweater...

...and commence stabbing. As you punch the roving, it's fibers sink into and interlock with the sweater. This causes the size of the roving to shrink a bit. That's why the blue flower on the left looks so much smaller than the one I'm punching.

Once finished with one flower pedal, follow the same steps to create the second one. They resemble heart shapes and already have me thinking up a Valentine's Day sweater. Never too early to get a jump start, says me. For the dot in the middle, I used a very small piece of felt that I rolled between my fingers and punched into place.
For the flower stems, I initially used green roving. But I just couldn't get the felt to cooperate. So I discovered a stash of 100% wool yarn in my sewing room (the things I have buried in there!) and decided to try it instead. It works beautifully. In the photo above, I've simply laid the yarn out where I want it to be punched and started stabbing away.
And this is a little what the end result of that looks like. For such things as the flowers with multiple pedals, I followed the same steps as the heart shaped flower. Really, you can create any ole shape with roving. Just use your needle tool to shape the flower, strawberry, leaf, stem, you-name-it as you go.

Wait! This pie needs more whipped cream! By the way, that dip-dyed blouse under my sweater is yet another Anthro-copy that I plan to share with you next week.

Probably my favorite photo from our day out. You can see the back of the collar and the little sprinkle of flowers on my shoulders. Did I tell you I kinda love this sweater? You know what I really love? $198 in my pocket.
Now I'm not gonna lie, this sweater took me ages. Mostly because it was one of those work-on-here-and-there projects. But I'm happy I finished it even if I've only got a matter of weeks to wear it. You'll have to let me know if you've given felting a shot. I'd love to see what you've created!


Read more »