Hey there, buddies! I hope y'all are doing swimmingly. Here in lovely Tennessee, we're in that moody in-between summer/fall phase which makes is impossible to dress without being horribly under/over prepared. Don't believe me? Lemme paint y'all a visual: Today it was 80% rain/80% sunny/99.2% cloudy/chance of sweating your butt off in the sunshine/chance of freezing your butt off in the shade. It's no wonder my sinuses are causing brain swelling. Tho with a brain the size of mine, a lil swelling never hurt nuthin. There's plenty of real estate between these ears o' mine. During one of those moody fall days this weekend, I had the wonderful, super-duper, uber-exciting opportunity to teach a workshop at Nashville's Frist Center for Visual Arts!
That's right, this crazy art teacherin' lady got to teach adult-sized artists my fave craft: needle felting! Our creations were inspired by the Postcards of the Wiener Werstatte which translates to the Vienna Workshop. The Workshop began in the early 1900s and was a means of turning your life into a "total work of art" (sounds fab, right?). Meaning they sold everything you could ever desire as a lovely artistic creation so that your life simply permeated art. The best seller at the time? Postcards! And that's the basis of this incredible exhibit.
My buddy Rosemary Brunton, associate educator for community engagement at the Frist, lead us through the exhibit, filling us in on the history and allowing us time to explore and sketch. When we returned to the studios, this incredible group of art teachers, fiber-arts lovers and workshop-junkies (you know who you are!) were busting with ideas for their needle felted postcards.
That's right, we created needle felted postcards! AND mailed them (more on that shortly). We created these little 4" X 6" masterpieces to tiptoe into the fine art of needle felting. It allowed the participants to watch me give a short demo and explore the medium in anyway they wanted. It was a fun and quick-ish intro for the crew. If you wanna catch a snippet of what they learned, you can check out these videos I filmed a while back that will walk you through the needle felting basics and supplies.
Supplies purchased from Amazon:
* Clover needle felting tool
* Replacement needles, fine
* Roving, variety pack of colors
* Cushion. I prefer the Clover brand bristle brush but you could use foam in a pinch
* Fabric to needle felt on. YOU CAN NEEDLE FELT ON ANYTHING. Seriously. Jersey, acrylic felt, wool felt, wool, cashmere, you name it. Shoot, sometimes even your flesh but that's usually after a glass or three of wine. Which I don't recommend.
Stabby-stabby-stabby. It's seriously a stress reliever!
Exploring on an inexpensive material like acrylic felt or muslin will allow you to really explore the medium without getting hung up on doing it "just right".
These participants did a fine job of really trying out their new craft. I love this spiral!
You can simply use roving in needle felting or you can combine it with yarn like the example on the right. I've only used wool yarn when needle felting but was told that even acrylic yarns would work.
I love the three dimensional quality of this piece!
And this one! This and the one above were created by my art teacher buddies whom I've dubbed my Pensacola Friends! These lovely art teacherin' ladies drove all the way from Pensacola to attend the workshop. They were so sweet and fun, I loved having them!
I can see this being a great exploration of the use of line and shape for older students. This piece is just so happy!
Once the postcards were complete, we wrote messages on card stock and hot glued them to the back. We popped them in the mail...but, sadly, Rosemary informed me today that they were returned to her. She was kind enough to stuff 'em all in envelopes and resend them. Lesson learned...but it was such a great idea, I thought!
Once our practice pieces were complete, we moved on to a larger format work of art. Some participants sketched their design in chalk as I often do. I love using chalk on fabric as it "erases" pretty easily (just look at any sleeve of any sweater of mine!).
Others just dove right in with the roving like this van Gogh's Sunflowers-inspired piece.
Did you know you can needle felt felt to felt? Did you know I can use the word felt in one sentence three times? How does that make you felt, er, feel? I love this piece...just wait til you see it complete!
I loved everyone's unique ideas and hearing about their inspiration. We had such a happy group that loved to share ideas, thoughts, awkward youtube videos (what WAS that hand-held needle-felting tool/vibrator thing?!).
I love the graphic nature of this piece.
And my Pensacola Friends were all about the texture! I love the idea of "yarn painting" with needle felting. I never thought of that!
Text-ure, baby! Love all the feels!
Didn't I tell y'all it was amazing?!
Did I mention that there were art teachers in the house?! This one needle felted pencils onto a pencil case that she hand embroidered. Oh! AND made that wet felted button. WHUUUUT?!
Alright, art history buffs, can you spot the artist-influence behind this tabby-cat piece? If you guessed Georges Rouault, you are correct! I love the stained glass quality of this piece.
Look how painterly this piece turned out?! I love it!
Seriously. I could not have spent my Saturday with a more fun (funner!) bunch. Thank y'all for making my workshop such a blast to teach. And special thanks to Rosemary and the Frist for allowing me to do so!
I mightah told y'all that when I was a kid, I was addicted to attending Vacation Bible Schools. I didn't care what the denomination, all I needed to know was: Will there be Barrel Drink and will there be Macaroni Art?
The school I attended didn't have art class so my only experience in arts -n- craftin' came in the form of a lil Bible learning and a whole lotta popsicle stick art (you shoulda seenmy popsicle stick Noah's Arc, y'all. Best o' Show.) As an adult (if that's what you wanna call me), this translates into me being addicted to taking art classes around town. Luckily for me, our local art museum The Frist always has the best of offerings...even if they forgot to serve Barrel Drank.
The Frist doesn't have a permanent collection and I think that's pure genius because it means no stale art that's been hanging for years. It's an ever-changing canvas of art history, culture and contemporary art that keeps locals like me coming back. One exhibit they currently have is the work of Jaume Plensa (that's his surreal sculpture there) whose work is phe-nom-in-alll. The last class I took at The Frist was the awesome hat making workshop where I made my donut hat! And I'm excited that I'll be leading a workshop at The Frist on needle felting soon. But enough about that, let's talk about these two wild -n- crazy guyzzz:
Meet Nieves Uhl and Chris Cheney, owners of the letterpress and design studio Sawtooth Print Shop! Both met at Hatch Print Show and opened their place about three years ago. Not only do they offer their design services and prints but they also offer classes (guess who is dying to sign up for that?! GUESS). Sadly, as you can tell by the photo above, they are both entirely too serious to be any ounce of fun. Bwaha, I kid! I loved 'em so! I mean, how could I not when what comes out of their studio are masterpieces like this:
You better believe I whipped out my credit card and purchased this beauty. It now hangs proudly in the Masterpiece Gallery in the art room!
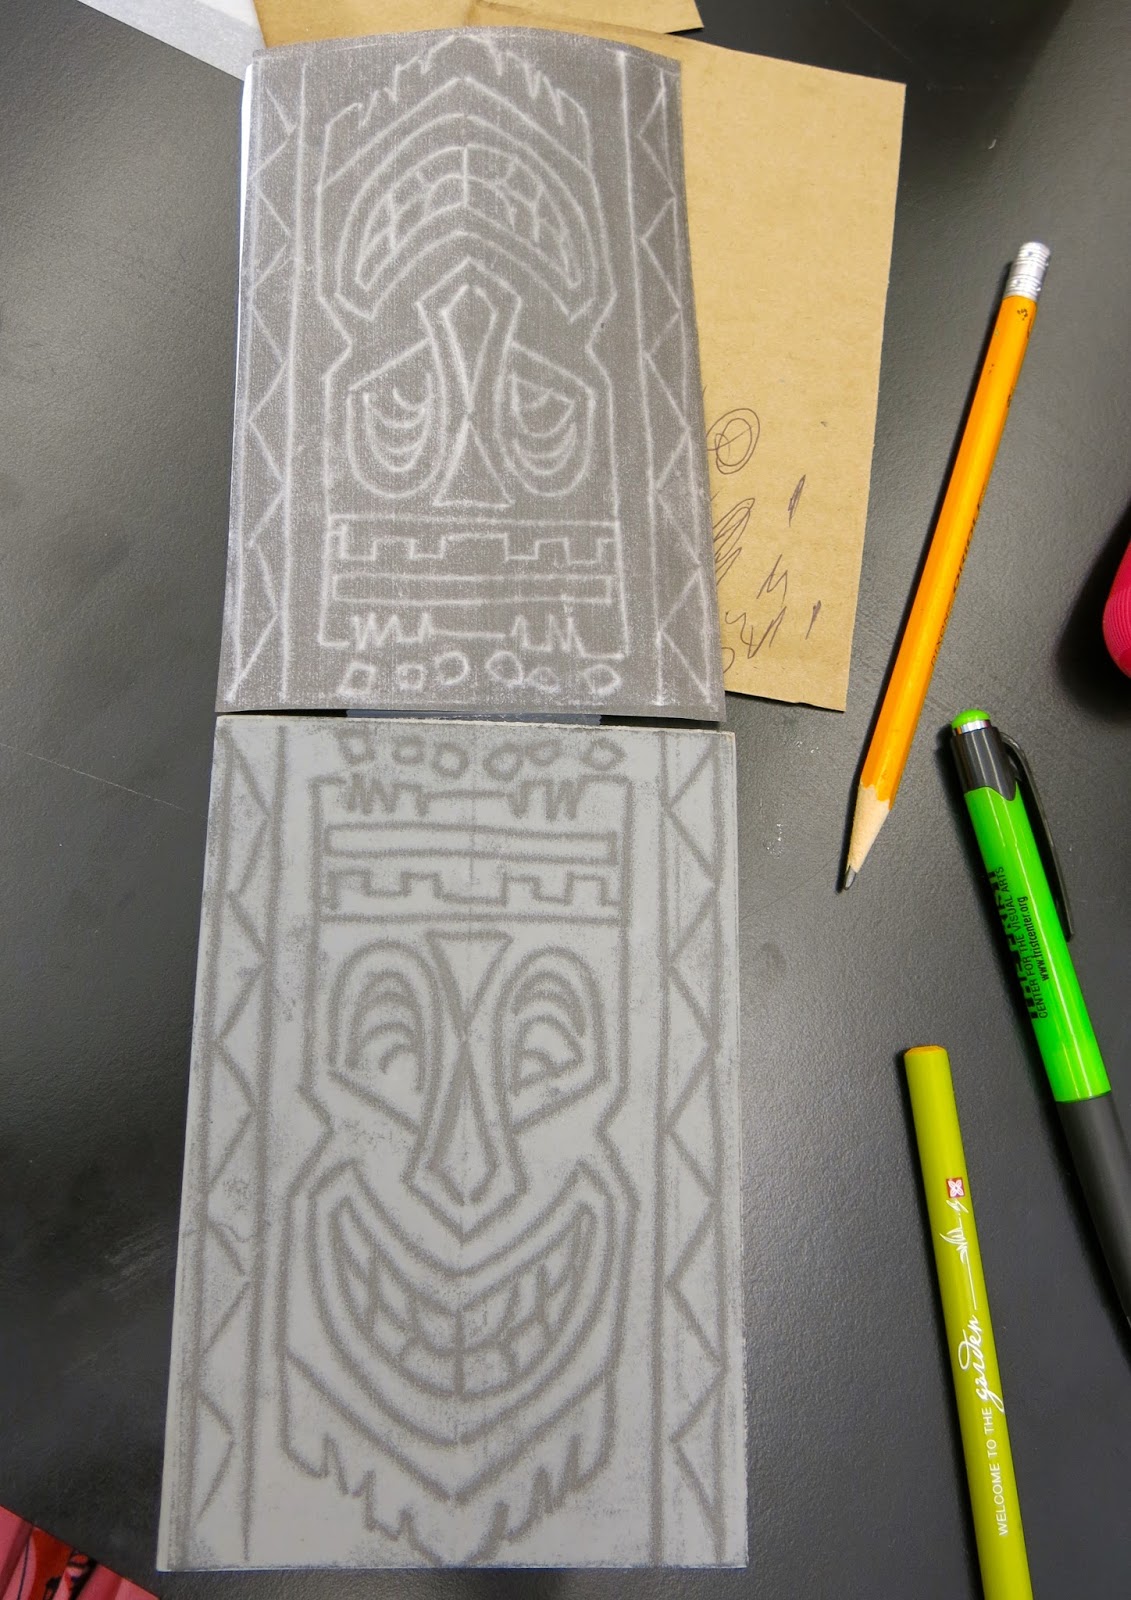
So Chris and Nieves carve on linoleum blocks. Which is pretty hard to do for us newbies. So we worked on Softoleum which was like carving in butter. We began by copying our design onto our blocks.
Graphite paper worked well for this but several attendants found that simply rubbing the back of our pencil design very firmly easily copied the design onto our surface. Who knew? Well, apparently several folks did. One of them NOT being me.
I didn't take printmaking in college (a regret. One of the many.) so my only experience was a woodblock carving print-stint in high school. Which sucked. Wood carving is for beavers, y'all. But this stuff I loved because of the easy which you could carve into it. Not to mention that if you don't carve too deep can you flip it over and carve on the backside! So filling up my virtual shopping cart with these bad boys.
I'm on this Tiki kick. So that was my inspo. I'm dying to print these Tiki blocks onto the bottom of a dress or a skirt kinda like I did here one million years ago.
Tho, I gotta tell ya, I'm not as in love with this block. Hence the reason my virtual shopping cart is loaded down with s'more blocks.
I did treat my paper before printing. Instead of using white paper, I rolled a lil gold and a lil blue onto several sheets before printing my blocks. I wanna host a Tiki Party just so's I can send these out as invites! But what does one DO at a Tiki Party? Aside from drink fancy barrel drinks with umbrellas?
I attended this class with a coupla art teacherin' buddies who made the cutest of prints! Check out my friend Virginia's portrait of her dog and my buddy David's Mickey-inspired print as well as his sailor-themed print of his last name. I have smart artsy friends, y'all.
But, seriously, what made the class so special was our awesome host Rosemary Brunton and our instructors Nieves and Chris! Can't wait til the next class, I'm already signed up (um. Actually, I think it's my class. So, never mind)!


 Did I mention that there were art teachers in the house?! This one needle felted pencils onto a pencil case that she hand embroidered. Oh! AND made that wet felted button. WHUUUUT?!