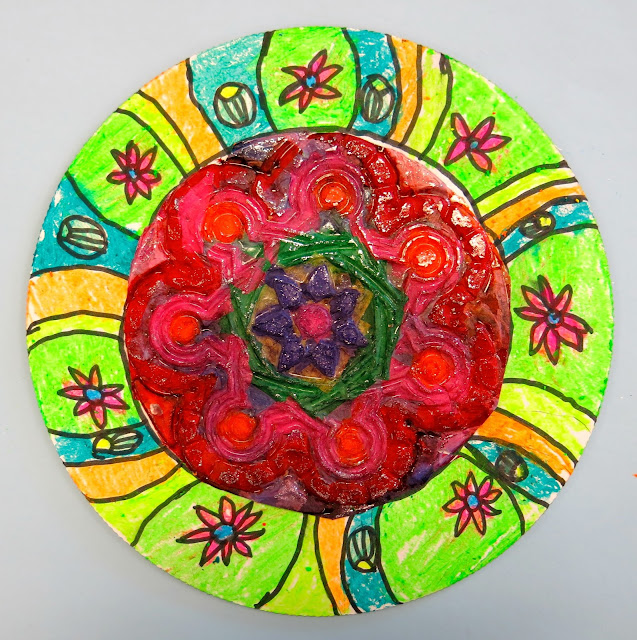
Hey, kids! Today I'm sharing with you the follow up to a lesson I shared a coupla weeks ago: Tissue Paper Relief. Because of the delicate nature of these tissue paper reliefs, I knew the kids would need to back them on something. So, after a review of radial balance and design, as well as the elements of art, we created these colorful backgrounds, added our tissue creations to them and, viola! Third grade successfully created their dot designs for Dot Day!
Aren't they so spectacularly colorful? I swear they practically glow in the dark! In case you missed it, here is the video I created to introduce the kids to radial balance and design as well as the process of making the tissue reliefs:
BIG SHOUT OUT to AOE and Blick for sharing this lesson at the most recent online conference.
Surprisingly, this project was a quick one. We spent one day creating our tissue reliefs which needed a day (or more) to completely dry before popping out.
Once dry, I popped the designs out as they are pretty delicate and I didn't want the kids to accidentally tear them. The following art class, they were given 10" cardboard rounds. They traced their tissue relief in pencil and then created a radial design in black marker.
I reminded them to keep their designs big because they would be coloring with these bad boys:
So I'm a sucker for all things fluorescent. And so are the kids. I love these Gallery brand oil pastels which you can find in most of your art supply catalogs and Amazon.
Creating and coloring the design took them just under an hour. Enough time to attach our tissue reliefs to the center and have them ready for a display in the hall!
What I love about this project is that it reinforced our study of radial balance...
Gave us the chance to work with a variety of art supplies...
And create something really cool! Definitely a project I see myself teaching again in the future.
I'm not usually a repeat offender when it comes to art projects but for this one, I might have to make an exception.
I know several of you purchased the rubbing plates after hearing about it from AOE. I'd love to see where you take this project!
Until then, have a super bright week, y'all!

Read more »
Aren't they so spectacularly colorful? I swear they practically glow in the dark! In case you missed it, here is the video I created to introduce the kids to radial balance and design as well as the process of making the tissue reliefs:
Surprisingly, this project was a quick one. We spent one day creating our tissue reliefs which needed a day (or more) to completely dry before popping out.
Once dry, I popped the designs out as they are pretty delicate and I didn't want the kids to accidentally tear them. The following art class, they were given 10" cardboard rounds. They traced their tissue relief in pencil and then created a radial design in black marker.
I reminded them to keep their designs big because they would be coloring with these bad boys:
So I'm a sucker for all things fluorescent. And so are the kids. I love these Gallery brand oil pastels which you can find in most of your art supply catalogs and Amazon.
Creating and coloring the design took them just under an hour. Enough time to attach our tissue reliefs to the center and have them ready for a display in the hall!
What I love about this project is that it reinforced our study of radial balance...
Gave us the chance to work with a variety of art supplies...
And create something really cool! Definitely a project I see myself teaching again in the future.
I'm not usually a repeat offender when it comes to art projects but for this one, I might have to make an exception.
I know several of you purchased the rubbing plates after hearing about it from AOE. I'd love to see where you take this project!
Until then, have a super bright week, y'all!


