Hey there, friends! It's that time of year where the days might be cold and a little gloomy but the art room can be a bright and colorful place...especially with these projects!
 If you are short on time or are uncertain if your kindergarteners won't accidently decapitate their snowman in the cutting out process (it happens) then you could...simply have students decorate the background! This early finisher made a second snowman and just added spots of color for snow. So do what works! Save your sanity!
Making snowflakes is always fun but have you ever tried EMBOSSED snowflakes?! You can check out how we did these here!
Read more »
I thought I'd round up some of my very favorite winter art lessons that are (totally free!) kid tested and approved and share them with you. You are welcome to use them in your art making world (although I do not grant my permission for any of these lessons to be repackaged and sold on Teachers Pay Teachers). Nearly all of these lessons come with a video for you and your artists and some come with free downloadable drawing sheets. So be sure and follow the link to the blog post.
Without any further chattin', let's dive in!
Kicking things off with this lesson of wintery penguins from my first grade artists!
This is the perfect Back to School after winter break lesson as it focuses on a review of LINE and PAINTBRUSH CONTROL. Of course, to kick things off for that, you might find my books Larry the Line and The Paintbrush Ballerina very handy!
This is the perfect Back to School after winter break lesson as it focuses on a review of LINE and PAINTBRUSH CONTROL. Of course, to kick things off for that, you might find my books Larry the Line and The Paintbrush Ballerina very handy!
Both books are rhyming books which make them super fun to read. Larry the Line will introduce your artists to the names of lines and ways to remember them and there is a free line guide to be shared with students in the back. The Paintbrush Ballerina has a strong focus on how to use, handle and care for a paintbrush. I created a ton of free downloads to accompany that book and you can find them here and here!
Once line and brush practice is complete, early finishers practice their penguin drawing on dry erase boards. The following glass, we dive into large paper and draw with our beloved bingo dauber! If you have not used them yet in your art room, here's more details!
Chalk was used (sparingly!) to add a little shadow and color to these cuties! From there, we cut them out and added them to the spiral line painted backgrounds.
Chalk was used (sparingly!) to add a little shadow and color to these cuties! From there, we cut them out and added them to the spiral line painted backgrounds.
Now this kindergarten snowman lesson was very similar in the lesson format! We reviewed lines and painting and created the background. We practiced drawing snowmen and then created our own with an ink filled bingo dauber. Then we cut then out and attached to the background!

If you do have some early finishers who are looking to practice their snowman drawing skills then I might have a fun game for y'all! This one is FREE WITH DOWNLOADS and I promise your students will love it. This works for all early finishers so be sure and have it on hand for your artists as they work.
Looking for a little something that would serve as an in-between project? Maybe a short lesson that is sure to yield big results? This winter pup and kitten lesson was a kid favorite! Each one was so cute and the artists just follow along drawing with me in the video! Check it out here.
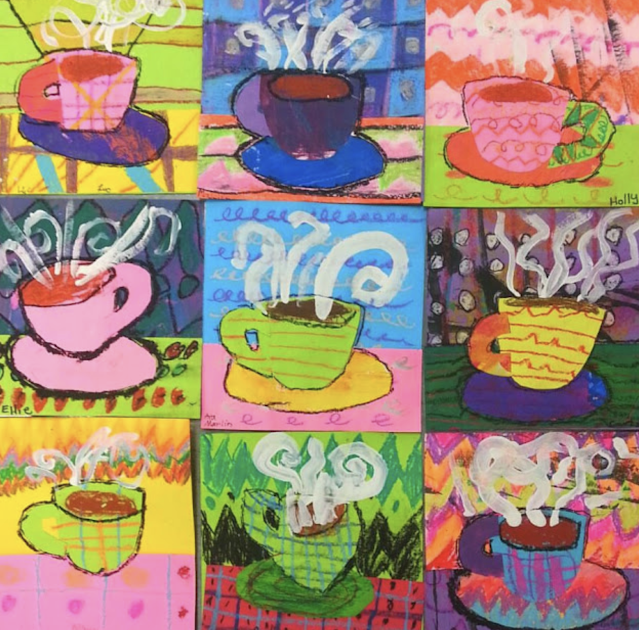
After winter break is usually when I start hyping myself up for upcoming clay projects! I definitely don't do those right after a break...I like to ease back into a routine. So to get the kids excited about clay and the annual Clay Mug Lesson, we create these big ole hot chocolate paintings! Of course, we use our ink-filled dauber. For color, I love to use neon oil pastels and liquid watercolor.
Looking for a quick collage lesson? This one is perfect! And we created them in a smaller format (I think it was 6-8" squares?) so we were able to use up paper from the scrap bin. This is a great lesson to remind students on how to use their scissors and glue too! Need a book about that? I might be able to help...
I wrote Scissors, Glue and YOU! to help all artists learn to use this supplies without waste or, worse, injury! It's another fun rhyming book that features Larry (from Larry the Line) and Alfred! Kids love to see these two in art class. You can check it out here.
Speaking of collage...here's one I do with kindergarten every year!
If you do decide to venture into the clay mug lesson, I've got ALL of my tips and tricks for you! I did this with my whole school for several years and they LOVED it. It was an outrageous hit and I think I figured out the best way to go about teaching it. You can check out all the details here!
If you do decide to venture into the clay mug lesson, I've got ALL of my tips and tricks for you! I did this with my whole school for several years and they LOVED it. It was an outrageous hit and I think I figured out the best way to go about teaching it. You can check out all the details here!
A lesson that I love to do each year with my third grade artists is this one! We used to create these pieces on cardboard pizza rounds until I convinced my friends over at Prang to create ROUND PAPER! You can now buy it here.
Speaking of round paper...that brings me to all of the snow globe lessons I've created! Turns out...I've made a lot! This lesson was designed for my fourth grade students. They loved getting detailed with all of the buildings for their snow gloves! Lesson here.
Because we explored MANY concepts in this lesson, it was a long one! So for some shorter snow globe projects...
Let's start here! This one is also great for a sub because I have a free video as well as two free downloads to go with this lesson!
Okay, question: are Gingerbread or Candy Houses JUST for the holidays?! If your answer is no then add THIS fun lesson to the mix!
Did I mention that there's a free download?!
Did I mention that there's a free download?!
I don't know about you, but I love to sneak in a short lesson after a long one! So...if your students have just wrapped up a big project, they may enjoy this two day art project for kids of all ages!
Learning to draw 3-D is always a hit with the kids!
Learning to draw 3-D is always a hit with the kids!
Just when you thought this blog post was done...I have more! Here's a rapid fire of all the other winter themed lessons I have for you for free!
This selfie with printmaking thrown into the mix. My second graders loved this one!
I know chalk can be a bit of a mess and that's a big reason so many of us steer clear but...would you look at these beauties by my fourth grade? Lesson details here!
Looking to get those kids out of their seats and work on a large scale project together? Then you might want to check out the details of these big and beautiful beast!Making snowflakes is always fun but have you ever tried EMBOSSED snowflakes?! You can check out how we did these here!
AND for those of you that are feeling ambitious, why not try tree weaving on for size?! You can see the details here!


