Showing posts sorted by relevance for query art show. Sort by date Show all posts

Tuesday, May 23, 2017

In the Art Room: Art Show 2017, 2-D Displays

 I recently shared with y'all the 3-Dimensional portion of our art show...today I thought I'd showcase the 2-Dimensional side. But before I have to do that, I must give a HUGE virtual high five and hug to Molly, Donna, Lori, Terri, Paula, Camilla and the rest of the crew for hanging EVERYTHING that you see in these photos. Without moms like these, there would not be an art show. For them, my young artists and I are forever thankful!

Now, let's take a tour of the show!
Almost every project you see here and in the video can be found on my blog our my YouTube channel. Feel free to use in your art teacherin' world. A shout out is always appreciated. 

In this blog post, I thought I'd also answer some frequently asked art show questions:
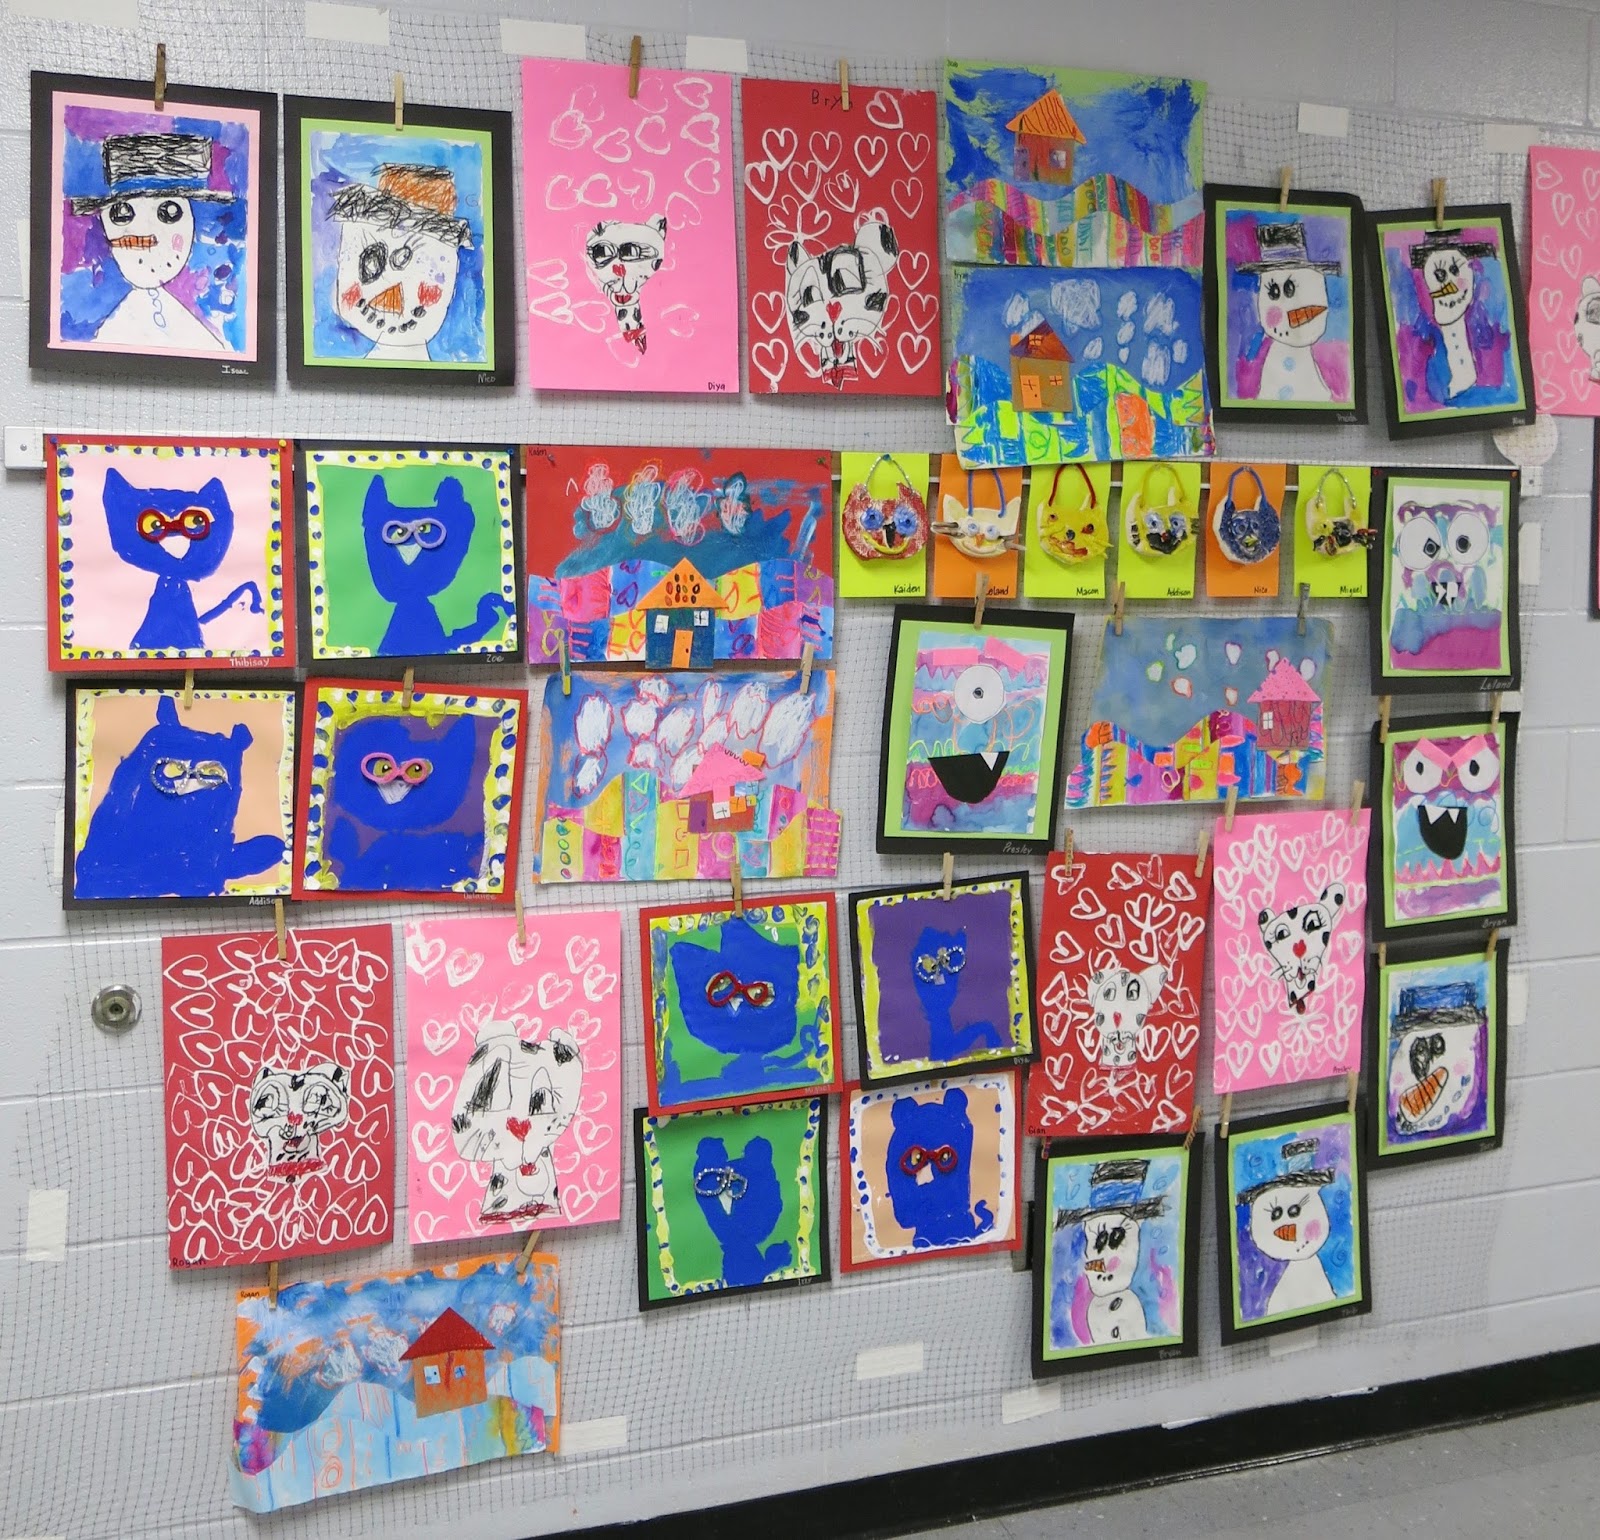
Kindergarten displays. I love how fun and funny their artwork is. It always makes me smile to see what they create. All these projects can be found right here on my blog. Just use the search bar. 

Do you hang everything that the kids have created all year? Yes. Everything. My room is very big (it used to be the school library) so storage is not an issue...staying organized, however, is. It's just not my nature to be a Lady of Organization. And I'm cool with that...but it is a pain when it's art show preppin' time! "Where did I put Mrs. So-in-So's classes art?!" Yeah. That may happen multiple times during art show season. 
 Kindergarten selfies and line monsters.

How is your artwork hung? We struggled for YEARS finding something that works. We use deer mesh adhered to the wall with 3M's Gaffer's Tape. About three weeks prior to the art show, the moms begin hanging the mesh which we purchase off Amazon. We try to leave it up from one year to the next but sometimes it gets damaged. The teachers use it throughout the year to display the kids' work. Here's a little more about that:
We've used this method for the last three years and there is no going back, we love it! And the artwork actually stays up...which, if you are in a building with cinder blocks, you know that is no easy feat. 
 With this much art, we have to display it "salon style" with art from floor to ceiling!

How do you get volunteers? The moms I have are AMAZING! In fact, my mom-in-charge this year doesn't even have a child at my school anymore! She's just so stinkin' incredible and good at what she does, she came back for more. Honestly, just reaching out to the room moms and requesting that they contact other parents is the best way if you've never used volunteers before. My mom helpers came in nearly every day for three weeks solid to make this magic happen. Not only did they hang artwork but they also framed, matted and did the thousand other small tasks that goes into the making of an art show this big. 
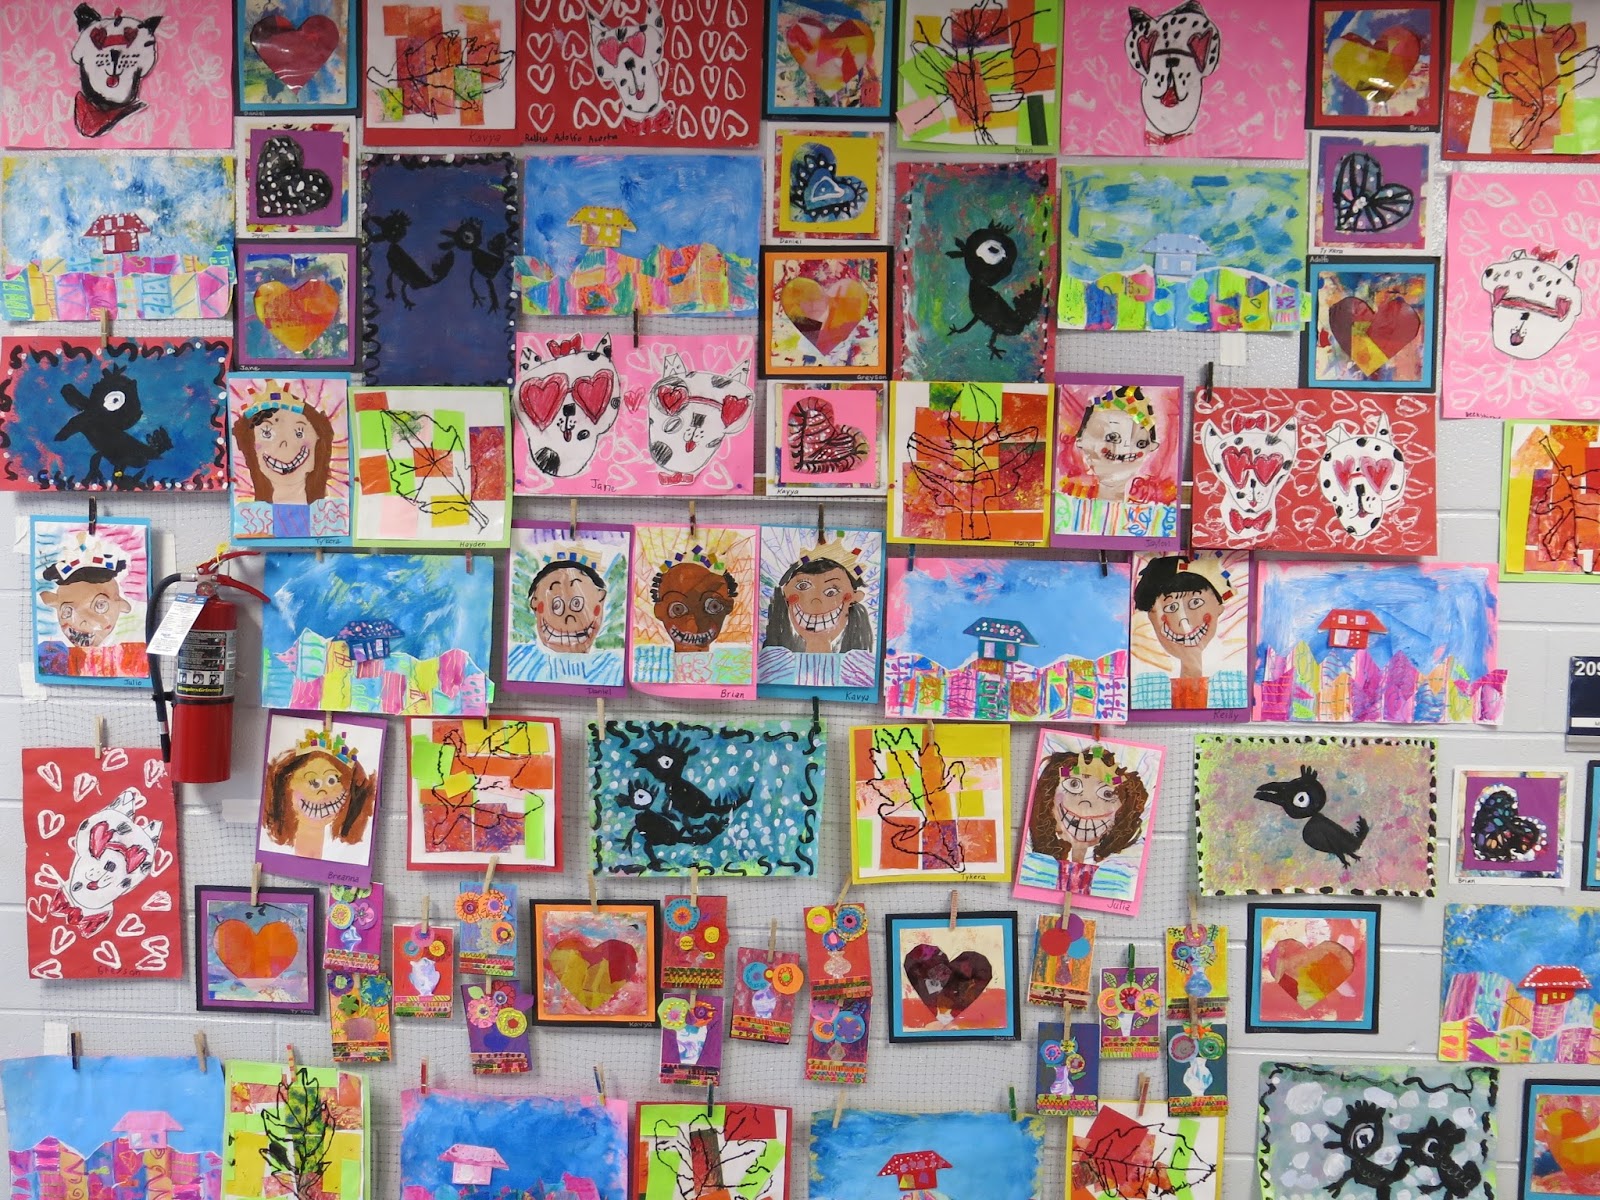
 First grade work...the Bebo birds are a fave of mine. 

Is your art show a fundraiser? I did two art shows this year. In the winter, I used Artome which is a fundraiser and I LOVED that experience as it was super simple and raised a good amount for our art program. Our spring show is not usually a fundraiser although we have taken donations for the local animal and homeless shelters before, one time raising $1200!
 The first grade had so much work! They flew through their projects this year. 
My mom helpers were ninjas at hanging artwork in hard-to-hang places, y'all. 

How do you get people to come to your art show? The art show at my school was established before I got there. It's a tradition at my school...one that I try to make bigger and better every year. Not only is it an art show, but it is also an ice cream social with free ice cream served up by our fourth graders in the school cafeteria. Often times we'll also have a book fair on the same night to bring in even more folks. We always have a huge turnout.
 Second grade created some of my favorite pieces this year. I am loving the weavings, the hearts and the rainbow books!
How do you manage your time to get everything done? I'm the worst time manager, y'all. Knowing this, I try to start early. After winter break, I try to get myself into art show mode by sticking around after school, framing pieces and gathering up my thoughts on what our theme will be. After spring break, we dive in to clay with that theme. Once clay is complete in March, April becomes the crunch month for the show.
Why do you hang up everything from everyone? We do a couple of other art shows in the community that showcases a handful of kiddos. This is a great self-esteem booster...for that small amount of kids. I always worry about the other kids who don't have artwork featured. I was never a kid who got picked for such things...and it always left me with a sour taste in my mouth. I carry that with me as an adult. I never want a child to feel like their creative work is not good enough. I want to celebrate all of the kids and all of their efforts...which is why I do my art shows like this. It's an INSANE amount of work. I'm not even gonna lie: I work on Sundays and put in many 12 hour days. But, in the end, it's so worth it. 
 I love having displays in this big bank of windows!
Do you repeat your projects or do new ones each year? Honestly, I like a challenge and I like change. I may repeat a process, like the marker prints for those floating leaves you see below, but I rarely repeat a project completely. You learn something each time you teach a lesson...what worked, what didn't, what can be improved upon, added or taken away. I also love learning new ideas and methods from other art teachers and I get excited to share them with my students. So, no. I don't usually repeat projects which means much more work for me but it does keep things interesting and the art shows every changing. 
Who takes the artwork down? So parents hang it up right outside the classroom teacher's doors. I do that so the kids can easily find their work. This also makes taken the art down a lot easier. A few days after the art show, the teachers take down the artwork during our field day and various other activity days that seem to fill the end of the school year. 
 How do you insure the artwork gets home safely? The fabulous assistants at my school create a paper portfolios for each child in our school. They start right after spring break and fold large sheets of bulletin board paper in half and staple the edge. Many teachers have the kids decorate their portfolios while they take their work down. I love how dedicated the teachers and assistants are to making sure the kids' work gets home safely. 
 I tried several new techniques with my third graders this year and they really rocked it. 
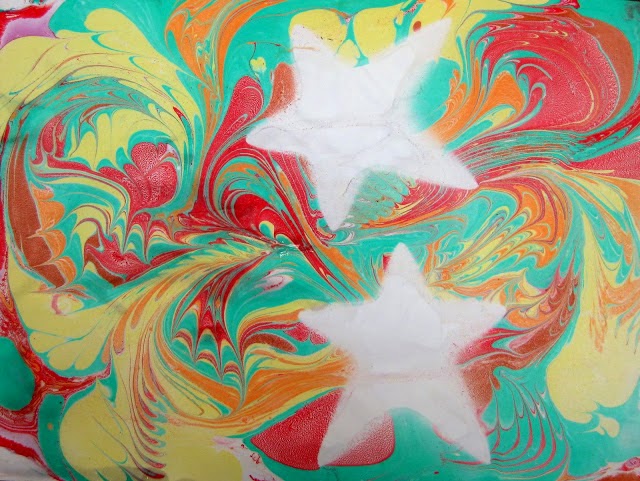
 String art was something I'd only done with my fourth graders previously. This year, I did it with third grade and they loved it. 
 Don't the kids get upset that they have to wait all year to take their artwork home? Because we've always done end of the year art shows, the kids know that they have to wait to take their work home. One thing the kids are always excited to take home are their clay projects. That's why I wait until after spring to do those projects: so the kids won't have to wait as long to take them home! It also makes storing those bigger pieces a lot easier knowing that I only have to find a place for them for about a month...not longer.
 Seeing these fourth grade works of art makes me sad...I'm miss these artists!
 At the end of the school year, even though my kids have worked all year, I only have a handful of works of art from them. Why is that?! I have found this to definitely be the case with my third and fourth grade artists. The answer is easy: they do projects that are more detailed and time consuming! You are teaching them so many techniques in one project...it can take a while. Also, my fourth graders had three 3-D pieces on display this year: sewn and stuffed monsters, plaster candy hearts and clay bobble heads. All of those took many weeks to complete leaving us with less time for 2-D works of art. It's okay! As long as your artists are creating and having fun, you are on the right track. 
I hope you enjoyed the art show! Another one in the books. Love to hear about your art shows in the comments, y'all. 

 photo signature_zpsd10b3273.png

Sunday, May 20, 2018

In the Art Room: 2017-18 Art Show, 3D Displays, Part 1

In case you  haven't noticed, things have been a lil quiet around this here blog. It's not because I've not been busy...in fact, it's quite the opposite. I've been so busy with art show prepping (and other life stuff) that I found myself unable to keep up with my usual three posts a week. This has NEVER happened before...and I think that's because this was our biggest and most time-consuming art show yet! 
 For our school-wide art show, we showcase EVERY piece of art that EVERY student has created all year. What that means is that the halls are filled from floor to ceiling with two-dimensional pieces. I'll be sharing that portion of the art show (complete with video tour!) in an upcoming blog post. Today, I thought I'd take you on a tour of the three-dimensional displays of the art show that I showcase in the art room. Here's a tour:
Yes, I know, my art room is very large! It used to be the school library before a remodel that happened well before my time. Why do you think I wanted to be at this school so badly?! I'm fortunate that my administration gives me the day of the art show "off" to set up my art room like this. My specials team also helped me out by taking some of my classes to allow extra set up time. You never realize just how long all of this takes until you start pouring weeks, days and hours in to it!
 I thought I'd give you a closer look at all of the projects and share links to videos and/or blog posts in case you'd like more details. We'll start with this fun and easy kindergarten project!
 All of our clay projects were created with Amaco's low fire cone 06 clay. We also used Amaco's Teacher's Palette Glaze, which we loved. The colors are so vibrant and shiny. The art class following our clay project, we worked with the three primary colors of Crayola's Model Magic Clay. The kids had to create the secondary colors and make them into a bead of rainbows by adding them to skewer sticks. 
From there, we used pipe cleaners to add them to our plaques with a little pony bead in between!
 The art show 3D displays were set up in four parts: kindergarten plaques, the superhero displays, the pizza pillows and, my favorite, the Art Supply Store! 
After learning about the artist Lucy Sparrow, I had each of my first through 4th grade classes create an art supply. My third graders and some of my second graders created these crayons. Complete lesson and video here!
 One fourth grade class created these glue bottles and also made little pencils. This project was so easy, it was kinda crazy! Here's the lesson with video. 

 Not only did we create these glue bottle sculptures but we also had to come up with a name for them! These were a hit at the show.
 First grade and the class of fourth who made the glue bottles created these cute little pencils! This is an easy and quick project that you can find more details on here. 
A couple of my other fourth grade classes created these tubes of paint! I'm telling you, creating these art supplies was not only fun but a great lesson on recycling as most of them were made with a toilet or paper towel tube base. You can find out more about this project here. 
 One project I never got around to blogging about were the making of these second grade scissors and glue sticks. These were super fun and easy to make...my favorite part was reading what the kids decided to call their "product" and price it. 
And that wraps up our art supply store! Join me tomorrow and I'll take you on tour of the rest of the 3D displays of our art show...or watch the video for the complete tour. 
 photo signature_zpsd10b3273.png

Wednesday, May 11, 2016

Art Teacherin 101: Episode 2

Hey, y'all! Thank you so much for your positive response to Art Teacherin' 101 (notice how I've already failed to even remember the name of this series in the title above. Tired brain, much?). I'm excited to share with you my TOP THREE TIPS to art show success: deer mesh and Gaffer's tape, amazing parent volunteers and a day off the day of the art show! Take a listen, I promise it's short and sweet unlike me...
I will share with you two (yes, TWO) blog posts about our show with video tour. It's a big one, y'all! You'll see the 2-D show as well as our 1950's diner with our 3-D food. Until then, here's just a couple of the things mentioned in the clip:

Deer mesh and Gaffer's Tape. Both can be purchased from Amazon. About four rolls were used outside of each classroom. My hope is that the classroom teachers leave the mesh up so that 1. We don't have to rehang and 2. So they can utilize it when it's not Art Show Season. Last year it pretty much got trashed due to the annoying paperclip tangling. I'm confident that this year the clothes pins will prove to be much better. The Gaffer's tape isn't cheap...but it's the one thing that we've found to actually adhere to those annoying painted concrete walls. It's holding the mesh to the wall as well as carrying the weight of the artwork. The parents do a fabulous job of hiding the tape behind artwork. You'll also need to invest in some Blue Dapp that can anchor any fly away corners of art. 
Here's a rather fuzzy view pulled from my instagrammerz. More photos to come...but I did want to give you a sneak peak of first grade. In the clip, I was standing in front of just ONE portion of ONE second grade class. Like I said, we hang everything that every kid has made. It's wall to wall wonderment, y'all! 

I'm so fortunate to have the best administration that not only supports the art program but the art show as well! Having a day to set up clay in my room while the kids are working on other art activities with a sub in another location is super fab. I'd be a hot mess without that extra time to finalize art show displays. 

AND, most importantly, parent volunteers. I have the best...THE BEST...and the art show would not be hung without them. Special thanks to them all with a big hug to Molly, Terri and Donna. Y'all are super stars!

So, what are your fave art show tips? For more, you can visit this blog post of my other Top Ten Tips to Putting Together an Amazing Art Show!

 photo signature_zpsd10b3273.png

Wednesday, June 4, 2014

In the Art Room: The Art Show, Part 2

 It's kinda funny to think that just a couple weeks ago, my school's hallways looked like this. Of course, now that school's out, the halls resemble some sort of institution (which, let's be honest, those last couple of weeks, we coulda all be institutionalized. The kids, the teachers, shoot even the class pets, were all a wee bit bonkers.) As I mentioned in my last art show post, all artwork that all students have created all year is hung for this show which is like hundreds of masterpieces. The World's Most Amazing Parental Volunteers hang everie-thang, can you believe that? I'm a lucky girl, this I know.

In my last art show post, I shared with ya'll the work of the wee ones in kindergarten through 2nd grade. I've yet to share with you the clay projects that were also displayed at the art show because I'm slowly putting together the how-to posts on those babies. When that's done, I'll wrap up this art show series. Oh! And if you wanna see some art shows of the past, you can see last year's show here and here.

And now, without further jibber-jabber, I present to you the masterpieces of 3rd and 4th grade with loads of linky-loos to lessons...
 For the art show, the parent volunteers hang the work outside the classroom. I don't give any directions on how to hang...just cross your fingers and use enough sticky tack to make it stay. I love how each volunteer hangs the work differently.
 In third grade, we started out the year learning about Norway and Vikings. My amazing student teacher Rebecca had just returned from a trip to Norway and this was a lesson created by her (and influenced by Painted Paper!). I wrote up a blog post all about Rebecca's adventures and this lesson here.
 My goal for this past school year was to create a mural with each grade level. I only partially achieved that goal (my younger kiddos did a collaborative mural to be shared in an upcoming post). My 3rd grade created a Magritte-inspired mural that proved to be the art project that just kept on giving. You can see examples of that in the work at the bottom of this photo.
 Here's one part of the Magritte project with tissue paper collaged landscape backgrounds.

This enormous beast of a mural hangs right outside of my art room. I think it's there to stay a while, I love seeing it when I walk out of my art room. The details of creating this mural are here.
 The paper we used to create the birds for the mural and our collage landscapes were so cool we decided to use them in yet another Magritte-y project. Final installment of Magritte series here.

 After all that Viking and Magritte-ness, I introduced the kids to the world of Asian art with a heavy dose of Ming vases and cherry blossom trees.
 This was a super fun lesson that incorporated so many thing. A review of watercolor techniques, symmetrical vase design, drawing a narrative, shading/shadow making and new ink painting methods. Full lesson here.

 
Both 3rd and 4th grade were introduced to Chinese calligraphy. We learned to grind out own ink and paint with sumi-e bamboo brushes. This was a big hit and we seriously painted tons of these characters. After a couple of classes doing that, the kids picked their fave to mount, label and frame.
 My 4th grade this year was like a dream group. We had such a good thing going, as they loved being in art as much as I did having them. Which was a bit of a problem as I was therefore always late sending them back to class. Seeing them go at the end of this school year was very hard for me, sniff. I'll miss them so much!
They kicked off the start of this school year creating this huge mural for a canned food drive. Full details here.
 I think this Viking project was one of my favorite lessons this year. I simply love all the watercolor techniques that the kids incorporated into their work. I will definitely be doing a redo of this here lesson in the future (I have a bad habit of doing a lesson only once as I get a little bored with repeats).
 Again, another lesson with many layers of stuff taught. It's like an onion, this project. Without the onion breath.
 These guys also did some Chinese calligraphy. However, theirs included a hanger with Sculptey beads on the end of a wooden dowel and a red stamp.
 Like with the wee ones, I also have these kids write an artist biography. These are slightly different though in that they are to also have friends add comments about them. I'll share more details about those bios in an upcoming post (I keep saying that, I hope I can keep up with all this "up-coming" posting!).
 When learning about Asia, we did some Suminigashi which is Japanese paper marbling. Details here.
 When I ran outta paper marbling supplies mid-way through the lesson (don't you hate that?! Argh!) I did a quick switch to chalk marbling...which I kinda liked even better!
 With those stars we used in the chalk stenciling, we created some fun narrative collages.
 Near the end of the school year, we put our sumi-e painting techniques to good use with these paintings. Students could create either bamboo, cherry blossom or pine trees after practicing on newsprint.
 I've not written up a lesson on this project yet...it's on my summertime to-do.
 A favorite was adding the tissue paper leaves or flowers. They just couldn't stop adding these, loved 'em so!
 Of course, in my absence at NAEA, the kids drew these adorable Chinese pandas. When I returned, they put their watercolor painting skills to work on the background. Lesson here.
 The day before the art show, in 30 minutes, the kids created these sweet things. On the night of the art show, we also host an ice cream social. The kids painted these for the occasion and I managed to get them up the day of the show! This was seriously the easiest 30 minute lesson ever. I'll be sharing the details in an upcoming post,

And there you have it, ya'll! The 2014 Art Show! Stay tuned for the final installment of the show which will include kid clay projects. Until then!