Sunday, July 10, 2016

Art Scouts, Tennessee Camp 2016

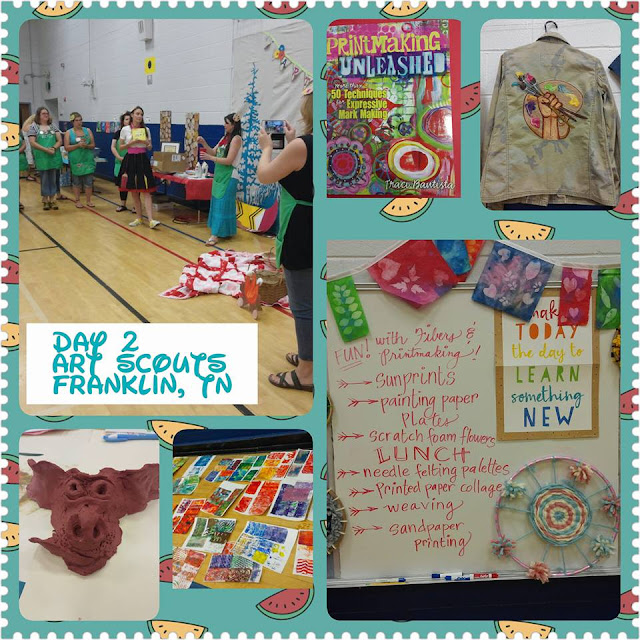
Well, hello there, strangers! My sincerest apologies for how quiet it has been on this here blog over the last week (let's be honest: you enjoyed the peace) but I've been super duper busy with my buddies Jennifer, Laura and Ginger getting ready for the Tennessee Camp of Art Scouts
Laura and Ginger arrived in town on Wednesday afternoon from Ohio. Jen and I  had just enough time to show them around our favorite place: Franklin, Tennessee. Franklin is a small town with a big history just 15 minutes south of Nashville. The downtown has a lovely Mayberry-esque vibe. After a stroll up and down Main Street, we took them to a local fave, Pucketts Grocery and Restaurant. The food was delish but the best part of the meal was when we walked in, Jen's husband Miguel and two sweet daughters were there. What a happy surprise! It was so fun to pull up a table and chairs to join them.
On Thursday morning, bright and early and fueled up on coffee, we began to set up Camp for our Scouts. Thankfully, we had the help of our art teacherin' friends Stephanie Preston and Jennifer Staples to get ready for the next couple of days. Those two girls were our right hand gals during Scouts and we just can't thank them enough for all they did for us and the Troops. Thank you, sweet friends! Also, a big shout out to my buddy Mr. Joe for hanging out with a bunch of wild and crazy art teachers for a couple of days. 
Friday morning, folks started to arrive and, after breakfast, chatting and a super secret Art Scout ceremony (sorry, y'all. Must be present to get the scoop), we dove right into the art of making big messes!
I have to tell you, we simply have the nicest folks attend Art Scouts. We had teachers from Michigan, Indiana, Illinois, California, Florida, Alabama, Virginia, the Carolinas, Texas (and I know I'm even forgetting some)...we were blown away! These sweet, kind and dedicated art teachers are a gift to their students, faculty and staff. 
 Not to mention, some seriously talented (and funny!) artists.
I mean, when is the last time you saw folks having this much fun at a professional development? And we had just as much of a blast hosting them. We were so lucky!
We had a little over 50 Scouts in attendance. Laura and Ginger lead 25 Scouts on their quest to earn their painting and clay badges in my art room. They created over three clay projects and multiple painted paper pieces during their first day with Troop Leaders Laura and Ginger. 
Now, y'all know that Laura is the master of all things painted paper and collage. Having the chance to learn her approach is so much fun...and I speak from experience. I had that opportunity at Tennessee Arts Academy last year. We've been friends long before that. I love and respect what she does for her students and the art education community. Not to mention, she's funny as all get out! 
 
 I loved the variety of creations that I was able to sneak a peak of when I popped down to my art room.

Ginger had folks working with Amaco's air dry clays because it has a very similar texture as kiln fire clay. Ginger is such a jack of all trades but, unlike me, she's a master of all. When we were brainstorming ideas on what badges our Scouts would earn and what we'd like to share, Ginger is so versatile, she could teach it all!  She did such a fab-o job sharing fun clay projects with our Scouts.
I so wanna do this with my students, I know they would have a blast!
Ginger is also our Mural Maven (if you've not seen the time lapsed videos of her students painting murals, go here). The Scouts worked on this scene of the Smoky Mountains that Ginger drew. This helped every understand her simply and impactful method of teaching mural painting to children.
I love how the colors pop on that black paper!
Back in our territory, Jen and I shared everything we could pack in on fibers and printmaking. Jennifer shared such a fun assortment of printmaking projects that are not your usual carve-into-block type of thing. What I love about what Jen shares is that she brings her bright and cheery personality to each project. The sunny sun prints and the colorful wax crayon prints are a true reflection of how colorful the projects are which she shares with her students. 
Because Jen has 30 minute art classes with her kindergarten through fourth grade kids, she was able to share how she breaks her projects down into bite sized bits. She also enlightened us to some fast and easy clean up tips!

 Marker prints were also thrown into the mix!
 We also had a big time exploring Gelli Arts printing plates!
Those printing plates are so versatile and fun. I mean, check out these effects!
These look fabulous just as they are...however the Scouts turned them into beautiful flower collages.
 Love this orchid collage by Stephanie.
And this one being cut out is fabulous. I love that the Scouts swapped flowers to add variety to their collages. 
Now all y'all know that needle felting is my jam. So when I shared that we'd be taking a stab at it (wink, nudge), the Troops were thrilled. And shocked at just how easy needle felting can be. Check out the cute lil palette hair clips we made!
Because I'm secretly on a mission to have ALL art teachers dress like CRAZY art teachers. 
 We also learned how to do some of my favorite weaving activities, circle loom and tree weaving, to name just a few. 
I always love the variety of paintings created on something as simple as a paper plate.
I mean, I wanna paper my walls in these beauties!
Remember: you can circle loom weave on anything round! Hula Hoops! Embroidery Hoops! CDs! Just make sure you have an odd number of warp threads. 
To earn their fibers and painting badges, our Scouts created three printing projects and three weaving and one felting masterpieces. We were busy, y'all.
 It's been such fun getting to know these new friends of ours. One of my favorite things was seeing all of the fun images shared on Facebook, Instagram and Twitter. Here's a collection of what was shared by our Scouts.
P.S. THAT PENCIL DRESS!! Beth, you know I love that dress, girl!
I love this collage of art teacherin' fashion that Rina created...so glad I made the cut! 
 Painted paper fun!
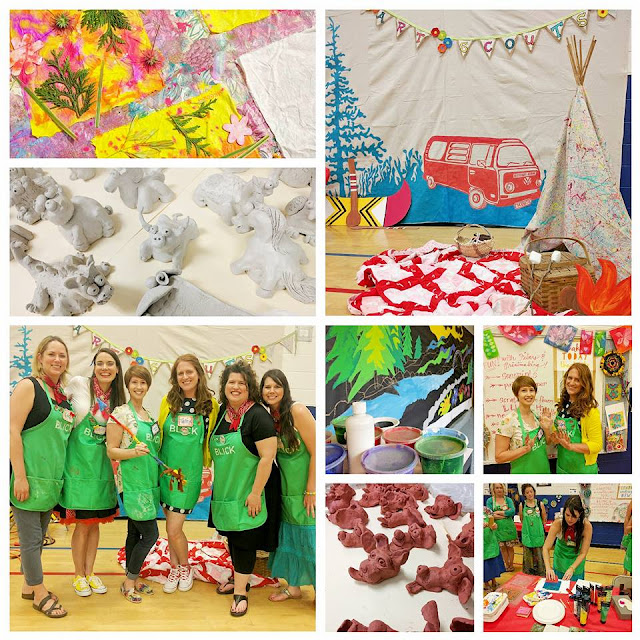
Happy faces, fun projects!
Just one half of the Scouts wearing their needle felting palette hair clips!
I love this photo collage created by Scout Brandi!
We had so much fun sharing out passion of making big messes with little people...with our new best friends, the Art Scouts!
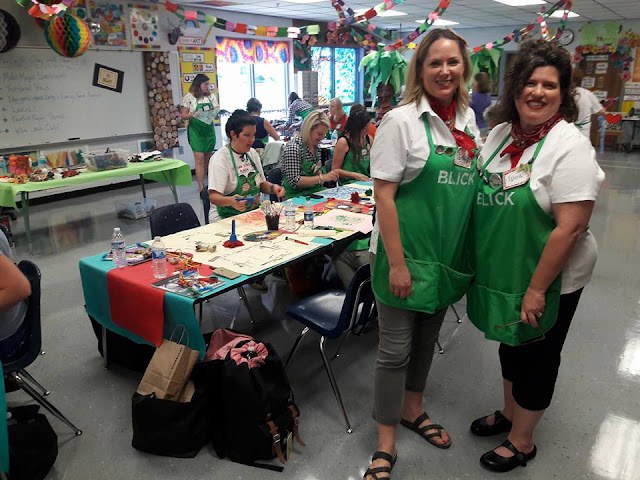
We couldn't have done it without our Ohio friends Ginger and Laura! After our Scouts left Saturday afternoon, we broke down and put our feet up. 
 Because I live just 4 miles from my school, I had the gang over to my place for some dinner and chill time. We're already brainstorming ideas on plans to bring more Art Scouts Camps to our future Troops...and we couldn't be more excited! 
To keep up with us, you can follow us on Instagram! You can also join our Facebook group where you'll find a ton of more images and be able to make inquires and chat with attendees. 

Here's to more art making fun! 


Wednesday, June 29, 2016

Art Teacherin' 101: Episode 9

I recently created this Cursive Writing Dry Erase Board for a couple of reasons: it opens up another activity for my early-finishers and it introduces my students to the fine motorin' fun of cursive handwriting which is no longer apart of our state curriculum. In this Art Teacherin' 101, I'll share with you what options my early finishers have in my art room. I'll also show you how I created this fun and cheap Cursive Writing Dry Erase Board!
Just a little back history about me, I didn't attend an elementary school that offered art. In fact, I didn't have art classes until 7th grade! So my art fix came in the form of those purple ditto sheets with lines and lines of cursive writing practice. I loved getting my kitten mittens on those cool purple worksheets (y'all have to be a person of a certain age to even understand what it is I'm talkin' about!). Sadly, cursive writing was removed from our curriculum a couple of years ago and replaced with keyboarding. KEYBOARDING, Y'ALL. Don't they know the proven benefits to having children write in cursive?! So I'm on an art teacherin' mission to bring it back:
Now, I didn't come up with this idea of cursive writing boards. You can purchase them on several websites. However, the cheapest I've seen them is $6. Picking up those lined boards for a dollar at Target was a great buy. It took me maybe 5 minutes to write up the letters and paint with ModPodge. 
I'll be interested to see how my students take to this new early finisher activity. Many of them are already fascinated with cursive writing and want to learn. I'm kinda thinking that introducing them to calligraphy might be fun as well. I had a set as a kid and it was one of my favorite things. 
What are some of your favorite early finisher activities in your art room? Would you ever give Cursive Writing Dry Erase Boards a go? 

 photo signature_zpsd10b3273.png

Monday, June 27, 2016

What the Art Teacher Wore #166: A Feature in Threads Magazine

A while back, I was contacted by Threads magazine about a feature in their magazine. I was beyond flattered and thrilled that this publication, which is for some super serious sewers, thought of crazy ole self-taught-stitcherin' me. Now that this issue of the magazine is no longer available on newsstands (this article is from their April/May issue), I am free to share it here with y'all. 

Now if some of these photos look familiar that's because they were the ones snapped by Nashville Arts magazine for this article! The other dresses were more current creations. For that reason, I boxed 'em up and shipped 'em to Threads magazine so they could take pictures of them. Because the copy is super small, I thought I'd share with you what Stephani L. Miller and I chatted about here. Enjoy!
Cassie Stephens: An Art Teacher Fashions Fabulous Outfits to Inspire Students

Cassie Stephens learned how to sew just a few years ago. Since then, she's graduated from ready-to-wear refashions to attention-grabbing ensembles that she wears to support her art lessons in the classroom. The Nashville, Tennessee, elementary school teacher's motivations is to encourage her 400 students to get interested and learn about art. She makes outfits inspired by artists and cultures to engage her students' interest and show them how art can be applied to life. Cassie has found that wearing something she's created nearly every day is a great way to start conversations with students and spark their creativity. 

Threads talked to Cassie about using sewing as a classroom tool, and how linking her creativity to her teaching fuels her passion for both.


Threads: What first inspired you to sew something for teaching?

Me: I needed an apron to wear while teaching, but all I could find were aprons for chefs. So I stocked up on fabrics from a thrift store and an old pair of jeans. I sewed an apron that looked like I was wearing a shirt and jeans, and I appliquéd a guitar - complete with faux tuning pegs and strings - across the front. I embroidered a patch onto the jeans that read "Art Rocks". I had so much fun creating it that I started sketching more ideas and attempted to bring them to life. Rock Star Apron, here

Threads: What was the first thing you sewed specifically to support a lesson plan?

Me: In the beginning, I was unsure of my sewing skills, so I eased into it by repurposing thrift store clothing. My first masterpiece-inspired dress was based on Katsushika Hokusai's woodcut print, The Great Wave at Kanagawa. I appliquéd the entire scene onto the front of a thrifted white dress. I likened appliqué to collage, and I feel very comfortable with that medium. My students and colleagues responded so well to that dress that I decided to create more. The Great Wave Dress, here

Threads: How do you plan your lessons and outfits?

Me: Here's how my ADHD-fueled mind works: Planning lessons leads to sketch outfits to accompany the lessons. From there, I start scouring the Web for the perfect fabric or media to make my lesson-inspired outfit. Then, I finish lesson planning. It has become an integral part of my teaching method. When I first began teaching, I focused solely on educating my students. I read every book written. I worked tirelessly on my lessons and in my art room, but I stopped creating. And I became very unhappy and even bitter toward teaching. But when I decided to marry my passion for creating with teaching, I became excited about teaching again. I realized the using my ability to create and educate was what art is all about. I became a whole lot happier when I started to connect as many dots as possible in my teaching and creative lives. I need to create to teach and teach to create.

Threads: How do the students respond to your outfits?

Me: My students are very curious about my clothing. Many of them have never seen a sewing machine and are unaware of the concept of making their own clothing. In their world, clothes come from a store, and how they are created never enters their minds. We have many conversations about how my clothing is made. And they'll often come in with an outfit they've altered based on something wacky I have worn.

Threads: How do you translate an art inspiration into a garment?

Me: When an artist has inspired me to design, I think of what medium would best translate their style. For example, when I sewed my Andy Warhol inspired Cambell's Soup Cans dress (here), I knew appliqué would be the best medium. When I wanted to create a dress featuring Claude Monet's Water Lilies (seen here), I thought needle-felting would best showcase his Impressionist style. Sometimes, I get lucky and find fabric featuring an artist work, like a Piet Mondrian print (here). When that happens, I use that fabric to sew a dress.

Threads: How do you hope your students remember you?

Me: I hope they remember how much I love teaching them. I have a sign in my art room that reads, "My job is to love you." I hope I convey that love by my actions, my lessons and my wacky clothes!

Thanks for reading, y'all! 
 photo signature_zpsd10b3273.png

Wednesday, June 22, 2016

Art Teacherin' 101: Episode 8

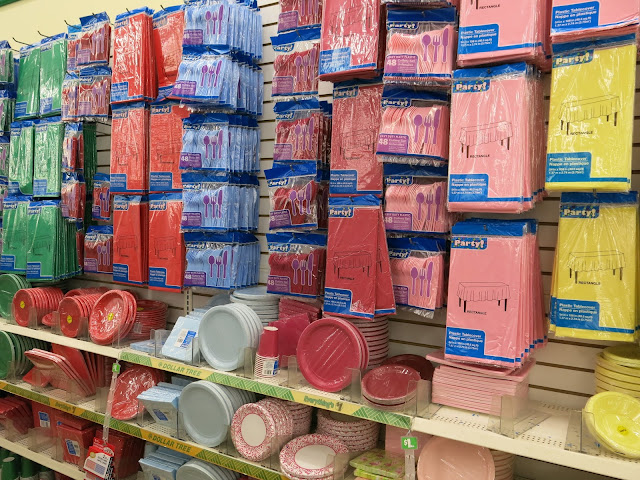
Holy moly, y'all! I have discovered Art Teacher Heaven and it looks like this: 
I know most of you art teacherin' types are familiar with The Dollar Tree and all of it's amazingness but I hardly ever venture inside. Prolly because I don't trust those places that refer to themselves as "dollar"-y when they actually mean dollar$$ (yes, I'm talking about YOU, Target "Dollar" Spot. Smh.) Then the other day, on a whim, I spotted something shiny in the window and tiptoed inside. Two giant bags of dollar-y goodness later, I was CONVINCED that this place was perf and I just had to share my excitement with y'all. So, here's what I picked up for my art room, why and how I plan to put it to use in some crazy creative art making!
Now, like I said, I didn't buy EVERYTHING...but I got really close. Below are somethings that I left behind but I do believe would be useful in any art room. 
This kind of chalk is pretty useless for making art inside...but it would be great for the outdoors (hence the name "sidewalk" chalk). I thought it was a pretty solid amount of chalk for the price. 
If it's one thing that no art teacher can ever have enough of, it's bowls, trays, plates, bins, you get the idea. I loved the sweet patterns on these hard plastic bowls. 
Okay, help me out here. I need these in my art room! I mean, the architectural history in these sand castle building thingies is just too much. I left them behind but I do love them so. 
 Need a cheap still life? How about a Frida Kahlo crown? The Dollah got you covered. 
For those of you that color coordinate your art room, the possibilities were endless. Totally digging the table clothes. 
I have a stash of thank you, birthday and blank cards at school for when I need them. 
I hate putting together puzzles. I'd much rather use the pieces for collage projects or print making! What a fun assortment for on the cheap.
The assortment wasn't huge but what they did have was good: U.S. map, behavior charts, die cut letters and those things I scooped up.
 In my art room, I have a little light that I turn on when it's the kid's turn to chat. Meaning, when I'm giving directions, I don't want to constantly see hands up and be fielding questions. It's disruptive and time consuming. When the light is off, the kids know it's my turn to chat. When it's on, they can ask questions. An alternative to this is an Open/Closed sign. A fellow art teacher told me about it years ago. It's the same concept: Open means they can chat and ask questions; Closed means it's a listening time. 
 Organization for days.
How fun would these mirrors be for self portraits? I don't know if the dudes would dig them but my girls would feel like Cinderella.
Safety googles for when things get a bit STEAM-y in your art room.
I was JUST trying to find these the other day to label somethings and none of my office supply stores had them. Now I know.
Totally digging those flowery trays. Think of all the art supplies those could hold per table!
 I mean, really. There is no reason I shouldn't be able to get organized. The Dollah was reminding me of this on every isle. 
If you have sinks, you need these. I've twice had sinks get backed up because sweet, innocent children (ahem) drop paint brushes down the drain. 
 These would be perfect screens for paper making!
 We use these trays in my room for papier mache and plaster projects. They are also great if you want to do paper marbling. 
 I send my students clay projects home wrapped in newspaper and stuffed in a lunch bag. These are so much cheaper than the ones I pick up at the grocery! Also, foil is wonderful for the leaf relief project you can find on the right hand side of this blog. 
All of my tables have table top trashcans. I totes would have picked these up if I didn't have some 'cans already. 
 I have a couple of these in my art room that get used plenty.
 Wanna organize those paint brushes?
Resealable condiment cups are my jam. These are great for paint, glue, you name it!
So, what did I forget? I'm dying for a reason to go back!
 photo signature_zpsd10b3273.png