
 | |
| Every time I go into the kiln room and see these little guys staring at me from the shelves, I feel like singing: I always feel like...Somebody's watching me. And I have no privacy, Whooooa, oh-oh (go get you some Rockwell here and be prepared to get your paranoid on). |
Greetings from the land of Pinch Pot Pets! Last week my younger students completed glazing their clay animals (my older students are still painstakingly working on every minute detail of theirs) and I'm excited about the results. Our theme for this year's clay projects were cats and dogs as our students will be "selling" their work back to their parents for a donation to the local humane society. We're do-gooders like that. The kids love clay and really enjoyed this project. But I'm rambling. Check out this cuteness:
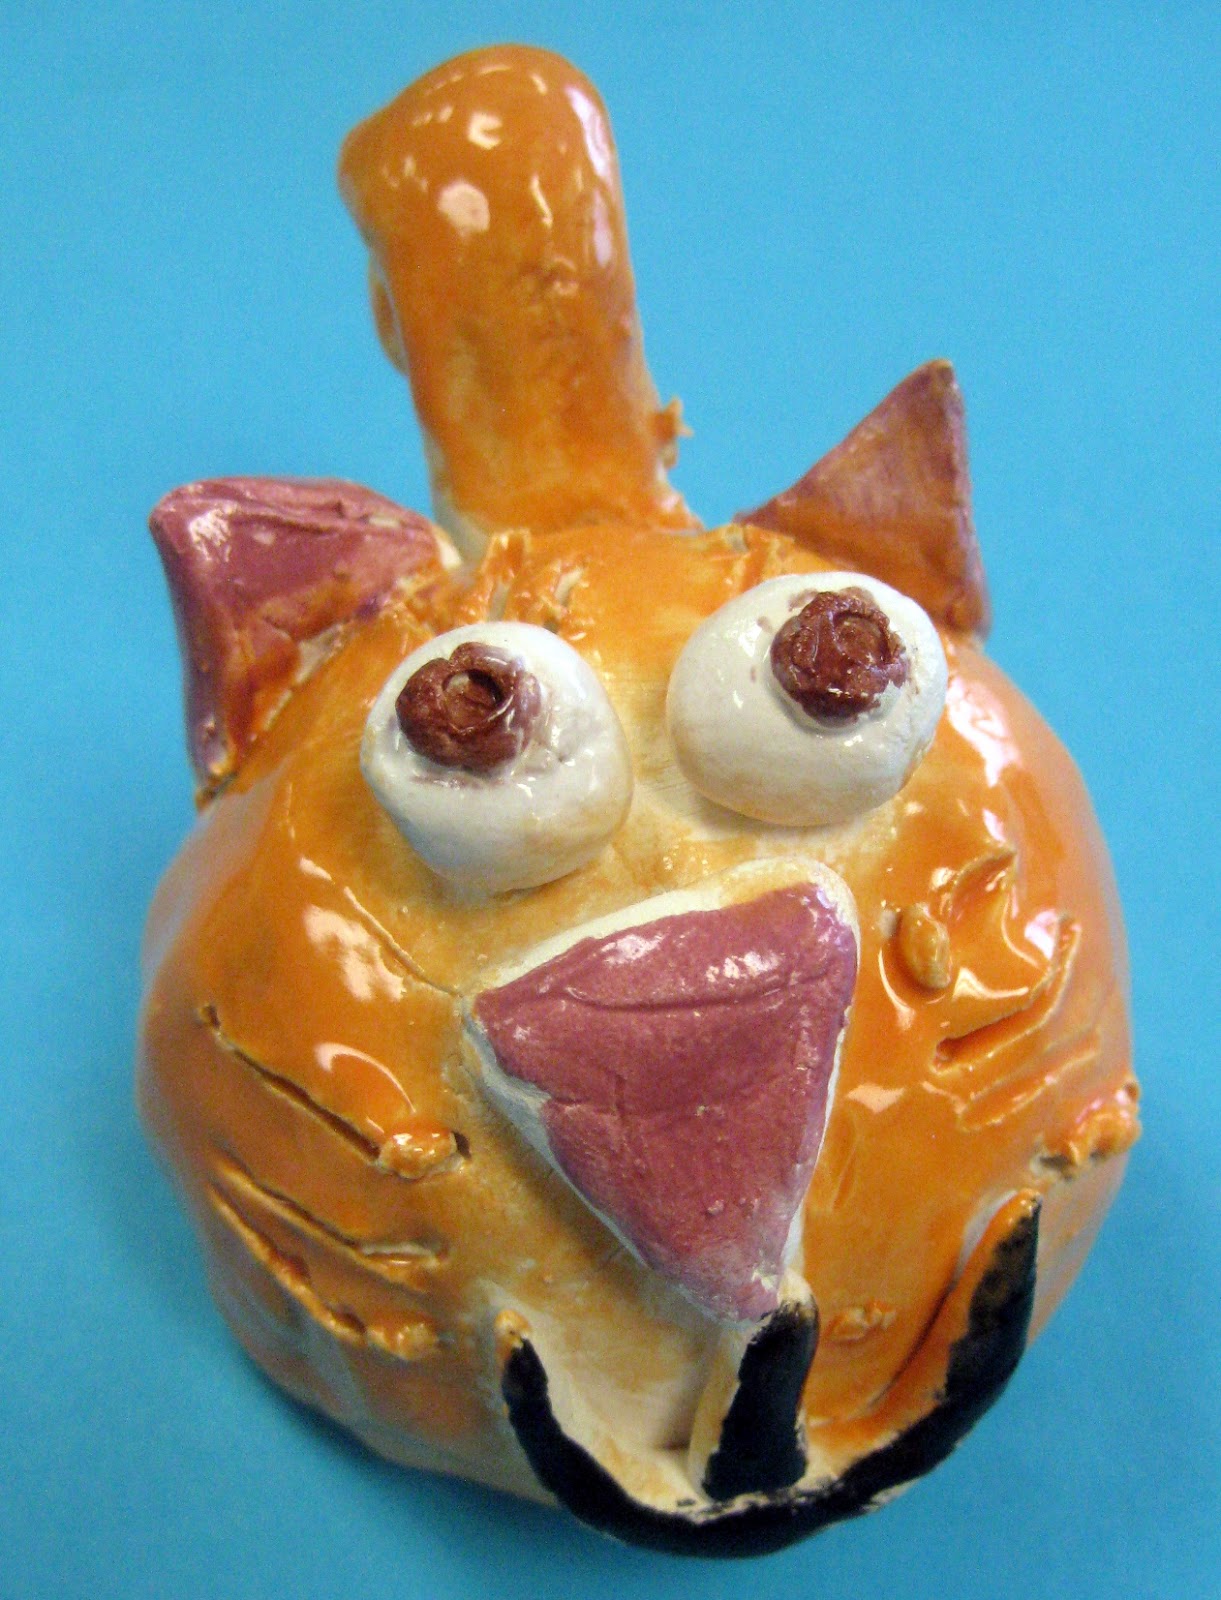
Aw! This looks like a certain orange cat that lives in my house! I wonder if this one plants herself on the table at dinnertime as well.

"Hmmm? Did someone say snack?!" I love the added detail of the collar and hair bow by this first grade student.


 For the demonstration, I have the students gather around a table and I show them the steps to creating a pinch pot. Here's what I tell 'em:

So just how did my wee ones complete
these clay projects in half an hour art classes, you ask? Well, it wasn't
easy. But I've found that breaking the clay construction up into two
days helps. And having several parent volunteers on hand. Mostly to keep
me in line.
In preparation, here's what's on each table:
- a clay mat for each child, purchased from The Clay Lady
- 2 cups of water and 2 toothbrushes
- 4 skewer sticks
- 1 piece of clay the size of a small orange per student
- One labeled ziplock bag per student
- a damp paper towel per student


- Roll your clay into a sphere and place it into the palm of your hand.
- Using your other hand, put your thumb on the top of the sphere and wrap your fingers around the back.
- Sink your thumb so deep into the clay that it looks like your thumb is wearing a clay afro. But don't go too deep and have your thumb pop out the other end because then you'll end up with a donut. And nobody likes clay donuts.
 That part they can do no problem. Thumb afros, they got that. It's the pinching-into-a-pot part that some struggle with. I ask them to imagine they are holding a cookie and show me what that would look like. They all hold up their fingers about 1/2" apart. I tell them that their clay should have that same thickness. And then we eat the imaginary cookie with a loud "crunch!" and "mmm!" before proceeding.


- After showing them a couple of non-examples of pots that are too thick or thin, I show them what a correctly pinched pot should look like.
- At this point, the demo is over. I show the kids how to wrap their pot gently in a damp paper towel and place it carefully into the ziplock bag. They are not to seal the bag closed as trapped air inside will dry out the clay. Instead we simply tuck the bag underneath the pot. Like this, their project will stay damp for up to a week. But it might begin to smell a bit if kept longer.

- The following art class, I tell the kids that they may either create a dog or a cat. I introduce them to the idea that you can make anything out of clay with three things: a sphere, a slab and/or a coil. To illustrate that, I begin by using spheres for the eyes.
- Note: all pieces of clay must be attached by using the toothbrush and cup of water. I tell the kids, if you don't brush your teeth, your teeth fall out. If you don't brush your clay, your parts will fall off. It kinda works.


- I demonstrate using the stick to add the pupils and eyelashes.
- A sphere pinched into a triangle is used for the nose.
- Coils for the mouth and skewer-drawn whiskers.

- I tell the kids that the parts of a face for a dog and cat are about the same. It's the ears that make the difference. Using a slab, or flattened piece of clay, the kids can create dog ears. Cat ears can be created by cutting the slab into a triangle shape.

- Some finished theirs off with a coil for a tail.
- And that concludes the second day of Pinch Pot Pets! As the students finish, the volunteers and I wrote their names and teacher codes on the inside of the pot. Then I set them out over Spring Break to dry completely.

After Spring Break and many firings, their bisque-fired clay animals were ready for glaze. I like to use Mayco's Stroke and Coat. I gave the kids every color in the rainbow (which many saw as an opportunity to go hog wild) and told them my two glazing rules: don't glaze the bottom as the glaze will cause the project to stick to the kiln shelf; don't layer 15 different colors of glaze on top of each other. Because it will look like a rainbow exploded in a really bad way. However, if you want color, do it with patterns.
 |
| And suddenly I feel like I'm in San Francisco all over again. Super psychedelic, dude. |

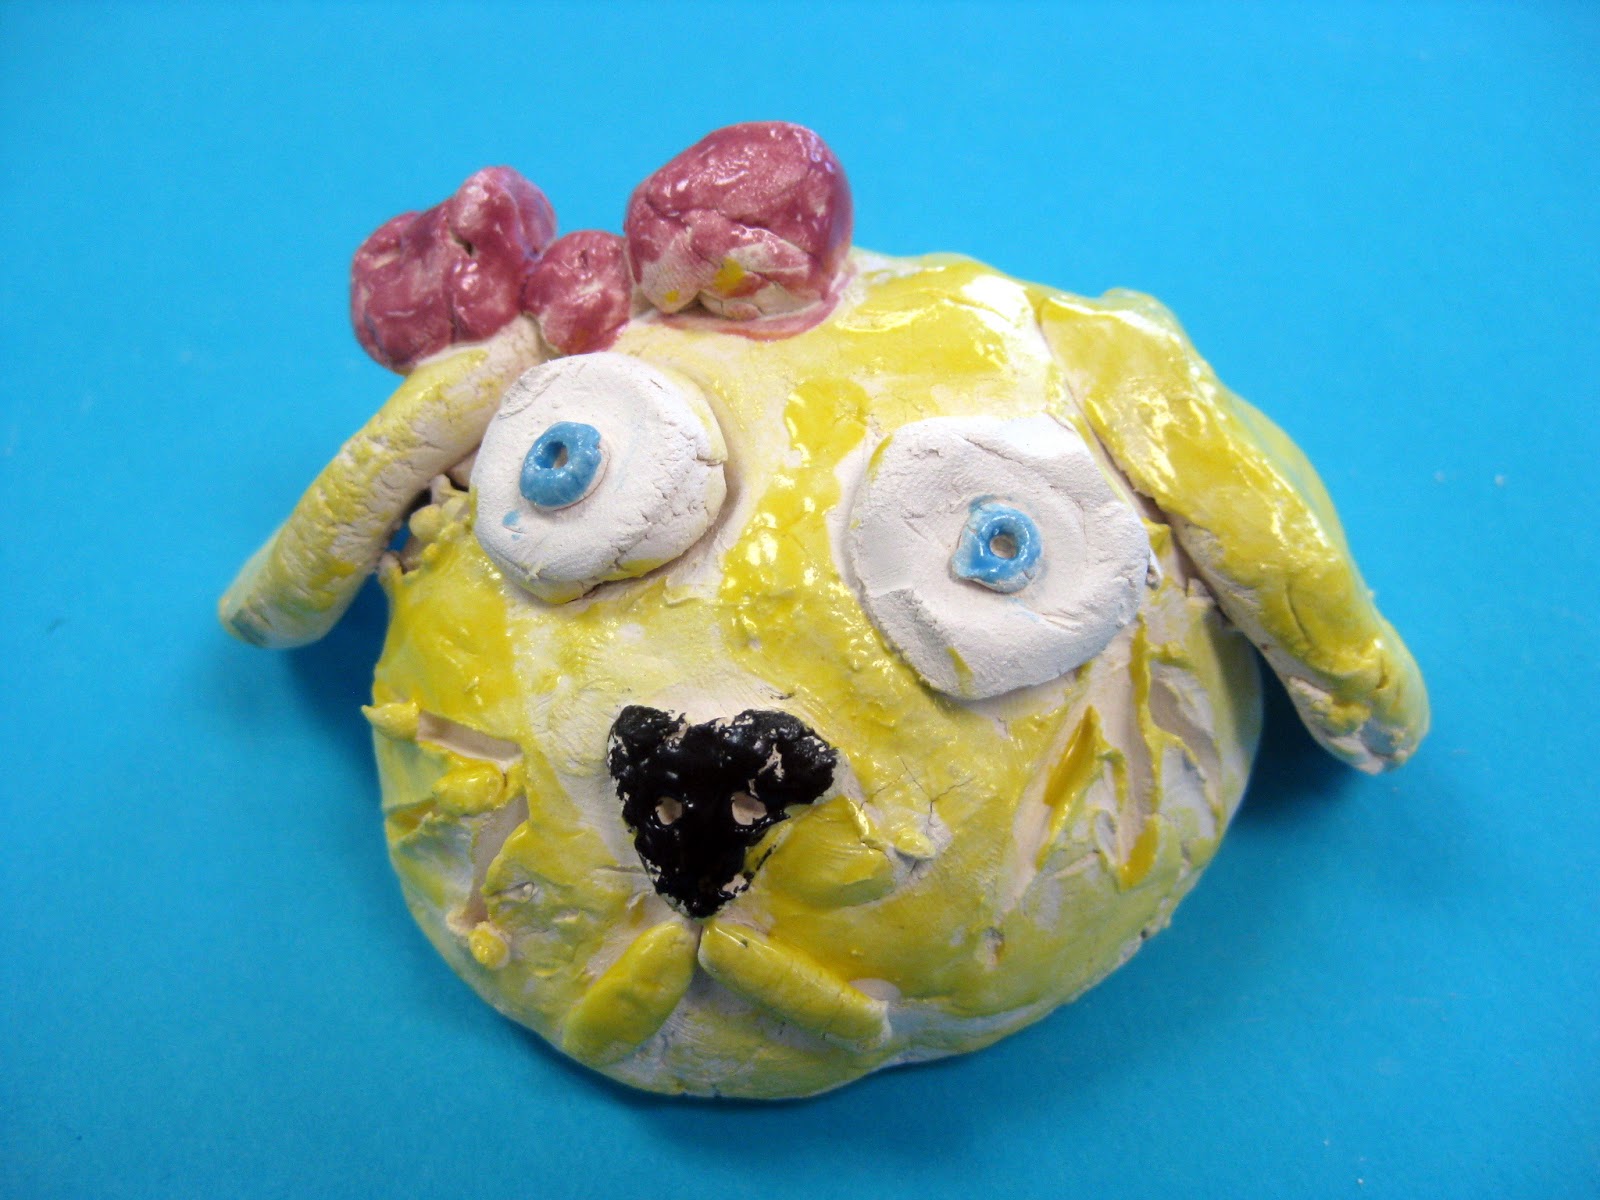
These two crack me up. The Eye-Popper-Outter and the Cheshire Cat.
 |
| Stripes and spots were a pretty big hit. |
 |
| And there you have it! Pinch Pot Pets. If you'd like to see what my students created last year out of clay, you can visit here. Be on the look out for more clay posts within the next couple weeks as the kiln just keeps spittin' out these awesome little masterpieces. Until then, enjoy the rest of your week! |


Wow, it's so neat to see your students' work and to hear about the process of creating these pieces! Thanks for the glimpse into the artroom.
ReplyDeletehttp://www.youtube.com/watch?v=Vmg0Ghqg3fE
ReplyDeleteCheck out this youtube. The song will get stuck in your head while you make a pinch pot!
Cute lesson!!!
These are gorgeous!! Love your step by step instructions. You have given me some inspiration!
ReplyDeleteWhat grade did you do this project with?
ReplyDeleteHi! This is first grade :)
DeleteI love the blog. Great post. It is very true, people must learn how to learn before they can learn. lol i know it sounds funny but its very true. . . Pet insurance
ReplyDeleteThanks for sharing us a great information that is actually helpful. Good day!
ReplyDeleteCat Bed
Hello I am so delighted I located your blog, I really located you by mistake, while I was watching on google for something else, Anyways I am here now and could just like to say thank for a tremendous post and a all round entertaining website. Please do keep up the great work.
ReplyDeleteKitten Collar
Interesting topic for a blog. I have been searching the Internet for fun and came upon your website. Fabulous post. Thanks a ton for sharing your knowledge! It is great to see that some people still put in an effort into managing their websites. I'll be sure to check back again real soon.
ReplyDeleteCat Collar
Thanks a lot for providing the true info is visible in this poker game and sharing the great services in this roulette game.
ReplyDeleteThis is very much enjoy the great info is visible in this poker news that to using the great services in this poker tables. I am really satisfied by the great info is visible in this blog that to using the amazing info is visible in this sports bet.
ReplyDeleteThis really is a great deal satisfied by the excellent facts is seen on this online casino games weblog and by using the good know-how is seen in this best casino games weblog. Thanks loads for furnishing the good info is seen on this web log along with the awesome engineering in such a grosvenor casino blog page.
ReplyDeleteIt is certainly admired with the nice info is seen with this 3card poker
ReplyDeleteweb site and using the nice solutions in this particular free poker games
web log. Many thanks lots for providing the great info in this free live poker weblog and by using the nice products and services in this site.
Actually excellent info! I’m also an expert in this topic so I can understand your effort.
ReplyDeleteBest Toys For Dogs at L&H Guerra
This one is good. keep up the good work!.. chameleon care
ReplyDeleteThe post is written in very a good manner and it contains many useful information for me. Pet Exportation
ReplyDeleteGreat instructions and images. I'm just wondering could you do these without the kiln? Allowing them to dry in the air?
ReplyDeleteKittyKit has got some amazing Kitten collars and collars to the public, love the blog post. kitten collars
ReplyDeleteHard work is a prison sentence only if it does not have meaning. goa honeymoon resort packages
ReplyDeleteI recently came across your blog and have been reading along. I thought I would leave my first comment. I don't know what to say except that I have enjoyed reading. Nice blog. I will keep visiting this blog very often.
ReplyDeletepets
Nice Information, to Get Best Quality pet table designed for professional groomers, including electric & hydraulic large dog grooming table . we offer high quality grooming supplies at lower prices! Both retail and wholesale are welcomed!
ReplyDelete