Showing posts with label clay projects for kids. Show all posts

Wednesday, March 1, 2023

Let's Talk Clay! Part 1

Well hello there, y'all! It's been a minute...and, if you haven't heard, a lot has happened around here. Like, for instance, me stepping away from teaching art in a classroom setting after doing so for 25 years! I KNOW. CRAZY. All the details on THAT very soon but first...a little something that I've been promising on Instagram for quite some time: a big ole post on all things CLAY. 

Let's first cover my supply list of Must-Have's for working with clay:
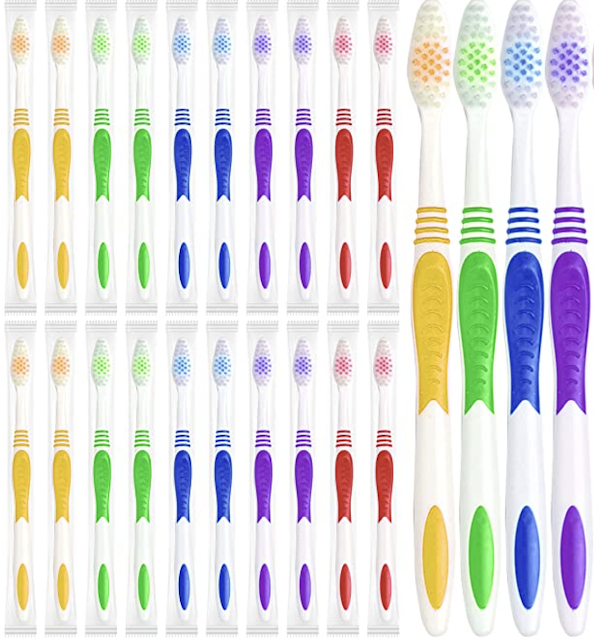
* TOOTHBRUSHES! I'm so sorry to shout...actually, I'm not. You will thank me later but THIS is what your kids should be using when they slip and score. Buy this set and use them year after year!
* WATER DISHES! This is where we keep our slip. In fact, I use the same set of no-spill cups each year, just add more clay to it. When clay time is over, I let the water evaporate and just leave the dried clay inside. When the new year begins, I just add water and we have insta-slip! Kids dip their brushes here. We also have a set of these just for painting...so I don't have to worry about cleaning them out when we switch from clay to painting!
* DOGGIE DISHES! Okay, so this is an alternative to the no-spill cups. I love these! We use these also when painting. So if the other cups are too much for your budget, try these!
* DOILIES! Since I started shouting, now I just can't stop. I LOVE doilies...in fact, just scroll below and you'll see a ton of my projects features a texture...it's from theses bad boys! You can also find them at your local thrift store and yard sale so be on the look out!
*SKEWERS! I think we all know about using skewers with clay but one thing that really always bothered me was how long they were. I was always thinking someone was gonna lose an eye! Not a happy thought. I discovered these shorter skewers a couple years ago and now...this is all we use. 
*TRAYS! Contain all of that dusty mess with trays. I didn't start using trays until recently and I was like WHERE HAS THIS BEEN MY WHOLE ENTIRE LIFE?! 
* GARLIC PRESSES! Oh man. You can't just get one of these. You're gonna need bunches! I found them here...but I have also found them less expensive at the Dollar Tree and Walmart. 
* REUSEABLE TOWELS! Oh man...I cannot tell you how much this saved the MESS in my room this year. Hear me out: I placed a bin of water on each table with a splash of soap and 2 towels. At the end of each art class, the kids used a towel to both clean their hands and the table. This kept the dust mess down! My custodian friend was so happy. 

The other items you'll find on my list are the air dry clays I've used in the past. I'm also sharing glaze (which is only used on kiln fire clay). I purchase my clay locally from The Clay Lady. She also sells the clay mats I strongly recommend. If you purchase your clay locally, you'll be supporting local businesses. 

And now...on with the show!

Isn't it crazy to think that we are expected to know about all things clay...just cuz we have an art teacherin' degree?! Well, I created a video sharing everything I know about clay. You can catch even more details in this blog post. 

Of course, there are plenty of ways to add beautiful color to ceramics without the hassle of a second fire and of the expense of glaze. I'll share a TON of projects in the second installment of this blog post that do not require glaze...and still look amazing. BUT FIRST...
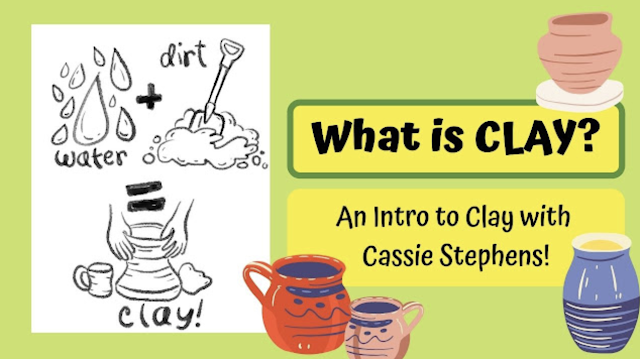
What is Clay is a video I created several years ago to share with my students on the very first day of working with clay. With my 30 minute classes, we watch the videos and then we spend the rest of class just rolling up our sleeves and getting a little messy. It's a great introduction to clay, no matter what the project. Here's a peak at the video:
And now...a moment from our sponsor. 

Me. I'm the sponsor. 
Many of my projects can also be done with air dry clays, either homemade or store-bought. And if you are kiln-less and would like a little more guidance, I wrote a whole book about it! You can find it here
Okay, y'all. I really thought I could also add all my favorite clay projects also in this blog post BUT...I think I'll save that for the second installment of this series, so stay tuned. Until then, have a good one!


photo signature_zpsd10b3273.png


Read more »

Sunday, April 3, 2022

Clay Mugs for Kids!

Hi, friends! My students are wrapping up one of the clay projects they created and I thought I'd share. Last year, my first through fourth created clay mugs and it was easily everyone's favorite clay project. When I shared that we were working with clay again, a few weeks ago, their first question was "are we making mugs again?!" I had already planned on it...so they were excited to hear the answer. Once mugs are complete, we celebrate by drinking hot chocolate out of them...so it's a whole lot of fun. 

This year, I created a video to share with them. Because I have 30 minute art classes, I only showed the pinch pot portion and a bit of coil making for the first class. The second class, we did a brief coil making reminder and then watched the portion about creating a handle. The video helped them trouble shoot and get their mugs completed in just two 30 minute classes!
This week, we started glazing! They were told they could use any two colors of glaze, one for the inside and one for the outside. They were to do at least three coats of their chosen colors and not to glaze the bottom. Once complete, they could join me at the splatter glaze station!

When my students were finished glazing, they could help a friend or work on the large banners I created to announce our upcoming art show! 

We used Prang's Creativity Street Tempera Sticks to color these with.
The glaze we used are from two companies and I like them both: Mayco's Stroke and Coat and Amaco's Teacher's Palette. Both are food safe and fire to cone 06.
When introducing clay to your students, you might find this video fun to share:


Read more »

Thursday, May 21, 2020

Let's Make Black Light Clay!

Bet you didn't even know you could make clay that glows under black light! Let me show you how to make Salt Dough Clay with my simple three-ingredient recipe...and then how to make it glow! I'll also share how to create a deep sea scene. You'll need the following:

1/4 cup of water
1/4 cups of salt
1/2 cup of flour
Prang Fluorscent Paint
Cardboard
Crayons

Let's create!

 photo signature_zpsd10b3273.png
Read more »

Sunday, December 1, 2019

In the Art Room: All Things Clay!

When I first started teaching, teaching clay was in my curriculum and I FREAKED.THE.FUNK.OUT. I didn't take a single clay class in college and only made a couple of pieces in high school. I managed to melt down a kiln, explode hundreds of pieces and even drop my share of masterpieces. Despite all of that, after teaching art, clay and kiddos for over 20 years now (and having written a book on the topic!), I feel like I can finally share my (semi-limited) wealth of knowledge on all things clay!
While my book was written for children who don't have access to a kiln, many of the projects can be used with kiln fire clay! 
Over the last three weeks, I have shared everything I know about kiln fire clay on my podcast! It's so much...that I had to break the series into three episodes just to squeeze it all in. So, if you'd like to take a listen here, here you go:


But wait, there's more...


AND just a pinch more...


In case you need a visual, as I often do, here's a video of some of the clay tips I mentioned. For the complete blog post, you can visit here. 
 More details on my favorite tools and how I set up for clay in the video and my podcast!
Part 3 of this series is all about glaze and glaze alternatives. If you'd like a video with more, check this one out:
The blog post with more details on glaze can be found here. 
And if you need a visual of the clay projects I mentioned or just some clay project ideas, then check out this post with my very favorite clay projects! Have fun! 
 photo signature_zpsd10b3273.png
Read more »

Wednesday, July 26, 2017

Field Trip! A Visit with Audry Deal-McEver

Last year, I started a series of videos titled Field Trip! The purpose of these videos was to take all of my students on a virtual adventure to meet contemporary artists, see their creative spaces and witness them creating. You can check out my playlist of Field Trip! videos here. If you subscribe, you can also stay up-to-date as to when I post a video. I actually have three more Field Trip! videos recorded that I need to edit and upload before sharing them with you and my students. Please feel free to use these (and any of my videos) in your art room...I think all students can benefit from learning about these unique, creative and current working artists. 

I admit, I fell off the wagon HARD last spring when it came to searching out artists, contacting them and filming them. I was starting to feel super overwhelmed with all things art teacherin': the national conference where I presented a couple of times; our school-wide art show which is a beast of an undertaking and our clay unit which we always kick off in the spring. I will also admit this to you...I am very lazy, not consistent, a procrastinator and, did I mention lazy? I'm lazy. One look at Mount Laundry and you would agree.

But knowing just how much my students benefited from these videos, I knew I had to continue creating them. So during the spring, I attended an artisan fair and picked up just about every business card that I saw sitting out. Once home, I researched the artist, looked into their location (Nashville and just a little beyond is ideal) and sent them an email. I got a great response...artists are so giving with their time and willingness to share! The first artist I scheduled to visit is the one and only Audry Deal-McEver
Look at her beautiful home! Audry's studio is right behind her home and it is absolutely stunning, check it out:
When I arrived at Audry's home, she reminded me that we actually met many years ago (we are thinking about 10-12). My brother, who is 10 years my junior, was in a very bad car accident and was in a coma for several weeks. During that time, my administration allowed me to be with him and my family. Audry's mom, an art teacher, stepped in for me. She taught my classes, kept the students creating and made it so I could focus on what was most important. Her daughter, Audry, came in one day and did a wheel throwing demonstration for the students. I still have the photos of that day and share them with the kids when we chat about clay. What a crazy turn of events, right? My brother, by the way, pulled out of the a coma that they said he would not and is now an English teacher on a Native American reservation. 

I'm rambling...here's the video!
I have to tell you...Audry is an INCREDIBLE teacher...because she IS a teacher. She's taught ceramics and photography for the past five years at a local school. She is now taking time off from teaching to focus on her work. However, she does such a wonderful job explaining every element of working with clay that I feel this video would benefit all students, upper elementary on up to college. 
At the start of the video, you'll find her wedging clay. She explains the reasoning behind that and how to do it. Then she moves on to throwing on the wheel...which she makes look incredibly simple. I could only dream to throw a pot on the wheel that didn't end up looking like Patrick from SpongeBob Square Pantalones. 
I love how Audry shares her inspiration...and the origin of paisley! I had to include that in the video, it was new to me. Also, watching an artist work is always hypnotizing and she does her clay carving so quickly. It was fun to watch.
I was thrilled when she explained how a kiln works and the different types of kilns. I know that can help even us art teachers who might not understand how to operate a kiln.
Audry mixes up her own glazes to create the desired color. Her application process was interesting to see. 
And I loved the results so much, I had to have one of her vases in my home. She also gave me a beautiful mug...I know the kids will love to see me gettin' my coffee on with one of her pieces. 
A big THANK YOU! to Audry for allowing me to visit. Be sure to follow her Instagram as she shares videos and photos of her process.
I hope you enjoyed this visit to Audry's studio as much as I did! Until next time...
 photo signature_zpsd10b3273.png
Read more »

Tuesday, June 27, 2017

In the Art Room: Clay Tacos!

Hey, friends! I thought I'd share with you a fun clay project that you can do with either kiln fire or air dry clay: Clay Tacos! I did this project with my kindergarten kiddos and it was a huge hit. It also taught them a ton: clay can capture texture; how to create a sphere, coil and a slab, the holy trinity of clay sculpture; how to adhere clay with an alternative slip and score method. So here you go: Clay Tacos!
One thing I love when working with clay and kiddos is introducing them to texture and clay. We step on the clay, pound it into textures, you name it, we try it. My favorite thing is to have a variety of lace, doilies and burlap for them to experiment with. 
With a class of 20 kids pounding clay flat, it is going to sound like a crazy roll of thunder (with echoes of lots of laughs from the kids) but I have found it to be the quickest and easiest way to introduce the kids to creating a slab. 
With a beautiful textured piece of clay, the possibilities are endless! In fact, I'll be sharing EIGHT of my favorite air dry clay projects using this method and more at the Art Ed NOW conference
Have y'all signed up? You really should, it's a ton of fun. 
I explored EVERY air dry clay on the market (seriously) when working on my clay book which is now available for sale here! Many of the air dry clays have the look and feel of kiln fire so it's a great way to introduce kids to the magic of clay even if you are kiln-less. So get you some clay and make you a clay taco today! 
 photo signature_zpsd10b3273.png
Read more »

Sunday, June 11, 2017

Art Teacherin' 101: Episode 37 GLAZE!

If you have a kiln, then you probably have glaze...and you are more than likely well aware of how freakishly expensive glaze is. I swear, it eats about a quarter of my budget. But I just can't give the stuff up: glaze really does give my students the ultimate ceramic experience. So today, I thought I'd share my very favorite glaze brand as well as how I distribute glaze and conserve it...so that I don't waste a single precious (read: pricey!) drop. Here you go:
My dog dishes, ice cube trays and just about everything else were purchased at the Dollar Tree. I love the Dollar Tree, y'all. If I could marry it, I totally would. Cassie Lane Dollar Tree. Has a nice ring to it, no?
Once our glazing days were done, I tossed the press and seal I was using to keep the glaze fresh and let them dry out. Just a crack of the tray works to pop them out. Then put them in the glaze bottles, add water and shake. Clean trays + conserved glaze = happy art teacher!
This is a messy task...and one that you will only want to do once. So get all your glaze bottles and trays out and knock it out in one fell swoop. 
You'll be happy you did. Clean (ish) glaze/ice cube trays and fresh glaze for the win, kids! 

 photo signature_zpsd10b3273.png
Read more »

Tuesday, June 6, 2017

In the Art Room: Salt Dough Sunflowers!

Here's a way to introduce your kiddos to clay even if you don't have a kiln: Salt Dough Clay! Last summer, when I was writing my book Clay Lab for Kids, I had to come up with kid-friendly clay recipes. You see, the book is divided into three parts: projects created with air dry clays available at craft stores; polymer clay projects and clay projects created with homemade clays. There are several clay recipes in my book (including an edible clay!) and this salt dough clay is one of my favorites. Here's how to make it and create a Salt Dough Sunflower (a project not found in my book, just for you!):
Here's the recipe which would be enough clay to create a half dozen flowers:
(Allergy warning! If you are allergic to gluten, this is not the project for you.)

* 2 cups all-purpose flour
* 1/2 cup salt
* 3/4 cup water

Mix all of the ingredients together in a bowl. Dump out ingredients onto wax paper or plastic and continue to knead until a soft dough forms. When creating, be sure to work on a plastic covered surface as this stuff is sticky! Also, when making this flower, use a styrofoam bowl or a bowl covered in plastic wrap so that the flower pops out easily when dry. 

Also, any clay not used, simply wrap in plastic wrap and store in the refrigerator for later use. 
I placed my flower in front of a fan to dry overnight. Just so you know: this is a dough so it will rise a bit! Don't be surprised if your flower looks a little fluffy once dry. 

Salt dough can also be cured by baking in the oven at 200. Keep an eye on it as the goal is simply to dry it out, not burn it. I have cooked mine for 15-30 minutes depending on the dampness of the clay. 

I painted my flower with acrylic paint but tempra could also be used. Be sure to cover with a coat of ModPodge to insure that it will not break. 
If you don't subscribe already, I update my YouTube channel with videos like this and all things art teachery pretty frequently. You are always welcome to use my videos and lessons...I just always appreciate a shout out. 

In other news, I'll be presenting at Art Ed NOW on August 3rd on...you guessed it, all things clay! I'll be sharing a TON of no-kiln clay projects for the elementary and middle school set. 

And if you've picked up my clay book and you have a spare moment, a review here would be so very much appreciated. Thank you so much, y'all!

 photo signature_zpsd10b3273.png
Read more »