Hey, y'all! I am so excited with how these kid-created portraits of the faculty and staff at my school are turning out, I thought I'd share. This is just Part 1 of the Gallery of Gratitude posts...I'll be sure and post again once these are on display. In case you missed the first post about our Gallery of Gratitude, you can check it out here. This idea is not a new one at my school...you can see our Gallery of Gratitude from a couple years ago here.
Two of my fourth grade classes got their portraits complete. They did such a great job and I have so much left over modeling clay that I think I'm going to have them create self portraits next week. They've become pros at this and have really loved creating them. Here's the lesson video I created and used:
Here are the supplies we are using: * Modeling or plasticine clay. No one brand is better than another. I have just been purchasing whatever is cheap at the craft store. * Model Magic Glaze. Here's the thing: modeling clay always stays soft. These portraits will be on display for a while in my school...so I knew I'd want them to be protected with a hard varnish. This "glaze" works really well at becoming super hard. I think ModPodge might work pretty good...but this stuff is a lot harder than that. * Plates from Hobby Lobby. So our "frames" are actually plates from Hobby Lobby! You can probably find them online. * Matte board. I cut ours down into 4" squares.
Day #1: It took us some time to cover the entire background, create a skin color and add the head, ears, neck and nose. That took us an hour, believe it or not. Chatting about the project and watching the video took some of the time too.
Day #2: We really made progress. Almost all of the kids finished their portraits...some were super close! I thought I'd share what their works in progress look like.
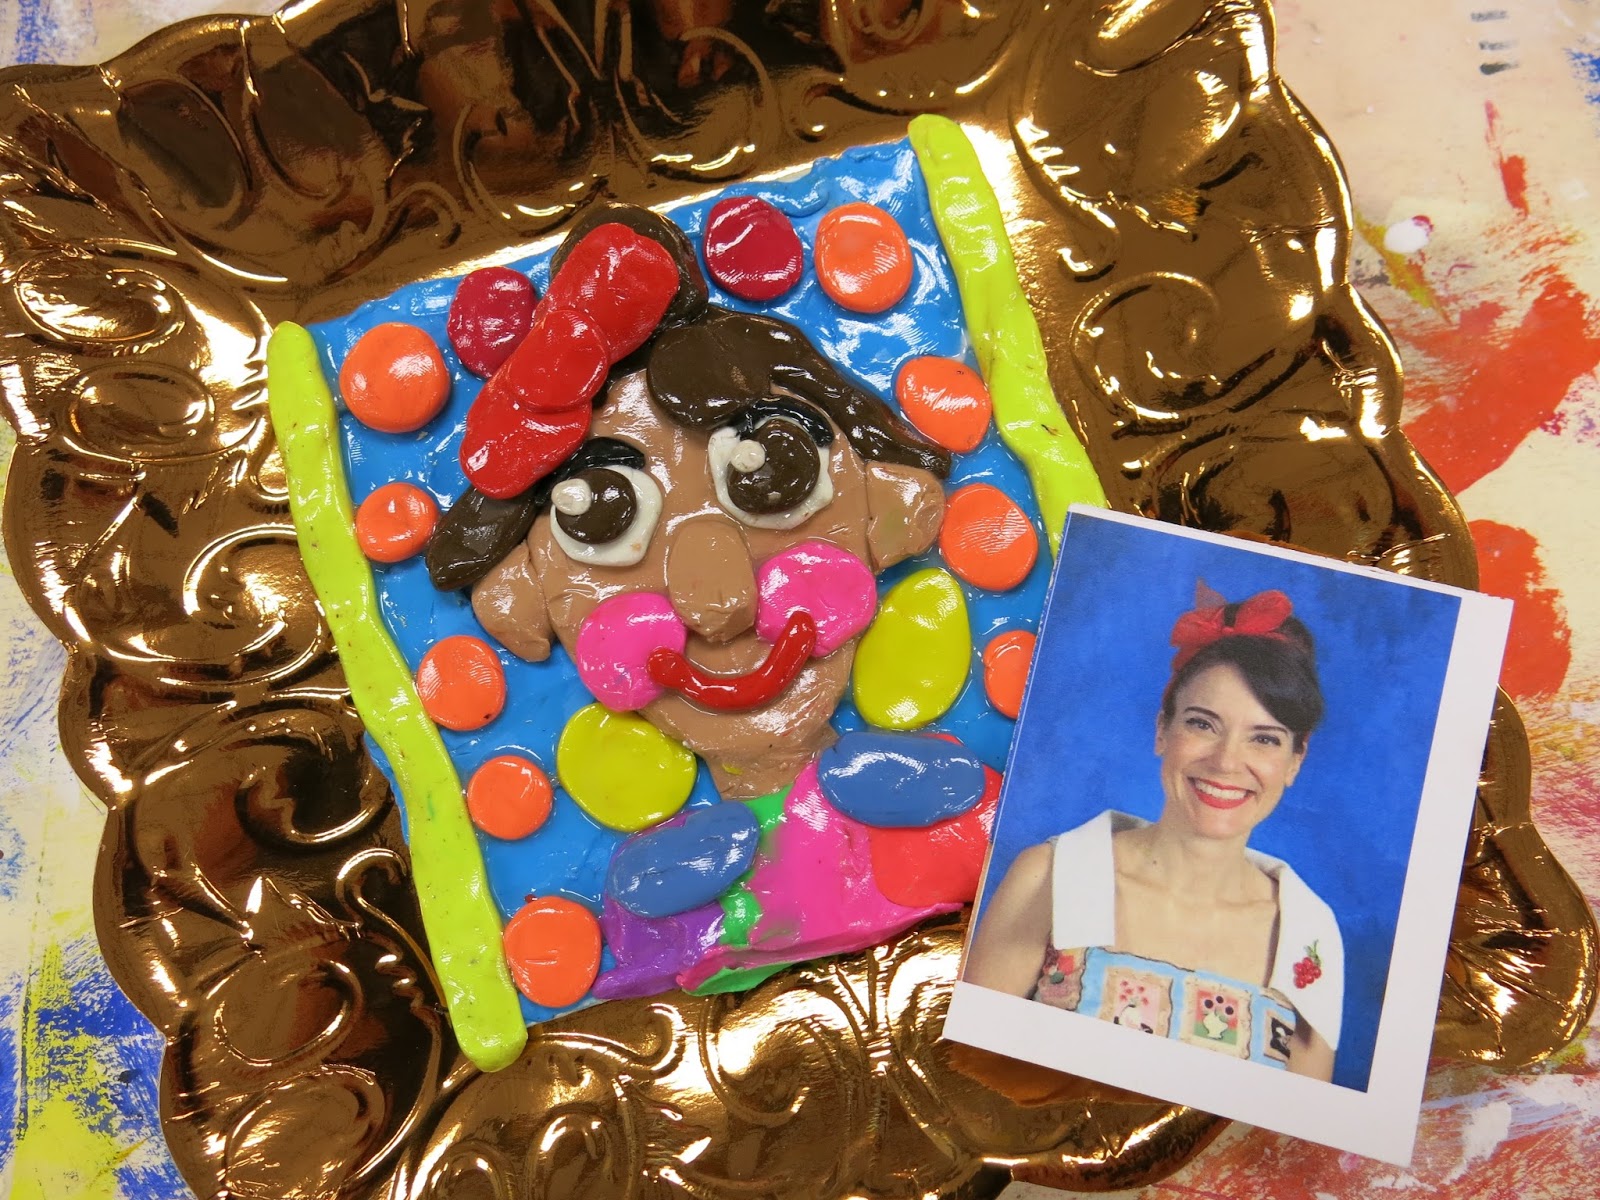
Biggest bit of advice: HAVE PHOTOS! The kids really studied the photos, matching outfits, hairstyles, glasses and more. My sweet buddy the bookkeeper printed off yearbook photos and each student was able to use one as a reference. I plan to hang these photos near the clay creations when on display.
And now, forgive me while I share a ton of these cute clay portraits!
When we take these down, they'll be gifted to the teachers, faculty and staff. The kids will also write a message of gratitude about that person to be hung with their portrait. I'll post about that in Part 2!
In the background, the kids were asked to add something that "said" something about that person. Here's a portrait of a kindergarten teacher.
Those are books behind our library assistant!
And music notes behind our music teacher!
I am loving the giant earrings and the cherries in this portrait.
This teacher plays guitar in his class. The glaze was just put on so it will dry clear, not milky like you see.
One of our custodians is also our school D.J. Here he is, outside on field day with his baseball cap on backwards spinning records.
This background, love!
Incredible attention to detail! This one makes me so happy!
Artistic license was taken with hair color here and I'm loving it. More to come, y'all! I had to share our amazing progress!
Such an awesome project!!! When I work with this medium I have problems with my kids mixing colors together... how do you prevent them from doing this?
I do trust all the concepts you've offered on your post. They’re really convincing and will definitely work. Still, the posts are very brief for beginners. Recuva professional key
This has to be one of my favorite posts from you!! Thank you for all of the details and video. I started a self-portrait unit last week before this post. ;) We used Crayola Model Magic and paint for the self-portrait part. I was thinking of doing the frames and the background with modeling clay. Do you think those two materials would work together?? Thanks in advance.
Do you assign faculty and staff to students or let them choose themselves? I know that in the past, when I've had students create appreciation cards through free choice, some staff were left out or given disproportionately fewer cards of appreciation than others.
Don’t like the Hobby Lobby modeling clay at all... I really want to do this project — esp after investing in so many plates & throwing away all the “modeling clay” (do not buy it at Hobby Lobby) — and want the right brand of clay. Thank U!
Extremely interesting blog! You bring up the unique worthy topic a finished it with a marvelous course of action. Like very much your post! Avg pc tuneup 2018 key
SData is one of the most recent versions of this application is edition 3 which was released in 2017 and the mid of 2018. Old version’s features had the potential to extend storage nearly 32 GB. The most up-to-date variation of SData Tool has the potential to double up the surface gadget area up to 128GB. Do we have much of information to be saved and not adequate house in our UNIVERSAL SERIAL BUS or SD Playing cards? We've got an answer for us. We are obtaining the greatest remedy for storage place matters by SData Tool. SData Tool is definitely an software which could strengthen the safe-keeping capacity of our Protected Electronic Cards or UNIVERSAL SERIAL BUS 3.0.


Amazing! Thank you!
ReplyDeleteSuch an awesome project!!! When I work with this medium I have problems with my kids mixing colors together... how do you prevent them from doing this?
ReplyDeleteLove, Love, Love!!! About how many 4th graders do you have and about how many things of clay? I'm worried I would run out!
ReplyDeleteSo cute! But, $6 per frame at HL is out of my budget. Going to check the dollar stores to see if they have something comparable.
ReplyDeleteI do trust all the concepts you've offered on your post. They’re really convincing and will definitely work. Still, the posts are very brief for beginners. Recuva professional key
ReplyDeleteIt’s actually $7 for a pack of 20 plates, so only $0.35 per “frame”
ReplyDeleteThis has to be one of my favorite posts from you!! Thank you for all of the details and video. I started a self-portrait unit last week before this post. ;) We used Crayola Model Magic and paint for the self-portrait part. I was thinking of doing the frames and the background with modeling clay. Do you think those two materials would work together?? Thanks in advance.
ReplyDeleteDo you assign faculty and staff to students or let them choose themselves? I know that in the past, when I've had students create appreciation cards through free choice, some staff were left out or given disproportionately fewer cards of appreciation than others.
ReplyDeleteDon’t like the Hobby Lobby modeling clay at all...
ReplyDeleteI really want to do this project — esp after investing in so many plates & throwing away all the “modeling clay” (do not buy it at Hobby Lobby) — and want the right brand of clay.
Thank U!
Sorry! Meant to add... Please would U tell us what brand of clay U used?
ReplyDeleteURs came out perfectly!
Thank U!
Val @ Pottery Playground
Really appreciated your art work. All the portraits are amazing. Keep it up . BandiCam keygen
ReplyDeleteLike always, love the their masterpieces.How much clay did you got for this project?
ReplyDeleteExtremely interesting blog! You bring up the unique worthy topic a finished it with a marvelous course of action. Like very much your post! Avg pc tuneup 2018 key
ReplyDeleteAre the plates paper? or plastic? I can't find them online =((((
ReplyDeleteThe thing i like about your blog is that you always post direct to the point info. ummy video downloader full crack
ReplyDeleteSData Tool Crack Full Edition Download
ReplyDeleteSData is one of the most recent versions of this application is edition 3 which was released in 2017 and the mid of 2018. Old version’s features had the potential to extend storage nearly 32 GB. The most up-to-date variation of SData Tool has the potential to double up the surface gadget area up to 128GB. Do we have much of information to be saved and not adequate house in our UNIVERSAL SERIAL BUS or SD Playing cards? We've got an answer for us. We are obtaining the greatest remedy for storage place matters by SData Tool. SData Tool is definitely an software which could strengthen the safe-keeping capacity of our Protected Electronic Cards or UNIVERSAL SERIAL BUS 3.0.