Showing posts with label gallery of gratitude. Show all posts

Thursday, November 6, 2025

4 Fun Lessons on Gratitude!

Hey, friends! 

I gathered together a handful of my favorite lessons for showing gratitude...always a fun thing to do ANY time of the year but especially terrific as we approach Thanksgiving.

So here you'll find a couple of lessons on creating faculty and staff portraits to surprise and thank those in your building, courtesy of your amazing artists!

For the other two lessons, I've got a daily doodle or a grati-doodle and a fun drawing activity that can be worked on by your early finishers. Did I mention I have a free download for you? Yep! Two, actually! So let's dive in!


First up, we have these modeling clay portraits! These were so much fun to create and made especially fancy with our Hobby Lobby metallic plates/frames! 

Now, the ONLY thing that was tough...connecting the students to the staff. Many of the kids have favorite teachers...and those teachers tend to be mighty popular. So I had to come up with a system where it was fair and where all the teachers and staff were chosen. To learn how we did it, you can check out the process here. 
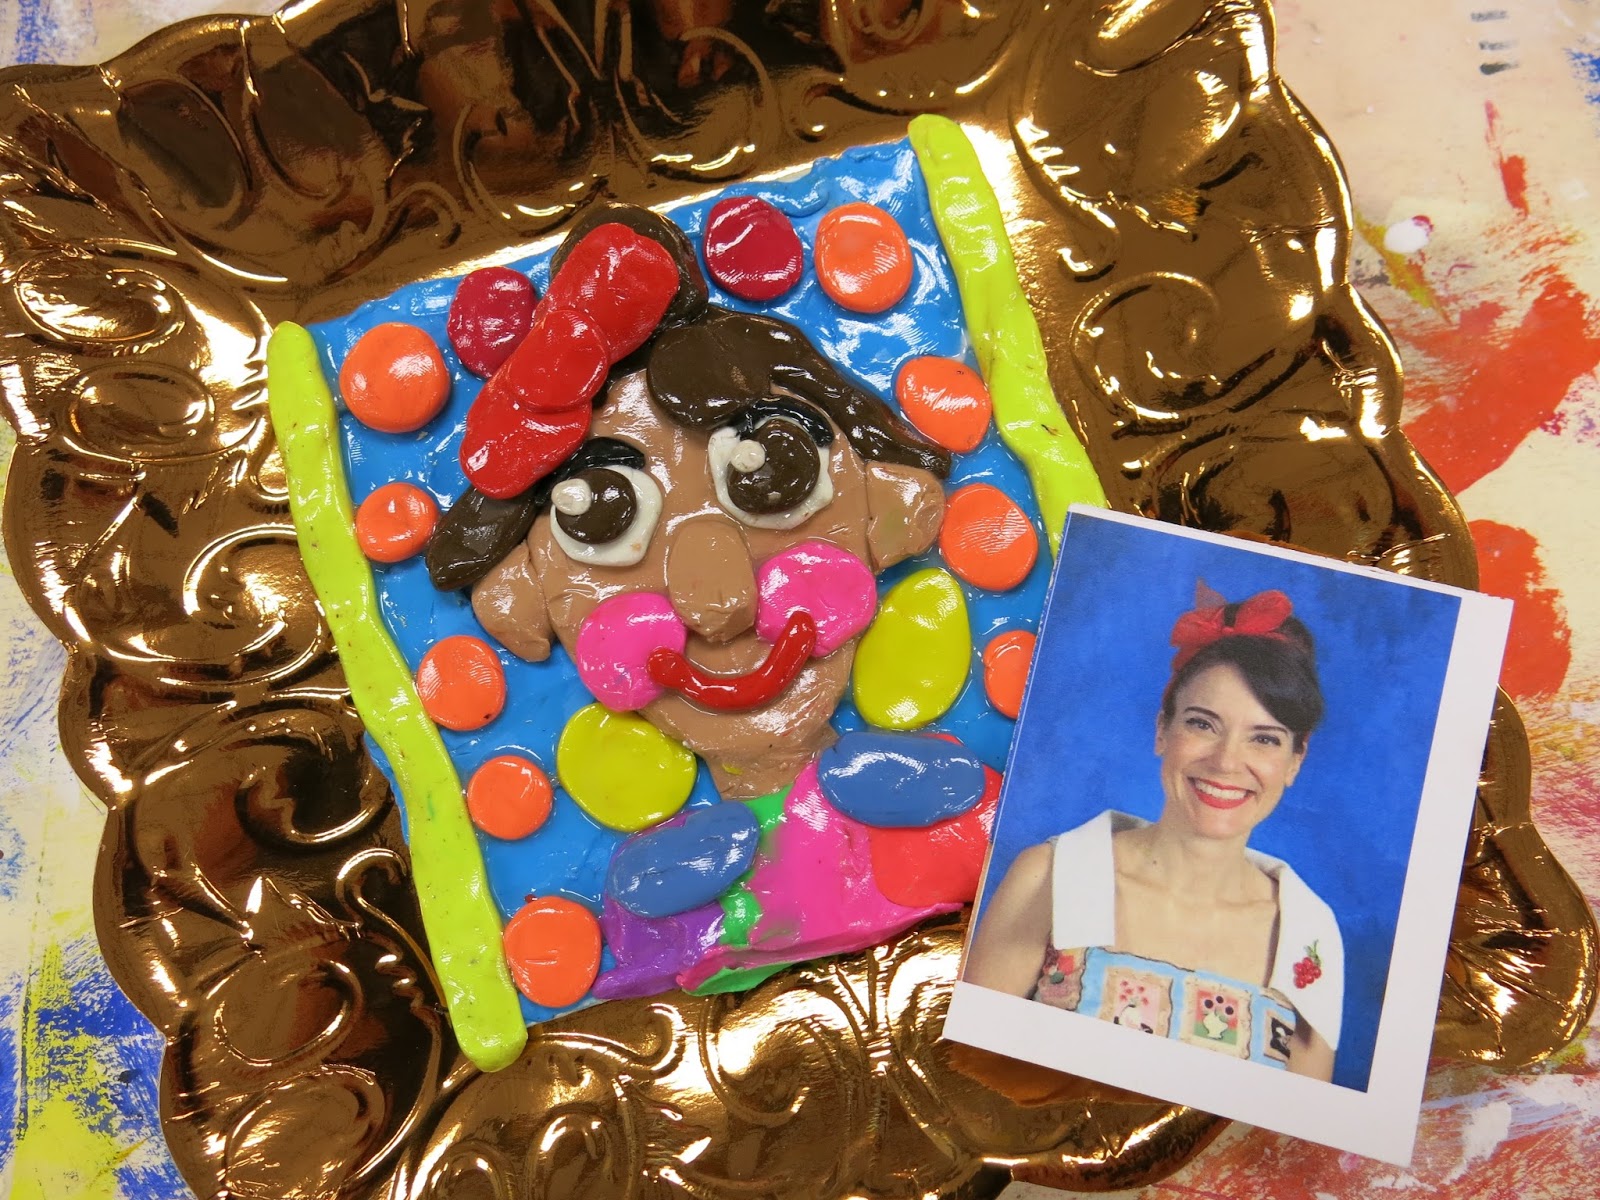
Now the key for this: work small. On our first day, we covered our mat board with a solid color for the background and then began adding layers of clay for the face shape, neck and shoulders. I created a video to walk the artists through the process and you can find it here:
My students who finished early either helped their classmates OR...many of them wanted to make a self portrait! These were so fun. 

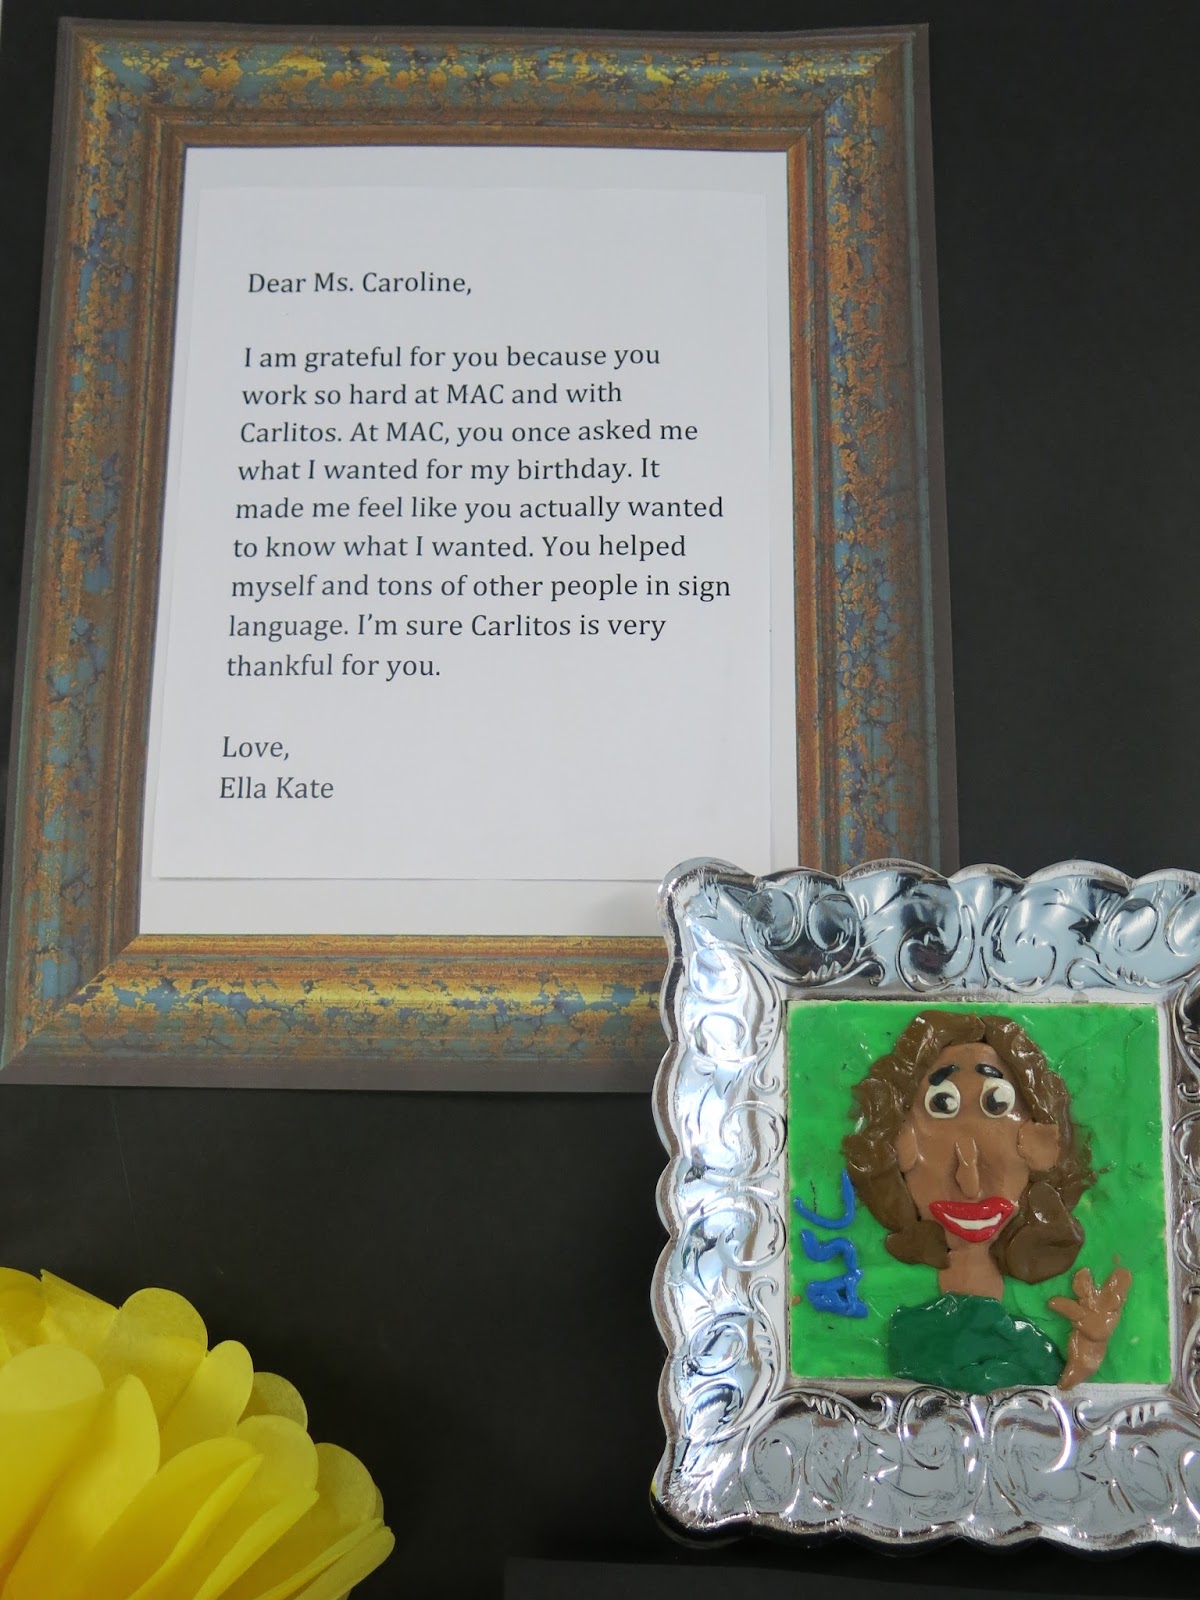
We even wrote about the faculty and staff members before hanging them all up for the display. To check that out, you can visit here. 
Now...I will say this: when we created these, we used modeling clay. Modeling clay never dries out, it always remains workable. That's not great for what we're going for here. Initially, I coated each piece with a hardening solution made by Crayola...that they no longer carry. So! Now, I would recommends something made by Mod Podge. They have a huge line of varnishes in a variety of finishes that would probably do the trick. The clay will ALWAYS be a little squishy. Just an FYI.
The lesson that inspired the clay portrait was this one! I had done a Gallery of Gratitude and it was a huge hit! It's much less prep and work...as you can see it involved the students drawing a portrait and writing up a statement about the person whose name the selected. 
Now if you are looking for some lessons that are a little less involved...you might be interested in these couple of FREE downloads! This one was created for my 3rd and 4th graders and can easily be used for a sub plan. So keep it in that sub tub, y'all!

If you are looking for a download that might be easier for your kindergarten through second grade students, I have that free download here!

And if you are looking for a continuing practice of gratitude by maybe doing a daily doodle (this is something fun just for you, if you like!), you can check out that process here.

Have a great week, friends!
photo signature_zpsd10b3273.png

Read more »

Sunday, September 29, 2019

In the Art Room: Tiny Gallery of Gratitude

Recently, I shared that my students in fourth grade are working on creating their own Tiny Art Show. Because I was going to be out of school for a couple of days visiting the art teachers in Vermont, I needed a lesson to keep my students engaged. I created this Tiny Gallery of Gratitude sheet for my third and fourth grade students. I hope they enjoyed it (I'll find out tomorrow!) but fingers crossed they did. If you think your student would like it too, here's a link to the FREE PDF. 
I gathered these books for my sub to start the lesson with. They are all wonderful books to introduce the idea of gratitude. Because my sub would be with my students for a couple of days, I asked that she read a book at the start of each class...but I let her decide which ones to read. 
 Here is the sheet I created for my kindergarten through second grade students. (link works, just click on bold sentence!)

As for supplies, I set out pencils, erasers and color pencils for my students to use. I asked that the sub save the work so that we could return to this drawing as a sketch for early finishers. I also want to see what they drew!

If you are interested in other projects that show gratitude, here you go:
 This Gallery of Gratitude lesson was a HUGE hit with the entire school with all creative hands on deck. I cannot recommend doing this lesson enough!
 I recently did an updated version of the Gallery of Gratitude and I love it even more! We used modeling clay and did a bit of writing out the faculty and/or staff member we were grateful for. Lesson here and here
Helping my students understand what gratitude is and how to show it is very important to me. Do you have lessons that you love that help spread gratitude? I'd love to hear about them!

 photo signature_zpsd10b3273.png
Read more »

Sunday, May 13, 2018

In the Art Room: Everyday Heroes!

Teacher Appreciation Week was last week and I FINALLY managed to get the fourth grader's portraits of our faculty and staff up just in time. If you recall, we created these some time ago...but I'd been saving them as a surprise for the teachers and staff on Monday of appreciation week. So I sneaked in on Sunday and got 'em all hung. They were a huge hit!

 Our theme for our art show is Superheroes...so I thought that calling this The Everyday Superheroes of Johnson Elementary would be fitting. If you recall, I did a similar project to this a couple of years ago and we called it the Gallery of Gratitude. For that, we simply created drawings. This time around, we used modeling clay. More information here
Here's the video I created for my students (and all y'all) to help them learn the process of creating a portrait with modeling clay:
I got a lot of questions about this project so I'll try to answer them here. 

*How did the kids pick the person they were to create a portrait of?
I had them silently draw the person's name after the video. If they knew the person, then they could go to their seat and get started. If they did not know the person (maybe they are a newer student or perhaps they simply have not had interaction with that person to know them well), then they could stay seated on the floor. After everyone drew a name, they could chat amongst the other kids on the floor and either swap names or do a redraw.
 * What about the people that didn't get their names drawn? Who did their portraits?

I had some kids who I learned were VERY fast at creating these mini portraits. And they loved creating them. So for those early finishers, I'd have them create a second or even a third portrait...or help those who were having trouble with their portraits.
 * What supplies did you use? Does modeling clay dry?

We used modeling clay from the craft stores...I found that some could be hard and some easy to manipulate. If they clay was hard, I simply told the kids to warm it up in their hands (see the video). I really found that all the modeling clay we used worked well. We used matte board cut to 3" squares as our base. Modeling clay NEVER sets so I added a varnish to the top to seal and protect it. For that, I used Crayola's Model Magic Glaze. The "frames" are actually plates from Hobby Lobby!
* How did you do the written portion? 

I didn't...the classroom teacher's handled that for me! I sent them an email letting them know what we were up to and asking if they could help me out. Not only did they talk to the kids about the written portion and have them write it up, they also had them type them! A parent volunteer then added them to the fancy paper frames. 
 * How long will this stay up?

I'd love to leave it up until the start of next school year...but I'm pretty sure I'm going to have to take it down before school's out for the summer. I'll be passing these back to the teachers and staff. 
 I think that about covers the questions I've been asked. My students loved making these so much that I followed their portraits up with a self portrait project of the same nature. They look so adorable for our art show!
 Were there tears on Monday morning? Y'all better believe it! This is one of the most favorite projects that I've done...it means so much to everyone involved!
 I loved reading the kind things our students had to say. Each and every person working in my school is so well loved!
 I'll definitely be doing this project again. I'd love to hear if you've done something similar!
Have a great week, superheroes! 
 photo signature_zpsd10b3273.png
Read more »

Thursday, January 25, 2018

Gallery of Gratitude, Part 1

Hey, y'all! I am so excited with how these kid-created portraits of the faculty and staff at my school are turning out, I thought I'd share. This is just Part 1 of the Gallery of Gratitude posts...I'll be sure and post again once these are on display.

In case you missed the first post about our Gallery of Gratitude, you can check it out here. This idea is not a new one at my school...you can see our Gallery of Gratitude from a couple years ago here
 Two of my fourth grade classes got their portraits complete. They did such a great job and I have so much left over modeling clay that I think I'm going to have them create self portraits next week. They've become pros at this and have really loved creating them. Here's the lesson video I created and used:
Here are the supplies we are using:

* Modeling or plasticine clay. No one brand is better than another. I have just been purchasing whatever is cheap at the craft store.

* Model Magic Glaze. Here's the thing: modeling clay always stays soft. These portraits will be on display for a while in my school...so I knew I'd want them to be protected with a hard varnish. This "glaze" works really well at becoming super hard. I think ModPodge might work pretty good...but this stuff is a lot harder than that. 

* Plates from Hobby Lobby. So our "frames" are actually plates from Hobby Lobby! You can probably find them online. 

* Matte board. I cut ours down into 4" squares.
 Day #1: It took us some time to cover the entire background, create a skin color and add the head, ears, neck and nose. That took us an hour, believe it or not. Chatting about the project and watching the video took some of the time too.
Day #2: We really made progress. Almost all of the kids finished their portraits...some were super close! I thought I'd share what their works in progress look like.
Biggest bit of advice: HAVE PHOTOS! The kids really studied the photos, matching outfits, hairstyles, glasses and more. My sweet buddy the bookkeeper printed off yearbook photos and each student was able to use one as a reference. I plan to hang these photos near the clay creations when on display.
 And now, forgive me while I share a ton of these cute clay portraits!
 When we take these down, they'll be gifted to the teachers, faculty and staff. The kids will also write a message of gratitude about that person to be hung with their portrait. I'll post about that in Part 2!
 In the background, the kids were asked to add something that "said" something about that person. Here's a portrait of a kindergarten teacher. 
 Those are books behind our library assistant!
 And music notes behind our music teacher!
 I am loving the giant earrings and the cherries in this portrait. 
 This teacher plays guitar in his class. The glaze was just put on so it will dry clear, not milky like you see.
 One of our custodians is also our school D.J. Here he is, outside on field day with his baseball cap on backwards spinning records.
 This background, love!
 Incredible attention to detail! This one makes me so happy!
 Artistic license was taken with hair color here and I'm loving it. 

More to come, y'all! I had to share our amazing progress!

 photo signature_zpsd10b3273.png
Read more »