Showing posts with label art class. Show all posts

Thursday, February 7, 2013

In the Art Room: Kindergarten Self-Portraits as Artists

If you've ever been in art school, then you know there's always that one dude that's always givin' the girls that one look. Thankfully, on a kindergartener, it's rather cute.
 Greetings from kindergarten-land! My wee artists finished off these self-portraits last week and I'm so excited to share them with you. My kinder-artists create a self-portrait every year but this time I wanted to do something a little different. I wanted them to portray themselves as artists, complete with apron, paint palette and brush.
Yes, that is a paint brush. Not...anything else it might resemble. Note to self: next year, have the kids paint the brushes brown to make them appear less doobie-esque.
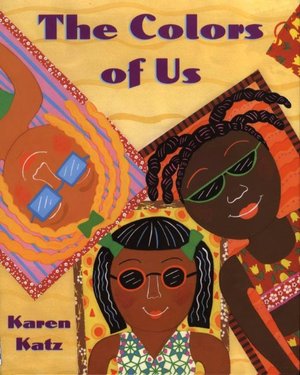
 I began this portrait lesson as I do every year, with a reading of The Colors of Us. I love how the author chats about how we are all different and beautiful colors, even equating our coloring to delicious foods. After that, the kids return to their seats and trace a head shape onto their paper to which they add a neck and ears. From there they chose a color from a variety that is the color of them. Once painted, these are put on the drying rack until next time.
To the kids, I refer to this as Funny Faced Fred but behind his back, I call him Freak Face. Again, kinda reminds me of the creeper dudes in my art classes. I mean, just check out his myspace page (ha, made you look). Despite the crazy looks, this silliness really does teach them a great deal about expressions. And, of course, they love Fred.
 The following art class is spent looking at a variety of portraits. After chatting about those, I bust out Fred to talk about how we might portray our emotions. Once I give a demo, the kids set to work on their self-portraits with oil pastels. 

From there, we cut out the self-portraits from the original paper and glue to them to a 12" X 18" piece of white paper. We spend more time looking at ourselves in the mirrors to see how we might paint our hair. On our portrait, that is. Although we do our fair share of getting paint where it shouldn't be in Kindergartenland.
I know what you are thinking: What's with the blacked out teeth? Well, five years of age is when we start losing our teeth...and it is an event that must be documented. So we always block out our most recent tooth loses.

With our portrait portion complete, we move on to "getting dressed for art". The kids added a 12" X 6" piece of construction paper that they had rounded the shoulders and created a collar for. I recycled our messy mats and turned them into aprons that the kids glued to their shirts. 
Creating the paint palette turned out to be a wonderful review of color mixing and our friend Roy G. Biv. Once that dried, we added it, our paint brush (an art straw that we frayed and colored one end of) and a die cut hand (after three weeks in self-portrait town, I was not willing to spend an art class having them trace and cut out their own hands). 

Our last step was to recall our study of lines and patterns from the beginning of the school year. Using our tempra cakes, we decorated the background and, ta-da! one adorable self-portrait as artist complete. 

After we finished, I had this exchange with one of my students:

Little Dude: Mrs. Stephens, I am going to be an art teacher when I am big, just like you!

Me: Cool! And then I can retire and paint all day.

L.D.: What does retire mean?

Me: It means I don't teach anymore.

L.D.: But you can't do that! I am going to teach in the art room with you!

Well, shoot! How can I ever retire now? I mean, how much fun would it be to teach with one of your students? Well...on second thought...

Thanks for dropping by!
Read more »

Tuesday, January 22, 2013

What the Art Teacher Wore #51

Monday with the Moms: Okay, I'm just going to brag and say I have the best moms at my school. A couple of them have been working with the kids to create a ceramic piece for a fundraiser. If you don't have mom helpers, I strongly encourage you to send out an email and just ask. You won't believe the response you'll receive! sweater and skirt: someone PLEASE make me step away from the Anthropologie sale rack, it is so awesome right now!; tights: Target; belt: made by me for the Gnome Dress; shoes: Miss Albright, Anthro
 Hiya, dudes. Sorry for the slightly delayed "What I Wore this Week" as I know you were just dying to see what duds I donned. But I have a good excuse:  My mom was in town from Indiana! We didn't have the chance to see each other over the holidays and so there was much gift-giving, chitty-chattering and face-timing with lil Bro and his girlfriend to do. Not to mention the serious retail therapy and dining out we indulged in. When we weren't together, I did manage to finish a DIY that nearly was the end of me (pretty sure I say that about every DIY). Spoiler: it involves 17 yards of tulle. A tool working with tulle? Never a good idea.

Along with my weekly wears, check out these rad photos hubs managed to get with his Christmas present. I got him a deer camera and he mounted it in the woods near our house. He's not a hunter but a big time animal lover and thoroughly enjoys seeing these animals in their element. I think I like these furry neighbors of ours way better than the human ones. 

I do hope you enjoy. Stay tuned for this week's DIY and possibly a finished art project by the lil artists. Until then, have a wonderful week!
Hubs had his camera on the motion sensor to capture these shots. This weekend he switched it so that the camera will start recording 30 second snippets of video. I can't wait to see what it captures.
Too Warm for Snow Tuesday: You already heard me whining about my lack of a Snow Day here. With the 50 degree temps we experienced this weekend, I have this sneaky suspicion we aren't going to score a free day this year. Such sadness. dress: Max and Cleo, TJMaxx; fur collar: gift from a friend; tights: Target; leg warmers: Germany; boots: Anthro
You might notice in some of these photos that the bucks are missing an antler. This is the time of year that the deer begin to lose their antlers. They grow them again in the spring. Hubs has found at least three deer antler on his walks in our neighborhood woods. We've got a couple on our mantle and one on our deck for the squirrels. Apparently they are a fan of the marrow.
Giant Bun Wednesday: I actually had  a student inquire what was inside my hair that "makes it so big." I told him donuts. And I have a kindergartener convinced that it's what I eat that causes my legs to "change colors". When I wore my purple tights, I told her I had eaten too many grapes and the white tights made my legs white from too much milk. This time when she asked what I'd been eating, I asked her what she thought. "Cotton candy and ketchup." Like, ew. dress, sweater, sweater clip: vintage; shoes: thrifted; red fishnets and turquoise tights: Target: bow belt: Pinkyotto
Can you count how many deer are in this photo? The camera isn't supposed to make a sound but it must do something. In many of the photos the deer are looking right at the camera. I love the thick coat of fur on this guy.
Big Ole Skirt Thursday: The only prob with wearing a crinoline under your skirt is that you are constantly knocking things off tables! I must have sent a dozen works of art flying off tables and to the floor with just a stroll through the art room. sweater and tights: Target, old; shirt and necklace: gift; skirt: made by me, tutorial here; belt: Pin Up Girl; shoes: Softt
While the deer cam was snapping away photos of animals in the wild, I managed to get a photo of this 18 lbs. beast with my cat cam. We found out this week that not only does she resemble Garfield in her girth and tabbiness but also her affinity for lasagna. P.S. If you come to my house for leftover lasagna, don't mind the cat hair.
Floral Legs Friday: Sometimes I don't even know what I was thinking when I put together an outfit. Take this fine specimen for example. Flowers? Plaid? I should thrown in some polka dots and called it a day. What in the world...? blouse, brooch and skirt: vintage; sweater: thrifted; tights: Urban Outfitters; shoes: Anthro
Hands down my fave deer camera photo so far, this image of Grizzly Adams. Or is that Chuck Norris? Sasquatch, perhaps? The world may never know...


Read more »

Thursday, January 17, 2013

DIY: Skirtin' the Issue

Dude, I'll have ya know that I suffered at nearly freezing temps to snap these photos. My goosebumps had goosebumps. Only a cup of hot tea and quality time with the space heater made it so I could feel my toes again.
 I am in a particularly fragile state. Since Monday evening, my life has been an emotional roller coaster from hopeful, to elated, then surprised, disappointed, hurt and just plain angry. I am on the road to recovery but it's been a very difficult week.

What could have caused so much headache and heartache in my life over the past couple of days? What could have possibly had me crossing my fingers, gnashing my teeth and shaking my fist at the sky above?

The possibility of a Snow Day that never came.
 It started Monday night when there was the chance of an ice storm. I had to scrap a thick layer of ice from my car after school and I just knew it was a sign. Our Snow-Day-Soothsayin' Custodian even confirmed my thoughts with a cheery, "I'll see you Wednesday since we'll be out Tuesday!" When I got home that night, I plotted and planned my DIYs for the next day. This here skirt was one of 'em.
 You might remember this pattern. I first featured it in my short list of New Years resolutions as being a new pattern I'd like to try. I'm not a fan of the vest (the pattern calls it a weskit) and I'm most def not doin' nuthin with sleeves right now. But I just knew that skirt would be the Jerry McGuire to my wardrobe and I also just knew I'd have all day Tuesday to complete it.
 But no. To school we went. However, at the end of the day, they sent us home a half an hour early because an ice storm was supposedly on it's way. I was even more hopeful this time around and decided to get a jump start on this DIY by cutting out the pattern pieces. I used this giant piece of fabric I picked up at Urban Outfitters years ago. They were selling it as a bed spread and I scored it for a mere $9. It looks to me like a Tammis Keefe design (whose vintage fabric reproductions I've used here and here). 
 But once again, the weather failed to produce. Sigh. After all of that torture, I just came to the realization that I wasn't going to get my day. So last night I attacked this dress with the determination to knock it out. Snow Day or no Snow Day, I was going to make this skirt. Even if I stayed up entirely too late and paid for it dearly today.
Asha the Photo Bomber. Look at her not paying the least bit of attention to me and my latest creation. Her thought processes are focused solely on: Squirrel! Bird! Did You Just Drop Cheese on the Floor?! Squirrel!
 Now when I say "knock it out", that kinda implies that I was just able to whip this skirt up in no time. Oh no. Nothing in Sewing City comes easily for me. Especially with directions written in vintage speak. I got as far as the waistband when the directions simply said, "Put in waistband." No how-to or step-by-step just put in waistband. What, by waving my wand? Cuz that didn't work on the Snow Day so I know it's not gonna do me any good on el waistbando.

So I youtubed it. That's right, I just typed in "sew in a waistband" and some marvelous lady named Professor Pincushion held my hand and walked me through the process in 20 minutes flat. I am in love with youtube tutorials. I'm almost certain I could remove my own kidney with the right tute. Now if only I could find the one titled "Bringing Snow to Middle Tennessee."
 Hey, would you look at that pretty little machine! It's an addition to my Brother sewing machine fam, my Brother serger. I was thrilled to see it already threaded so I used it as is straight out of the box to finish my seams and hems. Doesn't that look nice? Kinda makes me feel like a Big Girl Sewer. Which I couldn't be further from.
 Outfit Details: faux fur collar: Christmas present from a follow Hoosier; birdie sweater, green fishnets, burnt orange tights: Target; white collared blouse: as seen in the other photos, gift from my mom in law; pearl necklace: gift from a friend; belt: Pin Up Girl; shoes: Softt; crinoline: Pre-Post Modern, Nashville

So, okay. I didn't need that Snow Day after all to be productive and scratch this resolution off my list. And, honestly, there is so much fun stuff happening in the art room right now (more on that next week, I hope!) that I'd hate to miss out. I mean, if we'd been out, I wouldn't have had this convo with a third grade boy today:

TGB: Mrs. Stephens, how did you get your skirt so puffy?
Me: I have something called a crinoline under my skirt. It's like a ballerina's tutu.
TGB: Why would you wear a tutu?
Me: To make my skirt puffy. When your grandmother was younger, she probably wore one under her skirts and dresses too. 
TGB: Oh. So it's an old people thing. Okay.

Yeah. That's it. 

Until we chat again, enjoy Friday and your week's end!

Read more »

Sunday, December 9, 2012

What the Art Teacher Wore #45

Sausage-Sellin' Monday: When I was in Germany this summer, I picked up this dirndl because I knew the kids would enjoy seeing it during our study of Germany. And because I just love it. Dressing as dorky as I normally do, I didn't think twice about hitting the grocery after work in this getup. That is until the check out lady asked, "Hey, where do you work?" (before I could answer, she continued), "Do you work at the mall sellin' them sausages? What do they call that place?" Luckily the bag-gentleman was able to offer assistance, "It's called Hickory Farms, I think." Check out lady, nodding, "Yeah! That's it! You work at that place?" I hated to disappoint as they both seemed sad and perplexed that I was an art teacher. "But we're learning about Germany! And they do love sausage!" dirndl: Germany; boots: Seychelles; tights: Target
Dunno if you noticed or not, but I took What I Wore this Week off last week. Last week was a rough one that hit full tilt craptasticness on Thursday. I had gotten a late start that morning but just knew I had to wash my beyond-dirty mop of hair. Which made my late start even later. To compensate, I did minimal hair- and make up-doin' and rushed out the door. This I would regret as the following convo happened during my first class:

Kid: Mrs. Stephens, what's wrong with your hair? It's all [making an odd gesture around her head] messy.
Me: Well, um, I washed it today.
Kid: Where? [looking around the art room and then with a horrified expression] In the art room sink?!
Oh, look, it's my summer home in Bavaria, Germany. My fourth grade students are currently learning about Schloss Neuschwanstein (that'd be Neuschwanstein Castle to you English-speakin' folk) so I thought I'd include that in the artsy part of this outfit post. Hubs and I went with his boss and family a couple of winters ago. I'll share some of my photos of that trip too. This image I pulled form pinterest.
Yeah. Nice. Later I overheard a third grader say to another, "Oh, Mrs. Stephens is looking tired today." Defensively, I replied, "I'm not tired!" Looking at me sympathetically, she said, "Oh, maybe it's just your eyes then. [did I mention I had skipped my cat eye make up that day?] They look really tired."
The dashing King Ludwig II was born in 1845 and became king of Bavaria at the young age of 18. He is sometimes called the Swan King, the Fairy Tale King or just Mad King Ludwig. He acquired the first two names because his palace is near Swan Lake and the fairytale-esque castle he had created. And although his brother Otto was considered insane, the last nickname isn't accurate for King Ludwig II. He was definitely an eccentric but not insane.
But the cherry on the Super-Sucky Sundae was when kindergartenland came to my room.

We had thirty minutes to create a clay animal, get it put away, get our tables wiped down and get outta the room for the fourth grade. As you can imagine, we didn't make it. I had a coupla cryers, heads falling off animals, three-legged mutant mammals and one kid pee themself. AND we ran out of baby wipes. Which made for dusty crusty hands all around.

 When I was in the midst of the madness, I looked up at the clock and realized we just weren't gonna make it. In fact, time was already up, fourth grade was waiting at the door. Now, I have to tell you, my fourth graders are simply the best. I asked them to come in, buddy up with the kindergartener that was in their seat and help them get cleaned and lined up. And they did.

As the fourth grade and I sat down to finally begin our lesson and the kindergarteners were walking out the door, I heard one of my fourth graders say, "uh, Mrs. Stephens..." and tilted his head in the direction of a kindergartener. Who was licking the clay off his hands from the bottom of his palm all the way up to his fingertips. Before I could say anything to him, he waved goodbye with his other hand and walked out the door.

Yeah. So. It was a bad day. But I had to share it with you because, thankfully, now it's kinda funny. Except for the clay lickin'. That's just gross.
Cut The Lights! Tuesday: So when each class came to art, I invited them in, dimmed the classroom lights and turned on my dress, much to their delight. The only problem? I had one kindergartener that was obsessed with the light up dress. She kept telling me to "cut the lights!" so we could see the dress again. Eventually we had art in the dark. light up dress: made by me; tights: Target; shoes: dolls by Nina; sweater: thrifted
A view of Neuschwanstein from Hohenschwangau Castle. When you go to Neuschwanstein Castle, you park your car at Hohenschwangau Castle, a fantasy-style castle Ludwig's father had built near the Schwansee (Swan Lake). You can either take a carriage ride up the steep hill to the castle or walk. We opted for the carriage ride.


If this castle looks kinda familiar to you, that might be because Walt Disney used it as his inspiration when creating Sleeping Beauty's Castle in Disneyland.
Light Up Wednesday: When you make one light up dress, the kids expect you to light up all the time. So this outfit was a bit of a disappointment to the kids. sweater and skirt: vintage, thrifted; white blouse: gift; tights: Target; shoes: Clarks
In 1864, King Ludwig II began sketching out his plans for his palace which was intended to be a personal refuge for the very private king. The castle was funded by Ludwig's family fortune and borrowing, not with money from Bavaria. However, now with as many as 6,000 visitors a day in the summer, the palace provides much money for Bavaria.
Growing up a prince, King Ludwig II didn't have much of a childhood. He was constantly working on his studies and future duties of becoming a king. For that reason, he had a fascination with the carefree fantasies and imaginative fairy tales he heard in his childhood. While growing up, he spent a lot of time at his father's beautiful castle Hohenschwangau.
Cat Attack Thursday: My cat loves these shoes. Loves to attack them. So when I wear them, I have to put them on in the car. Either that or deal with runs in my tights and bloody legs. By the way, everything I'm wearing has a touch of DIY: I created the buttons on my sweater from clay, added lace to the bottom of my dress and crated these shoes. dress, sweater, shoes: thrifted; tights: Target
I created these last winter with a pair of t-strap shoes I found at Goodwill. You can read more about that DIY here.
I was so excited to find this Anthropologie sweater at the thrift store. Until I noticed it was missing buttons. I couldn't find any that I liked at the craft store so I created these bad boys out of clay. I pounded the clay onto a doily, cut out the circle shape, added the button holes and glazed them a satin gray.
During the Middle Ages, there were three castles that over looked the villages. One of those was called Schwanstein Castle. In 1832, Ludwig's father King Maximilian II of Bavaria bought the  ruins and replaced them with Hohenschwangau Castle. This is the castle that inspired Ludwig II. The ruins above the family palace later became the site for King Ludwig II's Neuschwanstein. Initially, the plan was to incorporate the older castles into the design of the new one, but for whatever reasons, that didn't work. 
Hubs and I a couple of winters ago. We are standing in front of what was to be a chapel had the interior been completed. Only 15 rooms of the castle were completed before the death of the king at the age of 41. Had the castle been finished, it would have consisted over around 200 rooms and been nearly 65,000 square feet.
Candy Cane Kinda Friday: This is actually a summer dress I scored in Germany...but it just looked so candy-cane-y I had to wear it. sweater: vintage, thrifted; green fishnets: Marshall's?
Sadly, King Ludwig II's creative and eccentric ways were his downfall. Being extremely introverted, the King avoided public functions and his kingly duties. This ticked off his government ministers but not the people of Bavaria. He was known for taking trips across the countryside, chatting with the farmers and people he met.
Even though the King paid for his castle project with his own funds and money borrowed, Bavaria still suffered financially. For this reason, the government ministers decided to get rid of their King. The only way to do it constitutionally was to have the King declared insane. Not long after his removal from the throne, the King died a mysterious death. At the time, it was ruled suicide...but there are theories his enemies shot him and left him to die at Lake Starnberg.
If you've managed to get this far, thank you for indulging me this super long blog post. I have really enjoyed sharing my art history research in these posts as it helps me prepare for my lessons. 

I hope you have a wonderful week!


Read more »

Tuesday, November 13, 2012

In the Art Room: Collage Paris

A collage montage. Brought to you by some hard-workin', Parisian-lovin' second grade artists.
 As you know, the kids in my art room have been spending some time in Paris. So you'll have to bear with me as every upcoming project I feature for my "In the Art Room" series, is gonna be something Parisian. You might recall last week was the third graders Printed Paris Project. This week, I present to you the second graders Collage Paris. I'm bringing these to you fresh off the drying rack...be careful, the glue is still wet.
 Paris, day and night.

We began this project shortly after completing our suitcase portfolios and our passports. Interested in creating a collaged landscape (it doesn't have to be Parisian, check out our Egyptian version from last year)? It's a whole lotta fun. You'll need the following:
  •  12" X 18" paper
  •  12" X 6" paper
  •  washable tempra paint (I prefer Crayola because the other stuff is junk. Trust me, I've tried it all.)
  •  texture combs 
  •  construction paper
  •  glue cups and glue brushes (I gave up on glue bottles long ago. They clog and the kids stab 'em with pencils and scissors. Give them a little cup with glue and a small paint brush and you'll never go back to the bottle. The GLUE bottle, that is.)
 We began this project with a lesson on with color and value. The 12" X 18" piece of paper that the kids were given was folded into six sections: three at the top and bottom. On the first day we chatted about creating shades and a gradation. We began right above the middle fold, painting the first section blue and adding a bit of black. Each section above that was to be a darker value. 

The following art class, we chatted about tints. Each section below the middle was to be a lighter value of blue. And, viola! A gradated paper.
 On our third art class, we learned how to mix green and created a textured  piece of paper with our texture comb. Don't have texture combs? You can make them by cutting notches into pieces of cardboard. I did that for years. Then I caved and purchased these plastic doohickeys. And I was like, where have these been all of my life?! I love 'em so much, they tend to make an appearance in just about every one of our art projects.

You know my art classes are 1/2 an hour, right? You've heard me belly-ache about that before. I'm an expert belly-ache-r, if you didn't know. So if it seems like my project is broken down into teeny-tiny bite-sized bits, now you know why.
 The following art class, we chatted about collage which is like French for paper and glue. How perfect! The kids were given the choice of having an evening or day time sky by either having the dark value or the light at the top of their paper.. Most opted for the Midnight in Paris vibe. Once that was decided, they were to tear their green paper diagonally, position the torn part on their paper so it created the River Seine and glue down. 

After a chat about painting clouds (if they are near the horizon line, they should be small and grow larger in size as they approach the top of the page) and stars/moon (with a glance at Vincent van Gogh's Starry Night for a ring-lit look) and the sun (all I ask is no sunglasses, puh-lease!), the wee artists were permitted to make their masterpiece their own.
 Before: plain landscape. After: Parisian Paradise!

 After the completion of our collage landscape, we began our study of the famous structures of Paris. After learning the history behind the Eiffel Tower, the Arc de Triomphe and Notre Dame, we learned how to create them. We chatted about how each was symmetrical and could easily be created with a folded piece of paper. The above and below bulletin boards were on display at the front of the room. This allowed the kids to work on each structure at their own pace.
 As we worked on our structures, we kept them safe in an envelope until each was complete.
 Do you remember that groovy group of college kids I had hanging in my art room earlier this school year? Well, I've got a new group and one of them created this awesome bulletin board to help introduce symmetry and the famous Parisian structures to the kids.
 Of course, no introduction is complete without the help of Jes, our school mascot! A kind French friend snapped these photos of Jes around Paris. Thank you so much, Sophie. This has been a wonderful way to excite the kids about exploring the world.
Gotta love an innovative thinker. One of my students wanted his buildings to "pop out". Recalling our paper collages from kindergarten, he folded feet onto the bottom of his houses and glued it so his structures would stand up. Genius!

Love that crooked row of buildings!
Thanks for joining us on our Collage-Landscape Fantasticness! I hope you enjoyed these masterpieces as much as these artists did creating them. Next up: First Grade Hot Air Balloons over Paris. Stay tuned!
Read more »