Showing posts with label clay lessons. Show all posts

Wednesday, May 15, 2013

In the Art Room: Cats and Dogs

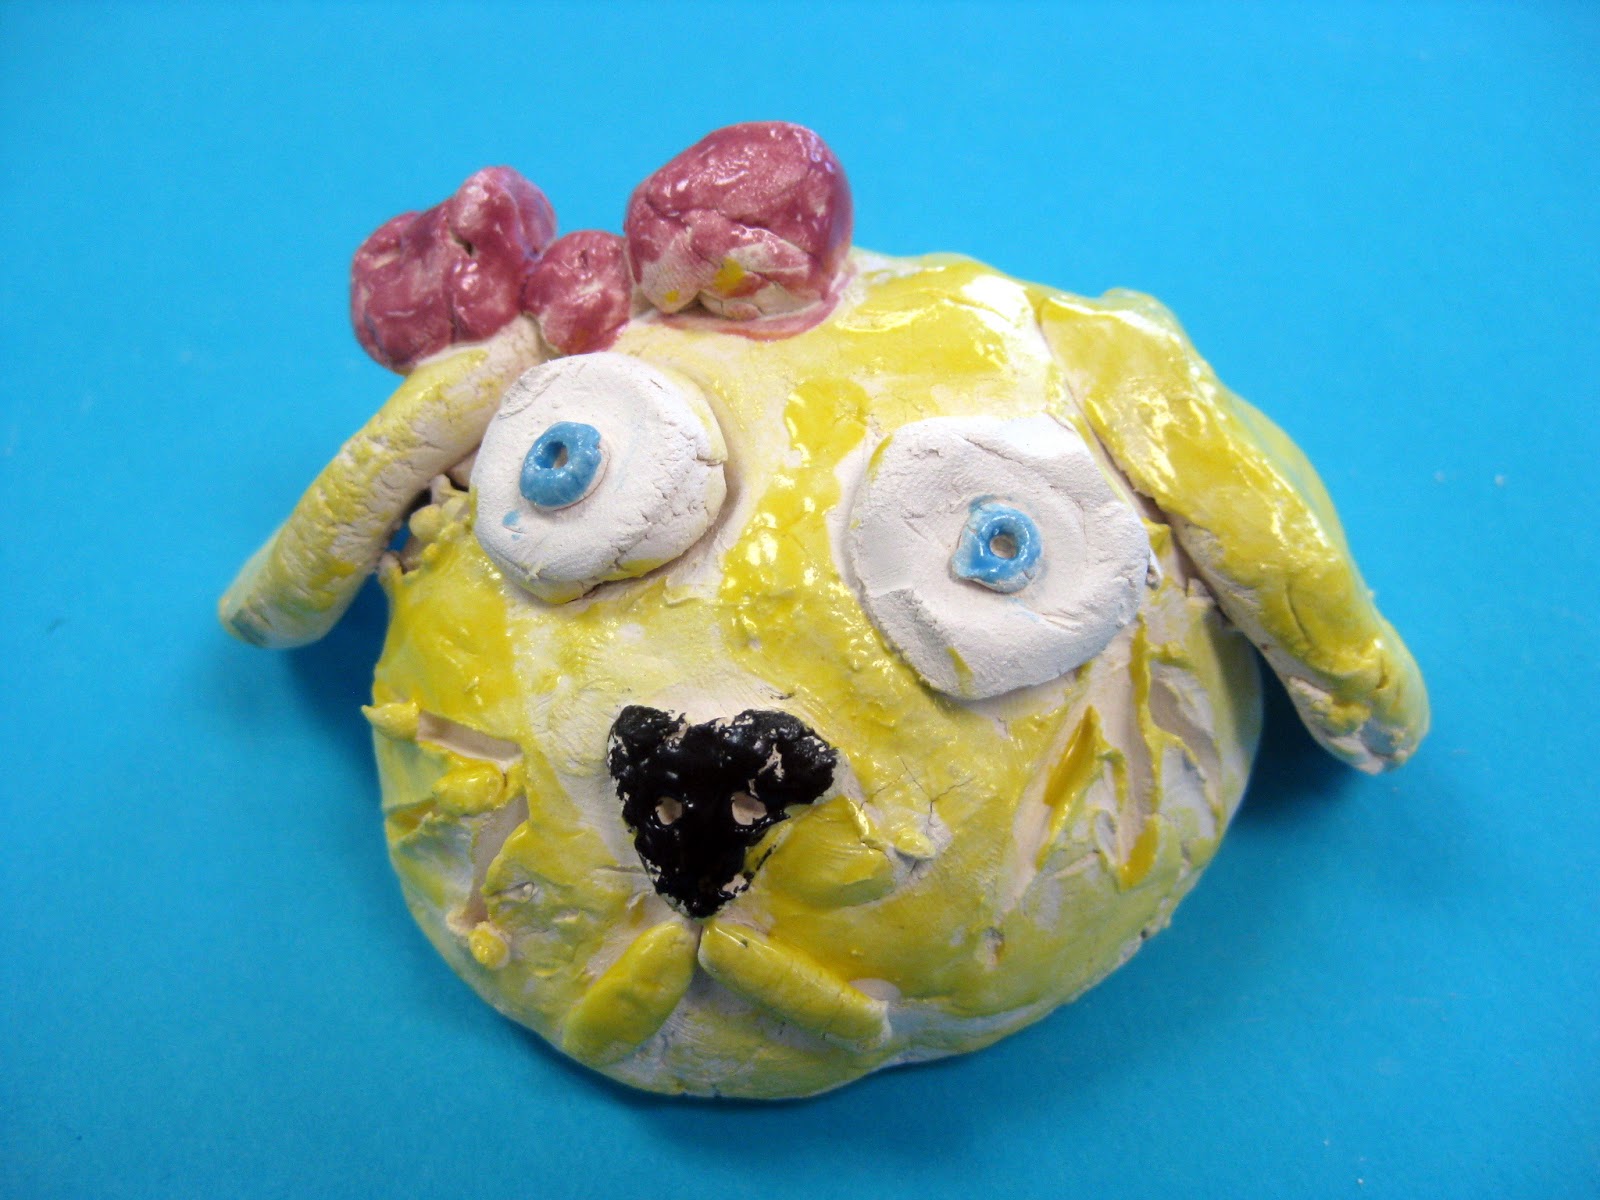
This sculpture just makes me wanna say, "Aw, who's a good boy?! Are you a good boy? Oh, yes you are!" in my most annoying talking-to-doggies voice.
Hi there. Remember me? I'm that blogger that used to post a weekly DIY. That was before the school-wide art show ate my life. Thankfully, almost everything is hung up and on display and ready for the big day tomorrow. And, since I'm blabbering about the art show (of which I will most definitely snap endless photos and share them here), I'd like to give a super huge cyber hug to all the amazing moms that help out in the art room. Seriously. They've hung 5 pieces of art for each of my 400 students. I don't like math, but I'm no dummy. I know that's a whole lotta artwork.
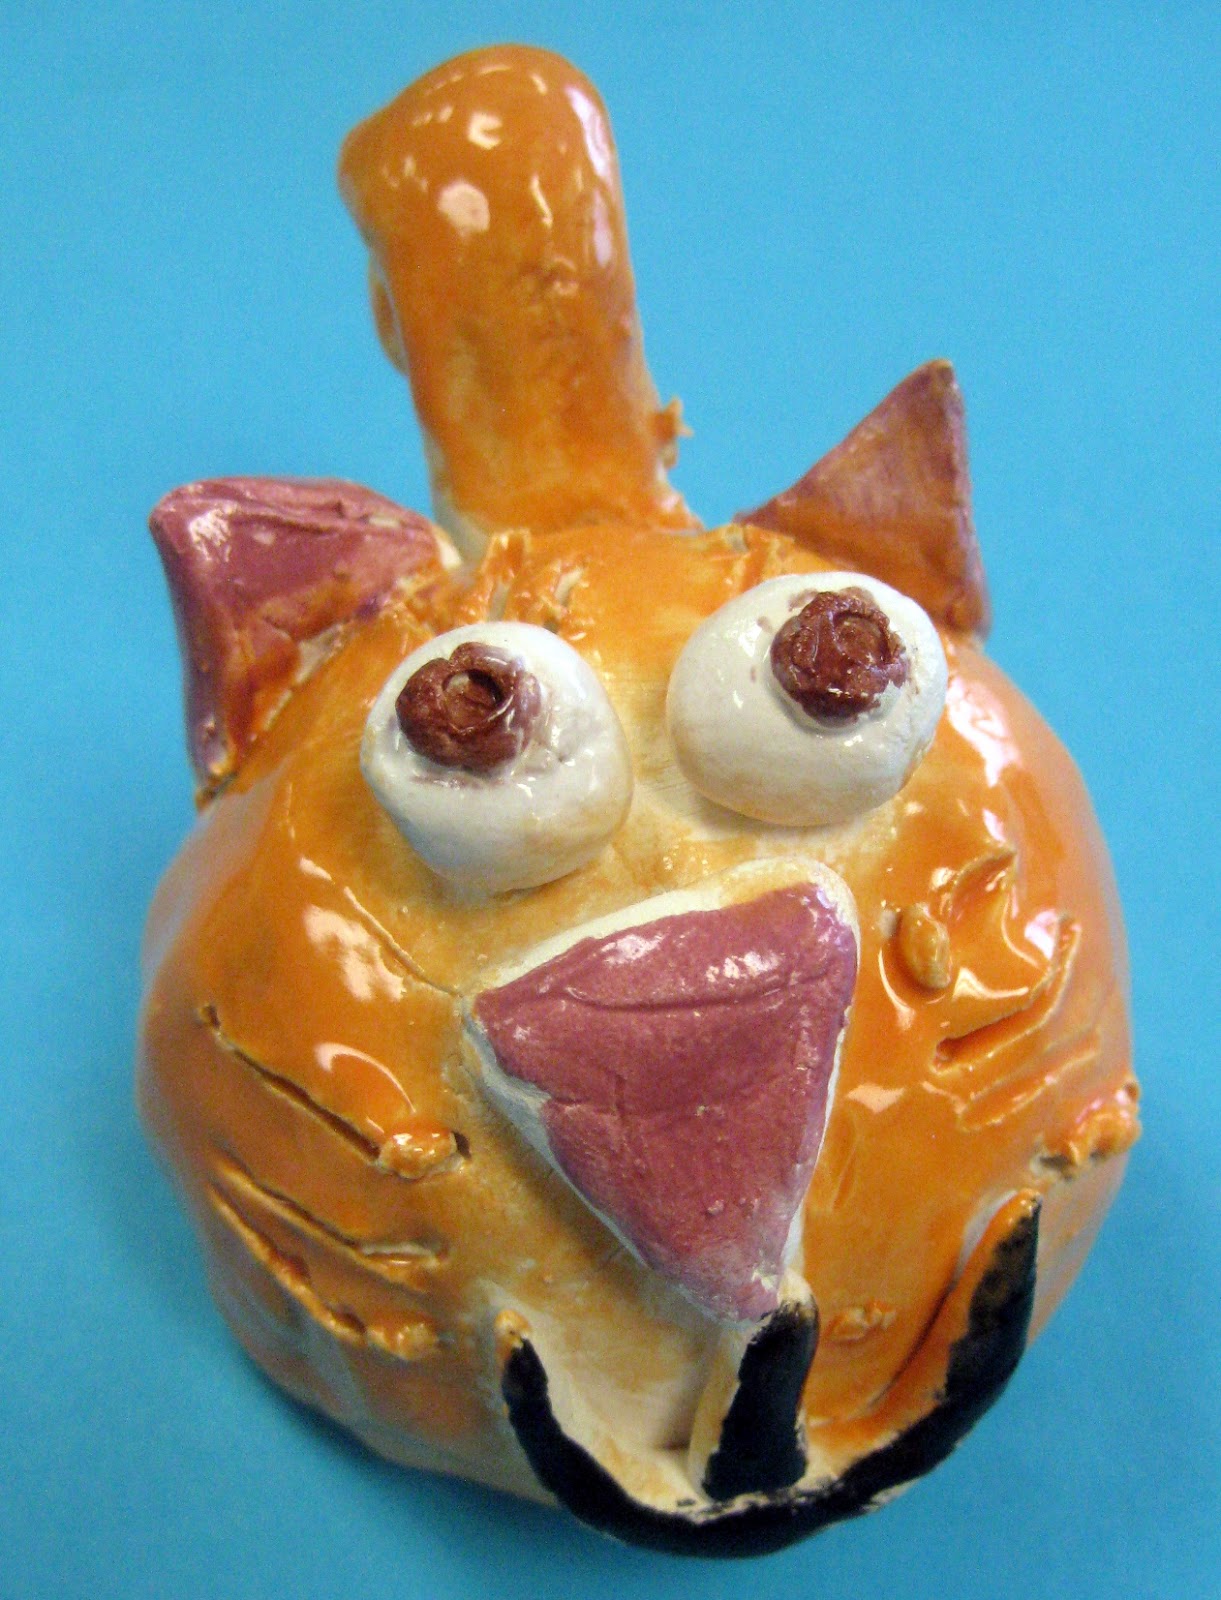
This is like one of those super cute kitties that the moment you turn your back on them they hiss at you, claw your legs and hack up a hairball in your purse. When you turn back around...all you see is this creepily sweet face. Shivers.
Since my life has been swallowed by art-showy-ness, I thought I'd give you a sneak peak at my fourth graders clay projects. You might remember from this post that my students have created dog and cat sculptures this year. This was apart of our art service project as donations will be collected on the night of the art show for these sculptures and the proceeds will be going to Happy Tales Humane.
Your typical dog and cat: Dog does goofy stuff. Cat looks on in disgust.
In years past, my students have participated in Empty Bowls, a wonderful using-art-to-give-back opportunity. I'm trying to instill in these little art students of mine just how powerful and helpful their work can be.
Someone please play fetch with this sweet little pup.
Now each one of my grade levels did a different version of an animal sculpture and I've gotta admit, I liked these the best. Each of my fourth grade students had such great ideas that it really was exciting to watch and teach. I just taught them the basics and they went from there. If you are interested, here's what I showed 'em:
  • To begin, chose a texture for your base. I've got a wide assortment of doilies, burlap and textured surfaces for them to use. Fabric works best for this as it won't stick to the clay. 
  • Position your grapefruit-sized piece of clay on your texture. Using the bottom of your fist, pound the clay into the texture until it has a thickness of a cookie.
  • Peal your clay from your texture and prepare to be amazed. Move your texture off of your surface and cut out a shape for your base. To save time, I give my students several base shapes to chose from: circles, rounded squares and a floral kind of shape.
  • With the excess clay, roll out four legs. I tell the kids these should be as long as their finger but twice as thick. Because my classes are a half an hour long, this is usually where we stop for the day. The clay is wrapped in a damp paper towel and placed inside a ziplock back with the child's name on the front.
  • The following art class, the students create a body with a thick piece of clay. The legs are attached by using a little water and some scrubbing with a toothbrush.
  • To make the face, I tell the kids to sink both of their thumbs into an oval shaped piece of clay. This becomes the eye sockets.
  • The mouth is created with a skewer stick wiggled into the clay horizontally.
  • The nose is pulled upward away from the clay.

  • Eyes are rolled from two spheres and pupils are given with the back of the skewer stick. Here's my rough and dirty example. I've found that by making my example far from perfect, it removes they "I could never do that!" idea. 
  • Now, like I said, that's the basics. What I really wanted to emphasize to the kids is that they are unique artists so their work should reflect that. I wanted them to really explore all sorts of different ideas. So that they could make their ideas come to life, I told them that anything can be created out of clay by using three things: spheres, slabs and coils. I asked them to give me some ideas on what they'd like to make so see if  my theory was true. They told me: frisbee? Sure, a slab. A dog bone? A coil. A sombrero (yes, there's a dog with a sombrero and a mustache)? Let's see, a slab and a sphere. Coil for the 'stache.
I love the windblown ears.

This beagle was created to look just like the artists own. I love the cat on the right. Notice the palette and paint brush in her tiny paws.

The texture on this dog is awesome but my favorite part are the crossed paws.
This student meticulously glazed the rug on which her cat sits...and it's stunning. I love all of the depth and texture in her piece.
Isn't this how every cat sees himself? Royalty. Or a royal pain. You decide.
When it came time for glazing, these kids were so invested in their masterpiece that they spent an entire hour glazing. I love the effect of Mayco's Stroke and Coat. But mostly I just love these creations. I cannot wait to see their parents reaction tomorrow night at the art show. Until I recover from that, enjoy the rest of your week!
Read more »

Wednesday, April 17, 2013

In the Art Room: Pinch Pot Pets

Every time I go into the kiln room and see these little guys staring at me from the shelves, I feel like singing: I always feel like...Somebody's watching me. And I have no privacy, Whooooa, oh-oh (go get you some Rockwell here and be prepared to get your paranoid on).
Greetings from the land of Pinch Pot Pets! Last week my younger students completed glazing their clay animals (my older students are still painstakingly working on every minute detail of theirs) and I'm excited about the results. Our theme for this year's clay projects were cats and dogs as our students will be "selling" their work back to their parents for a donation to the local humane society. We're do-gooders like that. The kids love clay and really enjoyed this project. But I'm rambling. Check out this cuteness:
Aw! This looks like a certain orange cat that lives in my house! I wonder if this one plants herself on the table at dinnertime as well.
"Hmmm? Did someone say snack?!" I love the added detail of the collar and hair bow by this first grade student.
So just how did my wee ones complete these clay projects in half an hour art classes, you ask? Well, it wasn't easy. But I've found that breaking the clay construction up into two days helps. And having several parent volunteers on hand. Mostly to keep me in line.

In preparation, here's what's on each table:
  • a clay mat for each child, purchased from The Clay Lady
  • 2 cups of water and 2 toothbrushes
  • 4 skewer sticks
  • 1 piece of clay the size of a small orange per student
Other preparation included:
  • One labeled ziplock bag per student
  • a damp paper towel per student
 For the demonstration, I have the students gather around a table and I show them the steps to creating a pinch pot. Here's what I tell 'em:
  • Roll your clay into a sphere and place it into the palm of your hand.
  • Using your other hand, put your thumb on the top of the sphere and wrap your fingers around the back.
  • Sink your thumb so deep into the clay that it looks like your thumb is wearing a clay afro. But don't go too deep and have your thumb pop out the other end because then you'll end up with a donut. And nobody likes clay donuts.
  • That part they can do no problem. Thumb afros, they got that. It's the pinching-into-a-pot part that some struggle with. I ask them to imagine they are holding a cookie and show me what that would look like. They all hold up their fingers about 1/2" apart. I tell them that their clay should have that same thickness. And then we eat the imaginary cookie with a loud "crunch!" and "mmm!" before proceeding.

  • After showing them a couple of non-examples of pots that are too thick or thin, I show them what a correctly pinched pot should look like. 
  • At this point, the demo is over. I show the kids how to wrap their pot gently in a damp paper towel and place it carefully into the ziplock bag. They are not to seal the bag closed as trapped air inside will dry out the clay. Instead we simply tuck the bag underneath the pot. Like this, their project will stay damp for up to a week. But it might begin to smell a bit if kept longer.
  • The following art class, I tell the kids that they may either create a dog or a cat. I introduce them to the idea that you can make anything out of clay with three things: a sphere, a slab and/or a coil. To illustrate that, I begin by using spheres for the eyes. 
  • Note: all pieces of clay must be attached by using the toothbrush and cup of water. I tell the kids, if you don't brush your teeth, your teeth fall out. If you don't brush your clay, your parts will fall off. It kinda works.
  • I demonstrate using the stick to add the pupils and eyelashes.
  • A sphere pinched into a triangle is used for the nose.
  • Coils for the mouth and skewer-drawn whiskers.
  • I tell the kids that the parts of a face for a dog and cat are about the same. It's the ears that make the difference. Using a slab, or flattened piece of clay, the kids can create dog ears. Cat ears can be created by cutting the slab into a triangle shape.
  • Some finished theirs off with a coil for a tail. 
  • And that concludes the second day of Pinch Pot Pets! As the students finish, the volunteers and I wrote their names and teacher codes on the inside of the pot. Then I set them out over Spring Break to dry completely.
After Spring Break and many firings, their bisque-fired clay animals were ready for glaze. I like to use Mayco's Stroke and Coat. I gave the kids every color in the rainbow (which many saw as an opportunity to go hog wild) and told them my two glazing rules: don't glaze the bottom as the glaze will cause the project to stick to the kiln shelf; don't layer 15 different colors of glaze on top of each other. Because it will look like a rainbow exploded in a really bad way. However, if you want color, do it with patterns.
And suddenly I feel like I'm in San Francisco all over again. Super psychedelic, dude.
These two crack me up. The Eye-Popper-Outter and the Cheshire Cat.

Stripes and spots were a pretty big hit.

And there you have it! Pinch Pot Pets. If you'd like to see what my students created last year out of clay, you can visit here. Be on the look out for more clay posts within the next couple weeks as the kiln just keeps spittin' out these awesome little masterpieces. Until then, enjoy the rest of your week!


Read more »

Monday, December 24, 2012

In the Art Room: Kindergarten Reindeer

Have you ever seen a reindeer that A.) Resembles Jay Leno and B.) Looks this cute resembling Jay Leno? I didn't think so.
Happy Christmas Eve to you! So the story goes that if you've been well-behaved, you'll be getting a visit from some chubby dude and his entourage of reindeer this evening. Lead by the one and only Rudolph, of course.

My kindergarten artists spent several art classes sculpting these reindeer masterpieces that, despite leaving me feeling as though it was not Grandma that got run over by reindeer but the Art Teacher, made me seriously proud. And, after one told me, "My mom is going to be so happy about my reindeer that she is going to say, 'Oh! Goodness that is the best little reindeer ever!'", I knew they were proud too.
How on earth did these five and six year olds create such amazement? With a half an hour, it really was nothing short of a Christmas Miracle. This lesson had some serious "Okay! Plan B!" moments so I thought I'd share with you how they were created. 
Our inspiration, of course. I've had this book since childhood. In fact, it even has my name written on the inside in my five year old handwriting.

For this lesson, we used the following:
  • Low fire clay
  • A stencil for the base
  • Brown, clear, white, black and red Stroke and Coat Glaze
  • Clay mats
  • Skewer sticks
  • Toothbrushes and cups of water
  • Ziplock bags and damp paper towels
  • A mountain of baby wipes
Several of my students put their reindeer together just as they would draw them: with their legs all in a row. 

I broke this lesson down in many days after trying to cram too much in during one class. When that lesson ended in tears (I managed to dry up before the fourth graders walked in), I decided to drag the lesson out even further. I'd rather give the kids too much time then to rush them. Being a super slow processor myself, I understand the need for lots of time. And tissues. Here's how I broke it down, yo:

On the First Day of Reindeer Clay, I gave to them one grapefruit sized piece of clay. I told them something crazy like, "hold your clay in front of your chest above your clay mat, drop it and pound it flat as a pancake." For a full minute the art room sounded like an elephant stampede with kid giggles throughout. Once flattened, the kids flipped their clay over to the smooth, not-pounded-on side and used their skewer sticks to trace the base shape. And that took us the entire art class, believe it or not. Each child was given a damp paper towel and a ziplock bag with their name on it. They were to "wrap their clay up in its blanket, put it in it's sleeping bag and say 'nightie-night'" until next time.
On the Second Day of Reindeer Figurines, I gave to them one piece of clay the size of a tangerine. We chatted about how many legs a deer has and I showed the children how to divide their clay into fourths. Twist sphere of clay in half and Viola! two pieces of clay. Twist other two pieces and Double Viola! now you have four. From there, they learned how to roll their clay into coils the length of their finger.
On the Second Day of Reindeer Clay, that really wasn't all, for the head I gave them one small ball. Once their coil legs were complete, they created a head. For one class, I tried to have them create all the coils, the head and assemble. That proved to be a reindeer train wreck. We just didn't have the time. Plan B for the following classes was to create all of the parts, wrap them up in a paper towel, gently place them on the base and place the base back into the bag until next time.

On the Third day of Reindeer Crazy, we had zero time for being lazy. The kids assembled their reindeer by "gluing" with the toothbrush and some slip to legs together for the front and two legs together for the back. These two sets were then glued together. Hooves were bent outward and assembled to the base. Lastly the head was added and our reindeer were kiln ready. Once dry, of course.

While the reindeer were drying, my other classes would come in and notice the reindeer. Except they didn't take them for reindeer. They'd say, "Oh! What cute dogs! Who made them?!" It reminded me of the story I read to the kindergarteners while we waited for some of our friends to finish sculpting, Olive the Other Reindeer. Like Olive, our little reindeer just needed some antlers to complete their look.
On the Fourth Day of Reindeer Craze, my little artists were ready to glaze! And I was so proud of their careful attention to detail.
"My Rudolph is a girl and she likes to wear a lot of red lipstick."
On the Last Day of our Reindeer Critter, our reindeer received his antlers made of pipe cleaner glitter! Now I was down to the wire on this, time wise. Normally, I'd expect the kids to create their own antlers, but between programs, field trips and assemblies, we just ran out of time. Thankfully, a very kind aide (thank you, Heidi!) and I managed to get them hot glued in just in time to send them home with the artists.
 I love the unintentional resemblance to Beaker on the left. Notice the sweet little black foot prints in the snow on the one on the right.

And there you have it! Just in time to guide someone's sleigh tonight. I hope you have a wonderful Christmas Eve and Day tomorrow. Enjoy!


Read more »